How to sell art online
Aug 02, 2026
/
By Margarita L. & Miglė C.
/
11 min Read

Selling art online lets you reach buyers beyond local galleries, exhibitions, and craft markets. It also gives you more control over how your work is presented, priced, and promoted.
You can sell original artwork, prints, digital downloads, commissions, or products featuring your designs. Each option comes with different production costs, profit margins, and fulfilment requirements, so the right approach depends on your art style, audience, and business goals.
You also need to decide where to sell. An online marketplace can help you reach an existing audience, while your own website gives you more control over your brand and customer relationships. Many artists use both as their business grows.
To get started, decide what you will sell and who it is for. Then choose the right sales channel, calculate sustainable prices, create persuasive product listings, and establish a reliable process for fulfilling orders.
1. Research the online art market
To sell art online, you need to understand your niche and your customers.
Always conduct deep audience and market research before setting up your art business.
Start by studying your potential customers:
- Interview people who might be interested in your art and learn about their needs, buying behavior, and preferences. You can start by tapping into your personal network (friends and family).
- Analyze forums and social media. Check what people write about different types of art and what seems to be popular.
- Find online reports and other content about current art market trends. You can even use AI tools like Perplexity to speed up your research.
Try to answer these questions:
- Which demographics are drawn to my art style?
- Who are my potential buyers? E.g., interior designers, or casual art enthusiasts.
- How do these buyers typically find and purchase art online?
It’s also a good idea to analyze your competition.
Look at how they price their work, which online stores or marketplaces they use, and who tends to buy from them.
For instance, if you want to sell retro posters, head to a marketplace like Etsy and search for “retro posters”.
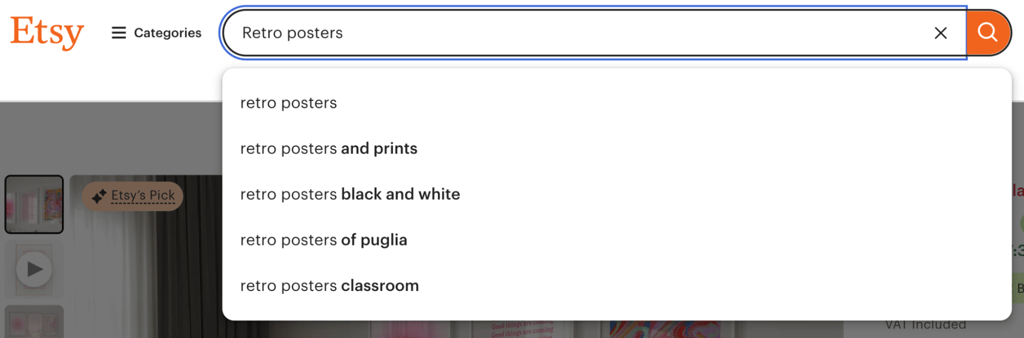
Examine the options you see.
Which stores sell them? What are the price ranges? What formats do they use (e.g., digital prints, framed, a set of prints, etc.)? And what styles seem to be trending?
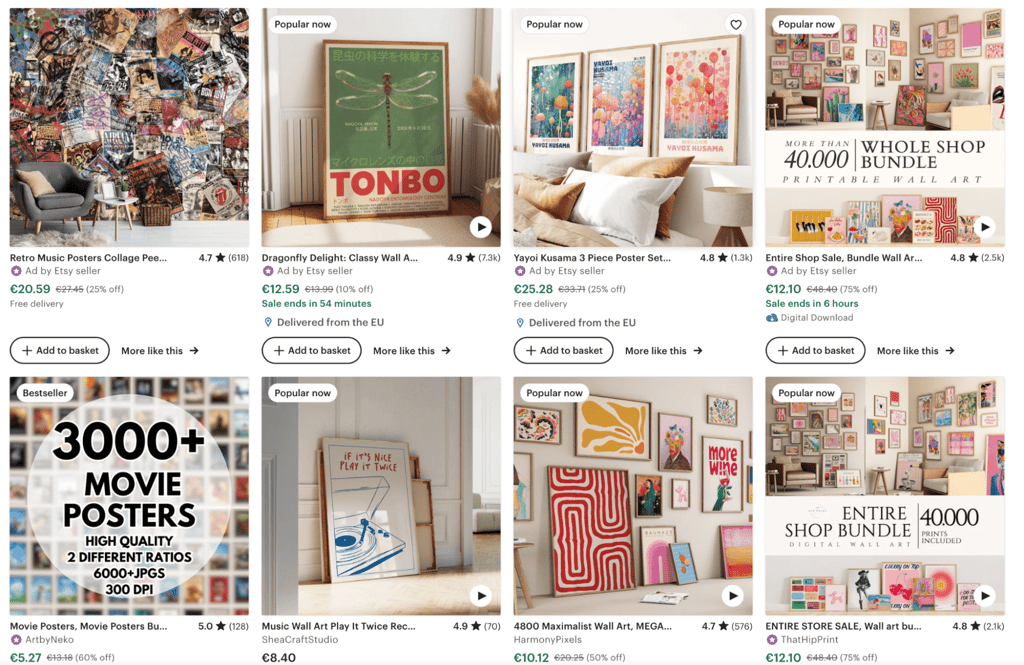
Then, look at the most popular items that have the most reviews.
What makes them stand out? And what do people write in the comments?
For example, you might learn about things customers value the most. You could also check their profiles and see other items and styles they were interested in.
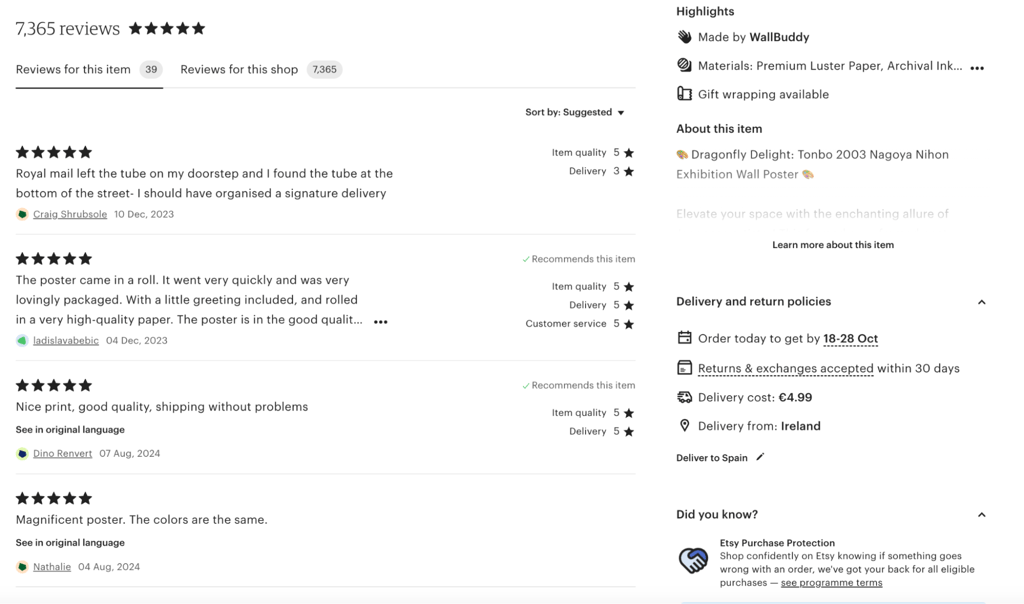
Conducting such analysis using marketplaces, Google search, social media, and other platforms shows you what is trending in the market and how to differentiate your brand.
Remember, you might test various approaches to audience targeting before finding the perfect one.
2. Decide what to sell
Next, decide which art items you would like to offer for sale.
One of the key questions you’ll face is choosing between original artwork and reproductions.
Here are the key differences:
| Original artwork | Reproductions |
| One-of-a-kind pieces you create like paintings, sculptures, custom art piecesCan be sold at higher pricesYou’re limited to selling each piece only once for physical art | Copies of your original work that can be sold multiple times, like art prints, posters, digital downloads, and print-on-demand items (e.g., mugs)Allows you to scale and sell to larger audiencesUsually comes at a lower price per item |
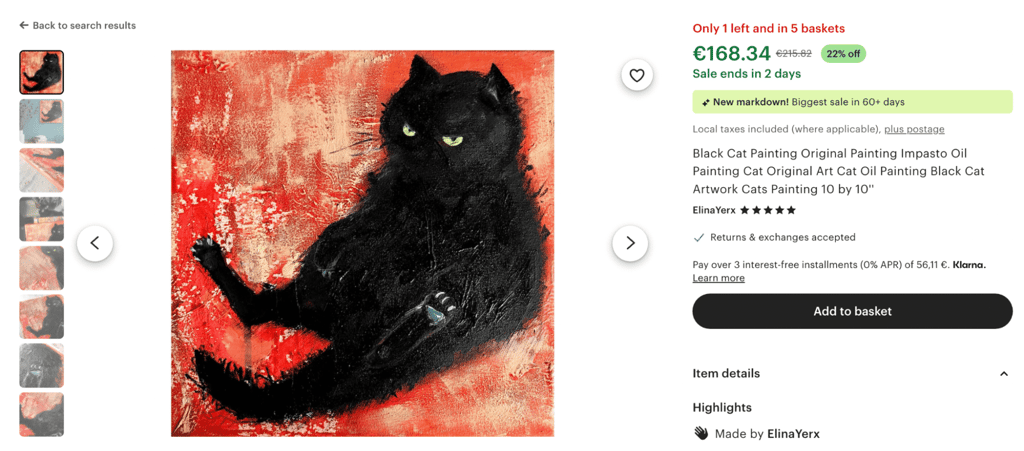
For example, this custom oil painting is priced at 168 euros:
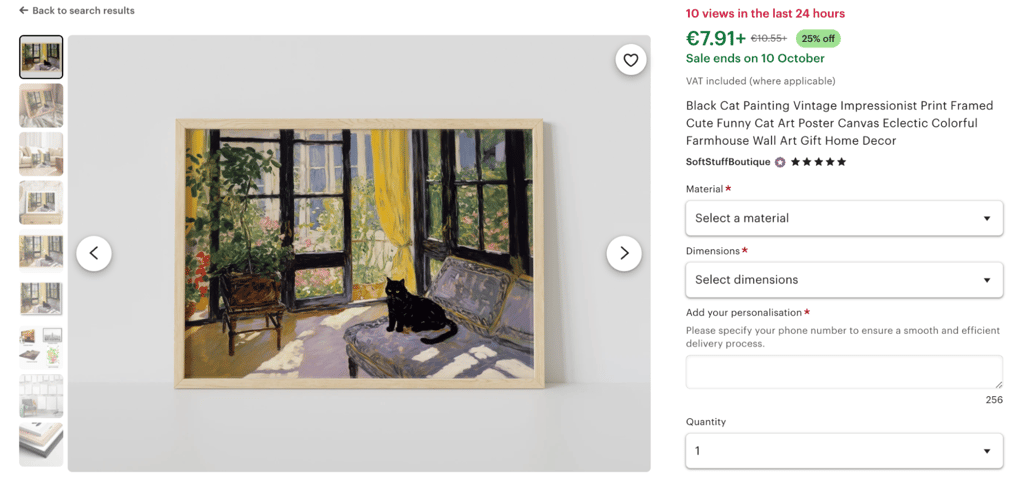
While an average poster costs around 7-15 euros:
Your decision will usually depend on your personal preferences.
- Are you passionate about crafting unique pieces? Focus on selling original art.
- Do you want to see your designs on various products and produce many pieces at a time? If so, go for reproductions.
That being said, many successful artists sell both original artwork and reproductions online. This allows them to cater to different price points and customer profiles.
For instance, Drew Brophy is a well-known surf artist who creates custom paintings for collectors. The prices for these items can go up to $6,500 per piece.
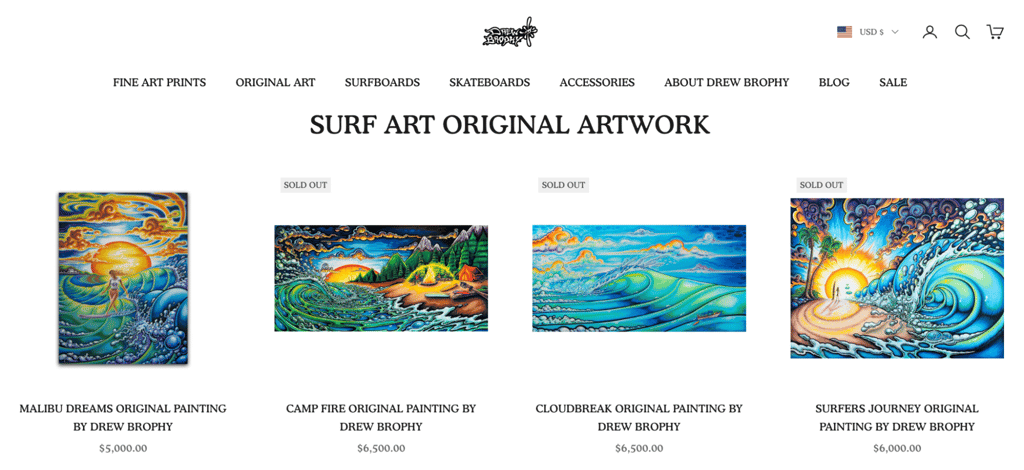
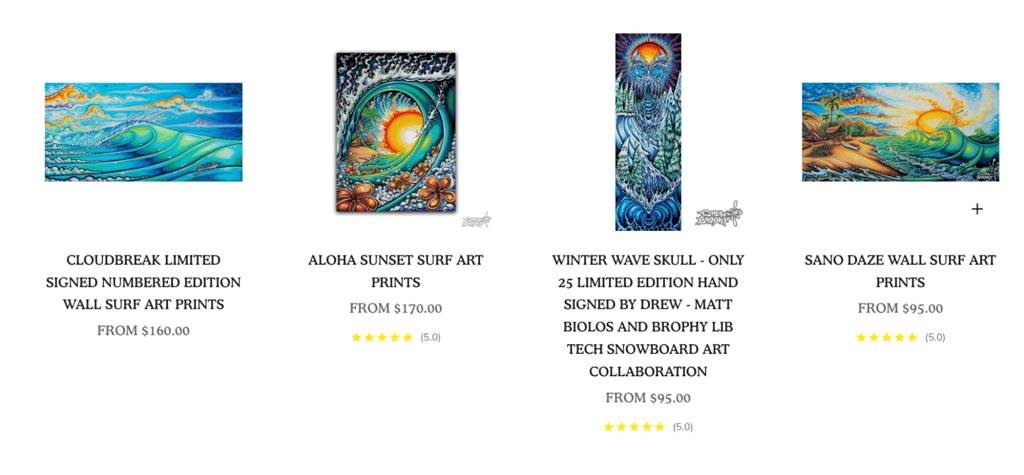
However, he also sells reproductions of his artwork in various forms, including limited-edition posters:
Here’s how it could work based on your primary medium:
- Painters and illustrators often find success selling both originals and prints online.
- Sculptors might focus on selling original art but could offer photos or 3D-printed miniatures.
- Digital artists typically sell prints or digital downloads, but could offer limited edition signed prints as “originals”.
3. Choose a business name
So, how do you come up with a name for your online art business?
Think about a name that reflects your art and resonates with your style or medium. You might go for:
- Using your own name and pairing it with “Art”, e.g., “Jane Doe Art” or “ArtByJane”
- Using the core theme or idea of your art
- Building on the art formats you’ll focus on
For example, the VoxFeline Etsy store sells creative cat-themed posters. Their business name speaks for itself:
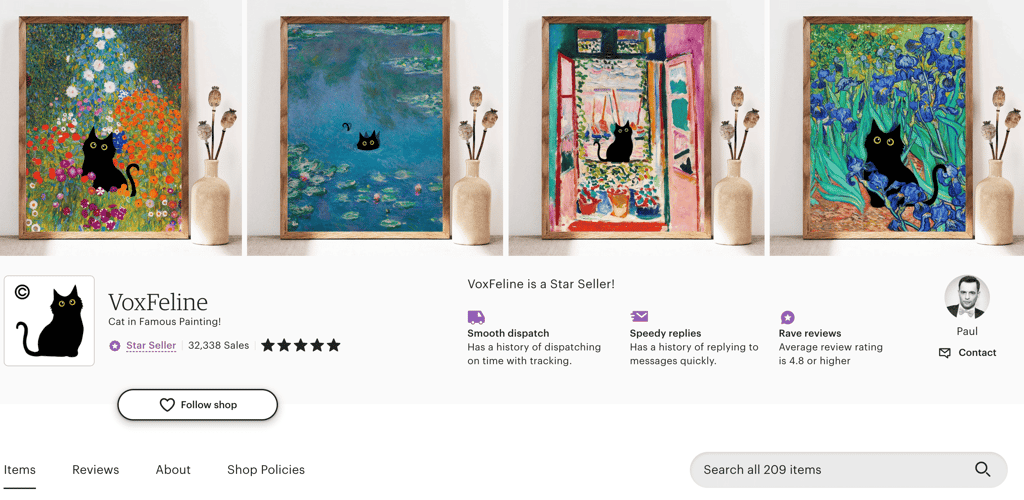
However, if this store ever wanted to start selling dog prints, they could have an issue.
So, make sure your business name will also stay valid and relevant in the long term.
Finally, make sure to pick something catchy and memorable. Here are some techniques you might find helpful:
- Wordplay (e.g., “Ink-redible Creations” for a pen and ink artist)
- Using repeating sounds (e.g., “Ceramic Creations” for a potter)
- Combining words (e.g., “ArtMosphere” combining art and atmosphere)
- Evoking emotions and feelings (e.g., “Serene Scenes” for landscape paintings)
4. Register your business name
Next, register your business name to make it official. Here’s what to consider:
First, file a DBA (Doing Business As) based on your location.
You’ll need a DBA if you want to use any business name other than your legal name. It’s mostly useful for sole proprietors.
However, you will also need it if have an LLC and want to operate under a name other than your official LLC name.
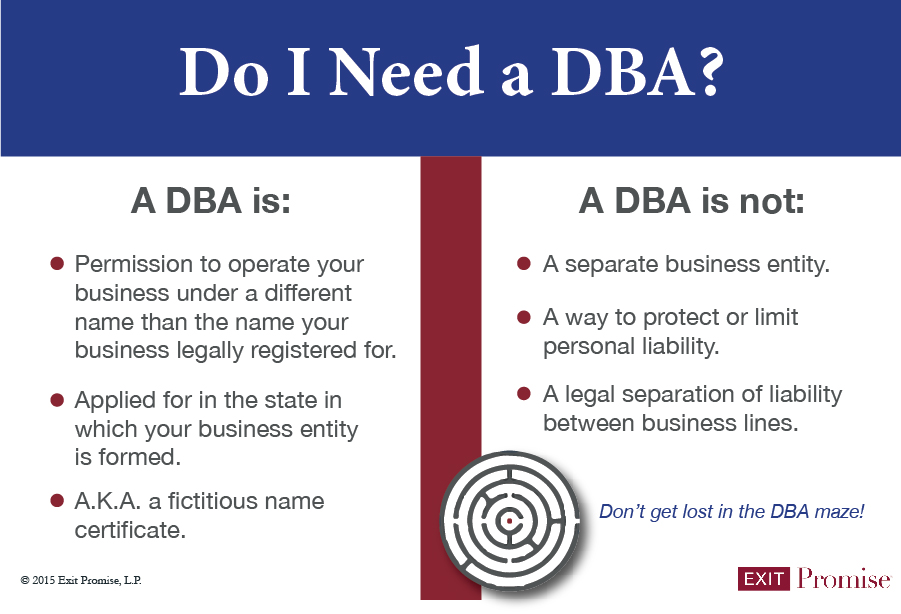
Source: Startup Promise
You typically file a DBA with your local county clerk’s office or your state government, depending on your location.
Next, consider trademarking your business name.
Trademarking your business name is optional, but it can be useful.
It’ll provide stronger protection for your brand by giving you legal ownership and the ability to prevent others from using a similar name.
This can be particularly useful as your art business grows beyond your local area.
To trademark your name in the US, search the USPTO (United States Patent and Trademark Office) database first to ensure your chosen name isn’t already taken.
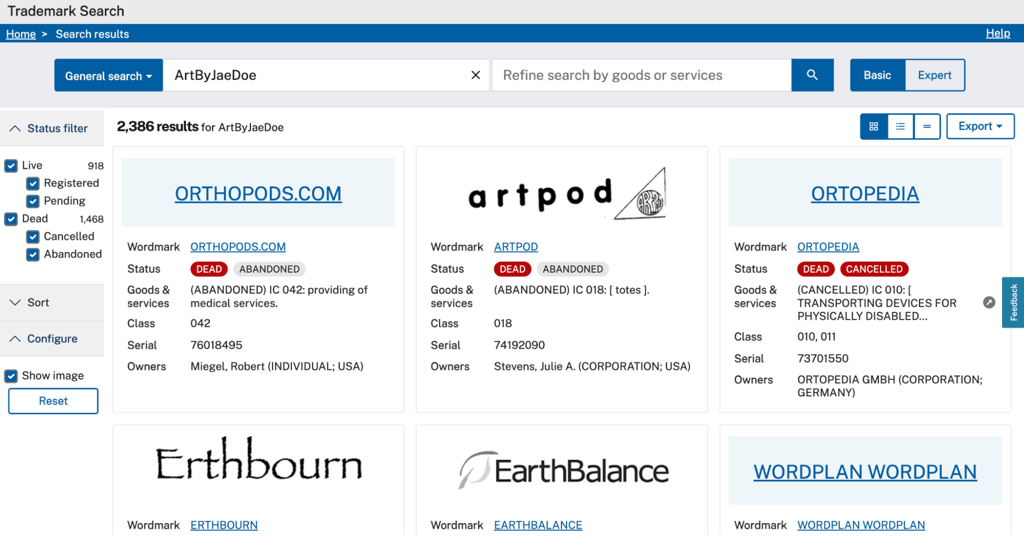
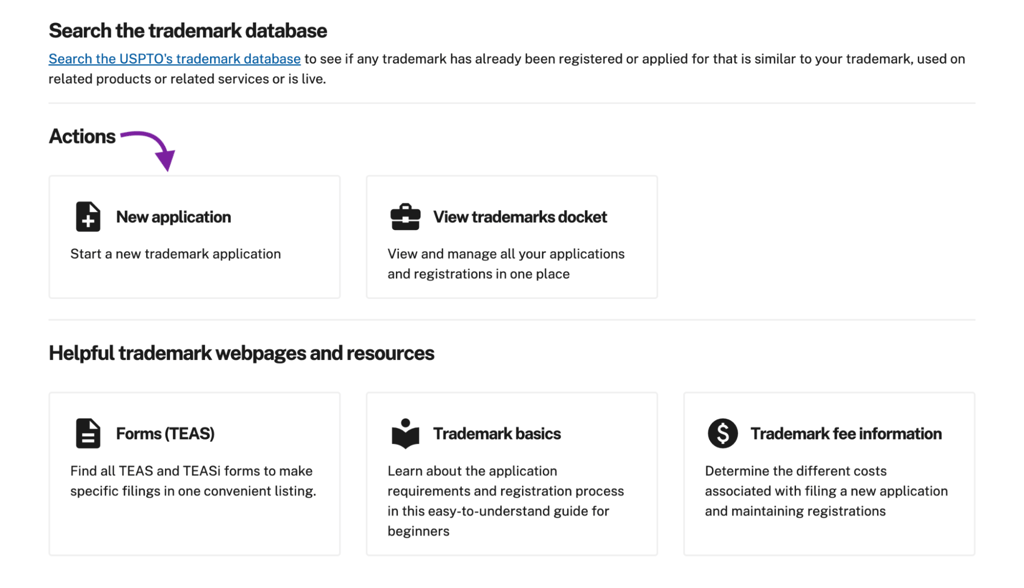
If it’s available, you can file an application online through the USPTO website. The process typically takes several months and costs a few hundred dollars.
Keep in mind that trademarks are specific to industries.
So, an existing trademark in a different field may not prevent you from using a similar name for your art business.
Finally, secure your name across various digital platforms.
Remember, your business name will be present in all digital assets. This includes your domain name, social media handles, and store names on marketplaces.
Even if you’re not building those online channels yet, it’s a good idea to claim your business name as soon as you can.
This is especially true for your domain. And you can easily do it in a couple of steps.
Start by checking if your desired domain name is available below with Hostinger’s Domain Name Checker:
Domain Name Checker
Instantly check domain name availability.
From here, you can choose one of the available options. If the “.com” option is already taken, the tool will suggest various alternatives.
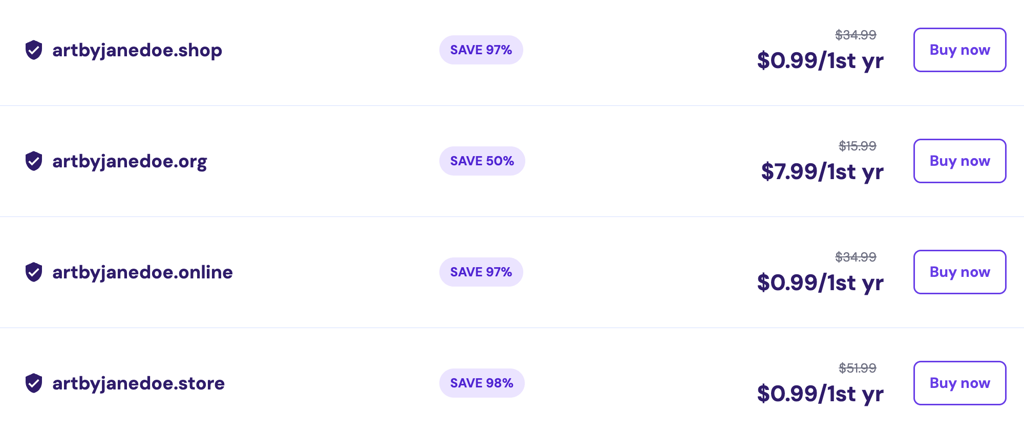
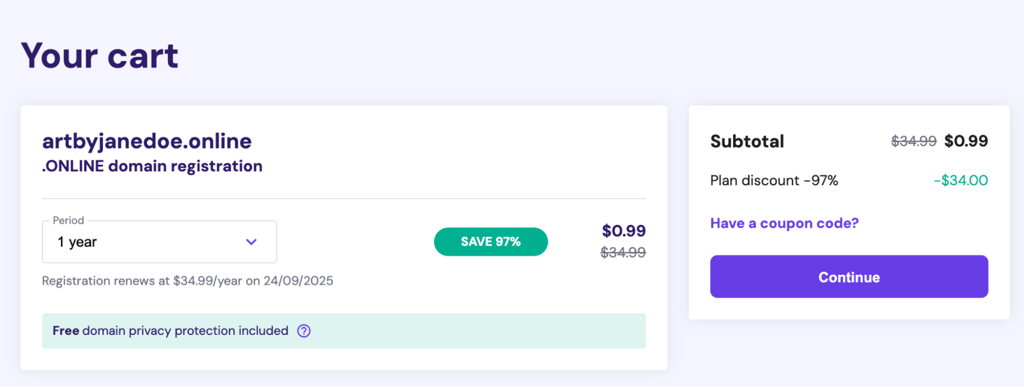
Click “Buy now” and reserve your domain name. It will be your starting point when you’re ready to build your website.
5. Prepare your art and take high-quality photos
Next, get your art items ready for online channels and for your art portfolio. To do that, work on digitizing your original artwork.
It won’t be necessary if you create your art digitally with programs like Adobe Illustrator or AI tools like Midjourney.
But if you sell original, physical art, this step is absolutely essential. It lets you sell art prints, create digital downloads, and showcase your work online.
There are two key methods you can choose:
Scanning | High-resolution photography |
| – Works well for graphic designers and illustrators creating digital art or flat pieces like ink drawings or watercolors – You’ll need to use a high-resolution scanner (at least 300 DPI) – For larger pieces, you’d have to scan in sections and stitch them together digitally using tools like Photoshop – More affordable and easier to set up | – Best for textured artwork, sculpture, fine art, or larger pieces – You’ll need a high-quality camera with good lighting – Make sure your setup capturates accurate colors – Requires a more complex setup (tech, studio, etc) |
If you decide to take photos of your art, ensure their highest quality. This will help show your work in the best light and attract more customers.
Here are some tips for taking photos of your art:
- Use natural light or a softbox for even lighting
- Choose angles that highlight your art’s best features
- For 3D art like sculptures, take multiple shots from different angles
- Use a plain, neutral background to make your art stand out
- Ensure your camera is stable (use a tripod if possible)
Check out this video with tips on taking pictures of paintings:
It’s also a great idea to create video content showcasing your art, especially if you sell sculptures or other items.
You can go even further and consider augmented reality for demonstrating your artwork. It’s one of the key eCommerce trends in 2025.
Finally, make sure to properly edit your photos. This includes cropping your images, adjusting brightness, removing distracting elements, etc.
You can use simple tools like Canva and Photoroom.
6. Protect your digital art
The next crucial step is safeguarding your digital art.
Here are the main tactics you could use:
- Register your copyrights. Register your artwork with the U.S. Copyright Office (or your country’s equivalent). While the website content you publish is automatically protected, this step adds extra security in the case of disputes.
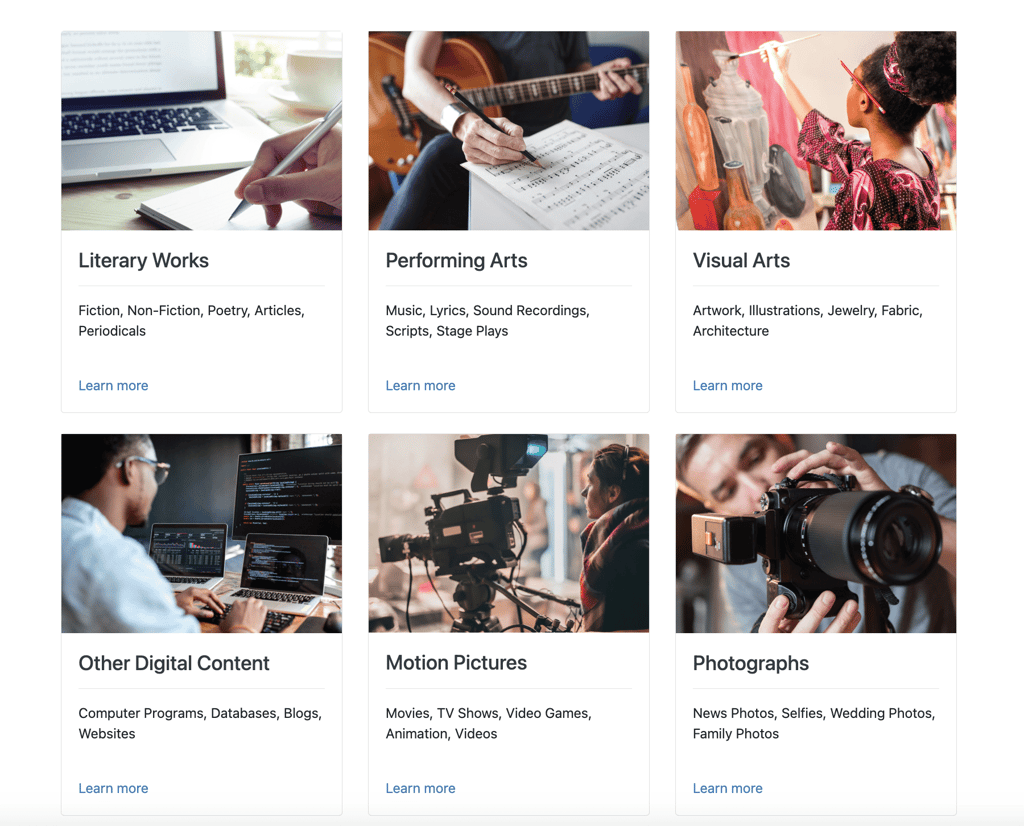
Here’s what you can copyright:
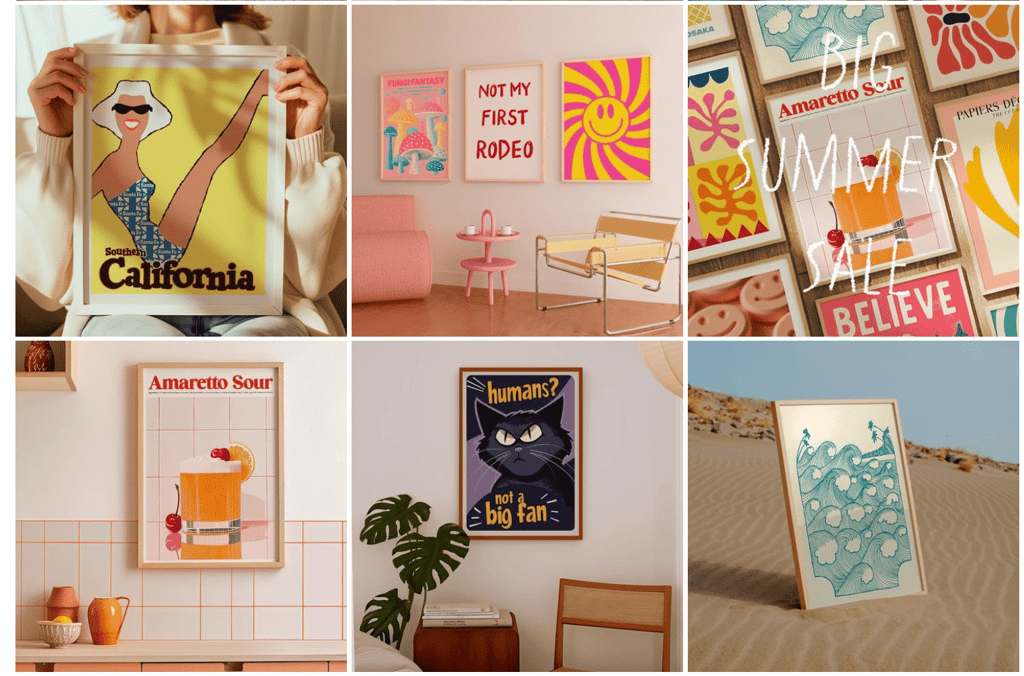
- Use low-resolution previews for social media and web pages. Display lower-resolution images (72-150 DPI) to discourage high-quality unauthorized prints. Then, save full resolution (300+ DPI) for actual sales or prints.
Many artists also use creative mockups to showcase their work:
- Use metadata. Embed your copyright information in the image file’s metadata for extra protection. Include your name, website, and copyright notice. Try software like Adobe Bridge or free alternatives for this.
Here’s what it might look like:
- Creator: Your name (e.g., “Jane Doe”)
- Creator’s Job Title: “Artist” or your specific title
- Website: Your website URL (e.g., “www.janedoeart.com“)
- Copyright Notice: “© 2024 Jane Doe. All rights reserved.”
- Copyright Status: Select “Copyrighted”
- Add watermarks. Place a semi-transparent logo or signature on your artwork, making sure it’s visible but doesn’t distract from the art. For example:
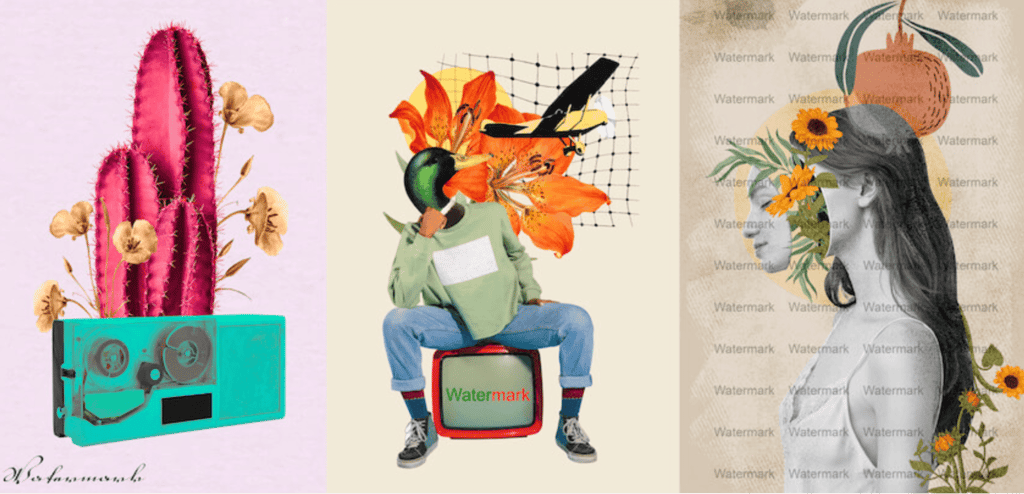
Source: Perfectlancer.com
7. Choose the right selling platform
Now it’s time to think about the best platform for selling your art online. This will impact how you’ll be reaching potential buyers, building your brand, and processing sales.
Let’s explore the two key options you have:
- Setting up an online store
- Selling via online marketplaces
You can set up your own online store. This means building a website with your branding, content, and eCommerce features.
Here’s what to consider:
| Pros | Cons |
| Full control over your art business and customer experience | No existing customer base and traffic |
| No competition from other artists on the same page | You’ll need a lot of resources for attracting clients and building your brand |
| Getting more profits from selling your art | You’ll also need to put more effort into setting up the online store, managing orders, etc. |
| Building a stronger brand and a direct relationship with art collectors and buyers |
To build your online art store, use Hostinger’s AI online store builder. It lets you create a professional site without any coding skills. If you’re looking for inspiration, check these digital portfolio website examples.
The next option is to sell on an online marketplace, such as:
Here are the key considerations for selling on an online marketplace:
| Pros | Cons |
| Access to a larger audience of potential art buyers | Limited control over your online gallery design |
| Built-in trust for selling art online | Competition with other artists on the same platform |
| Simplified setup process for beginners | Platform fees that affect your art prices |
| Handling of payment processing and some shipping costs | Potential restrictions on customer communication |
For example, here’s what the section with bath mats by different artists looks like in Society6:
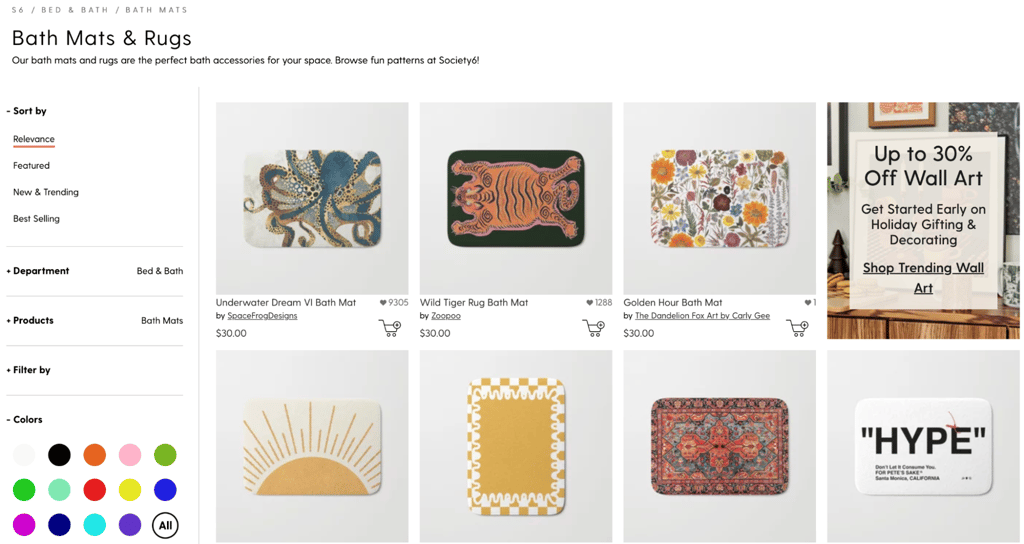
In reality, you might use a mix of both selling methods to promote your art.
On the one hand, you could leverage the online audiences of established marketplaces. On the other, you can drive social media and ad traffic to your own website.
8. Price your art
Next, work on your pricing strategy.
Pricing your artwork involves a careful balance between ensuring profitability and making your art accessible to potential buyers.
Start by calculating your costs – how much you need to spend to create each piece of art. For example:
- Materials: The cost of paint, canvases, digital tools, or any other supplies used to create your art.
- Production time: How much your time is worth per hour. Research the average hourly rates in your niche and try to make an estimation.
- Platform fees: If you’re selling through a marketplace like Etsy or Society6, consider their transaction fees, listing fees, or subscription costs.
- Shipping costs: This includes both packaging materials and actual shipping fees if you’re selling physical products.
Next, add a profit margin. This is what you earn beyond covering your expenses, reflecting the quality of your work, your experience level, and your brand positioning.
For instance, many artists can expect a profit margin of around 50%.
Let’s look at an example.
Imagine that you spend 5 hours and $50 on materials per art piece, and also value your time at $40 per hour. This brings your total cost to $250 ($50 for materials + $200 for 5 hours of work). Adding a 50% profit margin would bring your final price to $375, ensuring you cover both material costs and the value of your labor.
However, there are other factors you can consider. For instance, it’s important to analyze the market and your competitors’ pricing strategies.
Check out marketplaces and individual shops of artists in similar styles, mediums, and target audiences.
How do they price various types of art pieces?
For example, you could notice that many canvas prints are priced between 40 and 60 euros. This could give you an idea of what mass-market customers are willing to pay.
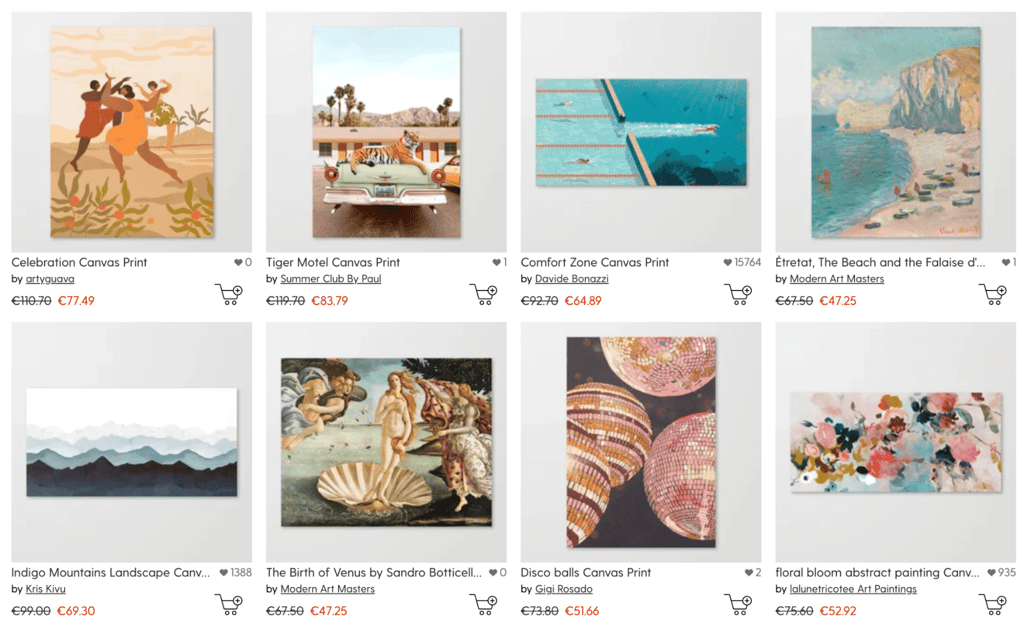
You might also see that established artists sell physical art for a much higher price.
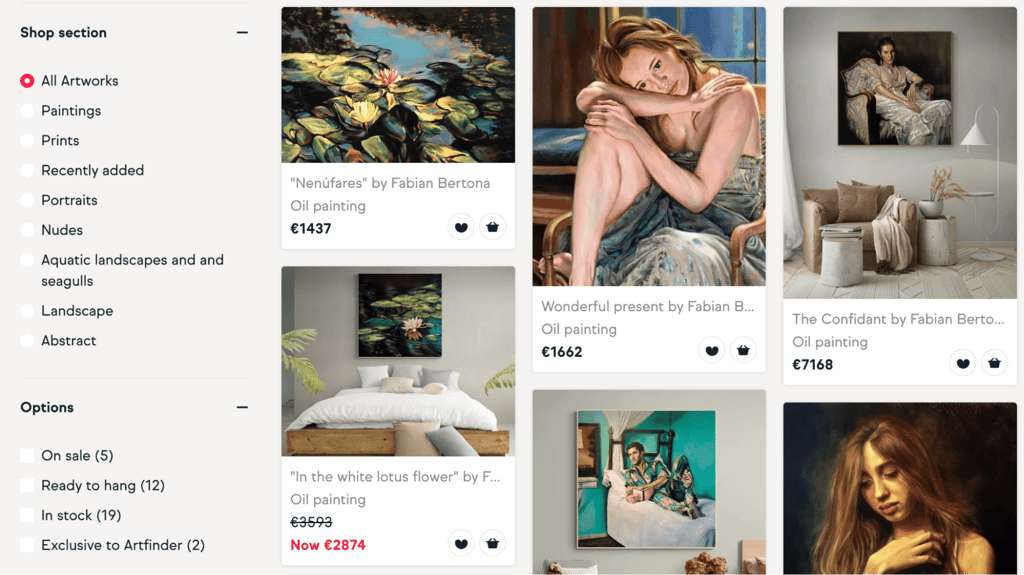
That being said, there’s always room for experimentation.
Make sure to test different pricing strategies to find your sweet spot. You could try:
- Tiered pricing: Offer a range of products at various price points to appeal to different audiences. For example, sell original paintings at a higher price and offer prints or digital downloads at a lower price.
- Limited editions: If you want to charge more for prints, consider offering limited editions. For example, you could sell numbered or signed prints to create a sense of exclusivity.
Remember, pricing is not static. As your reputation grows and demand for your art increases, you can gradually raise your prices.
Start at a level that reflects your current market position, but don’t hesitate to adjust as you gain more experience and recognition.
9. Write compelling art descriptions
Writing well-crafted art descriptions helps you attract the right buyers and communicates the value of your work.
Each description should include key details about your piece:
- Title: Choose a title that reflects the theme or emotion behind your artwork. It should be memorable and translate the key idea of the piece.
- Medium: Clearly specify the materials you used, such as acrylic, oil, watercolor, or mixed media. This helps buyers understand the nature and value of your work.
- Dimensions: Include the height, width, and depth (if applicable) in both inches and centimeters. This ensures buyers can visualize the size of the artwork and how it fits in their space.
- Inspiration: Share the story or motivation behind the piece. This could be based on a personal experience, a cultural reference, or an artistic challenge.
A strong art description tells a story.
Explain how the artwork came to life, what emotions or ideas it explores, and what you hope viewers will feel when they see it.
Let’s look at an example.
Here’s the original artwork by Philippa Headley.
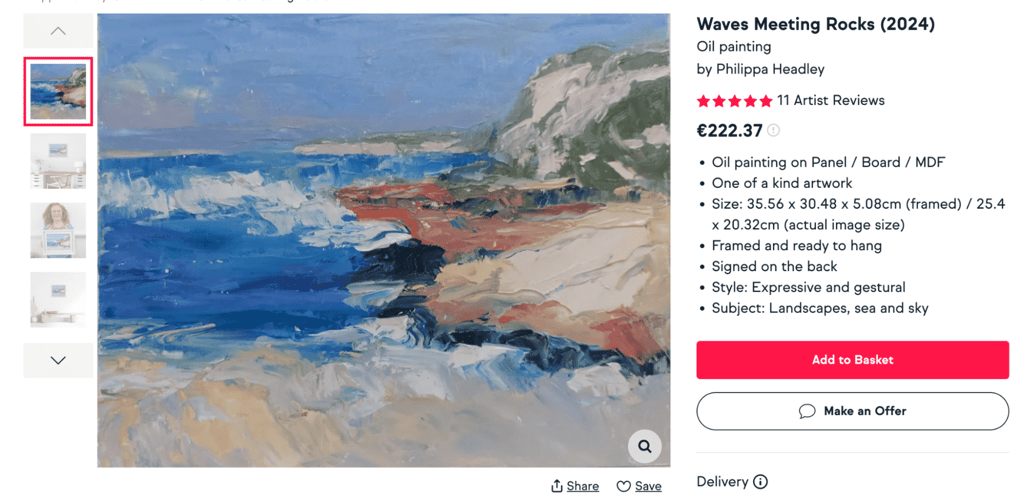
It’s titled “Waves Meeting Rocks” and provides a story-driven description by the author. It uses elements like a personal story:
“Ever since childhood I have been captivated by the sea, in particular where it meets the land. Its constantly changing colours and textures are mesmerising.”
It also describes the actual art piece in detail:
“Waves Meeting Rocks is a framed original oil painting created and painted by myself. The back of the artwork is signed and you will receive a Certificate of Authenticity.”
And shares technical details at the end:
“Materials used: Artists’ Quality Oil Paint, Prepared Oil Paint Boards. Size: 35.56 x 30.48 x 5.08cm (framed) / 25.4 x 20.32cm (actual image size). Framed and ready to hang.”
You can easily generate engaging art descriptions using AI tools like those offered by Hostinger.
Here’s how.
Head to Hostinger’s Website Builder and open the AI Writer.
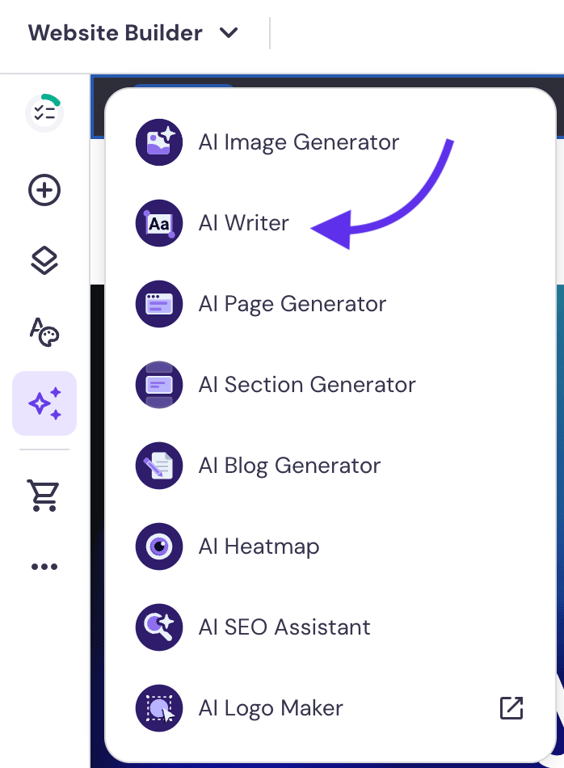
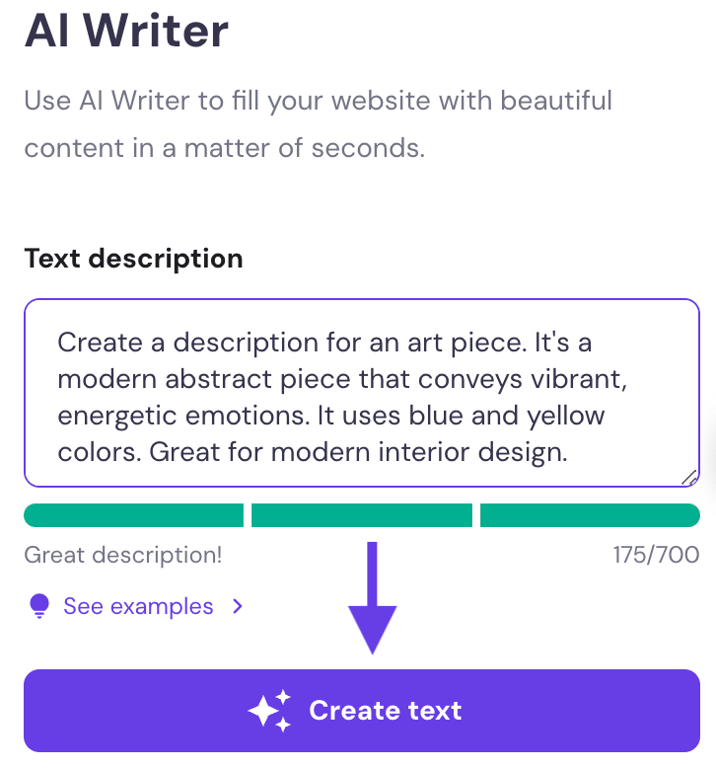
Next, specify the details of the art description you want to generate. You can describe the type of art, the ideas you want to translate, and so on.
Click “Create text” and get your description ready in a few seconds.
10. Market and promote your art
Just like anything else you sell online, your art store needs a promotional strategy.
Building a professional, SEO-friendly website with high-quality images is the first key step.
From here, use various online channels to spread the word.
First, create and actively manage your social media accounts. Instagram, Pinterest, Facebook work great for building your fan base.
For example, @rosacart is an Instagram account offering art for sale. The author creates engaging posts and reels to increase reach and attract potential buyers.
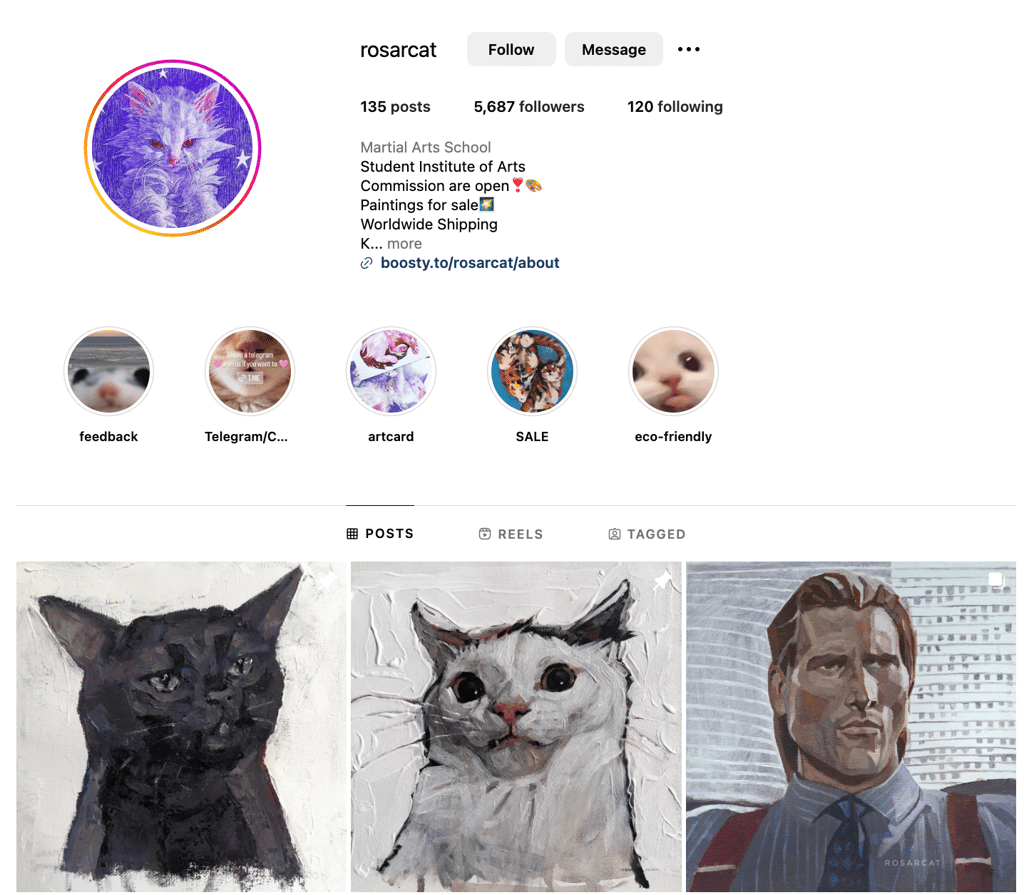
Make sure to regularly post video and static content and interact with your followers. In addition to showing your work, you can also use humor, art tutorials, and behind-the-scenes content.
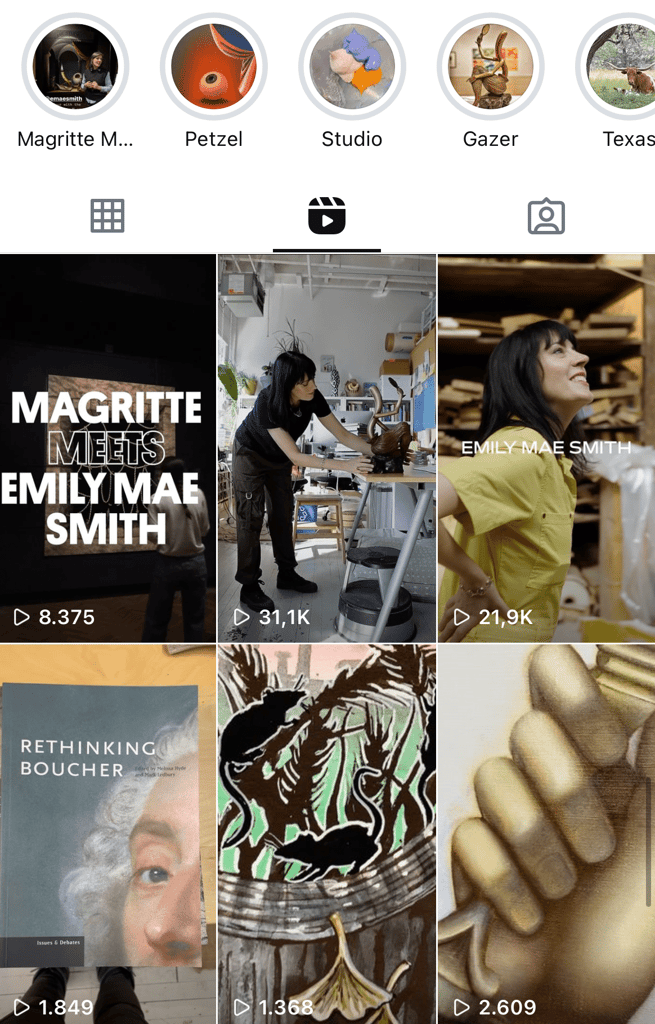
Creating reels (video content) can be especially effective.
Accounts like @emaesmith generate up to 30k views per reel showing their work process and the end result.
You could even run paid ads to promote your art for sale.
Meta lets you add all kinds of audience settings, including demographics, preferences, behavioral patterns, and more.
Overall, posting educational and entertaining content can do wonders for you.
You could even repurpose your video and image social media content and share it on other platforms.
For instance, write blog posts with painting instructions and post video tutorials on YouTube.
All this will help you attract followers and promote your art without a large investment.
Let’s look at another example.
Lachri Fine Art offers detailed painting tutorials, primarily in acrylics and oils. The channel features step-by-step guides and tips for artists of all skill levels.
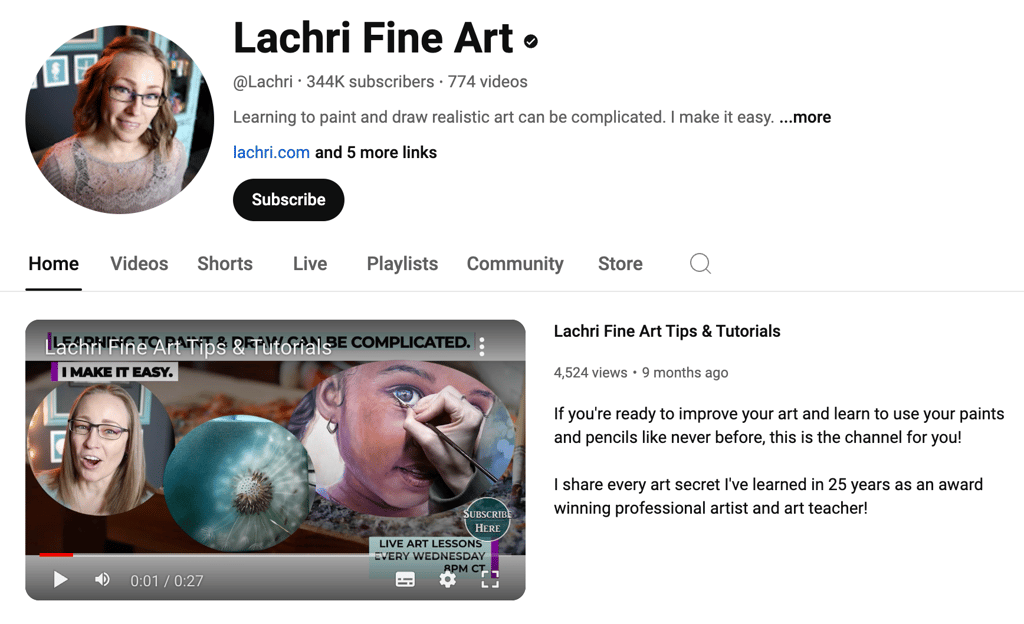
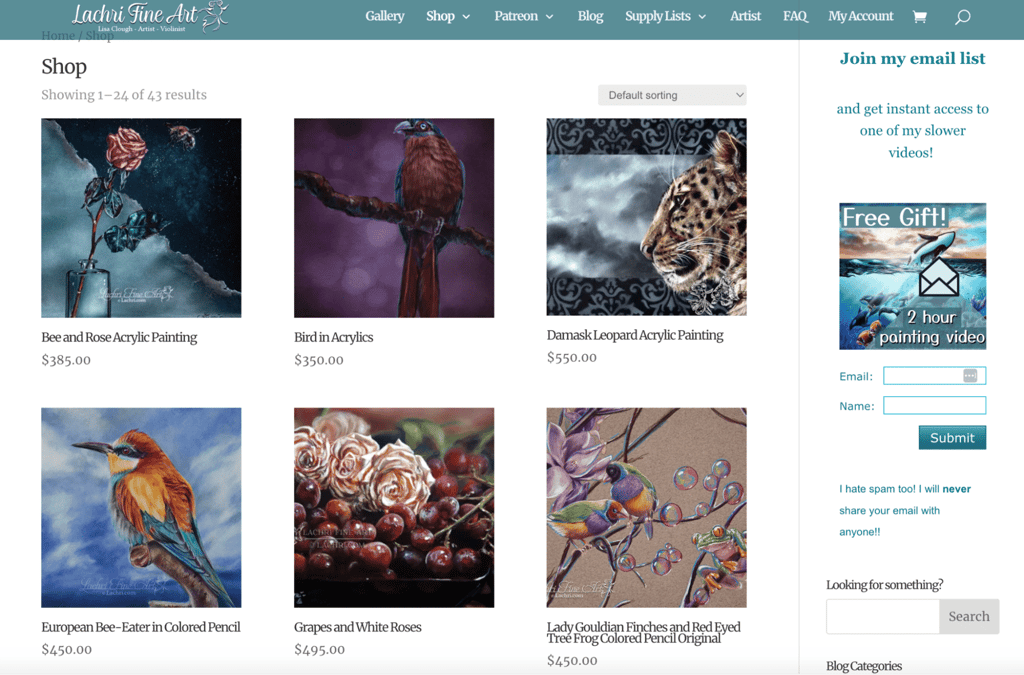
The artist, Lauren, also sells her original paintings and prints through her website linked in the video descriptions.
Finally, it’s a good idea to promote your work in online art forums, groups, and marketplaces.
Websites like DeviantArt, Behance, and Reddit’s art communities are excellent places to share your work, seek feedback, and network.
And, as we already established, joining marketplaces like Etsy or Fine Art America gives you direct access to a pool of buyers actively looking to purchase art.
Start selling your art online today
Selling your art online can transform your passion into a thriving business. If you feel like you’re ready to give it a try, follow the key steps we listed in this guide:
- Register your business and legally protect your work
- Analyze the market and your target audience
- Choose the right platforms for selling your art
- Create a pricing and promo strategy
- Keep learning and adapting based on your sales performance
Ready to launch your online art store today? Make sure to check out Hostinger’s Website Builder, which makes it easy, even for beginners.
All of the tutorial content on this website is subject to Hostinger's rigorous editorial standards and values.

Margarita is a Barcelona-based marketer with over eight years of experience across various tech industries. She also teaches content marketing and SEO at business schools and blogs about digital marketing.

Miglė Cicėnaitė-Jocė is a Product Manager for Hostinger's Website Builder. She is on a mission to redefine website creation, focusing on the AI flow and its features, and is always eager for product feedback and market insights to improve the user experience. Follow her on LinkedIn.