How to Run a Python Script in Linux VPS
Mar 26, 2025
/
Esther K.
/
10 min Read
Running Python scripts in Linux is a fundamental skill for developers and system administrators. Thanks to its versatility and ease of use, Python is preferred for automating tasks, analyzing complex data, building applications, and managing systems.
Python’s integration with Linux-based systems is seamless, thanks to the availability of interpreters and libraries in Linux repositories. In this tutorial, we’ll explain how to run a Python script in your remote server’s Linux command line.
You’ll also learn about common errors that could occur while running your Python script in Linux and how to troubleshoot them.

Prerequisites
Before we begin, have the following details of your VPS ready:
- Server IP address
- SSH port
- SSH username
- SSH password
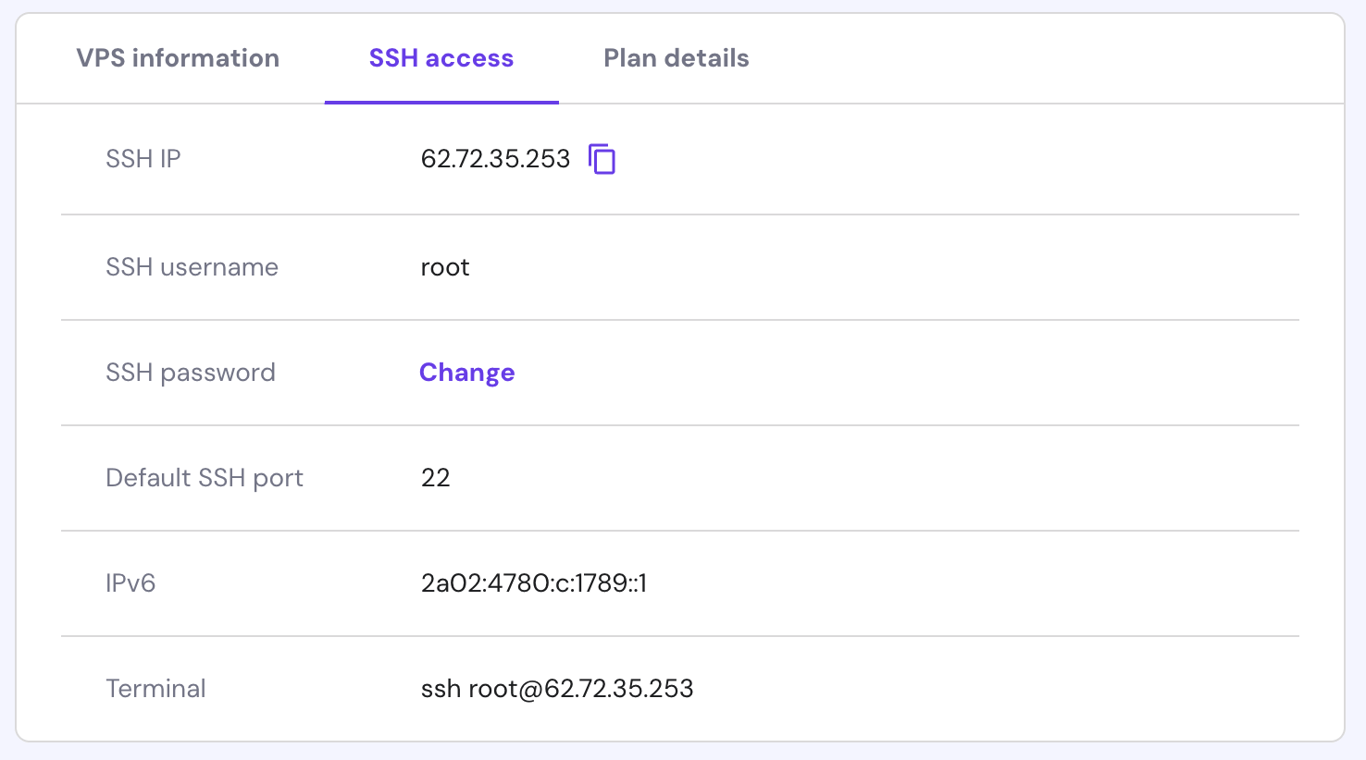
If you’re a Hostinger user, you’ll find these details under the following:
VPS → Server Details → Manage. Your credentials are located under the SSH access tab.

How to Execute a Python Script in your Linux VPS Command Line
This section will walk you through the steps to run Python scripts, from making them executable to running them in the Command Line Interface (CLI).
1. Transfer a Python Script to VPS
To run your script, you’ll need to import it from your local machine, and there are several ways to do this. Each method offers a different approach to transferring data from your machine to your VPS, with varying levels of complexity and security.
Here are some file-transferring methods and protocols out there.
Secure copy protocol (SCP)
SCP relies on SSH for safe data transfer as it encrypts both the file and the authentication information. To copy files, you must have read permission on the source file and write permission on the target system.
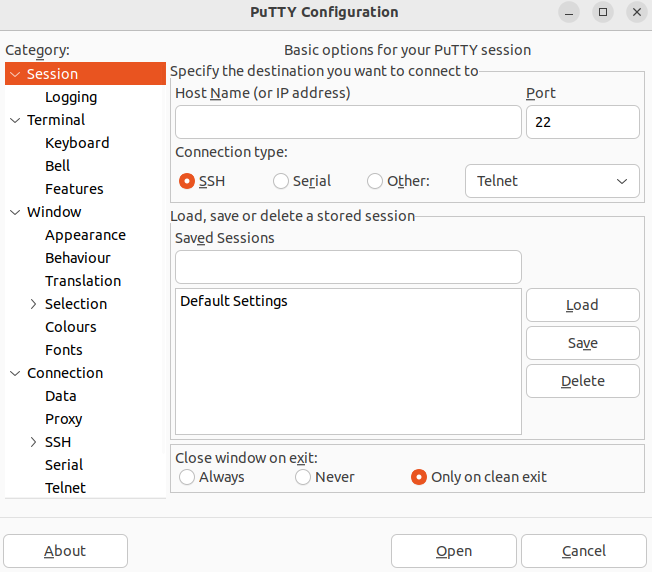
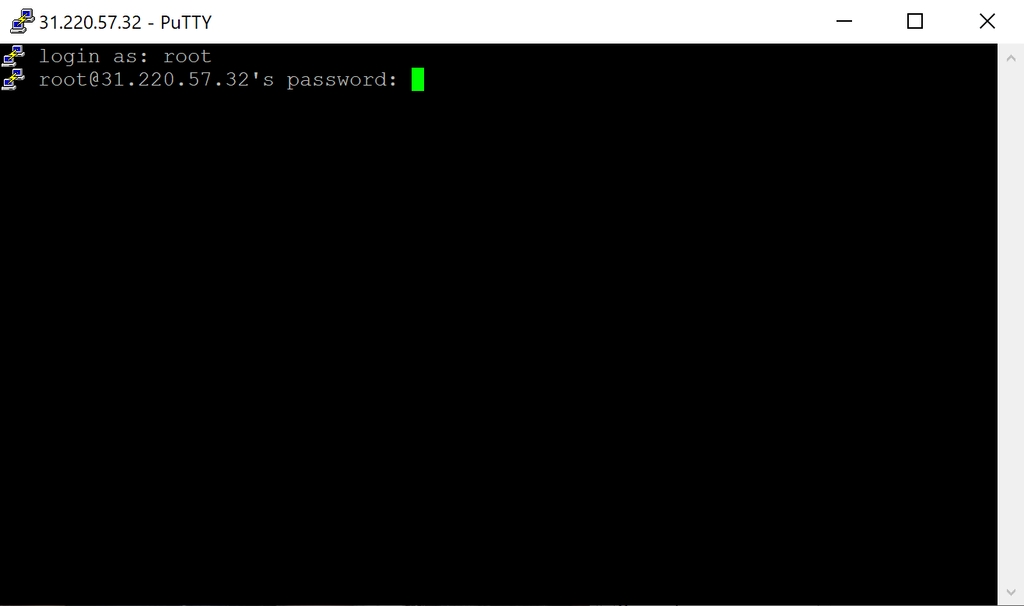
First, connect to your VPS using PuTTY. You’ll need to download it to your system to access your server.
When you’re ready, launch the PuTTY SSH client by typing putty into your Linux terminal. Use Ctrl + Alt + T or Command + Option + T if you’re using macOS to open the Terminal.
Enter your server’s SSH IP and SSH Port. Click Open to proceed.
If PuTTY disappears after entering your details and you see an unable to load font error, relaunch PuTTY and change the font.
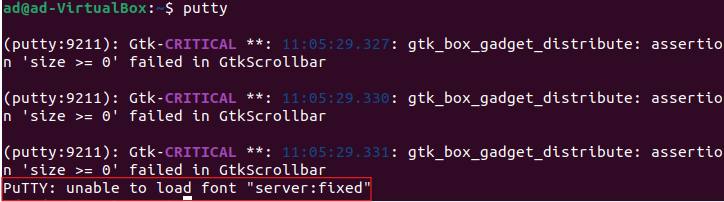
This error was displayed because the font wasn’t specified. Click Change and select the font.


Click Open, and the server window will appear.
Type your username and password to continue. Note that there will be no visual indication of what you’re typing in your terminal.
Now that you’re connected to the server, enter the following command:
scp [path to file/folder on your machine][username@IP address]:[path to desired location on VPS]
For example, if you want to transfer a file called scpfile.py located in the Code folder on your local machine to the files folder on your VPS, the you should use the scp command, which should look something like this:
scp C:/Users/username/Desktop/Code/scpfile.py root@31.220.57.32:files
Note that you can duplicate the terminal to perform this action since the other instance will be busy activating the server. If you get the connection timed-out error like this, modify the command to include the port.

scp -P [Port number][path to file/folder on your machine] [username@IP address]:[path to desired location on VPS]
scp -P 67003 C:/Users/username/Desktop/Code/scpfile.py root@31.220.57.32:files
You’ll get a warning message.

Simply type yes and enter your password.
A progress bar will appear, and the file will be uploaded to your VPS.

To upload multiple files, remove scpfile.py and replace it with an asterisk in the local folder path.
scp -P 67003 C:/Users/username/Desktop/Code/* root@31.220.57.32:files

To upload an entire folder, you’ll have to copy all the files by adding -r to the command line in the example here:
scp -r -P 67003 C:/Users/username/Desktop/Code/* root@31.220.57.32:files

Remember that SCP doesn’t provide any warnings or prompts before overwriting an existing file with the same name. Therefore, you can easily overwrite files or directories by accident, so be careful.
rsync
rsync (remote synchronization) is a method for syncing files and directories between two locations. The first time rsync is used, it transfers the entire content of a file or directory.
It uses a remote synchronization protocol that transfers only the changes between the files, making it an efficient solution for large data transfers. rsync also picks up where it left off when the connection is interrupted.
For copying multiple files, rsync is excellent because it can copy everything using a single command. It can automatically create subdirectories and use the same ssh session for each. It’s also a fast and efficient solution for backups and secure file transfers between local and remote systems.
To begin using rsync, check whether your VPS has it installed using the following command:
command -v rsync

If you don‘t have rsync installed, use this command.
For Ubuntu, Linux Mint, and Debian use the following:
sudo apt-get install rsync
For other distributions such as Fedora, CentOS, AlmaLinux, and Red Hat, use the command:
sudo dnf install rsync
Once that’s taken care of, start and enable rsync:
sudo systemctl start rsync

sudo systemctl enable rsync
This command will move your files from a local machine to your VPS:
rsync [options][path to file/folder on your machine][username@IP address]:[path to desired location on VPS]
rsync offers a variety of options to customize and control file synchronization. Here are some of the commonly used options:
- -a or –archive – preserves permissions and timestamps.
- -v or –verbose – shows detailed information about the files being synced.
- -z or –compress – allows compression during data transfer, reducing network usage.
- -r or –recursive – syncs directories recursively.
- -u or –update – skips files that are newer on the receiver.
- -n or –dry-run – performs a trial run without making any changes. A helpful command for testing.
- –delete – removes files from the destination directory.
- –exclude – stops files or directories from being transferred.
- –progress – shows progress during transfer.
- –bwlimit – limits the bandwidth to be used for the transfer.
- –partial – allows to continue interrupted transfers.
- –ignore-existing – ignores files that already exist in the destination.
- –include – includes only specific files or directories.
- –exclude-from – excludes files or directories listed in a specified file.
- –remove-source-files – removes transferred files from the source after a successful transfer.
These options can be combined to suit your specific requirements.
Refer to the rsync manual for comprehensive documentation and additional options:
man rsync or rsync
Here’s how a rsync command will look with the details plugged in:
rsync -avz -e ssh C:/Users/username/Desktop/Code/rsyncfile.py/ root@31.220.57.32:files/
Note that the trailing / (forward slash) at the end of both directory paths tells rsync to place all the files and subdirectories under that specific directory. Removing these will make rsync copy the directory itself.
Furthermore, you can use SCP and rsync to transfer files between locations. However, SCP is better used for one-off transfers, especially if the file size is relatively small.
In contrast, rsync is best used when the file size is big or when more complex and efficient synchronization is needed. It’s also the better choice for recurring tasks.
SFTP (SSH File Transfer Protocol)
SFTP is a secure alternative to FTP for transferring files over SSH. It provides file access, transfer, and management functionalities over a secure channel. Here’s how it works.
First, connect to the server using the following command:
sftp user@remoteserverIPaddress
To upload a file to your remote server, use put or mput if you’re transferring multiple files:
put sftpfile.py
Note: Move into the directory in which you want to place the file, or else it will be stored in the root directory. You can use the -r option or * to upload a folder, as seen in the SCP example above.
Secure Shell (SSH) protocol
SSH is a cryptographic network protocol that enables safe communication between two systems by encrypting the data transmitted between them.
First, connect to the server.
ssh username@IPaddress
Specify the port if you get an error. Unlike the others, ssh uses a small p.
ssh -p 6000 root@31.220.57.32
Now, use SCP to transfer the files to your VPS.
If everything is working correctly, you should see a progress bar that will alert you when the process is complete.
2. Make Sure Python Is Installed on Your VPS
First things first, ensure your VPS has Python installed. Most Linux distributions come with Python preinstalled, but you’ll have to install it manually if you don’t own a VPS. To check whether or not you have Python installed, run this command:
python --version
OR
python3 –-version
If your VPS has Python installed, a version number will be displayed.

Sometimes, Python can be saved in a different location. To view these locations, use the which command:
which python
OR
which python3

If Python is not installed, you will receive the following message:
bash: python3: command not found
If you’ve used the which command, you’ll receive a no python in path error instead.

Here’s how to install Python for different Linux distributions.
Ubuntu/Debian
First, update the package index using the following:
sudo apt update
Then, install Python 3 and the Python pip package:
sudo apt install python3 python3-pip
CentOS/RHEL
For CentOs/RHEL 8, use the following:
sudo dnf install python3 python3-devel python3-pip
For CentOS/RHEL 7, use these commands:
sudo yum install epel-release

sudo yum install python3 python3-devel python3-pip
Arch Linux
sudo pacman -Syu python python-pip python-setuptools
Fedora
sudo dnf install python3 python3-pip python3-devel
openSUSE
udo zypper update python3 python3-pip python3-devel
3. Make Your Script Executable
Before executing the Python script, you need to make it executable. Turning your script into an executable converts it into machine language your VPS can understand. To make your file executable, add a shebang line.
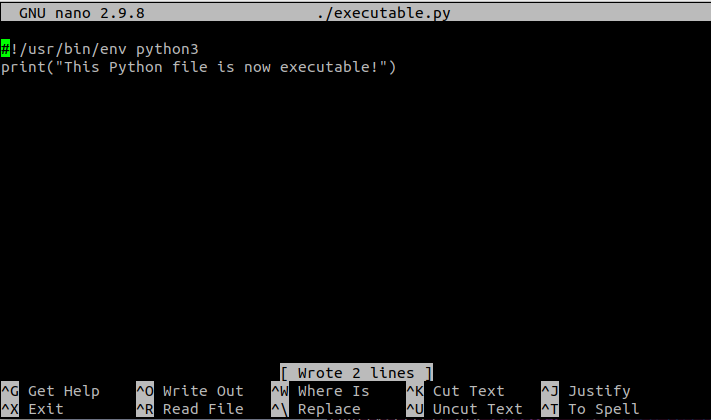
shebang is a special declaration that tells the VPS which interpreter to use. Add a Python shebang to the top of your script:
#!/usr/bin/env python3
/enli
shebang informs the VPS that the file is a Python script, so it should invoke the Python interpreter to run it.
To add a shebang, edit the script using nano, a Linux text editor. First, go into edit mode:
nano ./executable.py
Add a shebang at the top of the script and press Ctrl + O to save. Hit Ctrl + X to exit.
Next, navigate to the folder containing the file:
cd path/to/file
Now, you’ll have to set permissions for the executable using the following command:
chmod +x [Python file]
chmod +x  executable.py
The chmod command in Linux stands for change mode, and it is used to change the permissions of a file or directory. Each file or directory in Linux has permissions that determine who can read, write, or execute it.
These permissions are represented by a series of letters or numbers, known as the file mode or permission mode. The chmod command above adds execute permissions to your script.
4. Run the Script and View it in the Terminal
Once the script is ready to be executed, you can run it using the Python interpreter. Use the following command to execute your script:
./executable.py
After running the script, you can view the output directly in the terminal.

5. View Logs
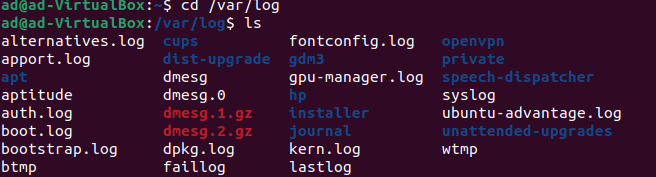
You can also check the system logs for errors or messages generated by the script. To access Linux log files, move into the Linux system logs directory. The default directory path is /var/log:
cd /var/log
Once there, type ls to list the logs stored within this directory.
Linux logs provide a timeline of events that occur on your computer. They are helpful for troubleshooting issues, monitoring system health, diagnosing problems, and investigating security incidents. There are different kinds of logs, but the following are some log files and their definitions:
/var/log/syslog– messages from the syslog daemon and other system daemons./var/log/auth.logor/var/log/secure– authentication-related messages. It records information about user logins, authentication attempts, and other security-related events./var/log/kern.log– information about the kernel’s operation, hardware drivers, and other low-level system activities./var/log/dmesg– messages from the kernel ring buffer. It provides information about hardware detection, device initialization, and other kernel-related messages from the last boot.
/var/log/boot.log– information about the boot process. It includes messages from system startup scripts and services that start during boot./var/log/daemon.log– messages from system daemons or background services. This includes messages from services like Apache, MySQL, and others./var/log/cron– information about cron jobs that are executed on the system, including when they were run and if there were any errors./var/log/maillogor/var/log/mail.log– mail server logs, including messages related to sending and receiving emails./var/log/lastlog– keeps track of all users’ last login times in the system./var/log/audit/audit.log– on systems with auditd installed—an auditing daemon—this file contains logs of security-related events such as file access, user authentication, and other system-level security events.
Keep in mind that the exact location and naming conventions of these logs may vary between Linux distributions.
To view or examine the contents of any log file, use less or cat:
less nameoflog
For example, this is the command you’ll use to view the syslog:
less syslog
Scrolling through any file might take some time because they are very long. You can use Shift + G to fast-forward to the (END).
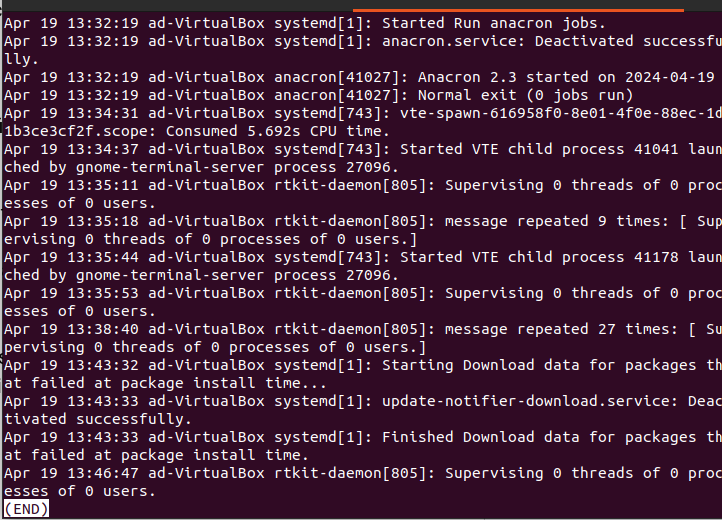
To exit the file, simply type q.
Moving on, another command that helps you view the log files is the tail command. However, it only shows the last part of the file, where problems usually lie:
tail /var/log/syslog or

tail -f /var/log/syslog
Due to the -f in the command above, tail will continuously monitor the log file, displaying newly written lines in real time:
For a specific number of lines, such as the last five, use the following:
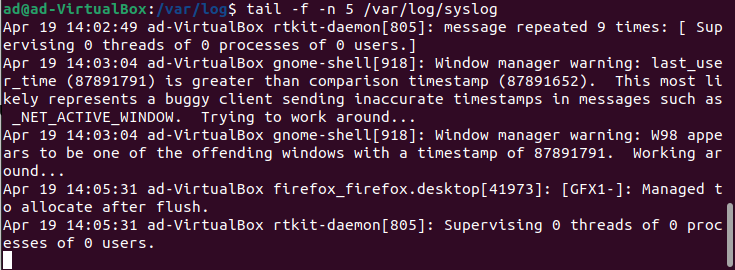
tail -f -n 5 /var/log/syslog
As new lines appear, older ones are replaced. To exit the tail command, press Ctrl + C.
Running a Python Code Interactively
Python provides an interactive mode where you can execute code blocks or single lines of code and receive immediate feedback.
1. Launching Python’s Interactive Mode
To launch Python’s interactive mode on your VPS, type Python or Python3 into the terminal to launch the Python interpreter.

2. Executing Python Commands Interactively
Once in interactive mode, you can enter Python commands directly and see their output immediately. This mode is useful for testing code snippets or experimenting with Python features.
We’re going to print Hello World to the console.

Here, we printed Hello World and performed an arithmetic operation. In the example above, we made a mistake, and Python threw an error.
In interactive mode, there is little room for error. You’d have to repeat the entire code if you make a mistake. This is why interactive mode is mainly used to test code snippets and not for creating large chunks of code.
3. Exiting Interactive Mode
To exit Python’s interactive mode, type exit() or press Ctrl + D on your keyboard.

Troubleshooting Common Execution Errors
Encountering errors while running Python scripts is common. Here are some errors to look out for.
Permission Denied Error
Error message: PermissionError: [Errno 13] Permission denied
Cause: script does not have execute permissions.
Troubleshoot: use chmod +x [Python file] to grant execute permissions to your script
No Such File or Directory Error
Error message: no such file or directory: ‘script.py’
Cause: script file path is incorrect.
Troubleshoot: make sure you are in the correct directory or provide the full path to the script:
python3 /path/to/pythonscript.py
Python Version Compatibility
Cause: you have multiple versions of Python installed on your Linux system, and your script requires a specific version to run correctly.
Troubleshoot: specify the desired Python version explicitly when running the script, depending on your requirements:
python3 script.py or python2 script.py
Interpreter Not Found Error
Error message: bash: python3: command not found
Cause: the Python interpreter is not installed or not in the system’s path.
Troubleshoot: Install Python using the package manager. Then, add Python to the path or specify the full path to the interpreter.
Conclusion
Linux is a powerful tool that makes running Python a piece of cake. This is beneficial because Python is a high-level programming language used to create powerful applications and systems.
In this tutorial, we’ve covered how to run a Python script in the command line, how to run a Python script interactively, and how to view log files. We’ve also talked about some common execution errors and ways to troubleshoot them.
These steps will help you smoothly execute Python code for numerous tasks, from automation to system management. We hope you’ve found this article helpful!
How to Run a Python Script in Linux FAQ
Here are some of the most commonly asked questions regarding running Python scripts.
How Do I Run a Python Executable in Linux?
To run a Python executable in Linux, simply navigate to the executable’s directory and run it using the ./ prefix followed by the filename. After running the script, you’ll see the output in the terminal, or if it’s an application, a window will open.
What’s the Difference Between Running Python Scripts Interactively and From the Command Line?
Running Python scripts interactively allows you to execute Python commands line by line in real time, whereas running scripts from the command line allows you to execute the entire script at once. The command line is usually used to execute massive chunks of code that wouldn’t make sense to run in interactive mode.
How Can I Run a Python Script at Scheduled Times on Linux?
Create a script with a shebang line, #!/usr/bin/env python3. Make it executable by typing chmod +x [Python script]. Add a cron job crontab -e. Specify the schedule [schedule] /path/to/python3 /path/to/script.py and save. Verify with crontab -1.
All of the tutorial content on this website is subject to Hostinger's rigorous editorial standards and values.

Esther is a copywriter for SaaS and Tech companies. She has a background in engineering and software development. When she’s not writing, she’s conducting creative experiments, inventing systems, writing screenplays, or laughing at her own dad jokes. Follow her on LinkedIn.