How to install Arch Linux: Manually, or using the Hostinger VPS template
May 11, 2026
/
Aris S.
/
9 min Read

Arch Linux is a minimalist, rolling-release distribution known for its extensive customizability. It’s particularly popular among developers and tech professionals who want maximum freedom when configuring their operating systems.
However, this flexibility makes installing Arch Linux notoriously tricky. Despite the comprehensive documentation, beginners may be intimidated by the level of complexity involved.
In this tutorial, we’ll explain how to install Arch Linux using two different methods: using Hostinger’s VPS template, or manually with commands. You can choose according to your level of expertise.
Prerequisites
Before installing Arch Linux, make sure you have a system that meets the following system requirements:
- x86-64 CPU architecture
- At least 512 MB of RAM
- Minimum 2 GB of storage
- Stable internet connection
Consider whether you want to install the operating system on a remote server or a desktop machine, as the procedure will differ. For a local system, you’ll need to create a bootable drive using a tool like Rufus.
Meanwhile, the steps for installing Arch Linux on a remote server differ depending on your hosting provider. For example, Hostinger provides a one-click installer, while others might require you to upload the ISO file manually.
How to install Arch Linux using a VPS from Hostinger
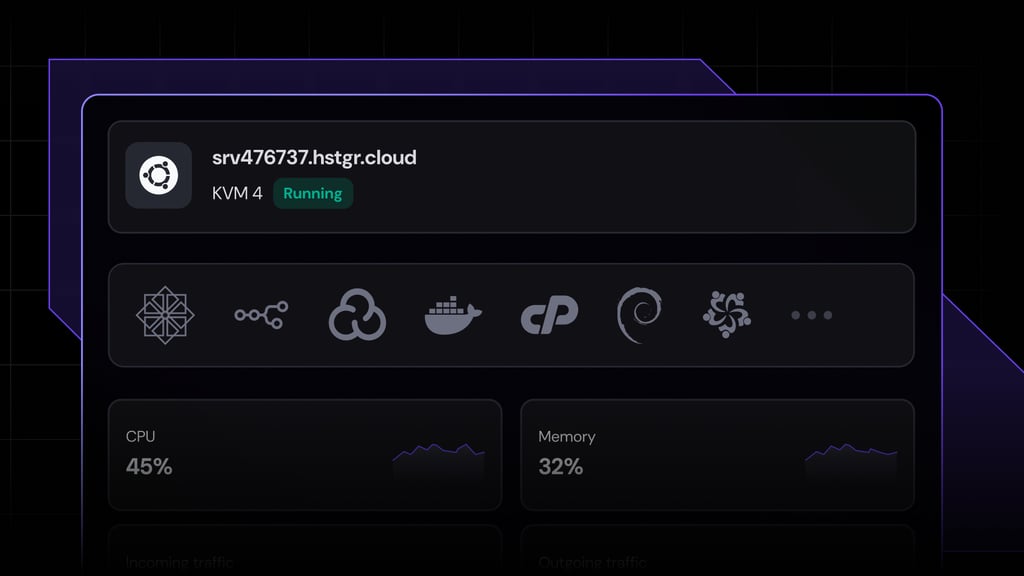
If you purchase Hostinger’s Arch Linux hosting plan, you only need to complete the onboarding process – the operating system will be configured automatically.

Important! Since installing an operating system will wipe existing data on your VPS, back up important files before proceeding. However, you can skip this process when working with a new VPS.
If you already have a VPS plan at Hostinger, you can easily install Arch Linux without commands by selecting the OS template. Here are the steps:
- Open hPanel and log in to your hosting account.
- From the sidebar, select VPS.
- Click Manage on the VPS where you want to install Arch Linux.
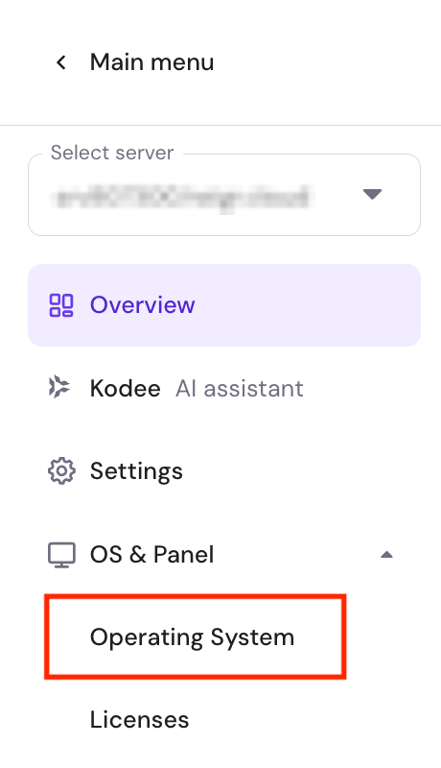
- Navigate to the sidebar → OS & Panel → Operating System.
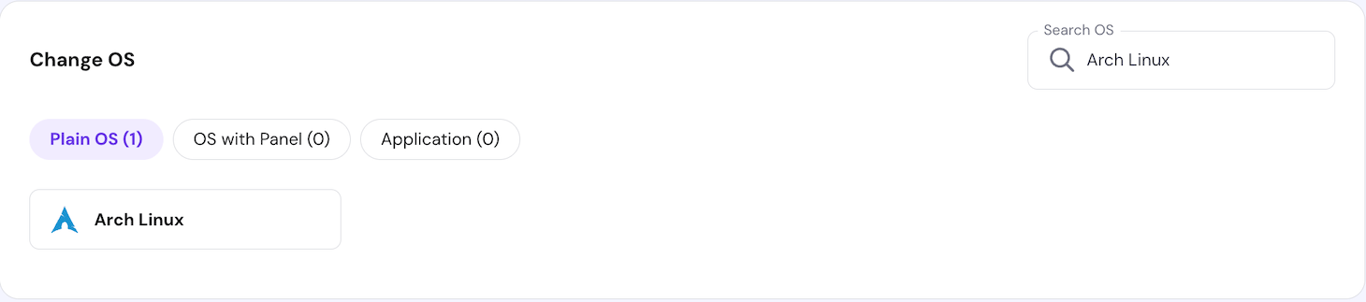
- From the Plain OS tab, choose Arch Linux. Click Change OS.
- Check the box to acknowledge data deletion and hit Next.
- Enter a new root password and click Confirm. Wait a few minutes for the installation process to complete.
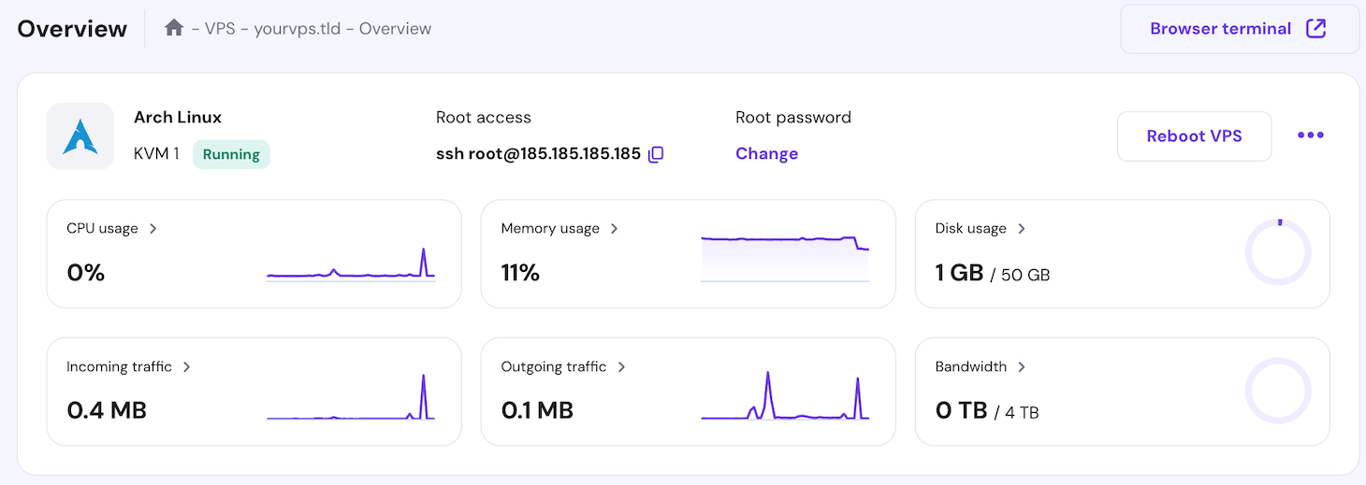
That’s it! If you go to the VPS overview menu, you’ll see that Arch Linux is installed on your server.
How to manually install Arch Linux
If you’re using a desktop, virtual machine, or server from another provider, you’ll need to install Arch Linux manually. Here’s how to do it.
1. Boot from the installation media
If you use a virtual machine, you should have already chosen the Arch Linux ISO image when creating the environment. On a desktop computer, plug in a bootable USB with the Arch Linux ISO and select it as the boot device via BIOS. Check with your computer manufacturer to find out how to peform this step on your device.
Similarly, you’ll need to follow your hosting provider’s instructions to upload the Arch Linux disk image to a remote server. This process varies depending on the provider.
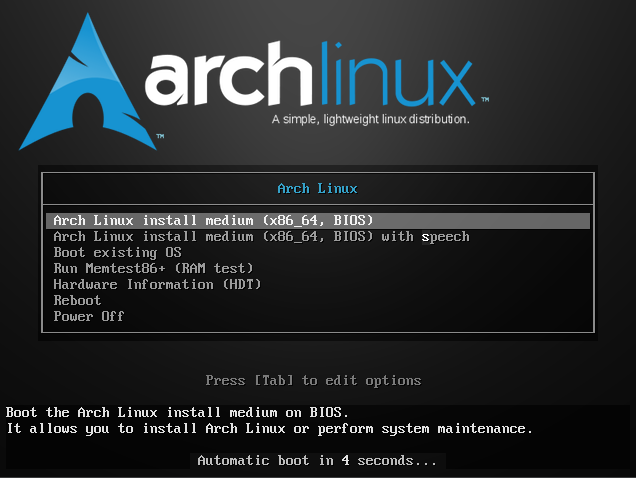
Once you’ve loaded the disk image, you’ll see the option to boot into different installation media. Choose Arch Linux. You can start the installation process once you see the root@archiso console.
2. Configure basic system settings
Start the installation by configuring several basic system settings. Here’s how to do it.
Changing the keyboard layout
By default, Arch Linux will use the US keyboard layout. If you want to change it, enter the following:
loadkeys [layout-name]
You can check the available layout using this command:
localectl list-keymap
Checking the internet connectivity
Checking if your system has access to the internet is crucial since the installation process will involve downloading packages from a remote repository. To verify the connection, ping any domain like so:
ping archlinux.org
If your system can’t access the internet, plug in your LAN cable or use the iwctl command to connect to available Wi-Fi.
Syncing the system clock
An unsynced clock can cause problems, from incorrect log timestamps to machine malfunctions.
While you can adjust the clock manually, it is easier to sync the time via the internet by enabling the Network Time Protocol (NTP). Here’s the command:
timedatectl set-ntp true
3. Set up the partitions
Create partitions to divide your system’s hard drive into multiple spaces for better data organization and separation. Arch Linux has several partition types with specific purposes.
You can use different partition schemes depending on your needs. In this tutorial, we’ll create a simple one comprising root and EFI. Here are the steps:
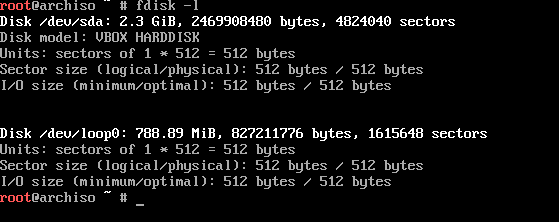
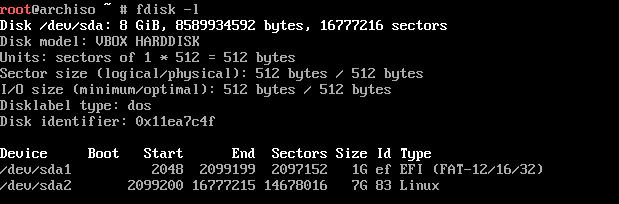
- List the disk in your system using the fdisk command:
fdisk -l
- Choose the disk you want to partition and note its name. Typically, the main storage is the first one from the top, like /dev/sda.
- Enter the following command to initiate the partition creation wizard. Replace disk-name with the actual name.
fdisk disk-name
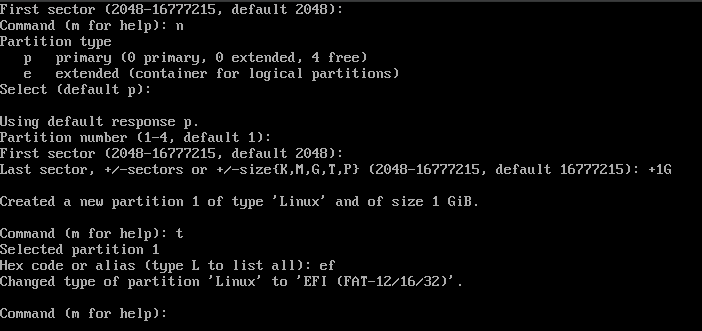
- Hit n and Enter to start the configuration.
- Configure the partition’s disk number, block size, and space allocation. Use the default values for the first two settings, but change the partition size to 1 GB.
- Change the partition type by hitting t and Enter.
- Type ef and hit Enter to reformat the partition.
- Create the root partition by typing n and hitting Enter. Use the default values for all the settings, including the partition size.
- Type w and hit Enter to write the new settings to the disk.
Now, list your system disk again, and you should see the new partitions.
4. Create filesystems
A filesystem organizes data in your storage, allowing the operating system to manage and process it properly. We must create one in each partition.
The type of filesystem differs depending on the partition. In our case, we’ll implement FAT32 on the EFI system partition and ext4 on the root.
Let’s create the FAT32 filesystem using this command. Remember to replace /dev/sda1 with your actual partition name:
mkfs.fat -F32 /dev/sda1
Next, configure the ext4 filesystem for the root partition using this command:
mkfs.ext4 /dev/sda2
Then, mount the filesystems. For the EFI partition, run the following command:
mount --mkdir /dev/sda1 /mnt/boot
Meanwhile, use the following command to mount the filesystem to the root partition:
mount /dev/sda2 /mnt
5. Installing Arch Linux from mirrors
Installing Arch Linux requires fetching the required packages and data from mirrors. These secondary servers store a copy of the operating system for redundancy and distribute the load from the main host.
Arch Linux has multiple mirrors in different locations. During the installation, you should choose the closest server to minimize the download latency.
Here are the steps to install Arch Linux from the closest mirror:
- Sync the Pacman repository using this command:
pacman -Syy
- Install Python3 and Reflector, which enables you to filter and sort the mirrors:
pacman -Sy python3 reflector
- Update the mirror list using the following command. We’ll use the 10 fastest and most recently updated mirrors in the US:
reflector -c "US" -f 10 -n 10 --save /etc/pacman.d/mirrorlist
- Mount the root partition by running the following:
mount /dev/sda2 /mnt
- Install Arch Linux and other essential software in the partition using this command:
pacstrap /mnt base linux linux-firmware nano dhcpcd
Wait until the installation process is finished. This might take some time, depending on your internet connection speed.
6. Configuring Arch Linux
Once Arch Linux is installed, configure your system’s basic settings to ensure it works properly. Here are some of the most essential configurations and how to set them up.
Creating fstab
Fstab is a file that defines how your system mounts data sources like disk partitions and block devices. To generate one, run the following command:
genfstab -U /mnt >> /mnt/etc/fstab
Switching root directory
After the installation, you’ll be located inside the live Arch Linux image by default. To configure your system, you must switch the root directory to the new Arch Linux installation. Here’s the command:
arch-chroot /mnt
Changing time zone
Like the system clock, setting the correct time zone is crucial for functionality. Before choosing a time zone, check the available ones by running this command:
ls /usr/share/zoneinfo

Then, set the default timezone for your system using the following command. Replace Region and City with your desired values:
ln -sf /usr/share/zoneinfo/Region/City /etc/localtime
For example, if you want to change your system time zone to New York, the command will look like this:
ln -sf /usr/share/zoneinfo/America/New_York /etc/localtime
Selecting locales
Linux uses locales to render text, ensuring it displays properly. To set one up, simply open the locale.gen file using this command:
nano /etc/locale.gen
Choose your preferred locale and remove its hash (#) symbol. The most common one is en_US.UTF-8.

Next, press Ctrl + X, Y, and Enter to save the changes. Now, generate the locales by running the following command:
locale-gen
Then, create the locale configuration file by entering:
nano /etc/locale.conf
Add your preferred locale using the LANG variable. The syntax looks like this:
LANG=en_US.UTF-8
Save the file, and the locale is now set.
Setting up a hostname
A hostname is an identifier for your system in a network. To set up a hostname, create the hostname file using the following command:
nano /etc/hostname
Add your preferred hostname. Save the file by pressing Ctrl + X, Y, then Enter.
Now, create the hosts file, which will map the localhost address to the hostname. Here’s the command:
nano /etc/hosts
Add the loopback IP address and your hostname at the bottom of the file. Remember to replace hostname with its actual value:
127.0.1.1 hostname
Save the changes. Now, finish the network configuration by enabling DHCP to allow your system to get an IP address automatically. Here’s the command:
systemctl enable dhcpcd
Important! To ensure your Arch Linux system’s connectivity works properly, follow the network configuration manual to test and adjust the network settings.
Configuring root
Set up a new password for your system’s root user using the following command:
passwd
Installing the bootloader
A bootloader is software that loads the OS kernel into your machine’s memory, allowing it to boot up. Arch Linux supports various bootloaders that are suitable for different needs and preferences.
In this tutorial, we’ll install GRUB as it is the most popular and flexible. Here’s how to do so:
- Add the GRUB bootloader by running this command:
pacman -Sy grub os-prober
- Install GRUB using the following:
grub-install /dev/sda
- Create a GRUB configuration file by entering:
grub-mkconfig -o /boot/grub/grub.cfg
To confirm that GRUB is configured correctly, press E when the system reboots. You should see a menu like the following:
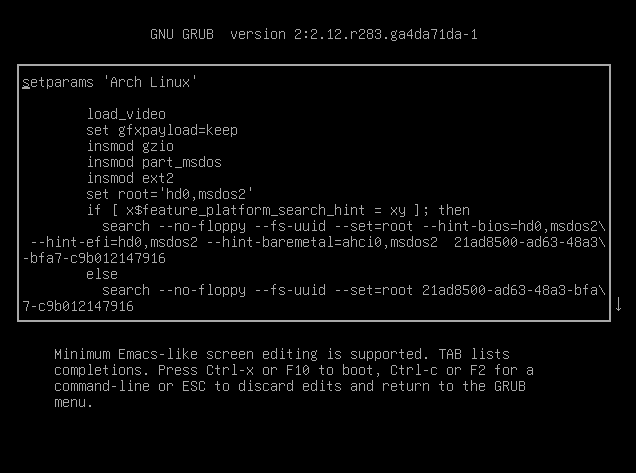
Rebooting the system
To finish the installation process and apply all the changes, reboot your system. First, quit the Arch chroot environment by entering:
exit
Then, unmount the root partition so that you can choose the correct boot partition in GRUB:
umount -l /mnt
Finally, remove or eject your Arch Linux installation image and restart the system:
sudo reboot
Arch Linux post-installation tips
After installing Arch Linux, whether on your Hostinger VPS or local computer, consider the following essential tips to ensure your system remains secure and performs optimally.
Update the mirrorlist regularly
As a rolling-release Linux distribution, Arch Linux receives patches more frequently than fixed-release OSes like Ubuntu. This makes updating your machine regularly integral for security and functionality.
To update your system, run the following command:
pacman -Syu
It synchronizes your system’s package database with the latest information from the mirrorlist and installs patches for all outdated software.
Enable a firewall
Arch Linux doesn’t have a firewall by default, which can be risky if your computer connects to a network or the internet. Hostinger VPS has a built-in firewall that you can configure via hPanel.
If you install Arch Linux manually on your system, you must install a firewall like Uncomplicated Firewall (UFW). To do it, run this command:
pacman -Sy ufw
Then, enable UFW using the following:
ufw enable
Important! If you’re working with a remote system, be sure to include SSH in the firewall allowlist. Otherwise, you might lose remote access. Read our Uncomplicated Firewall tutorial to learn more about how to configure a rule.
Check the UFW status by running the following. You should see that UFW is active and running:
systemctl status ufw
Set up automatic backups
Whether you are installing Arch Linux on a server or a personal system, enabling backups is important to maintain data integrity.
If you are on Hostinger VPS, weekly automatic backups are active by default. You can also use the snapshot feature to save the current state of your server for easy restoration.
For other servers or desktop systems, the easiest way to set up an automatic backup is by using a cron job. You can schedule the rsync command to copy your data to another computer at a specific time.
Install a desktop environment
By default, Arch Linux only has a command-line interface. It works fine as is, but you must set up a desktop environment if you wish to employ a graphical user interface.
Arch Linux supports two types of desktop environments: official and unofficial. The difference is that the officially supported ones are under Arch’s maintenance and documentation.
Since the steps to install desktop environments vary, check their documentation to learn more about their specific procedures. For example, here’s how to install Gnome, the most popular desktop environment.
Conclusion
Arch Linux is a rolling-release distribution known for its performance and flexibility. While popular among developers, it is not ideal for beginners due to the complex setup process.
In Hostinger VPS, however, you can easily install Arch Linux in a few clicks by selecting the OS templates. In other systems, you must follow these steps to configure it manually:
- Mount the installation disk image on your system
- Configure basic system settings like keyboard layout and clock.
- Set up the partitions for your operating system.
- Create filesystems to define how your system arranges files.
- Install Arch Linux from the closest mirrors.
- Configure essential settings, like root password and fstab.
After installing the OS, make sure to set up an automatic backup and configure UFW to maintain optimal security. If you are using Hostinger’s VPS, you don’t need to worry about this – just use the built-in features.
How to install Arch Linux FAQ
Is Arch Linux easy to install?
Arch Linux is quite tricky for beginners to install manually since it involves adjusting various configurations using commands. However, some VPS hosting providers like Hostinger provide a one-click installer that lets you easily set up any operating system without typing commands.
Is Arch good for beginners?
No, Arch Linux is not considered beginner-friendly for a few reasons. For one, it is difficult to install since users must manually configure important settings like the filesystem. Also, it doesn’t have a desktop environment by default, meaning you must work with it using commands, unless you choose to install a GUI. For these reasons, Arch Linux is more suitable for developers or tech enthusiasts.
How do I install Arch Linux?
To install Arch Linux manually, boot from installation media with the ISO image and configure the system settings via the virtual console. You’ll then need to create filesystems and download packages from mirror servers. If you use Hostinger VPS, you can set up Arch Linux much more easily by selecting the corresponding OS template.
All of the tutorial content on this website is subject to Hostinger's rigorous editorial standards and values.

Aris is a Content Writer specializing in Linux and WordPress development. He has a passion for networking, front-end web development, and server administration. By combining his IT and writing experience, Aris creates content that helps people easily understand complex technical topics to start their online journey. Follow him on LinkedIn.