How to create a Docker Swarm
Jun 24, 2025
/
Ariffud M.
/
9 min Read

Docker Swarm is a container orchestration tool that enables you to manage multiple Docker engines as a unified system. Using it, you can deploy and manage containerized apps across several machines. Your app will keep running even if one machine fails or goes offline.
This article will guide you through setting up a Docker swarm and deploying services on multiple virtual private server (VPS) instances. By the end, you’ll know how to create and manage a scalable, highly available cluster with Docker Swarm.
Prerequisites
Before creating a Docker swarm, set up at least two machines – one manager and one worker node. These can be personal computers, virtual machines, VPS instances, or other compatible environments.
In this tutorial, we’ll use three VPS instances from Hostinger’s Docker hosting service – one as the manager node and the other two as worker nodes.
Docker requires at least 4 GB of RAM to run smoothly, so our KVM 1 plan – starting at [pricing plan= “vps-kvm-1” period= “24” price=’price’]/month and offering one CPU core, 4 GB of RAM, and 50 GB of NVMe disk space – should be enough.
You can upgrade to a higher-tier plan anytime for more processing power or storage. Another benefit of Hostinger’s Docker hosting is that Docker and all its essential components come preinstalled, so you don’t have to set anything up manually.

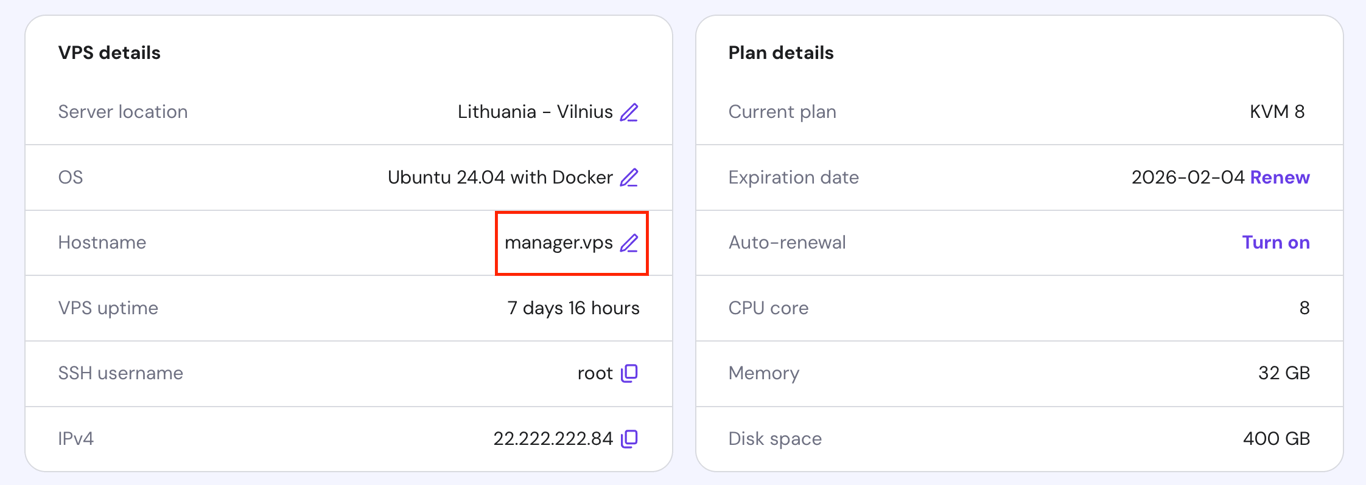
Once you have your VPS instances, we suggest renaming each one to reflect its role in the swarm. While optional, using custom hostnames improves readability and makes it easier to identify each node.
To change your VPS hostname on Hostinger, go to hPanel → VPS → Manage → Overview → VPS details. Then, click the pencil icon next to the current hostname and rename the instances like this:
- Manager node – manager.vps
- Worker node 1 – worker1.vps
- Worker node 2 – worker2.vps
If you’ve set up Uncomplicated Firewall (UFW) on your VPS, allow the following ports so the swarm nodes can communicate:
- 2377 TCP – for cluster management and node communication.
- 7946 TCP/UDP – for communication between swarm nodes.
- 4789 UDP – for overlay network traffic between containers on different nodes.
If you haven’t configured UFW or if you’ve just purchased your VPS, skip this part.
To allow the necessary ports, open your terminal on each instance and run:
sudo ufw allow 2377/tcp

sudo ufw allow 7946/tcp

sudo ufw allow 7946/udp

sudo ufw allow 4789/udp
Then, use the command below to verify that UFW is active and the rules are applied:
sudo ufw status
It’s also helpful if you’re familiar with basic Docker CLI commands, as you’ll use them when managing your services in the swarm. Check out our complete Docker cheat sheet, which includes the most commonly used commands for different tasks.
How to create a swarm in Docker
To create a Docker swarm, you’ll need to initialize one machine as the Swarm manager and connect the others as worker nodes. Then, you can deploy your service in the swarm and use Docker command-line interface (CLI) commands to perform tasks like scaling or applying rolling updates.
Follow these steps to create a Docker swarm and manage services across multiple instances.
Since you’ll work with both manager and worker nodes, pay attention to where you run each step – some apply only to the manager, others to the workers.
1. Install Docker on all instances
Run on: all nodes.
As mentioned in the prerequisites section, Docker comes preinstalled on Hostinger’s Docker hosting plans. Otherwise, you must install this containerization platform on all nodes before setting up the swarm.
Once done, verify that Docker is indeed installed by executing:
docker --version
Here’s what the output should look like:

Next, check that the Docker service is up and running:
sudo systemctl status docker
You should see a status like active (running), confirming that the Docker daemon is working properly.
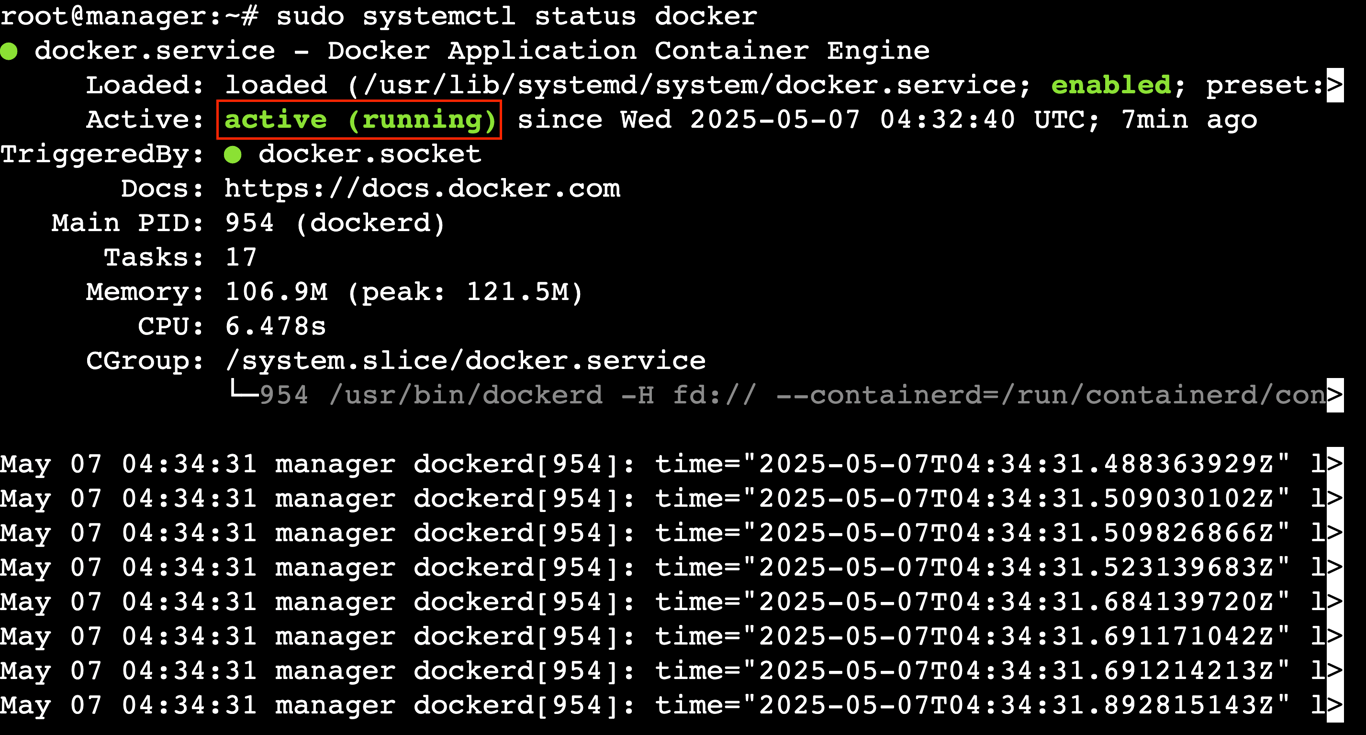
To exit the status output, press Ctrl + C.
2. Initialize the swarm manager
Run on: manager node.
After installing Docker on all nodes, switch your focus to the manager node – this is where you’ll create the Docker swarm. First, make sure you know the manager node’s IP address.
For Hostinger VPS customers, you can find the IP address in the VPS details section on the Overview page – the same place where you changed the hostname earlier.
Once you have the IP address, run the following command to initialize the swarm. Replace [manager node’s IP] with your actual VPS IP:
docker swarm init --advertise-addr [manager node's IP]
This command generates an output similar to:

Copy and save the join command – you’ll need it to connect the worker nodes to the swarm.
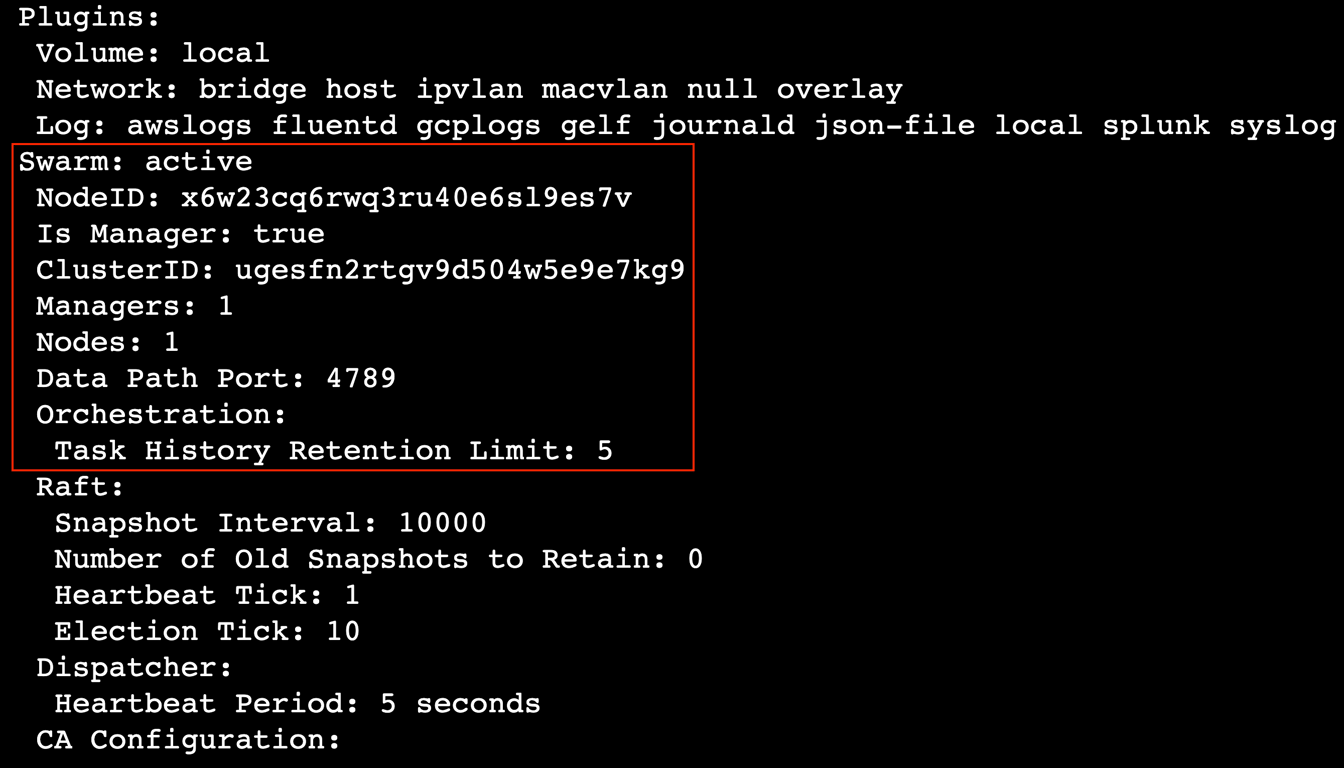
To confirm that the swarm started successfully, run:
docker info
This shows information about the swarm state.
Then, check the list of nodes in the swarm:
docker node ls
You should see details like node ID, hostname, status, availability, and role.

Pro tip
If you want to add nodes but forgot the token, run this command on the manager node to display it again:
docker swarm join-token worker
3. Add worker nodes
Run on: worker1 and worker2 nodes.
Now, move on to the worker1 node and run the join command you copied from the manager:
docker swarm join --token [join token] [manager node's IP]:2377
If you see the message “This node joined a swarm as a worker,” the node has joined the swarm successfully.

Repeat the same process on worker2 or any additional nodes to connect them to the swarm.
Pro tip
Each time you add a new node, go back to the manager node and run docker node ls to confirm that the new node has indeed joined the swarm.
4. Deploy your first service
Run on: manager node.
Return to the manager node to deploy a test service named hello-world. Although this is just a test service and you’ll delete it in the next step, practicing this will help you become familiar with service management in Docker Swarm.
Here’s the command to create the hello-world service:
docker service create --replicas 1 --name hello-world alpine ping docker.com
- docker service create – starts the service creation in Docker Swarm.
- –replicas 1 – defines the number of service replicas to run. In this case, it’s just 1.
- –name hello-world – sets the service name as hello-world.
- alpine ping docker.com – uses the alpine image to ping docker.com as a simple test.

After that, use the following command to list the services running in the swarm:
docker service ls

5. Inspect and scale services
Run on: manager node.
After deploying your test service, it’s time to inspect and scale it within the swarm.
Inspect the service details
Check your hello-world service details with the command below:
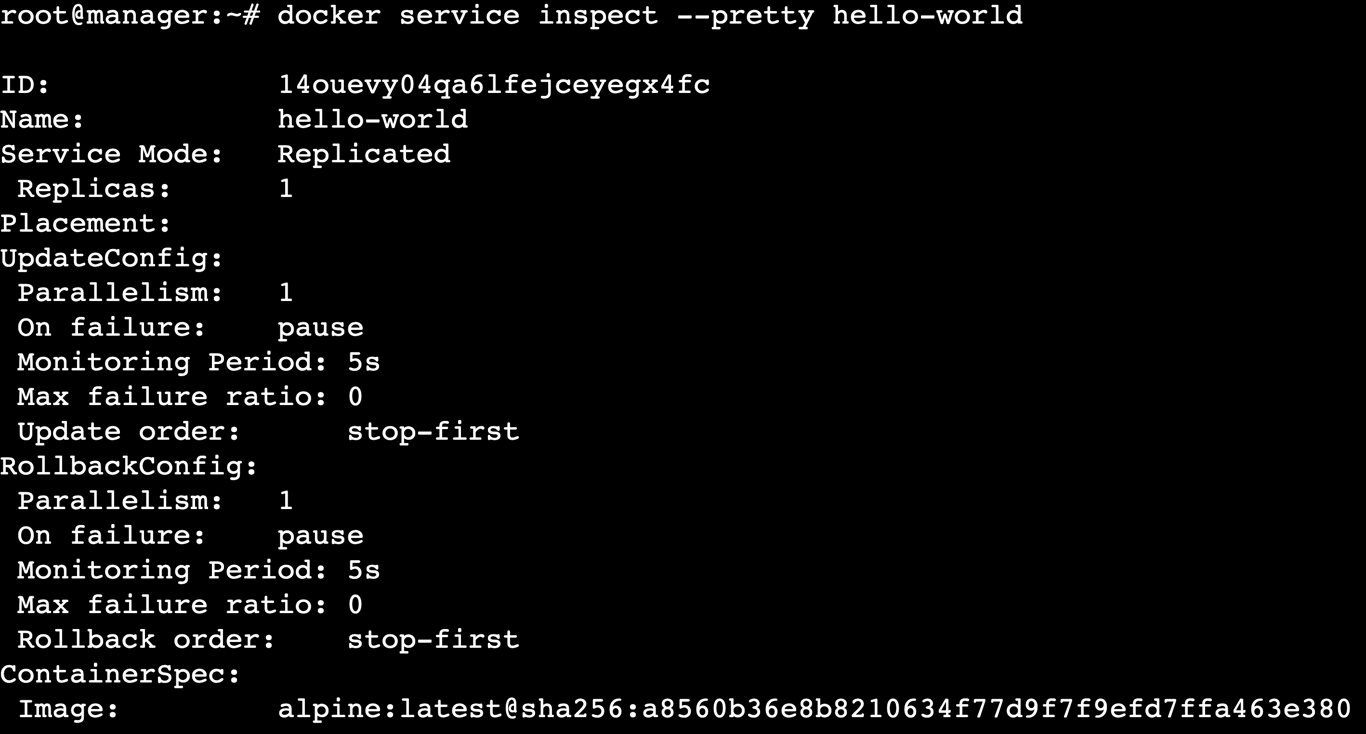
docker service inspect --pretty hello-world
This will provide detailed information about the service, including its ID, replicas, and other settings. The –pretty flag formats the output to make it more readable.
See where the service is running
Next, verify which nodes are running the service by executing:
docker service ps hello-world
This will list all tasks associated with the hello-world service and the nodes on which they are running.

Scale the service
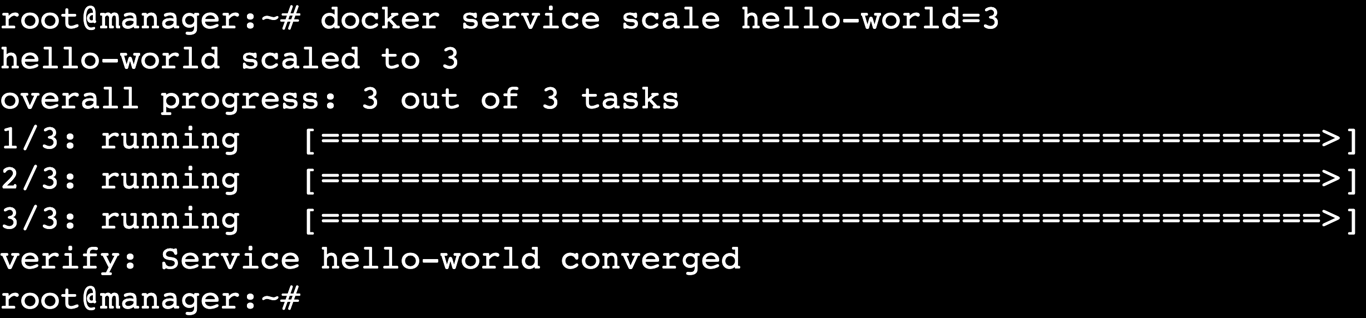
To scale the service, change the number of replicas. For example, to scale hello-world to three replicas, run:
docker service scale hello-world=3
Docker Swarm will then create additional replicas of the service on available nodes.
Review the updated tasks
After scaling, check how the tasks are distributed across the nodes:
docker service ps hello-world
You should see that the tasks are now evenly distributed across three nodes, compared to the previous state when you ran the same command.

Remove the service
Once you’ve finished inspecting and scaling the service, remove it from the swarm by running:
docker service rm hello-world
This command safely deletes hello-world from the swarm.

Confirm the service removal
Verify that the service has been removed from the swarm with this command:
docker service ls
If the hello-world service was successfully removed, it will no longer appear in the list.
6. Apply rolling updates to services
Run on: manager node.
A rolling update lets you update services without downtime. Docker Swarm updates one replica at a time and moves to the next replica once the update is complete.
You’ll first deploy a service using the Redis 7.4.0 container tag. Then, upgrade the service to 7.4.1 with the rolling update approach.
Deploy a Redis service
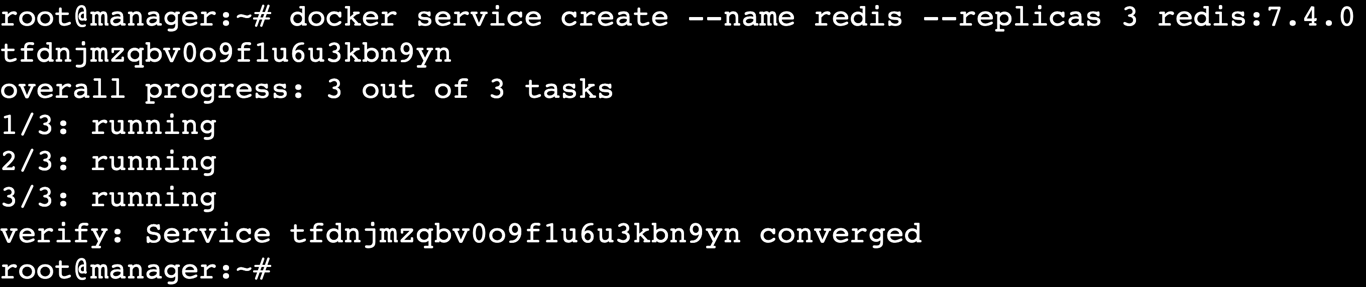
Start by deploying a service using an older version of the Redis Docker image so you can update it later:
docker service create --name redis --replicas 3 redis:7.4.0
Update the service
To update the service, run the following command, specifying a newer version of the Redis image:
docker service update --image redis:7.4.1 redis
Docker Swarm will gradually replace the old containers with the updated ones, ensuring zero downtime.
Inspect the service for the updated version
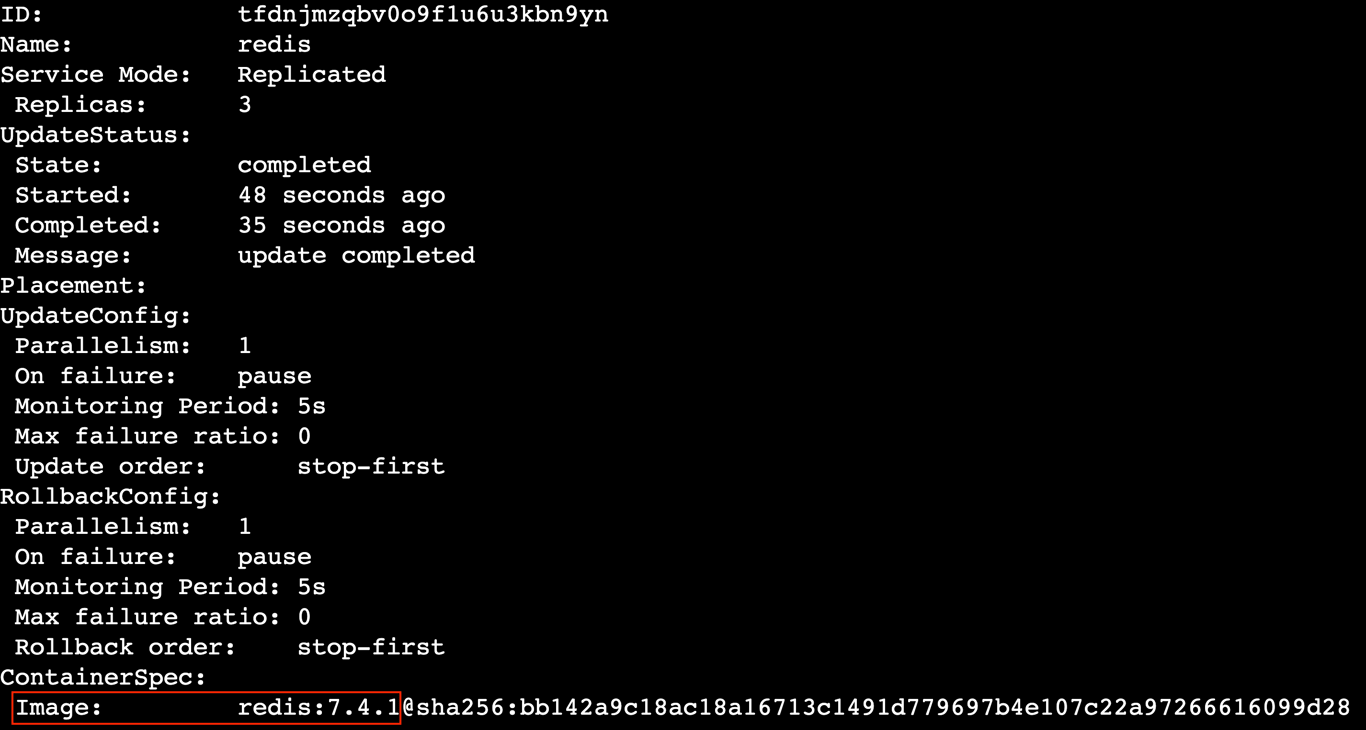
To check the updated service version and confirm the new image, execute:
docker service inspect --pretty redis
Check which nodes are running the service
To monitor the rolling update and see which containers are still running and which ones are being replaced, use:
docker service ps redis
You’ll see a list of containers with the desired state showing running for the updated containers and shutdown for the old ones.

7. Lock your swarm
Run on: manager node.
When you lock your swarm, it requires an encryption key to unlock and change its configuration. This ensures that only authorized users can access and modify the swarm, preventing unauthorized users from altering the cluster.
Important! You don’t need to unlock the swarm if you just want to join a new node to it.
Enable autolock on the swarm
Typically, you can lock the swarm during initialization by adding the –autolock flag, like this:
docker swarm init --autolock --advertise-addr [manager node's IP]
But since you didn’t enable autolock before, you can still lock the existing swarm by running:
docker swarm update --autolock=true
This configures the swarm to lock automatically whenever it’s restarted. It will also generate a key to unlock the swarm – store it safely.

If you want to disable autolock, simply change the –autolock flag’s value from true to false.
Retrieve the unlock key
If you forgot to store the key when enabling autolock, you can retrieve it by executing:
docker swarm unlock-key
Unlock the swarm
You must unlock the swarm to restart the Docker service or perform maintenance on the manager node. To do so, run:
docker swarm unlock
You’ll be prompted to enter the unlock key you stored earlier.
Suggested reading
To protect sensitive data, use Docker build secrets. While it doesn't directly secure the swarm, doing so helps seal your credentials and sensitive information during the build and runtime.
8. Manage and maintain nodes
Run on: manager node.
Managing a swarm involves regularly assessing each node’s availability and role. Doing so ensures the swarm’s health and prevents disruptions.
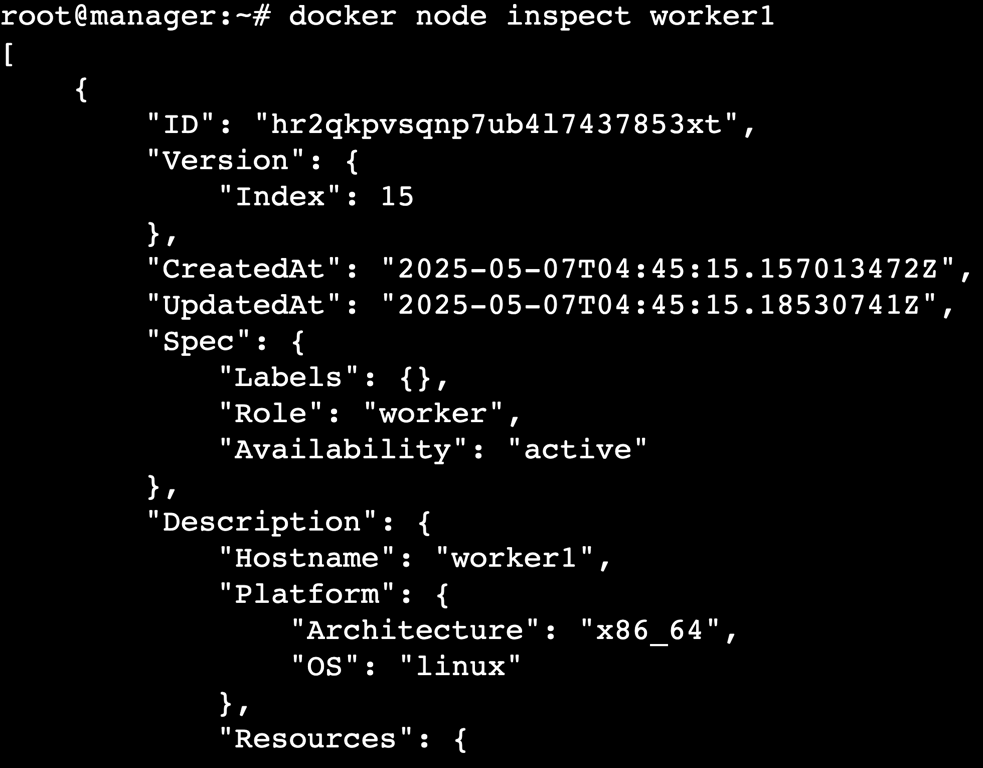
Inspect an individual node
Use this command to inspect a node, replacing [node name] with the actual node name:
docker node inspect [node name]
You’ll see the node’s current status, availability, and roles within the swarm.
Drain a node
Draining a node marks it as unavailable for new tasks, so you can safely perform maintenance without disrupting the swarm:
docker node update --availability drain [node name]
This stops new tasks from being scheduled on the node and migrates any existing tasks to other nodes.
Pause a node
Pausing a node prevents new tasks from being scheduled on it but still lets existing tasks continue running. Here’s the command:
docker node update --availability pause [node name]
This is handy if you need to temporarily stop task assignments to the node without affecting its ongoing operations.

Restore the drained or paused node
After finishing maintenance, restore the node to its normal state by changing its availability from drain or pause to active:
docker node update --availability active [node name]
Promote a node to a manager
To give a node the ability to manage the swarm, promote it to a manager with this command:
docker node promote [node name]

Demote a node from a manager
Sometimes, you may want to demote a node and revert its role to a worker due to reorganization or maintenance. In this case, run:
docker node demote [node name]

Pro tip
Instead of managing nodes one by one, you can update multiple nodes in a single command. For example, to promote worker1 and worker2 nodes as managers, run:
docker node promote worker1 worker2
9. Leave and delete the swarm
Run on: worker1, worker2, and manager nodes.
Last but not least, you can make nodes leave the swarm and even delete the entire swarm if needed.
Leave a worker node
On your worker1 node, run this command to make it leave the swarm safely:
docker swarm leave

Repeat the same process for any other nodes you want to remove from the swarm.
Remove the leaving nodes
After a worker node leaves the swarm, remove it from the node list on the manager node:
docker node rm [node name]
This will stop Docker Engine from distributing tasks to that node. As usual, you can remove multiple nodes in one command by listing their names:
docker node rm [node name 1] [node name 2]

Delete the swarm
There is no specific command to entirely remove a swarm, but you can make the manager node leave it, which will effectively defunct the swarm:
docker swarm leave --force
Make sure that this is the last node in the swarm. If other manager nodes remain, this command won’t delete the swarm.
Conclusion
Docker Swarm makes it easy to deploy, scale, and update containerized apps across multiple machines while keeping your infrastructure highly available and resilient.
In this tutorial, we’ve covered the steps to create and manage a Docker swarm from scratch:
- Prepare VPS instances and install Docker on them.
- Start the Swarm manager node.
- Join worker nodes to the swarm.
- Deploy a test service to familiarize yourself with service management.
- Inspect and scale the service to explore task distribution.
- Apply rolling updates with zero downtime.
- Lock the swarm for added security.
- Manage and maintain nodes efficiently.
- Remove nodes and delete the swarm.
Next, try deploying a real app on your swarm, set up a tool like NGINX as a reverse proxy to manage traffic, or explore Docker stacks to build a more scalable and maintainable setup.
Create a Docker Swarm FAQ
What is Docker Swarm?
Docker Swarm is a native clustering and orchestration tool that lets you manage a group of Docker engines as a single virtual system. It helps you deploy, scale, and maintain containerized apps with high availability and built-in load balancing across multiple nodes.
How do I add nodes to a Docker Swarm?
To add a node, first generate a join token on the manager node using docker swarm join-token worker. Then, run the join command on the new node to connect it to the swarm. The node will join the cluster automatically.
Can I create a multi-host Docker Swarm?
Yes, Docker Swarm is designed for multi-host setups. You can create a swarm using machines across different hosts or cloud providers. Once connected, they work as a single cluster, so you can run services across multiple hosts with built-in service distribution.
All of the tutorial content on this website is subject to Hostinger's rigorous editorial standards and values.

Ariffud is a Technical Content Writer with an educational background in Informatics. He has extensive expertise in Linux and VPS, authoring over 200 articles on server management and web development. Follow him on LinkedIn.