If your Node.js application fails to deploy or start correctly on your Hostinger hosting plan, you can use the information from the logs for troubleshooting. This article explains how to access and interpret deployment and runtime logs to find the root cause of any error, such as dependency issues or environment mismatches.
Step 1 – Access the logs
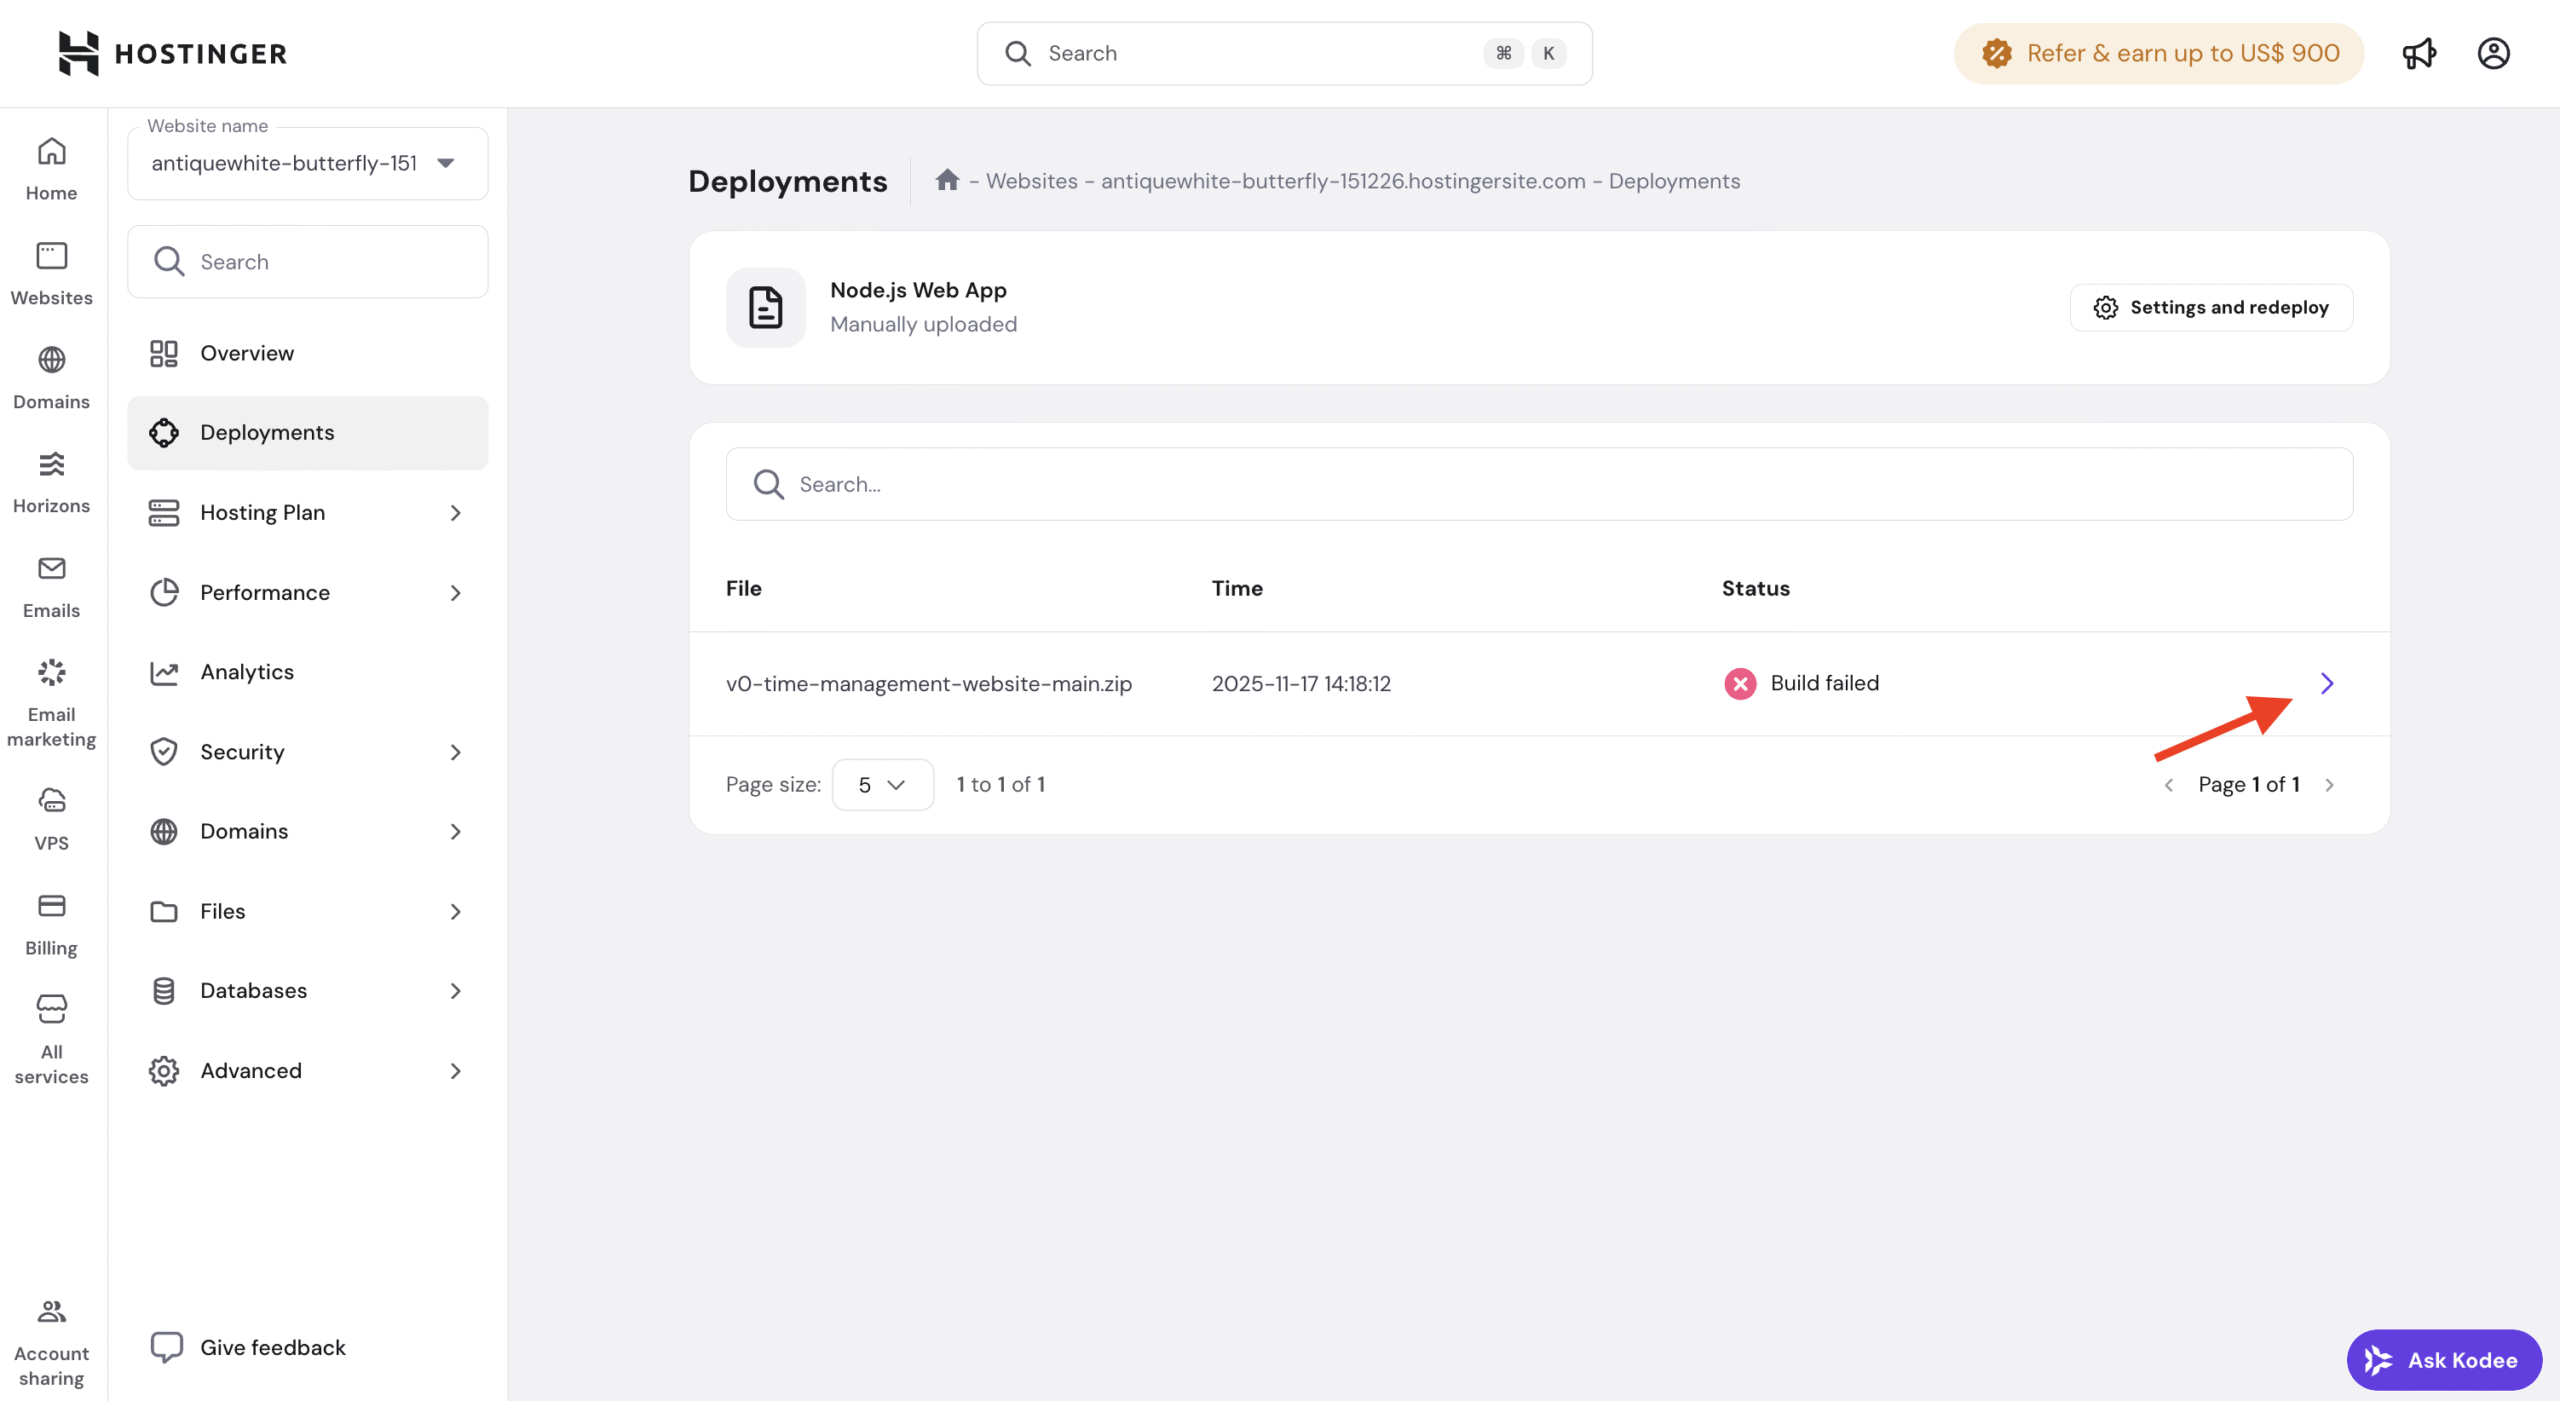
Option 1 – Check build logs
The deployment logs show the exact output of the build process, including dependency installation and script execution.
- Go to the Websites page on hPanel.
- Click Dashboard next to your domain.
- Select Deployments from the sidebar menu.
- Locate the failed build and click on the arrow (❯) to open the Deployment details.
-
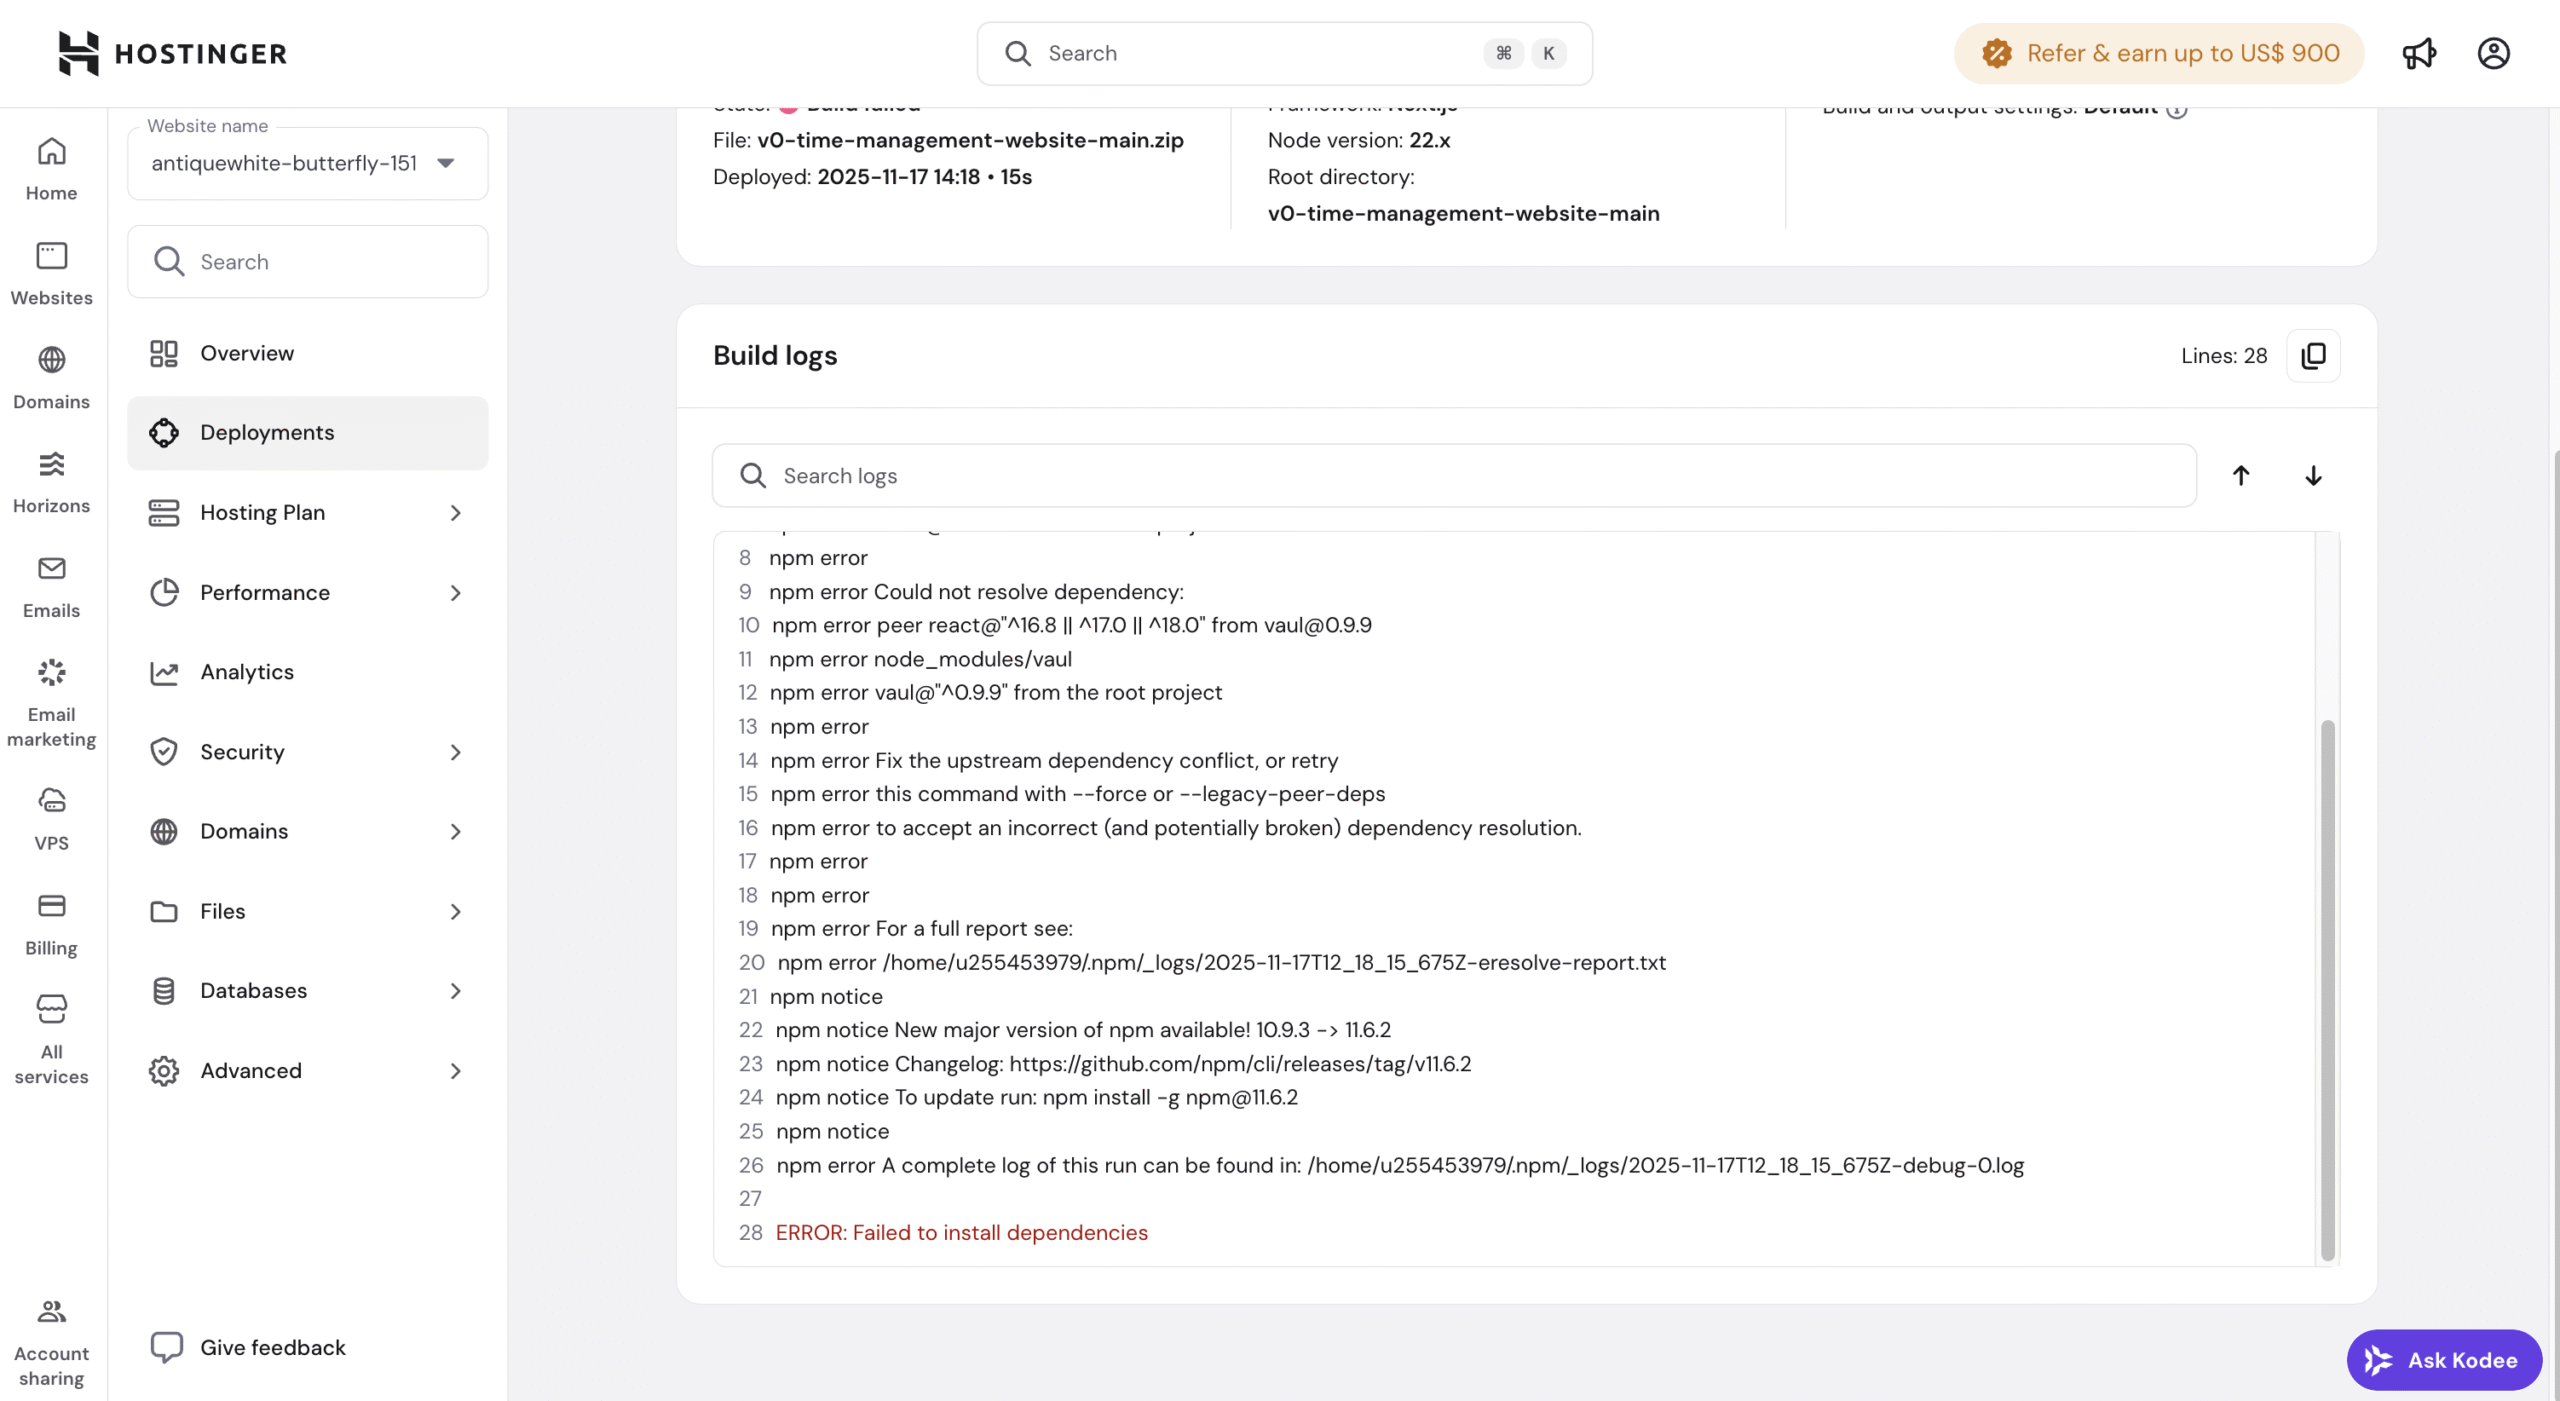
Scroll down to find the Build logs.
Option 2 – Check runtime logs
If the build succeeds but the application does not load in the browser, the issue is likely a runtime error recorded in the server logs. Depending on your setup, runtime errors can be captured in a stderr.log file in your application’s root directory.
- Open the File Manager.
- Navigate to your application’s root directory (nodejs folder).
- Locate and open the
stderr.logfile.
In both build and runtime logs, look for error messages or stack traces, such as Port already in use or Module not found.
Step 2 – Analyze for errors
Review the build or runtime logs to identify the exact cause of the failure. Focus on the most relevant parts:
- Lines marked as ERROR.
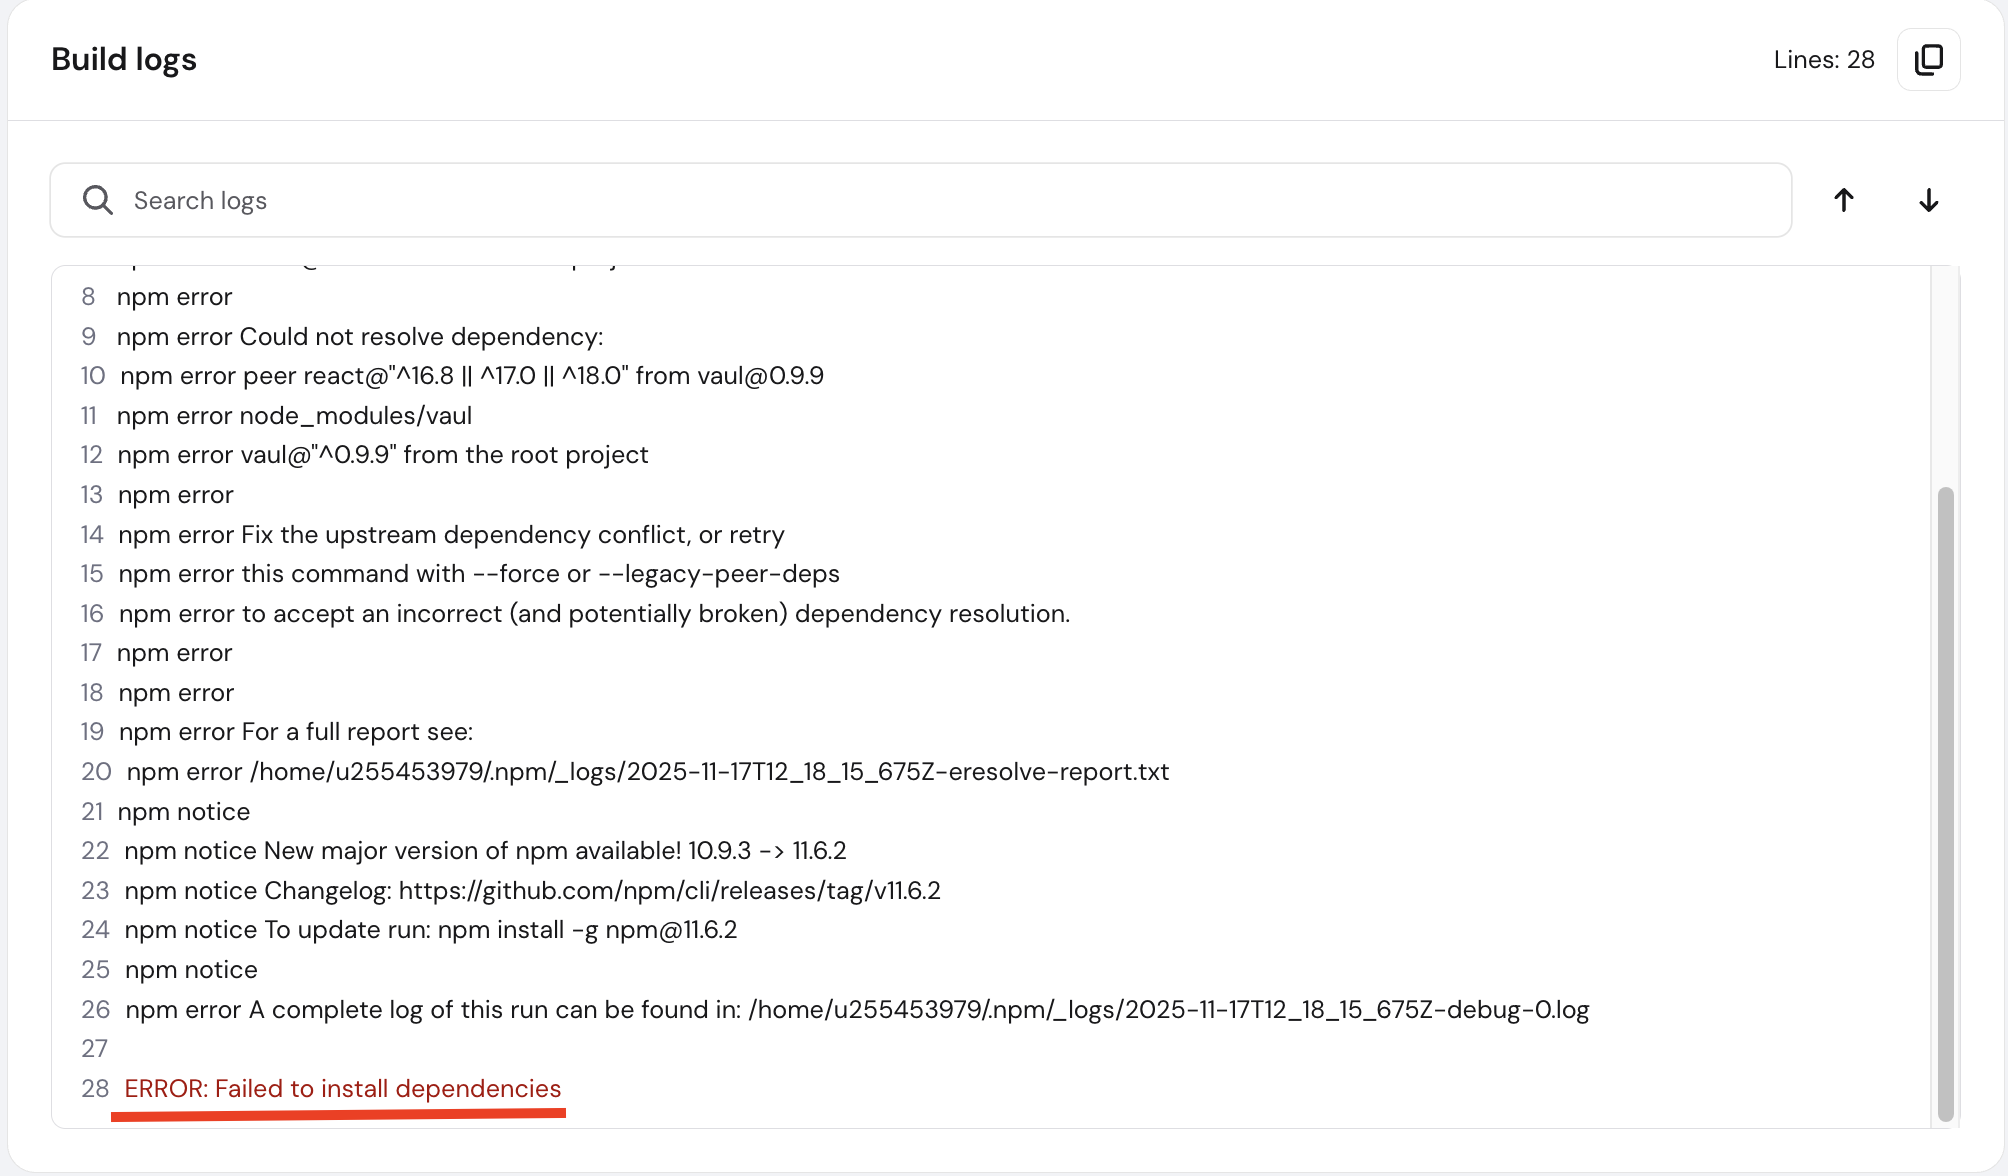
- Messages near the end of the log.
- Stack traces or module-related errors.
These usually point directly to the issue that caused the deployment or runtime failure.
Step 3 – Perform basic checks
Before making changes, verify the following:
- The selected Node.js version matches your project requirements.
- All required environment variables are configured.
- Your
package.jsoncontains correct build and start scripts. If it’s missing or empty, the build will fail with a specific “package.json not found” error. See: How to fix the “Failed to build the application” error. - The
node_modulesfolder is not included in ZIP deployments. - Recent changes have not introduced errors.
Step 4 (Optional) – Use AI tools
If the logs are unclear, you can analyze a sanitized version using an AI tool such as ChatGPT or Claud. AI tools can help:
- Explain error messages
- Identify common causes
- Suggest configuration or dependency fixes
Step 5 – Redeploy the application
After identifying and fixing the issue:
- Update your application code or configuration.
- Redeploy the application.
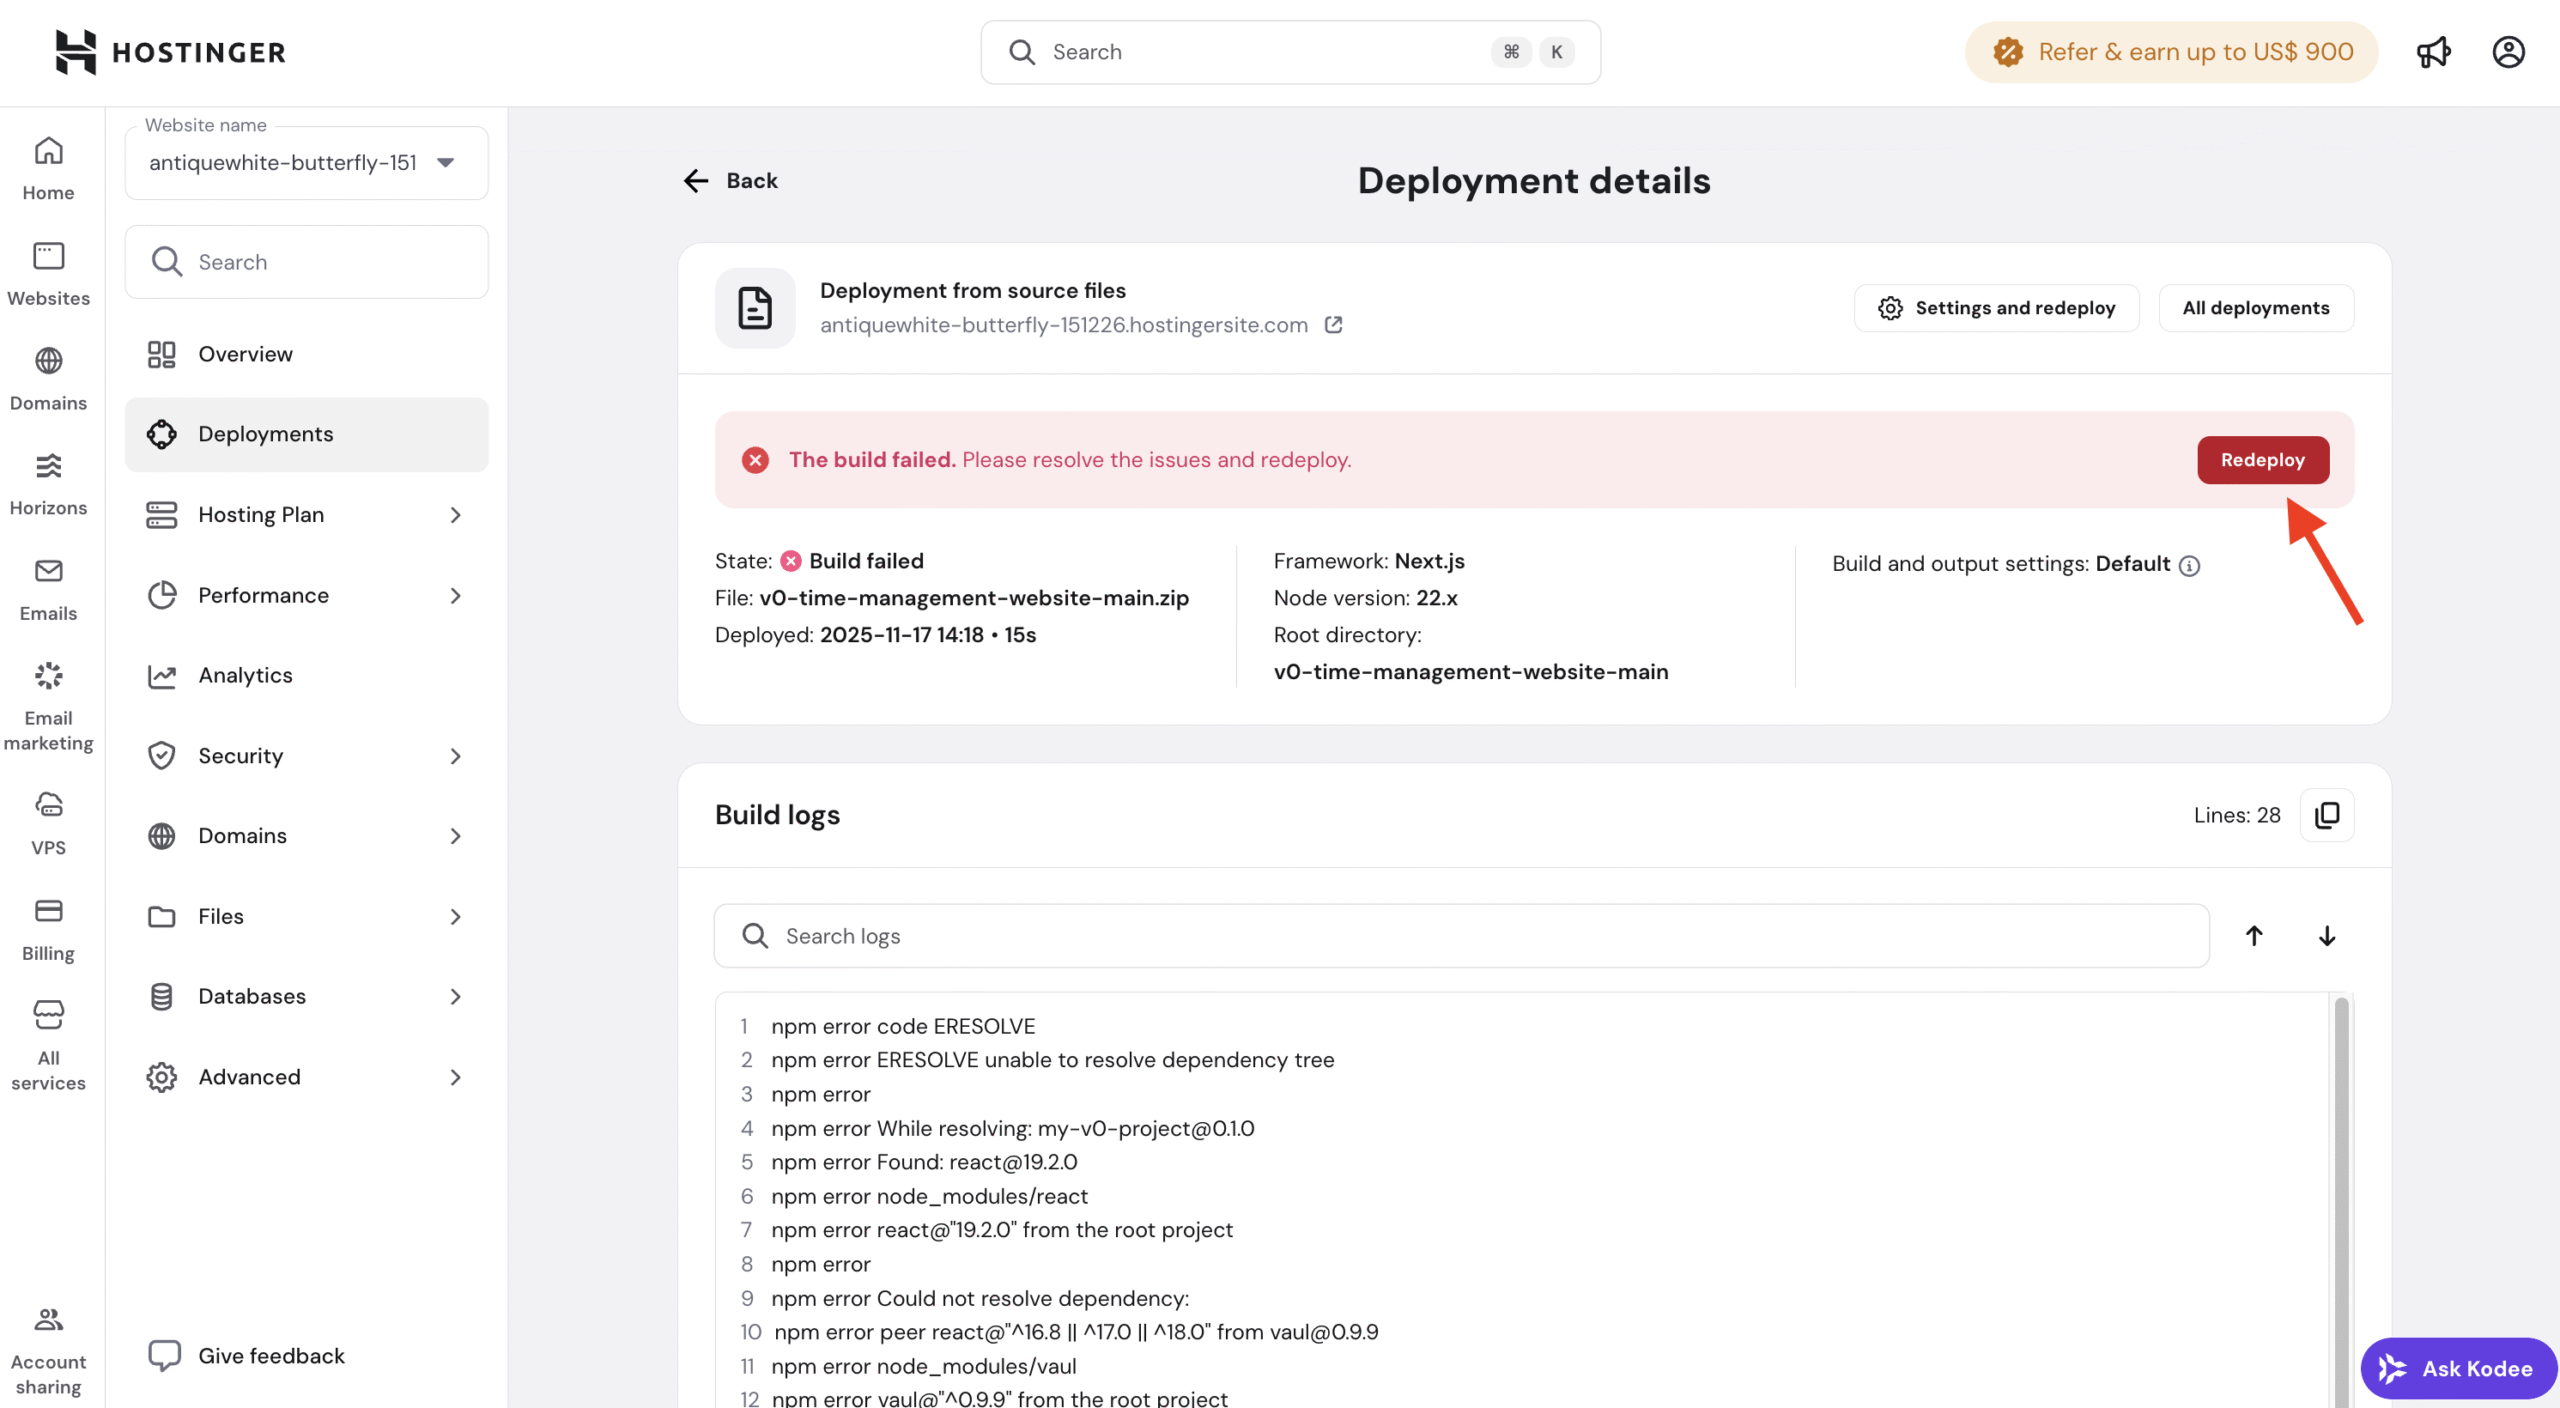
- Monitor the build logs to confirm the deployment completes successfully.
Reviewing logs and applying these checks helps you quickly identify and resolve most Node.js deployment and runtime issues, allowing your application to run as expected.