Node.js Web Apps Hosting allows you to deploy modern web applications built with popular JavaScript frameworks like React, Vue.js, and Angular directly to Hostinger with automatic builds and deployments. Yes, Hostinger supports Node.js applications on Business and Cloud hosting plans. This guide will show you how to deploy your Node.js application step-by-step.
Which Hosting Plans Support Node.js Web Applications?
Node.js web applications are available on the following Hostinger hosting plans:
- Business Web Hosting
- Cloud Startup
- Cloud Professional
- Cloud Enterprise
- Cloud Enterprise Plus
If you’re currently on a different plan, you can upgrade your hosting plan through hPanel to access Node.js support.
What You’ll Need
- A Business hosting plan or Cloud hosting plan (Cloud Startup, Cloud Professional, Cloud Enterprise, or Cloud Enterprise Plus)
- A Node.js app built with a supported framework
- Either a GitHub repository or compressed project files
Supported Frameworks and Technologies
Your Node.js app must be built with one of these frameworks:
- Frontend-supported Applications
- React
- Vue.js
- Angular
- Vite
- Parcel
- Preact
- Next.js
- Backend-supported Applications
- Next.js
- Express.js
Supported Node.js versions: 18.x, 20.x, 22.x, 24.x
Deploying from a GitHub Repository
Step 1 – Access the Node.js Web App section
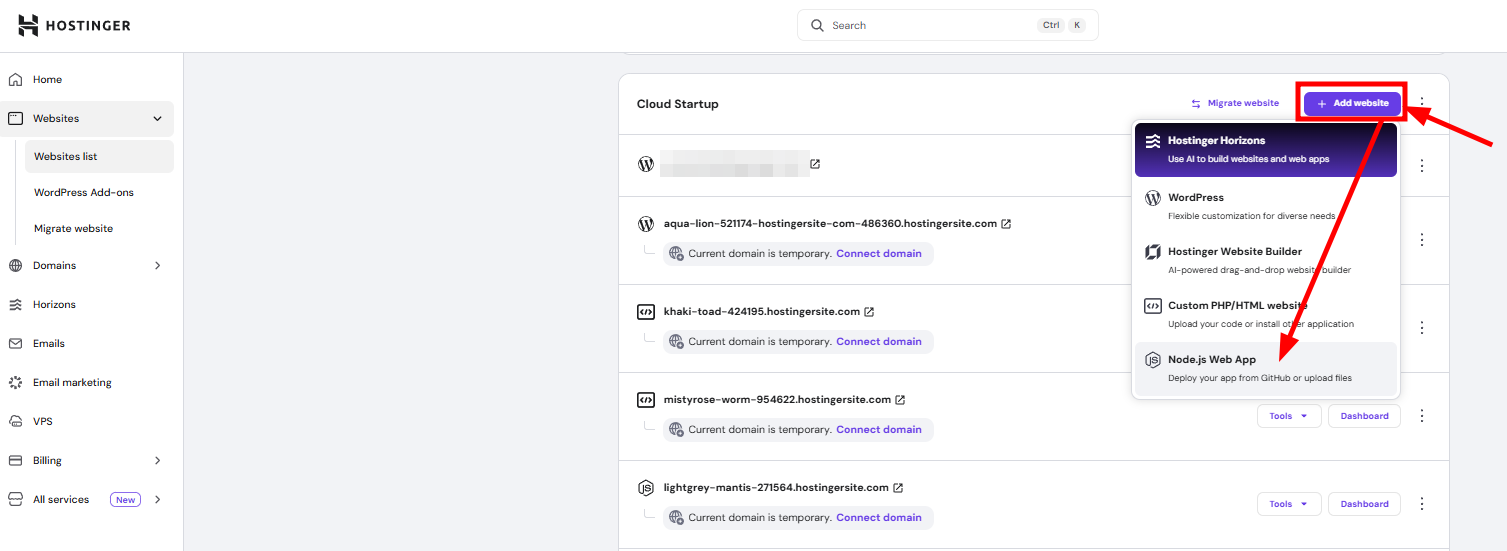
Log in to your Hostinger hPanel, navigate to Websites on the sidebar, and click Add Website:
Step 2 – Select Node.js Web App
Choose Node.js Apps from the available options.
Step 3 – Choose GitHub Integration
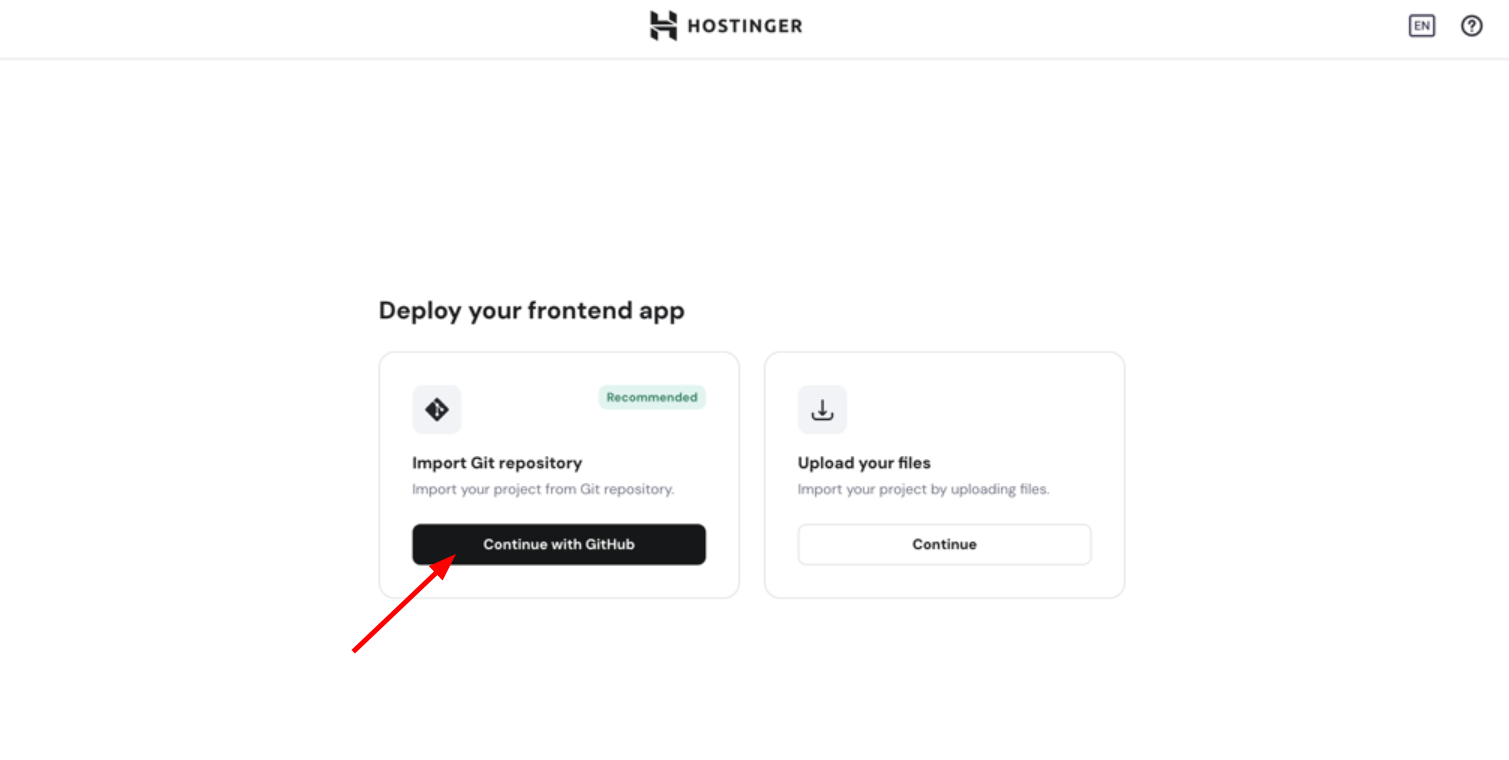
Select Import Git Repository:
Step 4 – Authorize GitHub Access
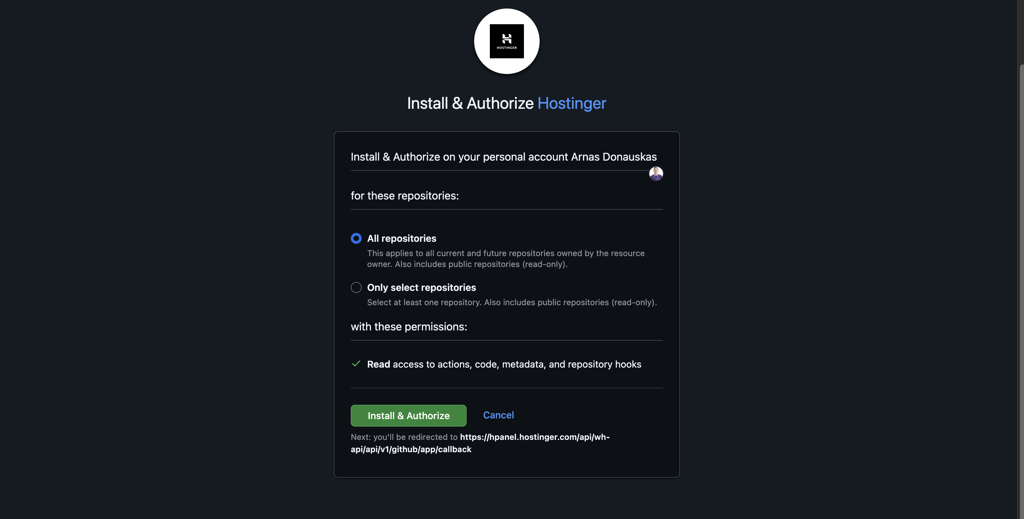
You’ll be redirected to GitHub. Click Authorize to allow Hostinger to access your repositories:
Step 5 – Select Your Repository
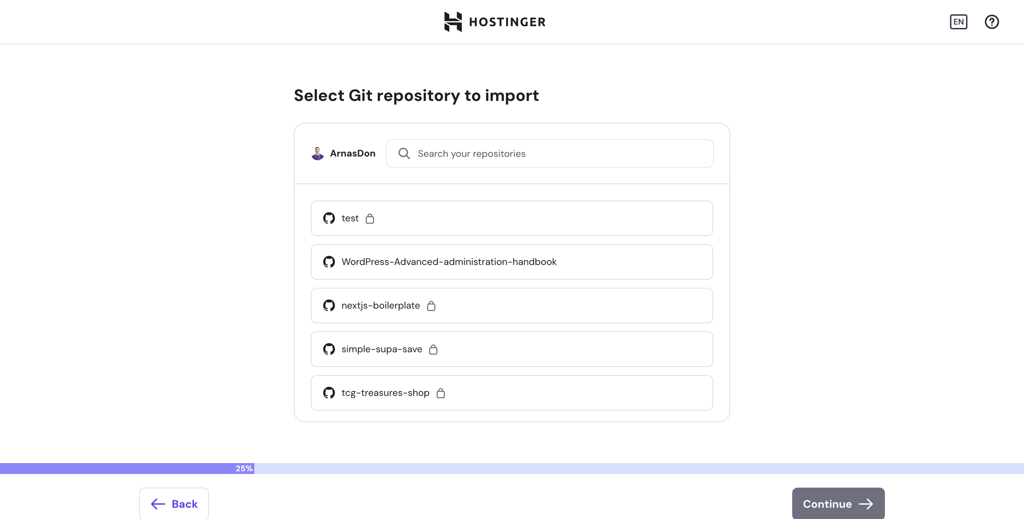
Choose the repository containing your Node.js app:
Step 6 – Configure Build Settings
The system will automatically detect your framework and suggest build settings where you can modify them.
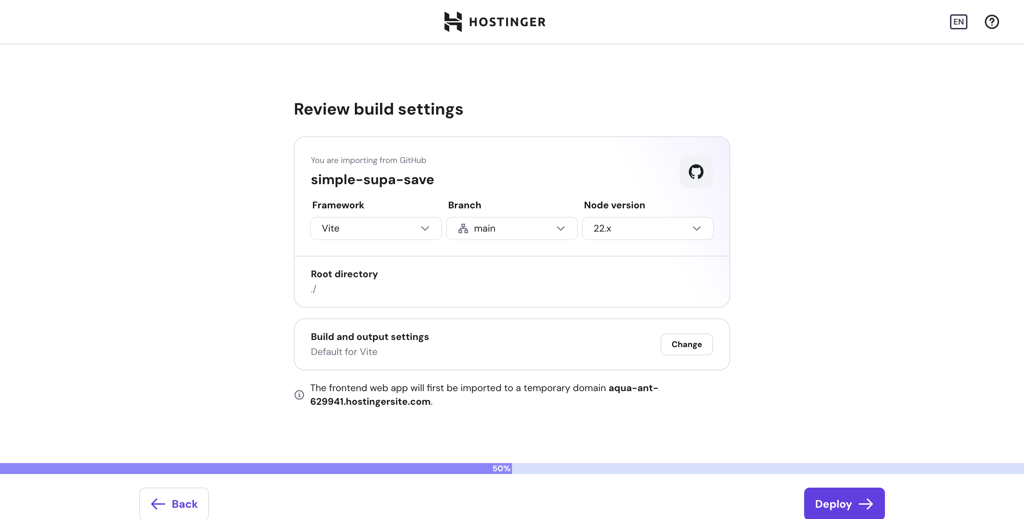
Step 7 – Deploy Your Website
Click Deploy to start building your application. Your website will be deployed to a temporary subdomain by default:
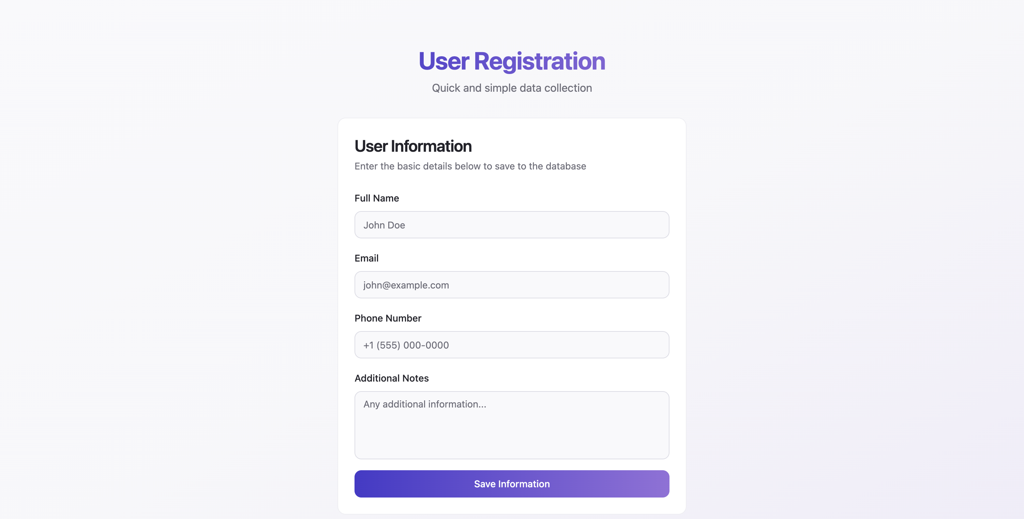
Your Node.js app is now live! 🚀
Deploying by Uploading Files
Step 1 – Access the Node.js Apps Section
Log in to hPanel, go to Websites, and click Add Website:

Step 2 – Select Front-End Application
Choose Node.js Apps from the options.
Step 3 – Choose File Upload
Select Upload your website files:
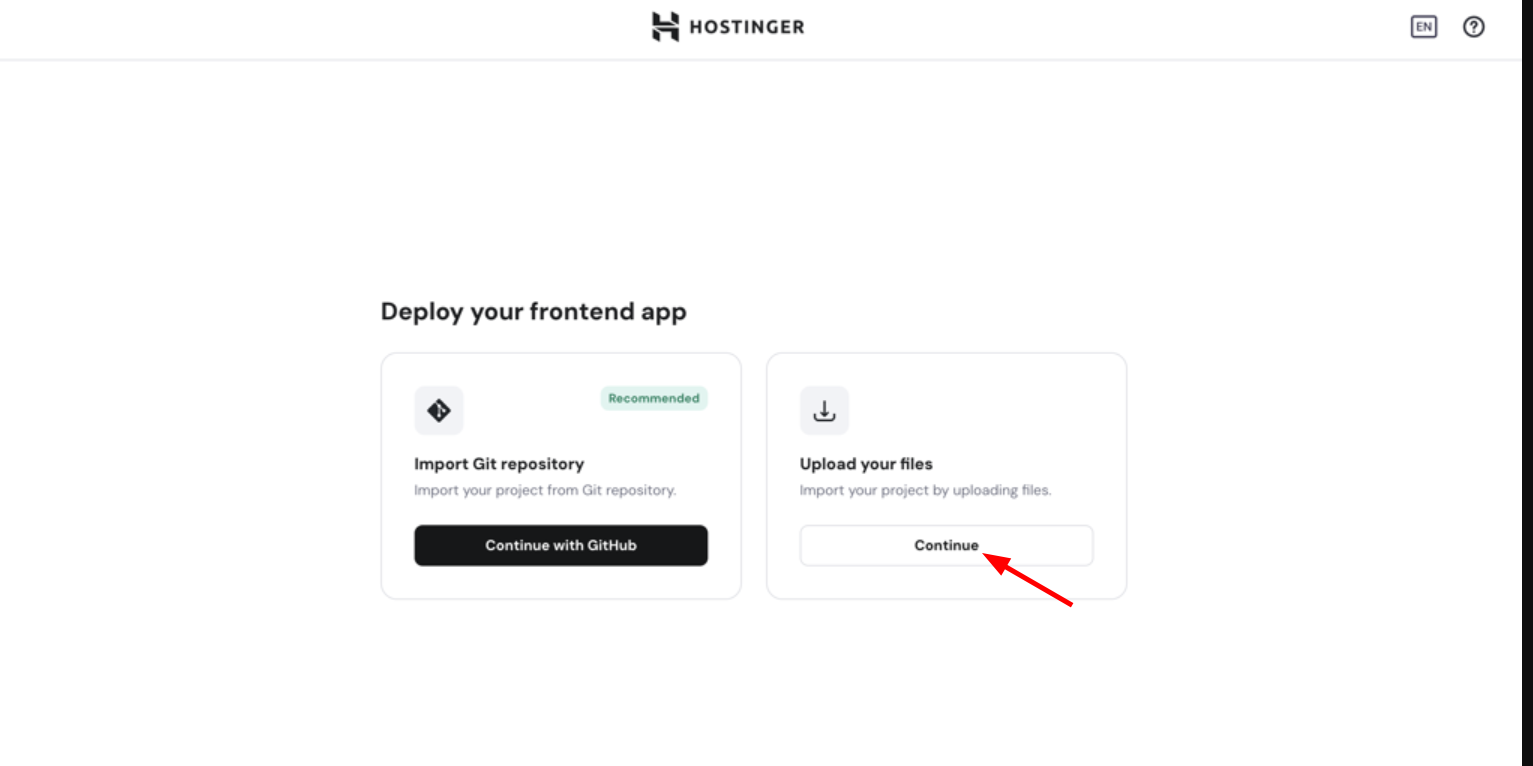
Step 4 – Upload Your Project
Upload a compressed file (.zip) containing your Node.js app.
Step 5 – Configure Build Settings
Confirm or edit the auto-detected build settings:
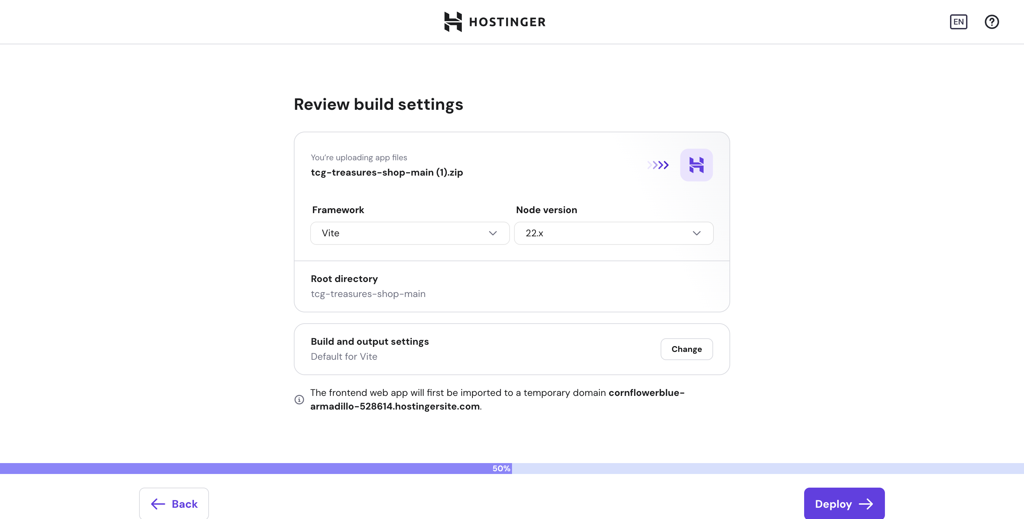
Step 6 – Deploy Your Website
Click Deploy to build and launch your application:

Your website is now ready to use!
Managing Your Node.js App
GitHub Deployments
If you deployed via GitHub, you will see Deployment Details in your website dashboard:
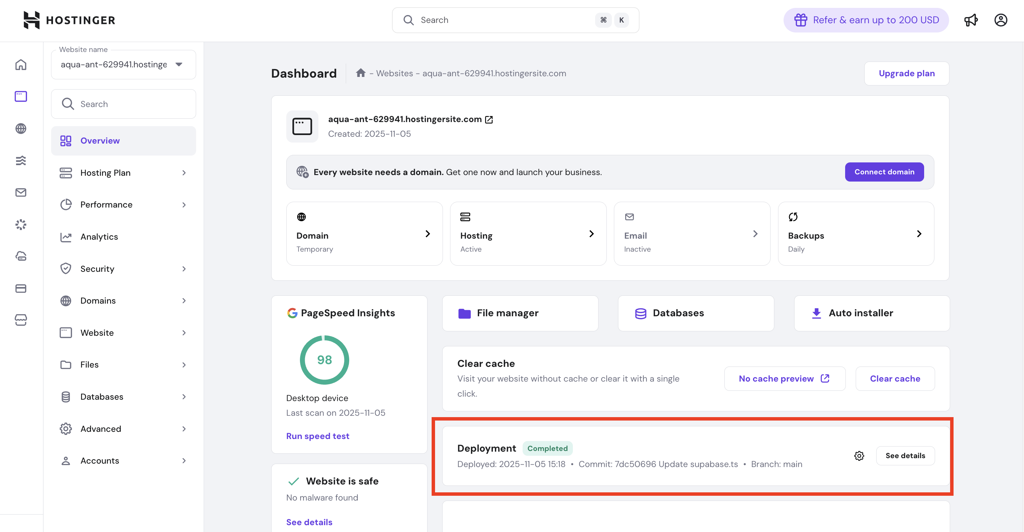
If you click it, you will see details for the deployment:
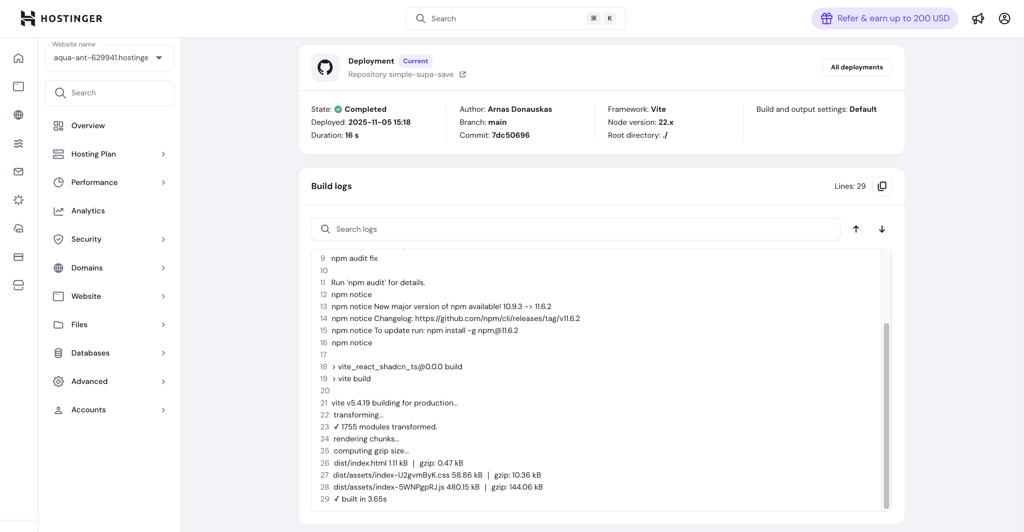
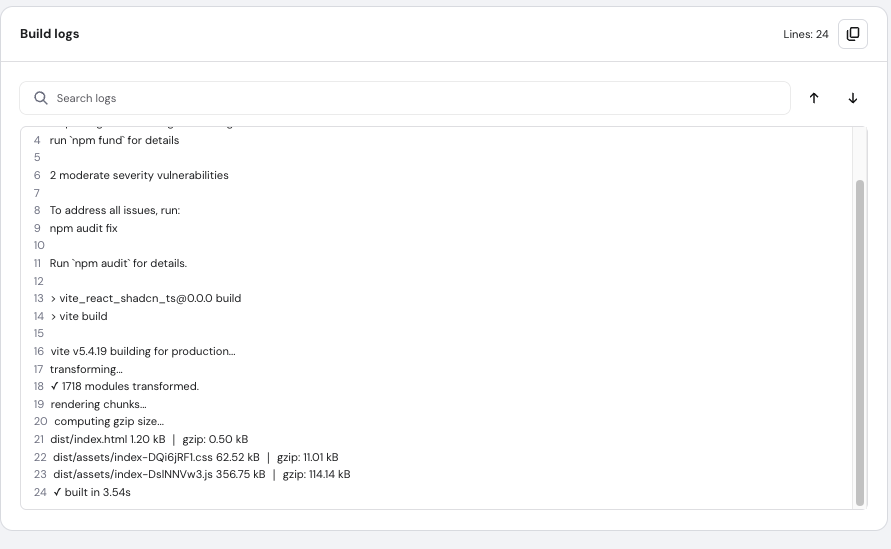
And if a build fails, the logs will show why the deployment failed.
File Upload Deployments
If you uploaded files directly, you can also upload new files and redeploy from the dashboard:
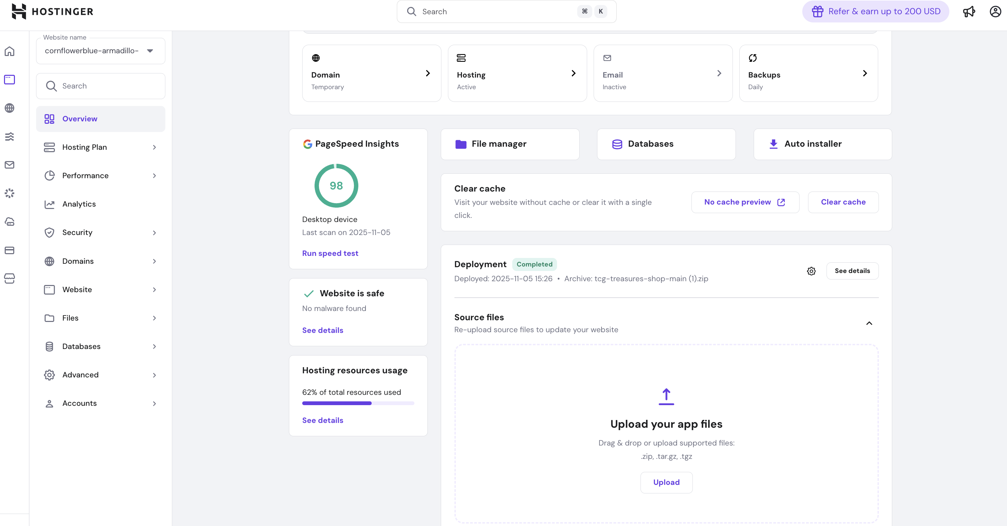
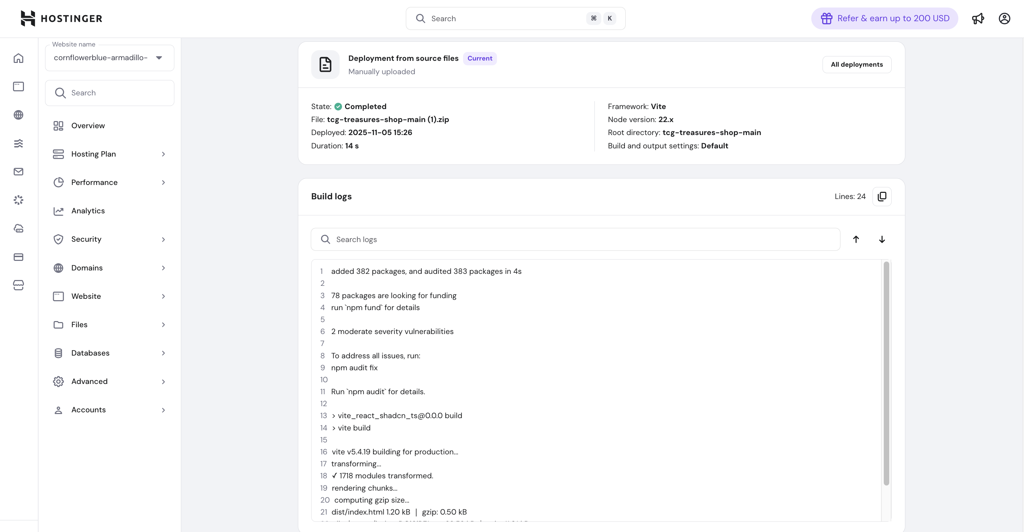
If you click See details, you will see details for the deployment:
Frequently Asked Questions
1. I already have a domain added at Hostinger. How do I deploy Node.js to it?
Currently, Node.js websites must be deployed as a new website with a temporary domain first. Here’s the process:
- Click Add Website and select Frontend web app
- Choose your deployment method (GitHub or file upload)
- Once deployment is completed, connect your preferred domain or subdomain to the temporary domain by following this guide:How to Connect a Preferred Domain Name Instead of a Temporary One at Hostinger
2. How do I remove or undeploy my Node.js website?
Currently, there’s no feature to “Stop” or “Delete” buttons for Node.js deployments. The recommended way to fully take your app offline is to remove the entire website from hPanel. This action will delete all associated deployments and take your app offline.
3. What npm commands can be run?
You don’t need to run npm commands manually via SSH or install NPM separately – it’s already pre-installed by Hostinger.
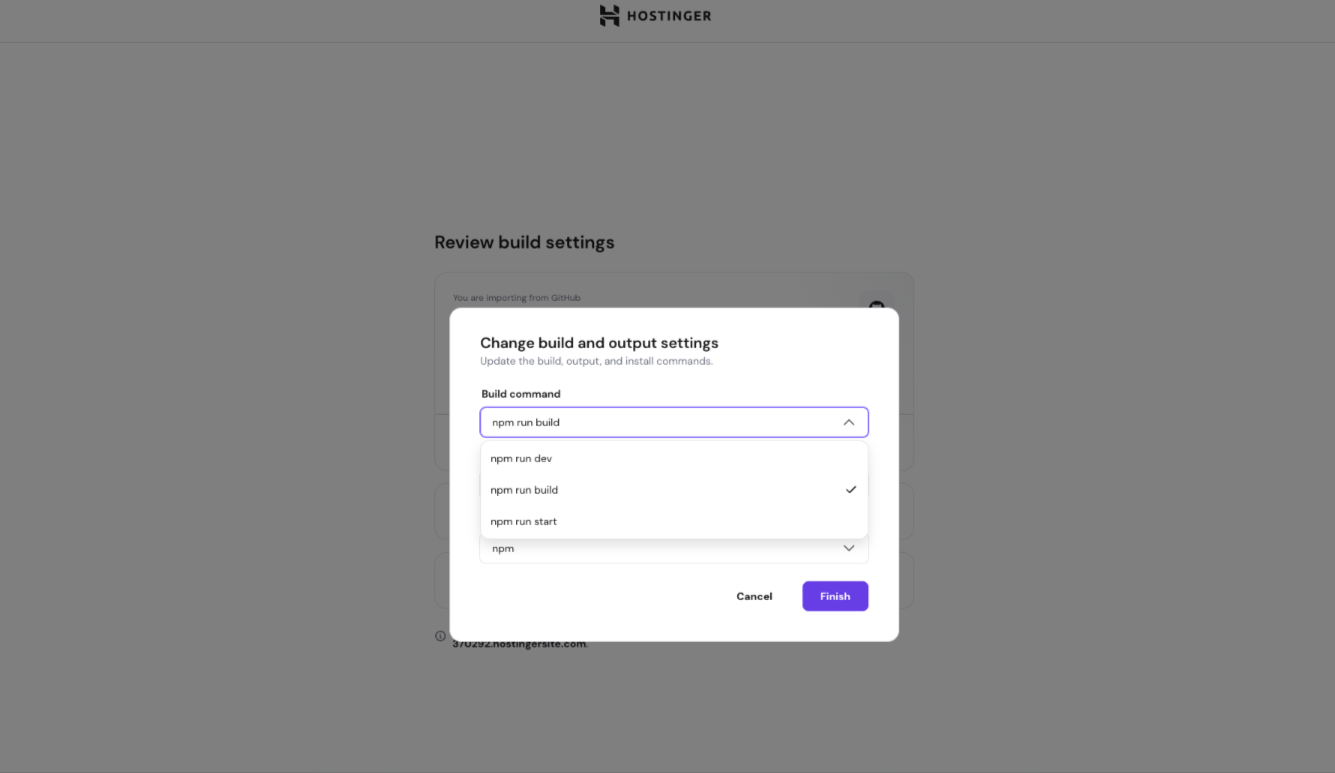
The npm build commands available to you are visible in the Build settings dropdown during application setup.
That’s it! Now you’ve learned how to deploy a Node.js app in Hostinger using either GitHub integration or direct file upload. If you have any questions or need further assistance, feel free to reach out to our support team via live chat 24/7 – we’re always here to help! 💜