To set up Hostinger Email on Mozilla Thunderbird automatically, follow this article.
To set up Hostinger Email on Mozilla Thunderbird manually, make sure that:
-
You have created an email account with Hostinger Email
-
Your domain is pointed to Hostinger
-
The correct Hostinger Email MX records are added to your domain’s DNS zone
Then, proceed with the steps below 👇
👉 Gather the Hostinger Email Account Details
Gather the configuration details of your email account:
|
IMAP (incoming) |
POP3 (incoming) |
SMTP (outgoing) |
|
Host: imap.hostinger.com Encryption: SSL Port number: 993 |
Host: pop.hostinger.com Encryption: SSL Port number: 995 |
Host: smtp.hostinger.com Encryption: SSL Port number: 465 |
If you’re not completely sure about your email password, you can easily reset it.
👉 Set Up Hostinger Email on Mozilla Thunderbird
First, make sure you have the Mozilla Thunderbird application installed on your device.
⚡Option 1 – Automatic Setup (Recommended)
Thunderbird can detect Hostinger email settings automatically in most cases. If for some reason this is not working, move to option 2.
Step-by-Step:
-
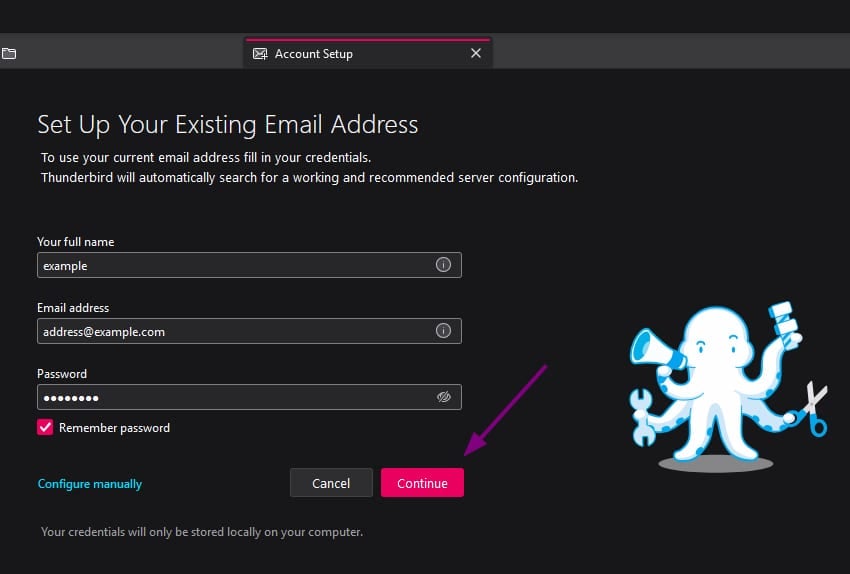
Open Thunderbird.
-
Go to Account Settings > Account Actions > Add Mail Account.
-
Fill in:
-
Your name (this will appear in outgoing emails)
-
Email address (e.g. example@yourdomain.com)
-
Password (email password)
-
-
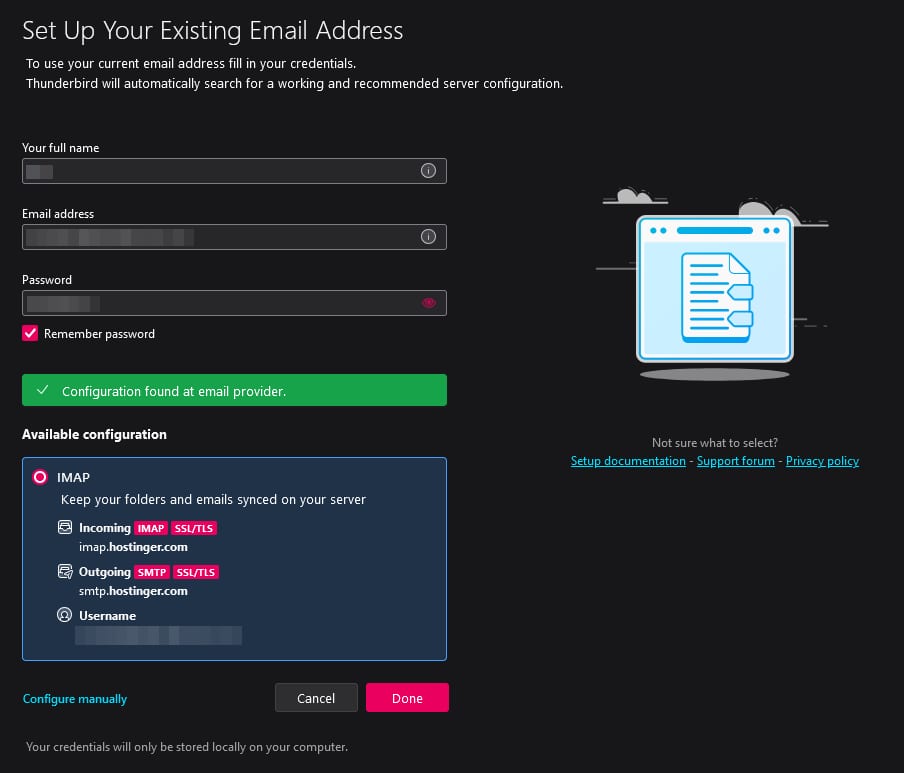
Click Continue.
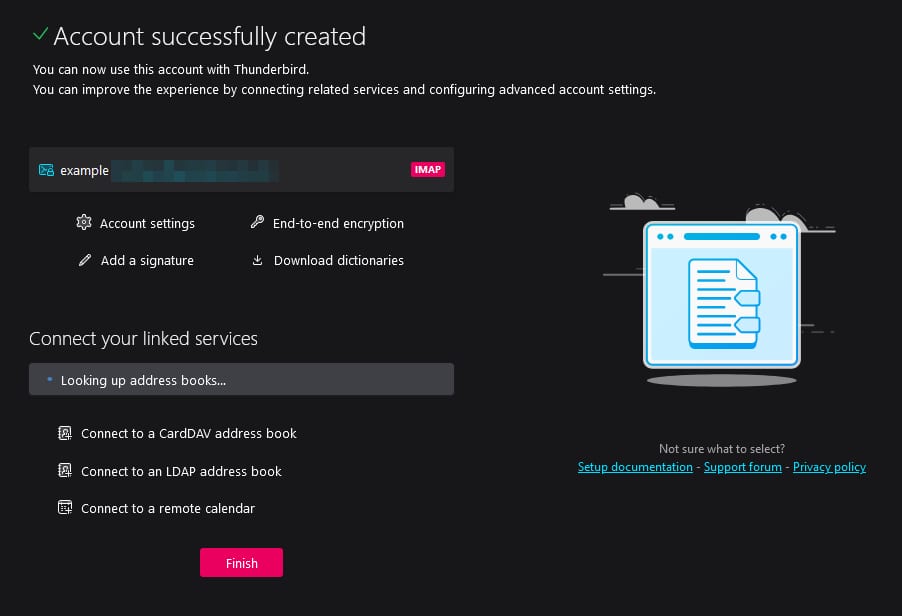
Thunderbird will attempt to auto-configure your account. If successful:
-
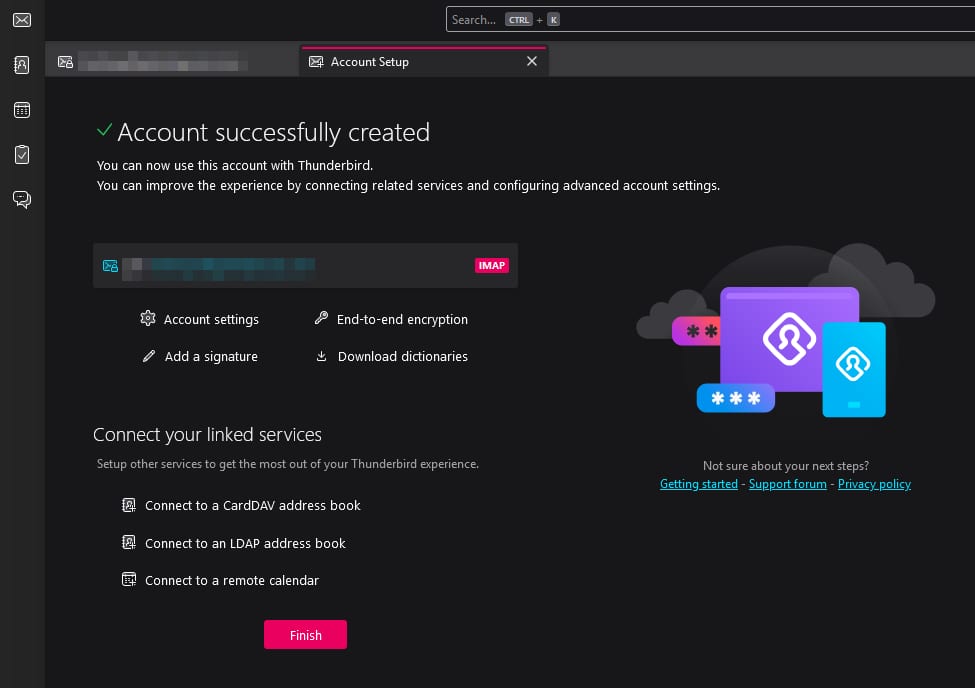
Click Done and then Finish.
Option 2 – Manual Setup
If auto-configuration fails or you prefer to enter settings manually, follow these steps:
Step-by-Step:
Step 1 – Add a New Mail Account
-
Open Thunderbird.
-
Navigate to Account Settings > Account Actions > Add Mail Account.
-
Enter your name, email address, and password.
-
Click Configure manually.

Step 2 – Enter Server Settings
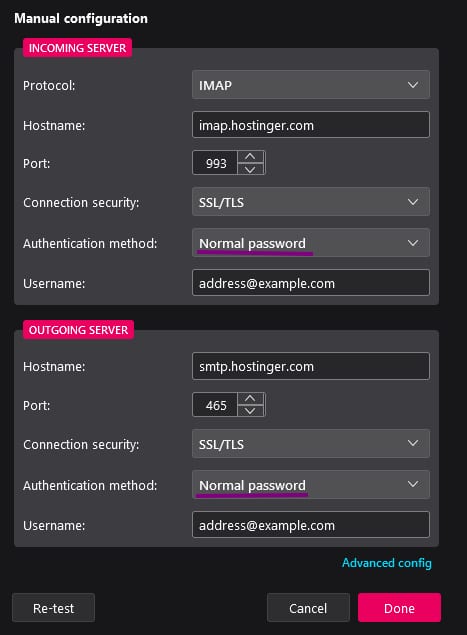
Choose either IMAP (recommended) or POP3.
👉 IMAP (Recommended):
-
Incoming server: imap.hostinger.com
-
Port: 993
-
SSL: SSL/TLS
-
Authentication: Normal password
-
Outgoing server (SMTP): smtp.hostinger.com
-
Port: 465
-
SSL: SSL/TLS
-
Authentication: Normal password
👉 POP3 (Alternative):
-
Incoming server: pop.hostinger.com
-
Port: 995
-
SSL: SSL/TLS
-
Authentication: Normal password
Use your full email address as the username for both incoming and outgoing servers.
Step 3 – Complete Setup
-
Click Re-test to validate the configuration.
-
Once Thunderbird confirms everything is correct, click Done and then Finish.

✅ That’s It!
Your Hostinger email account is now ready in Thunderbird. You can send and receive emails without issues.
Troubleshooting
If something doesn’t work:
-
Double-check the server settings.
-
Make sure SSL/TLS is selected.
-
Confirm the email and password are correct. If you’re not sure, please try changing it How to reset a Hostinger Email mailbox password.
-
Check if your domain’s DNS (MX and SPF records) is properly set Hostinger Email MX records.