You can connect to your hosting plan using an FTP account (except when using the Hostinger Website Builder for all your websites) to transfer files by following these steps:
Step 1 – Preparations
First, make sure that:
-
An FTP client is installed on your device; we recommend FileZilla (client version).
-
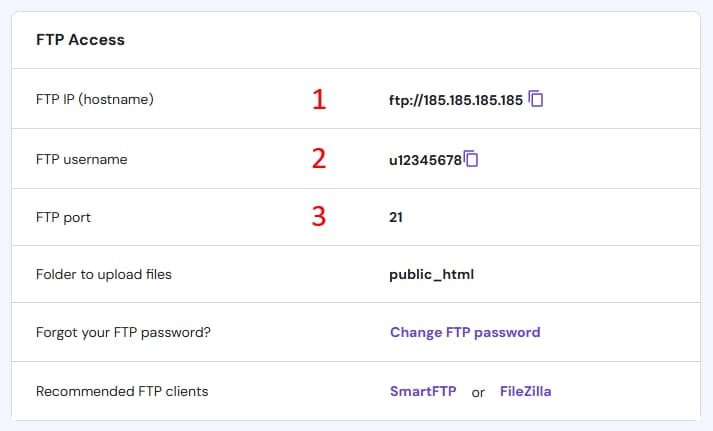
You have your website’s FTP information ready. You can find it by navigating to Websites → Dashboard, searching for FTP Accounts in the sidebar, and clicking on it.
If you need to create or reset your FTP password, refer to this guide: How to change your FTP password on hPanel.
Step 2 – Connection
Using FileZilla as an example, you have two main options to establish a connection.
Option 1 – Direct Access
Open FileZilla and fill in the Quickonnect section with the FTP details you got from the FTP Accounts section:

-
Host: The FTP IP
-
User: Your FTP username
-
Port: 21

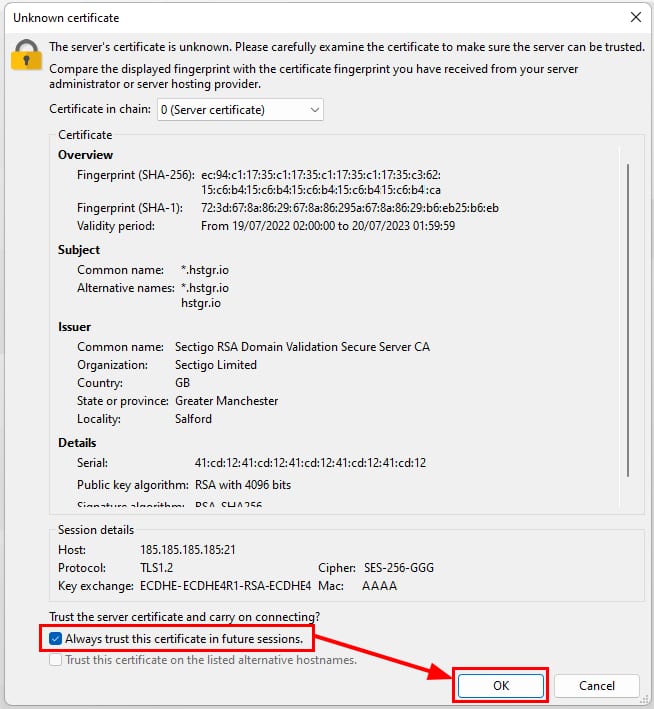
Enter your FTP account password in the corresponding field and click Quickconnect. The first time you connect to a server, you may encounter an Unknown certificate message. To proceed, check the Always trust this certificate in future sessions option and click OK:

If successfully connected, you will get a Status: Logged in message in the area below the Quickconnect bar.
Option 2 – Site Manager
With Site Manager, you can save your connection details, adjust the encryption type, or the protocol (FTP or SFTP).
-
Open Site Manager in FileZilla:

-
Click on New site:

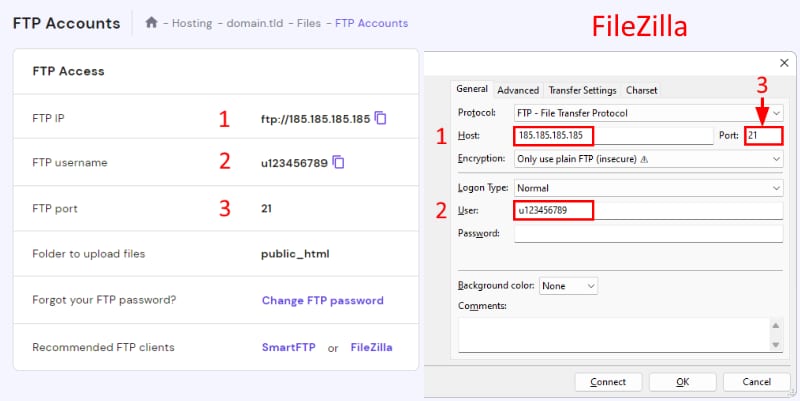
Then, configure the settings as follows, using the information from the FTP Accounts section:

-
Protocol: Selcect FTP – File Transfer Protocol from the dropdown.
-
Host: The FTP IP
-
Port: 21
-
Encryption: Select Only use plain FTP
-
Logon type: Normal
-
User: FTP username
-
Password: Your FPT password
Click on Connect, and if the details entered are correct, a Status: Logged in message will confirm the connection.
For more information on navigating the FileZilla interface to upload and download files, refer to this tutorial: How to use FileZilla.