At Hostinger, our Virtual Private Servers (VPS) are self-managed, giving you complete control over your server environment. This means you’ll handle the setup and configuration of your project, including the manual migration process if you’re transferring from your current VPS to another server on your Hostinger account.
Why can’t my OpenVZ VPS be automatically converted?
OpenVZ uses container-based virtualization — your VPS shares the host server’s kernel with other containers. KVM uses full machine virtualization — your VPS runs its own isolated kernel. These are architecturally incompatible. There is no in-place upgrade or automatic conversion tool. The migration requires you to set up a fresh KVM VPS and manually transfer your data.
What happens if I do nothing?
Once your OpenVZ VPS expires, Hostinger will permanently destroy the server and all data on it — including files, databases, emails, and configurations.
There is no recovery after this point. Hostinger cannot restore your data once the server is destroyed.
If your VPS is already suspended or expired, contact Kodee immediately to request a temporary 48-hour reactivation window for data rescue. Kodee can help with the entire recovery process.
Quick overview: what you need to do
- Purchase a new KVM VPS plan.
- Install your preferred OS and applications on the new KVM VPS.
- Transfer your files, databases, and emails from the old server to the new one.
- Point your domain to the new VPS IP address.
The rest of this article walks through each step in detail.
Choosing the right KVM plan
Use this table as a starting guide. Check the current VPS pricing page for the latest specs and pricing.
| OpenVZ plan | Specs (approx.) | Recommended KVM plan |
| VPS Server Plan 1 | 1 vCPU · 1 GB RAM · 20 GB storage | KVM 1 or KVM 2 |
| VPS Server Plan 2 | 2 vCPU · 2 GB RAM · 40 GB storage | KVM 2 |
| VPS Server Plan 4 | 4 vCPU · 4 GB RAM · 80 GB storage | KVM 4 |
| VPS Server Plan 6 | 6 vCPU · 6 GB RAM · 120 GB storage | KVM 4 or KVM 8 |
View current KVM plans and pricing: hostinger.com/vps-hos
Step 0 — Confirm you are on OpenVZ
You are on OpenVZ if either of the following is true:
- Purchase date: your VPS was purchased before April 18, 2023.
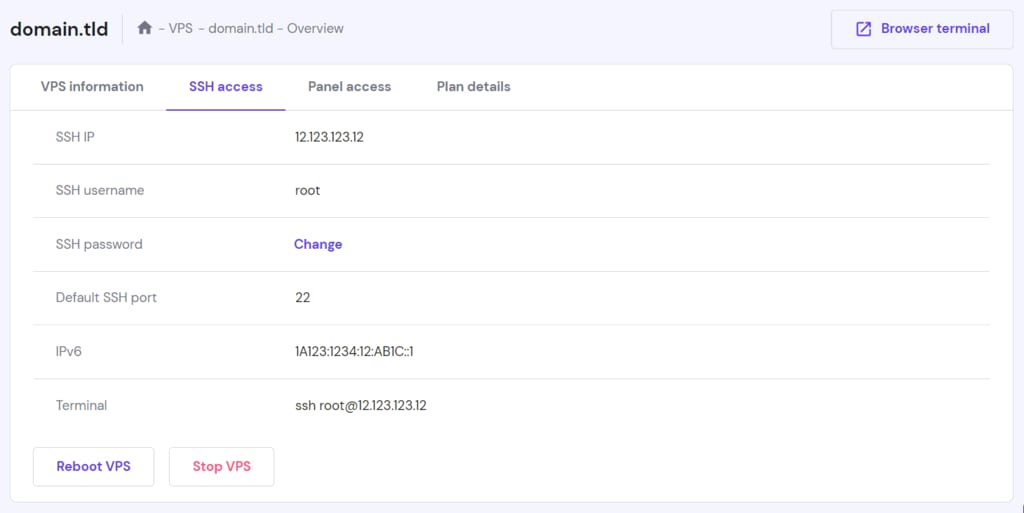
- hPanel check: go to VPS → Manage → Overview. If the plan type is VPS server Plan 1, this means that you are using OpenVZ

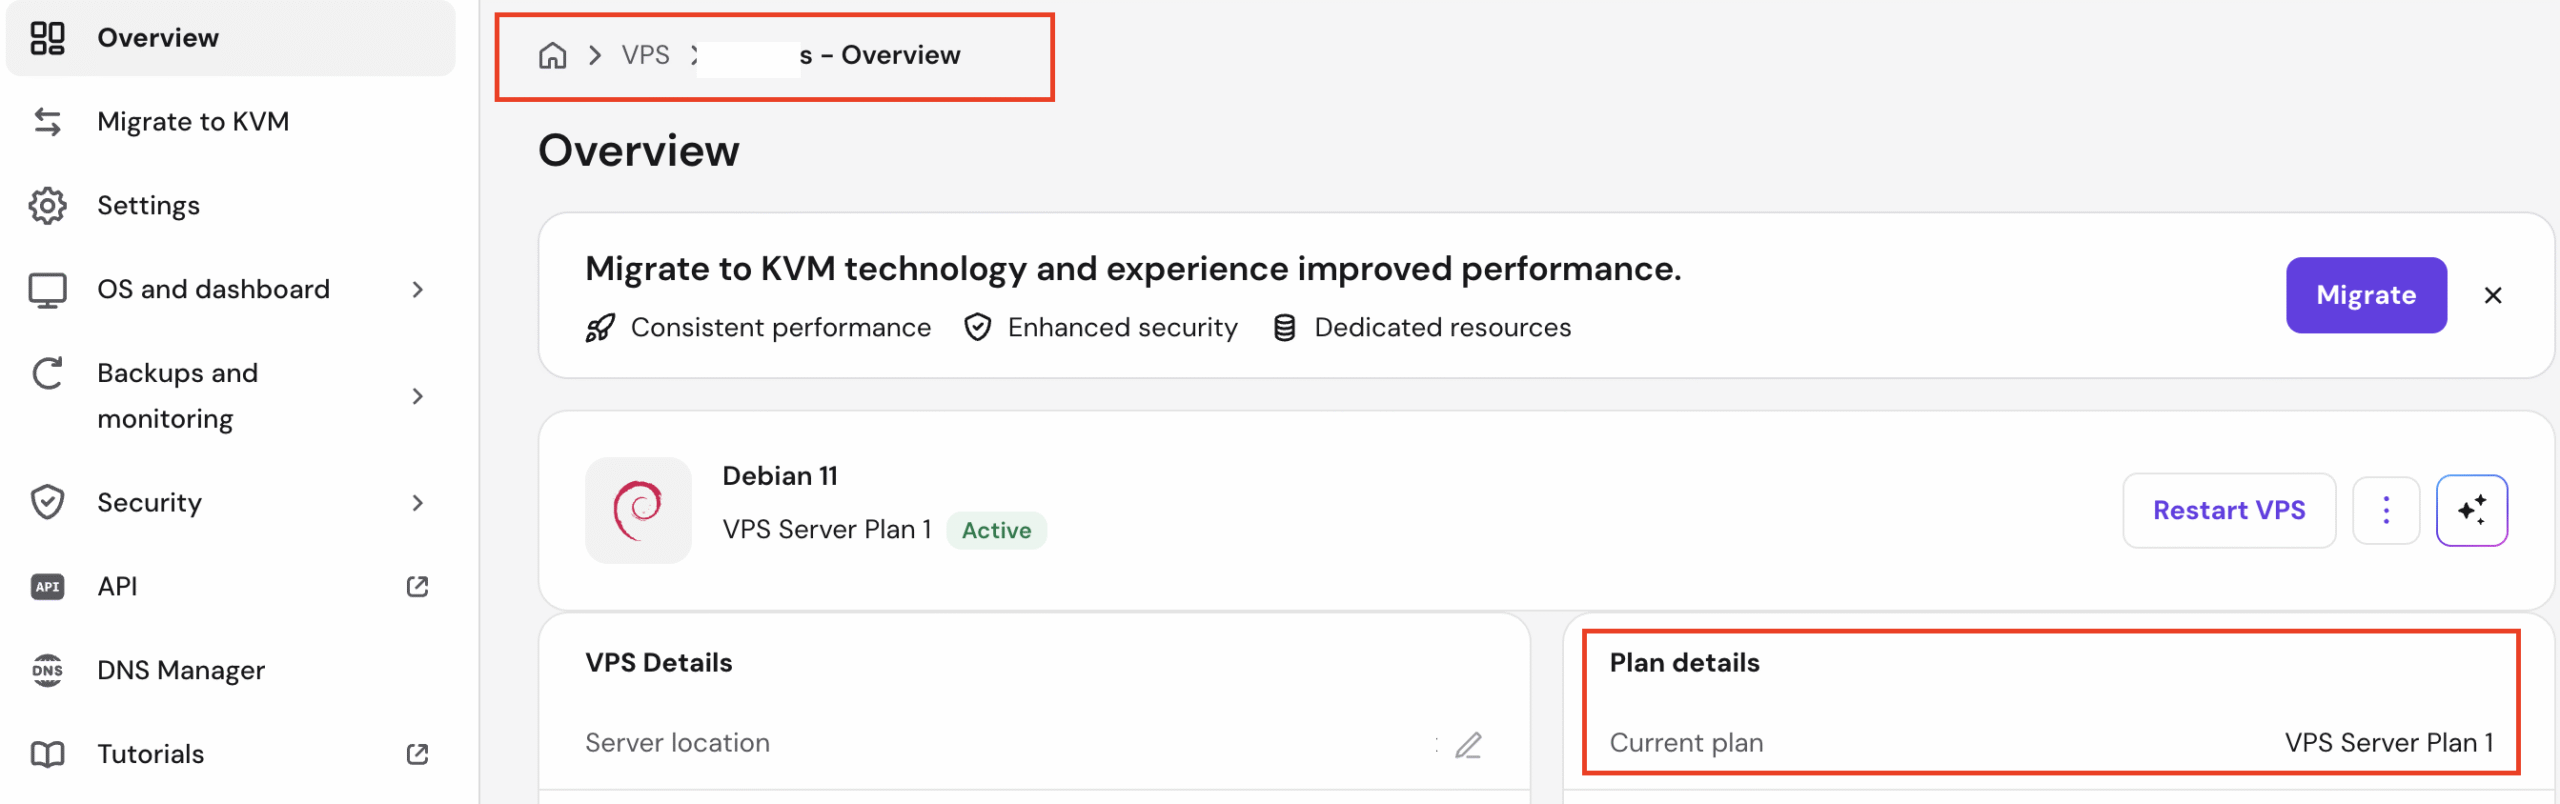
Another option is to check Billing → Subscriptions and look for “VPS Server Plan 1”, “VPS Server Plan 2”, “VPS Server Plan 4”, or “VPS Server Plan 6” — these are the legacy OpenVZ plan names.
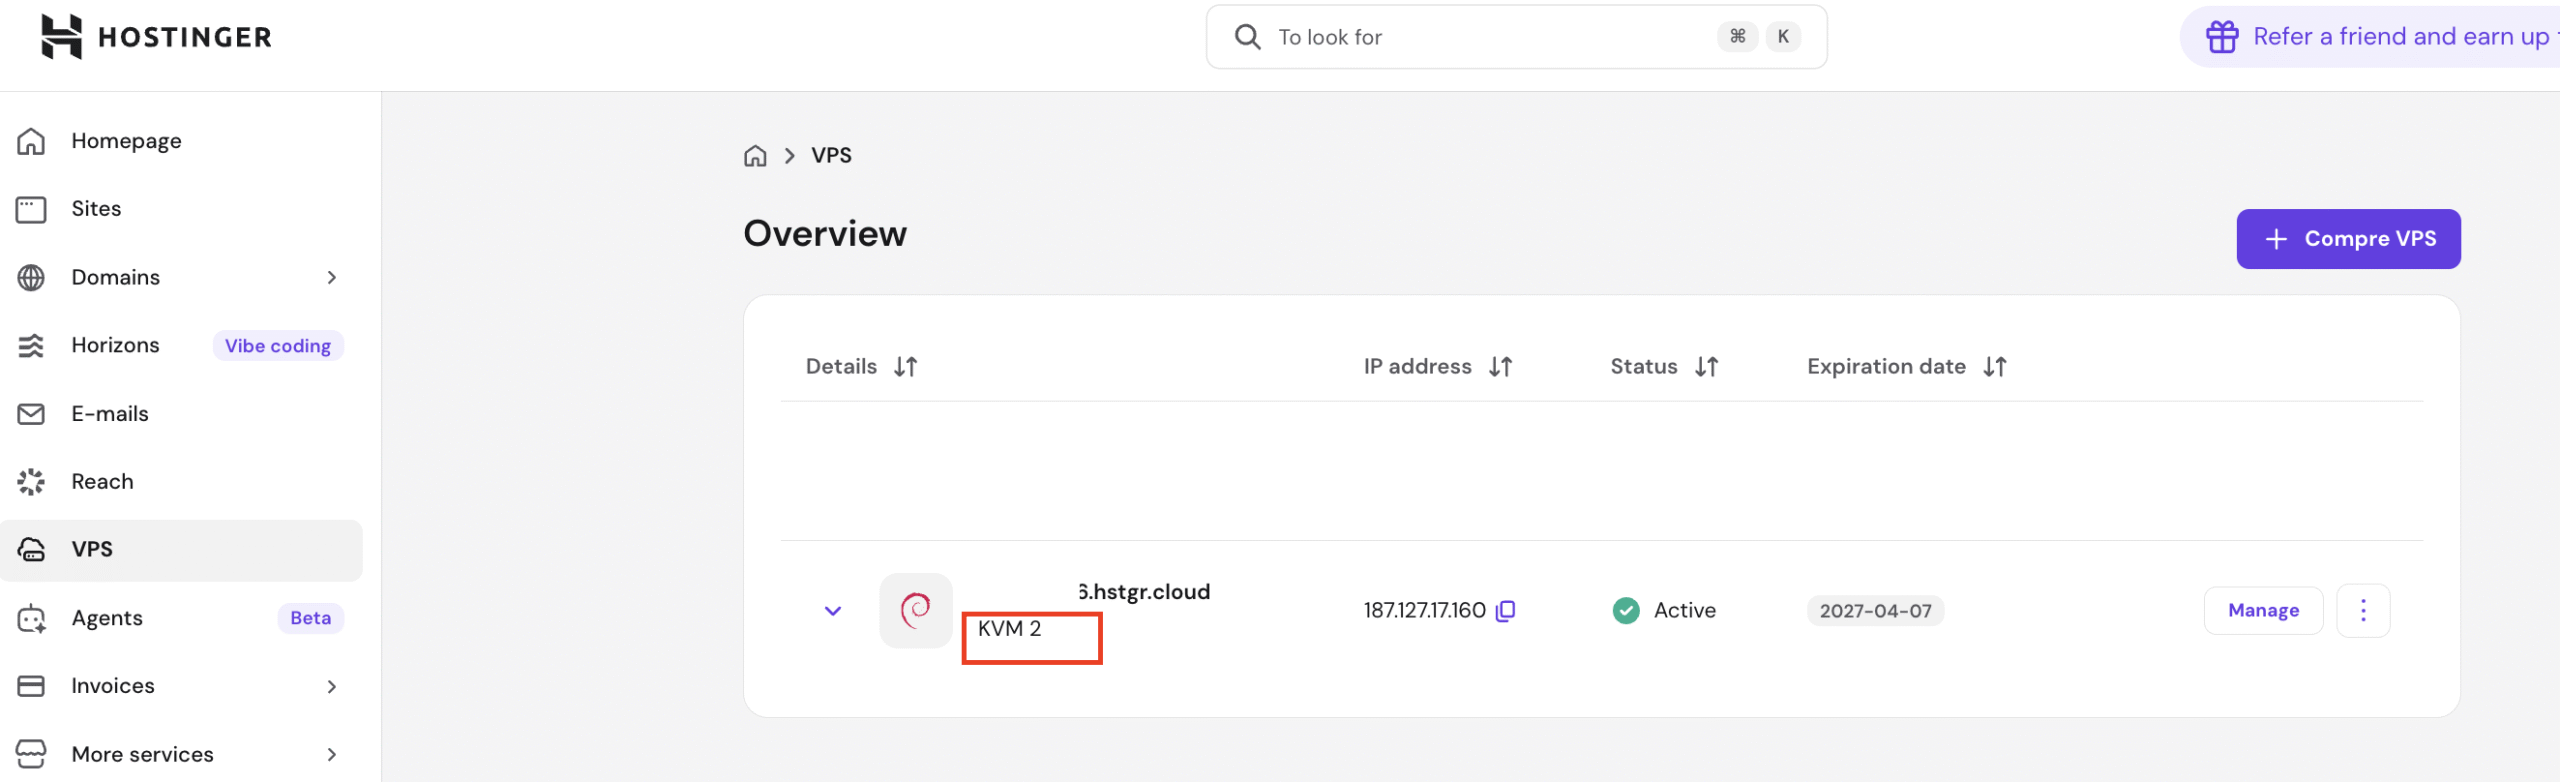
If near your plan details, you see KVM – means you are using our KVM plan.
 If you have purchased before April 18, 2023, you have an OpenVZ Server. This is a container-based virtualization technology. Due to the differences between virtualization methods, it is not possible to automatically transition from OpenVZ to KVM. To upgrade to our current KVM-based VPS infrastructure, you’ll need to purchase a new KVM VPS plan and manually migrate your data and configurations to the new server.

Related: What Is KVM Virtualization? | Hostinger Help Center
We have prepared a detailed guide below to support you during the migration. While the steps may differ depending on your operating system and the applications you use, the guide provides general instructions applicable to most Linux-based servers.
NOTE:
-
We recommend scheduling your migration during low-traffic periods to minimize service interruptions to your application.
-
During the migration process, also consider and allot 24 hours for DNS propagation.
Option 1: direct reinstall (recommended for most users)
The easiest way to upgrade is to reinstall your OpenVZ VPS directly to KVM through your hPanel.

This process:
- Allows you to select a new KVM plan during setup
- Automatically prorates your unused OpenVZ subscription period
- Applies the credit to your new KVM VPS
- Completes the upgrade in one streamlined process
Option 2: manual migration (for complex setups)
Step 1 – Prepare backups
Before starting the migration, you will need to do some previous checks:
-
Make sure to have an up-to-date backup, including all the files you will need to transfer and identify the backup location on your server.
-
If you are using a database, perform a new dump if required and confirm your database backup location.
Step 2 – Set up your new VPS
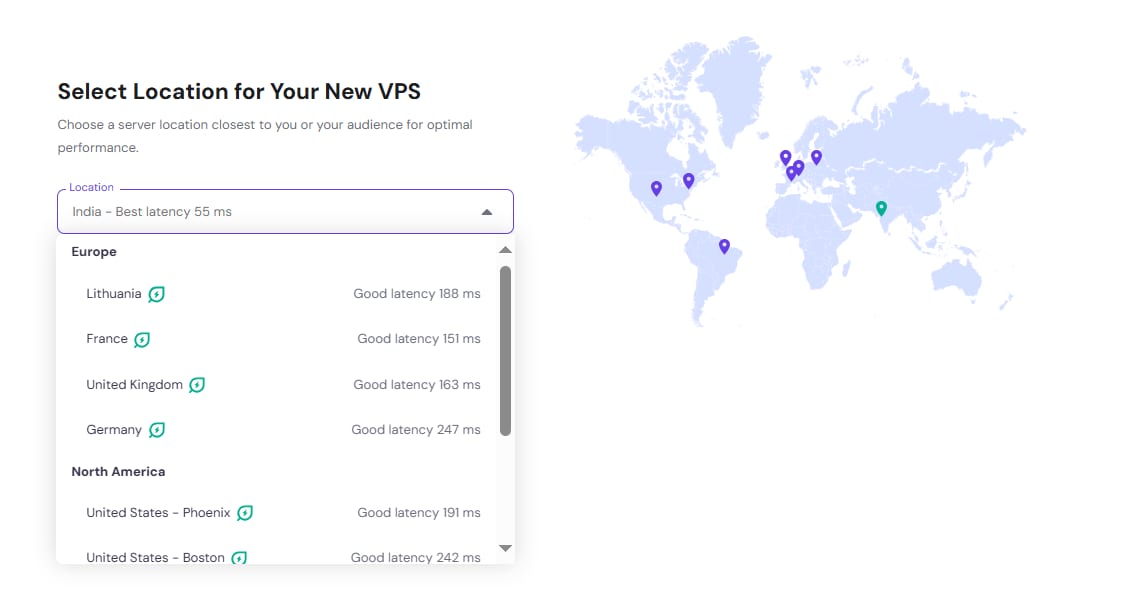
Once you have the backups, make sure your new VPS is set up. It is best to set up the server in the data center closest to you or your audience’s location. You can check out a full list of our data centers here.

Selecting a location is also made easier as the setup detects the lowest latency from your current location
NOTE: If you were using a license purchased from Hostinger, it is not transferrable to your new VPS. You will need to purchase a new license for your new server.
IMPORTANT: Since OpenVZ and KVM servers cannot communicate if hosted in the same location, direct data transfer using tools like SCP, rsync, and WHM’s transfer tool is impossible. You can choose a different location or download your data from OpenVZ and manually upload it to your new KVM VPS.
If your previous server is in Arizona, US – set up your new VPS to our Phoenix or Boston, USA locations
-
If your previous server had an older version of your preferred operating system – this is the perfect time to install the latest version on your new VPS 😊
-
Next, you can install the same applications you currently use, such as Apache, PHP, MariaDB, Redis, Node.JS, etc.
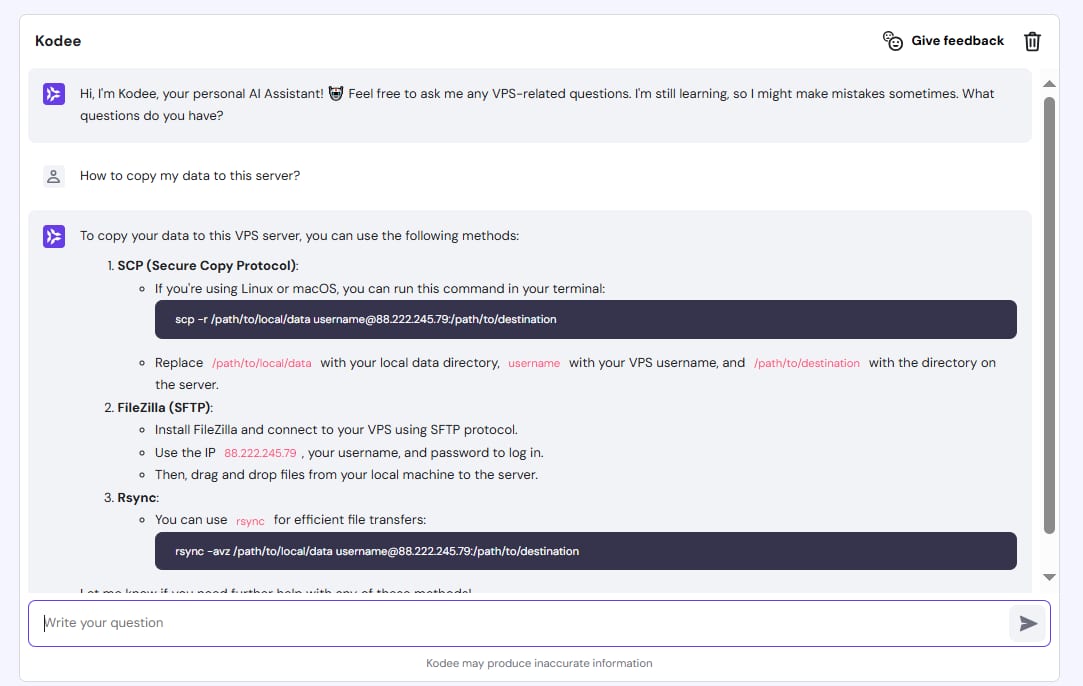
PRO TIP: You can use Kodee AI assistant for help with commands, troubleshooting, and simple management tasks 🚀
Step 3 – Transfer the data
Start the data transferring process by logging into your server as a root user and stopping all running services to avoid errors during the transfer.
Next, upload your backups to the new VPS by using FTP, SCP, or rsync tools. Once the upload is completed, move the application files to their correct locations.
Related: How to Upload Files to Remote System Over SSH
Step 4 – Test
After restoring your backups, test all your applications to ensure they work properly. You may need to change the configuration files to update hostnames, IP addresses, etc.
If you are hosting a website and your domain is not pointing yet, you can use tools like SkipDNS or change your host file to preview your website.
NOTE: If you encounter difficulties or configuration-related issues after the transfer, we recommend you contact your developer or a freelancer for further assistance
Step 5 – Point your domain
Once you’ve completed the tests and everything is good to go, point your domain by updating the A record to match your new VPS IP address.
After a few hours, when the propagation process is completed, your application will be running fully from the new VPS 😊
FAQ:
Q: I received a “Renew now” email — why can’t I renew from hPanel?
OpenVZ plans are non-renewable as of March 1, 2026. Renewal emails sent before this cutoff cannot be completed. The “Renew now” link in those emails leads to a dead end. Follow this migration guide instead.
Q: Can I keep my current IP address on the new VPS?
No. The old OpenVZ IP address is permanently decommissioned with the server. Your new KVM VPS will be assigned a different IP. You will need to update any DNS records and any upstream systems (IoT devices, file-drop integrations, payment gateways, etc.) that used the old IP.
Q: Can Hostinger migrate my data for me?
No. Hostinger support specialists cannot log into your server or perform migration steps on your behalf. If you need technical help, please hire a developer
Q: Are my sites, domains, and emails affected?
Only if they were configured to run on this VPS. Run the audit commands in the “Before you start” section to check exactly what is hosted there. If your developer set up the VPS, ask them to provide this information before the server is destroyed.
Q: What if I do not need to continue with Hostinger — can I still get my data?
Yes. Contact Kodee to request the 48-hour emergency reactivation window. Kodee can help you in this process entirely. You do not need to purchase a new plan to retrieve your data. Download your files via SFTP and your databases via mysqldump as described in the Emergency data rescue section above.
Q: The migration guide says to use SCP/rsync — but it is not working.
This is expected if your old OpenVZ VPS and new KVM VPS are in the same datacenter. Direct server-to-server transfer using SCP, rsync, or WHM tools does not work between OpenVZ and KVM in the same location. Use the download/upload method instead: download files from the old server to your local machine, then upload to the new KVM VPS.
Related articles
- What is KVM virtualization?
- How to point a domain to your VPS
- How to change the OS on your KVM VPS
- How to connect to VPS via SFTP
- How to export a database over SSH
- Where are Hostinger servers located?
- What is DNS propagation?