Migrating your website from a VPS plan to Web Hosting on Hostinger is a straightforward process. This guide will walk you through each step to ensure a smooth transition.
Step 1: Prepare for Migration
Before you start the migration process, make sure to:
-
Check resource requirements to ensure that your website can perform optimally on a Web Hosting plan.
-
Review limitations of Web Hosting to confirm compatibility (e.g., software compatibility, resource limits).
Note: VPS offers full control and flexibility, while Web Hosting may have restrictions on certain scripts and resource-intensive applications.
Step 2: Download Files and Databases from VPS
-
Connect to Your VPS via SSH:
in your terminal enter this command, with your VPS IP address.
ssh root@your-ip-address -
Find Your Website Directory:
To locate your directory, use this command:find / -type d -name "your_website_directory" -
Compress Your Website Files:
Compress all website files into a .zip file:zip -r file_name.zip path/to/your/directoryNote: If you see
zip: command not found, install zip with:
sudo apt-get install zip -
Download the Compressed File to Your Local Device:
Run this command on your local machine’s terminal (not on the VPS), changingyour_vps_ipwith your actual IP:scp root@your_vps_ip:/path/to/file_name.zip /local/path/ -
Export Your Database:
Create a backup of your database:mysqldump -u root -p database_name > backup_name.sqlYou will be prompted to enter your password, you should enter your mysql password for the specified user.
Note: While you are entering the password, it will seem that nothing is being typed in the terminal. It’s a common security practice.
-
Download the Database Backup:
Again, on your local machine’s terminal (not on the VPS), run:
scp root@your_vps_ip:/path/to/backup_name.sql /local/path/
OPTION A:
Step 3: Set Up Your Web Hosting Environment
-
Log in to hPanel and open your Web Hosting plan.
-
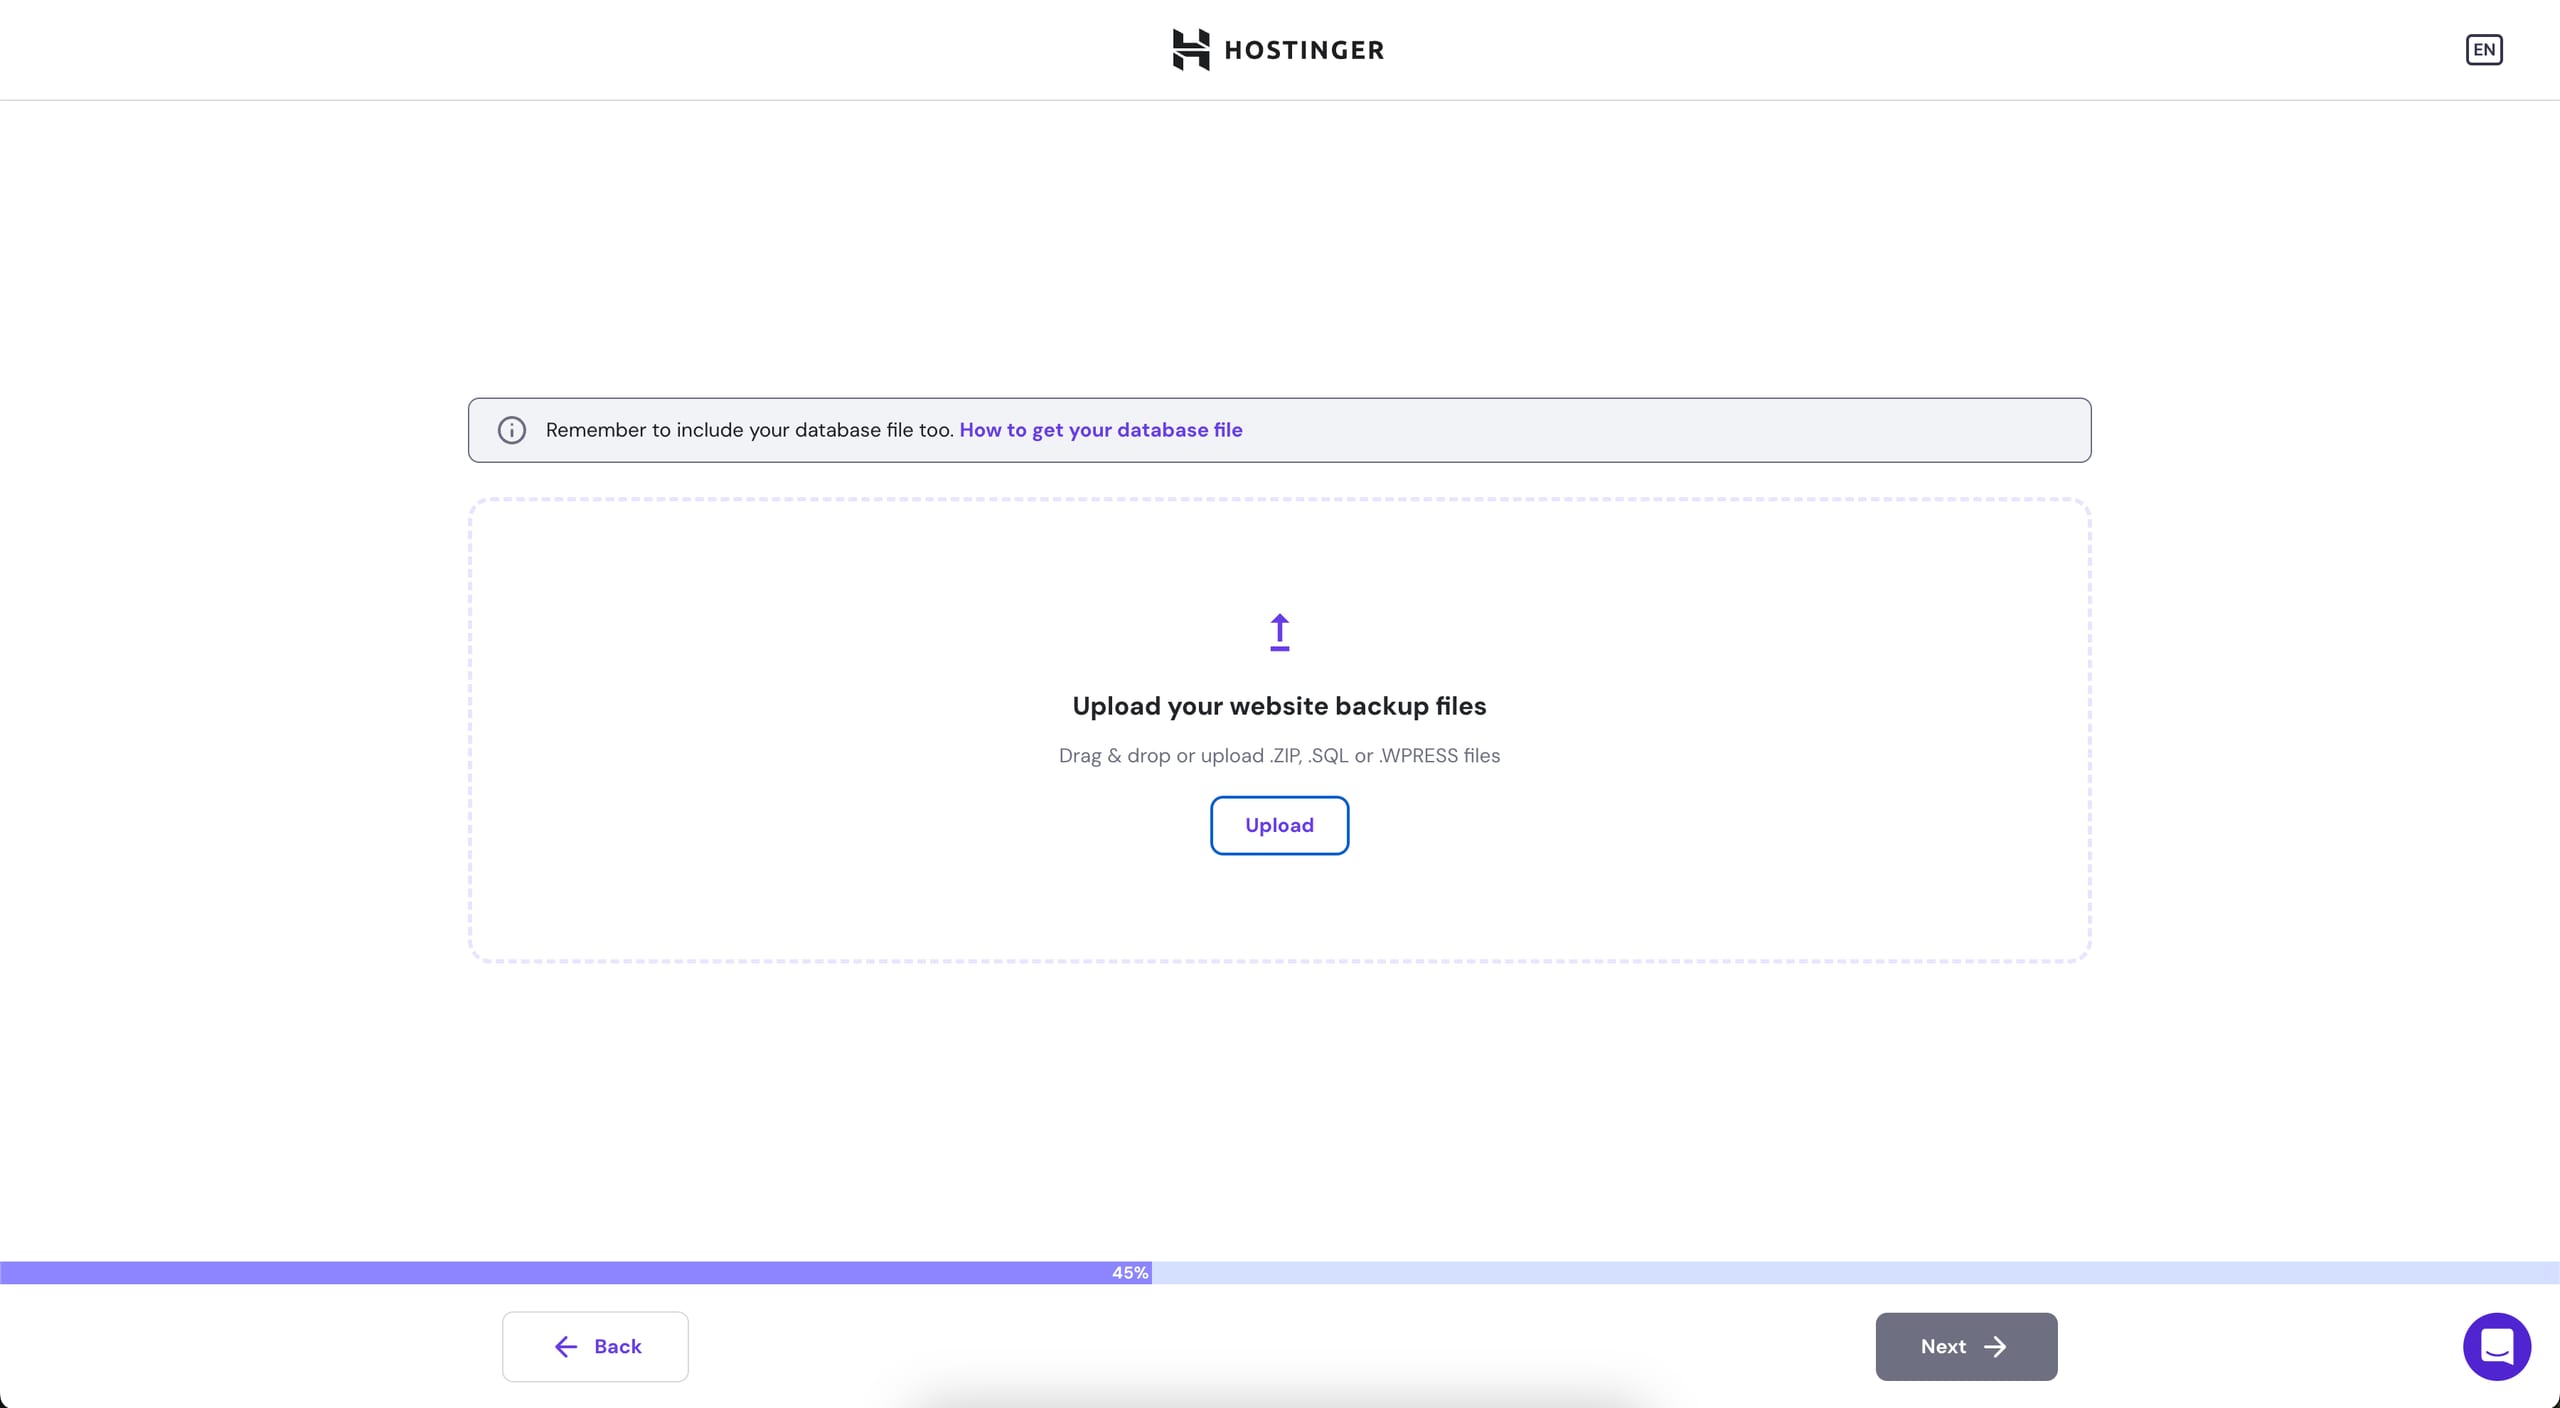
Press on “Add website” -> “Migrate Website”

-
Upload your website backup files (don’t forget the database file)


Step 4: Final Checks
-
Monitor your website’s performance to ensure it’s stable on Web Hosting.
-
If everything looks good, you’re all set!
OPTION B:
Step 3: Set Up Your Web Hosting Environment
-
Log in to hPanel and open your Web Hosting plan.
-
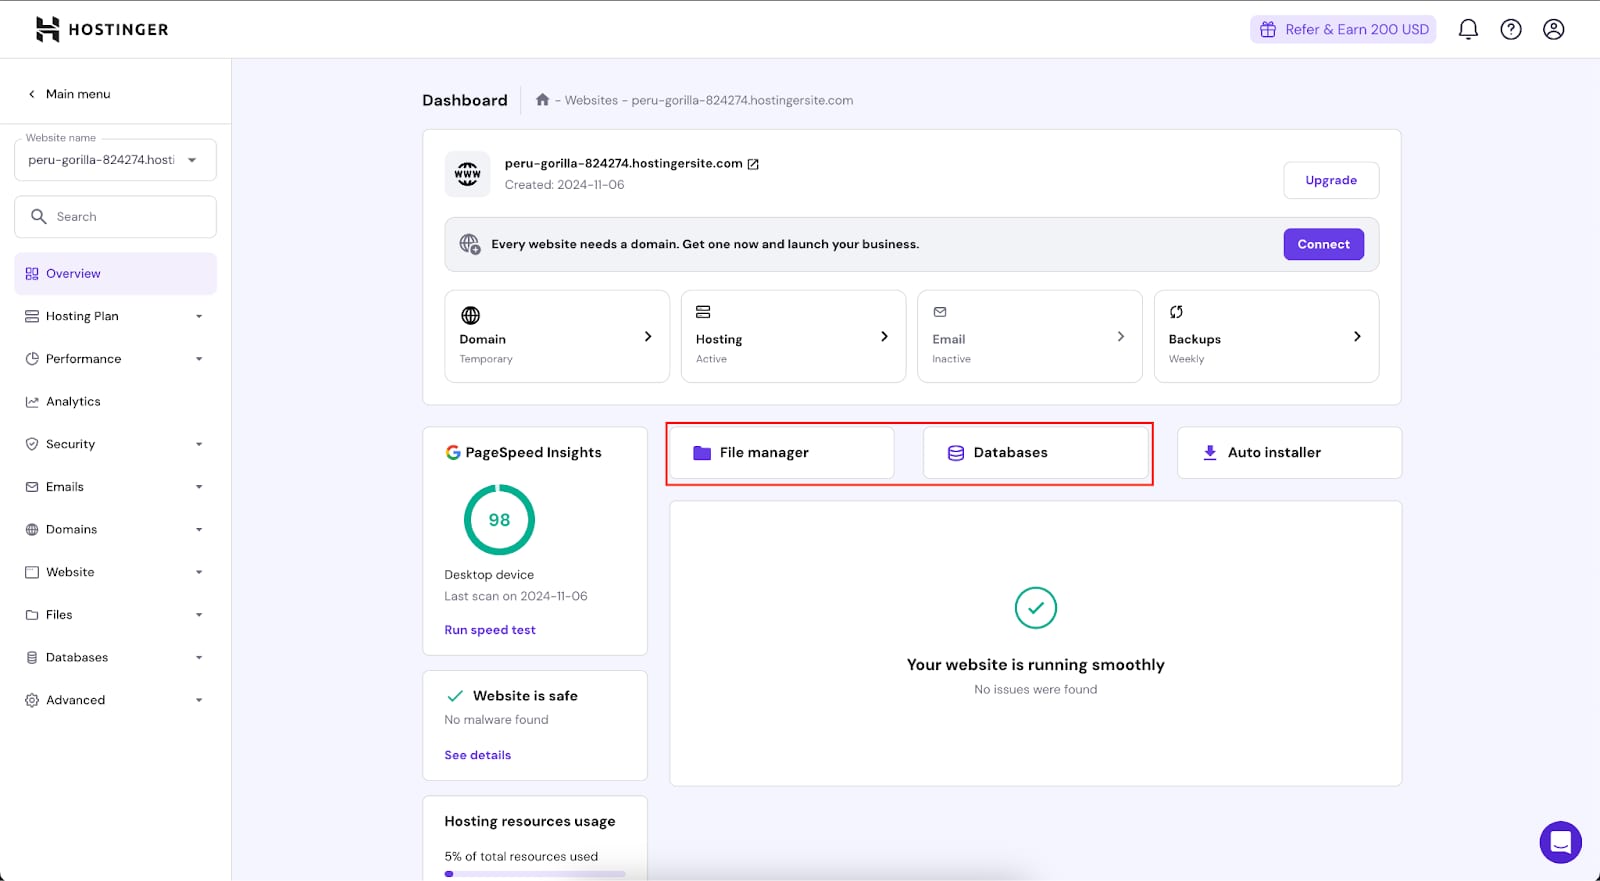
Go to File Manager and upload your website files to the
/public_htmldirectory.

-
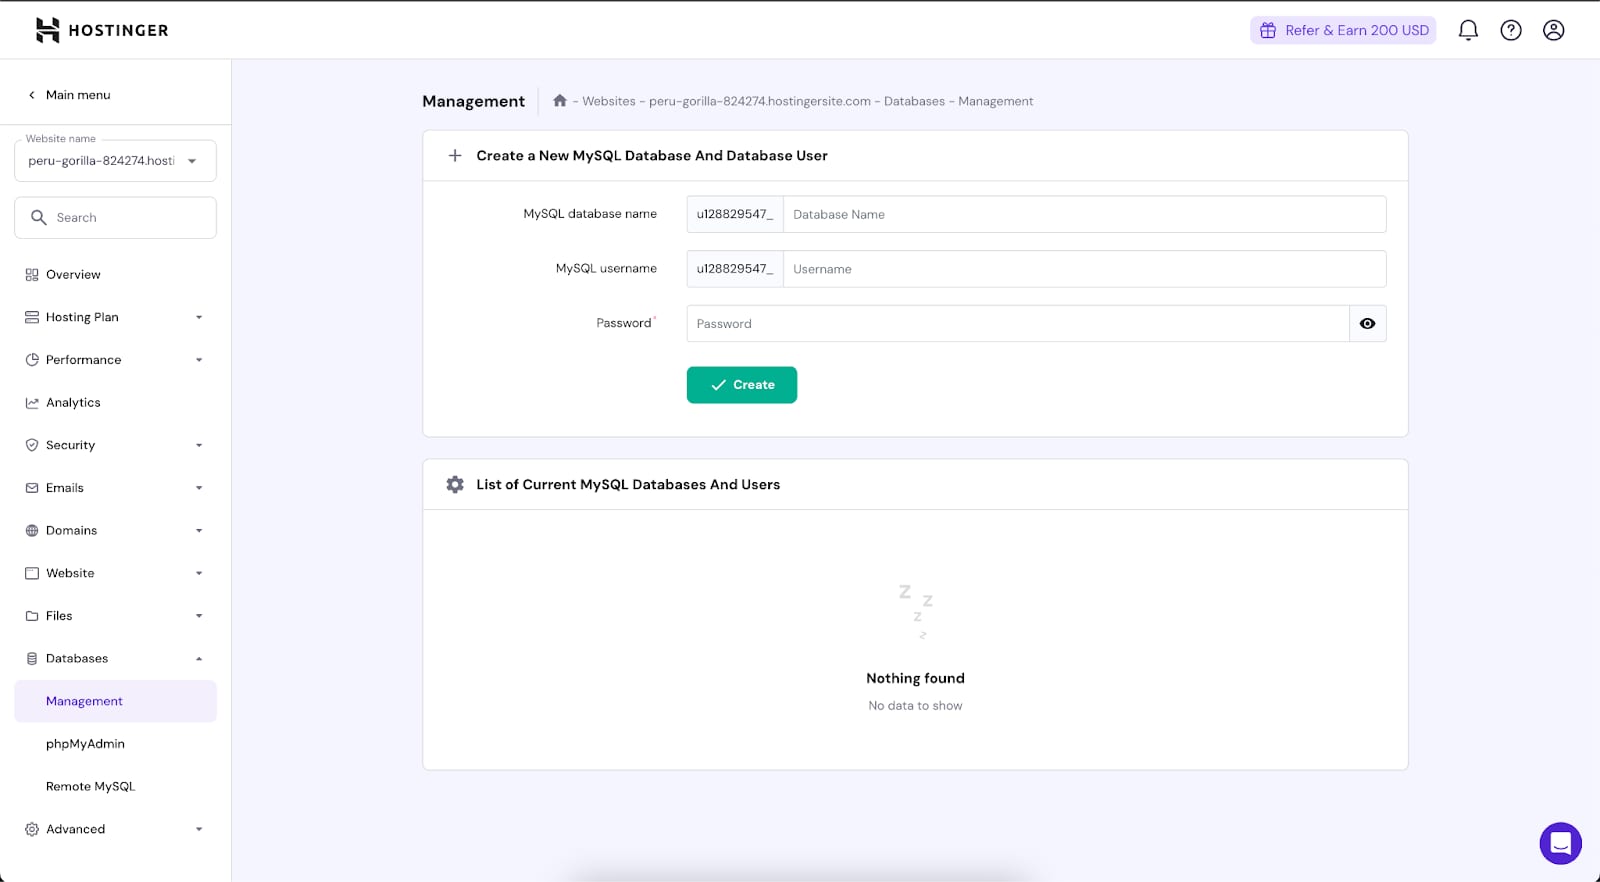
Create a new database for your website by going to Databases in the side menu, then Management, then by creating new database name, username and password.

-
Import your database:
-
Go to phpMyAdmin in hPanel.
-
Select your newly created database and import the
.sqlfile from your local device.


Step 4: Update Configuration Files
Edit your configuration file (e.g., wp-config.php for WordPress or config.php for other CMSs) to reflect the new database details:
Update database name, username, and password with the one’s created in hPanel.
Step 5: Final Checks
-
Monitor your website’s performance to ensure it’s stable on Web Hosting.
-
If everything looks good, you’re all set!