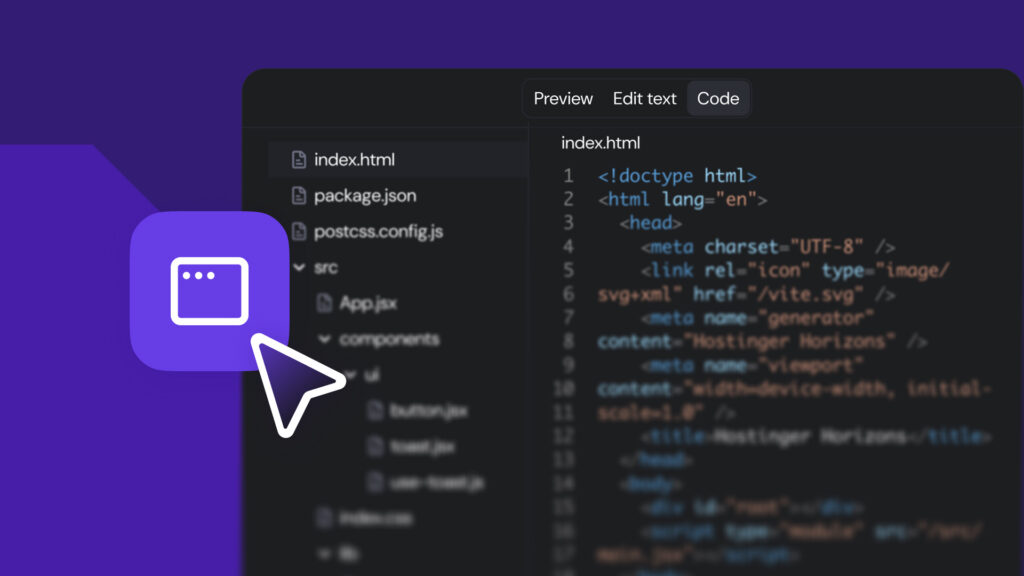
How to set up Hermes Workspace
Jun 08, 2026
/
Ariffud M.
/
7 min Read
Hermes Workspace is an open-source web UI for Hermes Agent, a self-improving AI agent from Nous Research.
It brings the agent’s chat, persistent memory, skills marketplace, terminal, and multi-agent orchestration together in a single self-hosted dashboard that you can access from any device.
To set up Hermes Workspace on a virtual private server (VPS), install the workspace alongside the agent, configure the gateway and dashboard, and access the interface through an SSH tunnel or a domain.
Running Hermes Workspace on a VPS keeps your conversations, agent memory, and API keys on infrastructure you control instead of relying on third-party services.
1. Check the prerequisites
Hermes Workspace runs on a VPS with at least 2 GB of RAM and a major Linux distribution, such as Ubuntu 24.04. The workspace works as the interface, while Hermes Agent handles the tasks underneath.
Set up a VPS first if you don’t have one yet, then connect to it over SSH.
Hermes Workspace needs three tools: Node.js 22 or higher, Python 3.11 or higher, and pnpm. Ubuntu 24.04 already includes a compatible Python version, so you only need to install Node.js and pnpm.
Update the system first:
sudo apt update
Install curl and git, then add the NodeSource repository for Node.js 22:
sudo apt install -y curl git
curl -fsSL https://deb.nodesource.com/setup_22.x | sudo -E bash -
sudo apt install -y nodejs
Install pnpm through npm:
sudo npm install -g pnpm
Verify that each tool is installed and meets the required version before moving on:
node -v # 22.x or higher
python3 -V # 3.11 or higher
pnpm -v

2. Install Hermes Workspace
If you’ve never installed Hermes Agent before, set up Hermes Workspace with the official one-line installer. It clones the workspace, pulls Hermes Agent from PyPI, and creates the starter .env files in one command:
curl -fsSL https://raw.githubusercontent.com/outsourc-e/hermes-workspace/main/install.sh | bash
On the first run, the installer asks you to pick a model provider and enter an API key, so make sure you have one ready. Once it finishes, you’ll see a confirmation message indicating a successful installation.

If you’ve already installed Hermes Agent, skip the one-line installer. Instead, clone the workspace separately and point it to your existing services:
git clone https://github.com/outsourc-e/hermes-workspace.git
cd hermes-workspace
pnpm install
cp .env.example .env
echo 'HERMES_API_URL=http://127.0.0.1:8642' >> .env
echo 'HERMES_DASHBOARD_URL=http://127.0.0.1:9119' >> .env
Use 127.0.0.1 if the agent runs on the same server. Use the server’s real IP address if it runs elsewhere. Either way, you’ll still need to set the gateway key next.
Regardless of your installation method, the workspace and gateway need to share the same secret key. This requires three new entries across two files.
First, generate the secret key and copy it somewhere safe:
openssl rand -hex 32
Open the agent’s environment file with the nano text editor:
nano ~/.hermes/.env
Add these two lines to the file. Replace your-gateway-secret with the secret key you generated earlier:
API_SERVER_ENABLED=true
API_SERVER_KEY=your-gateway-secret
Here, API_SERVER_ENABLED turns on the HTTP API that the workspace calls, and API_SERVER_KEY protects it with a password.
The gateway needs both before it can serve that API, even when the workspace and gateway run on the same server. This step is easy to miss because a local-only setup can feel like it doesn’t need a password.
Save the file and close nano with Ctrl+X → Y → Enter.
Now open the workspace’s environment file:
nano ~/hermes-workspace/.env
Add the token using the same secret key, so API_SERVER_KEY and HERMES_API_TOKEN have matching values:
HERMES_API_TOKEN=your-gateway-secret
Save the file the same way to finish the configuration.
3. Start the gateway and workspace
Three Hermes services run together: the gateway on port 8642, the dashboard on port 9119, and the workspace UI on port 3000. The gateway and dashboard belong to Hermes Agent, while the UI is the part you use in the browser.
Navigate to the workspace folder:
cd ~/hermes-workspace
Start the gateway, dashboard, and workspace UI with one command:
npx concurrently --names "gateway,dashboard,workspace" --prefix-colors "blue,green,yellow" "hermes gateway run" "hermes dashboard" "pnpm dev"
💡 Pro tip
Some documentation suggests using pnpm start:all, which should do the same job as running all three services. In our testing, though, it leaves out the dashboard.
Without the dashboard, core features like chat still work, but you lose access to sessions, skills, memory, and jobs.
We recommend starting all services with npx concurrently instead because it’s more reliable and lets the workspace run with full features.
The output prints the workspace UI URL at your VPS IP on port 3000, such as http://22.222.222.84:3000. Open it in your browser.

The dashboard loads ready to use, so you can start chatting, browse memory and skills, or open the built-in terminal right away.

If you close the SSH session or lose the connection, these processes stop with it. To keep them running after SSH disconnects, run them inside a tmux session:
tmux new -s hermes
cd ~/hermes-workspace
npx concurrently "hermes gateway run" "hermes dashboard" "pnpm dev"
Detach with Ctrl+B, then D. Reattach later with tmux attach -t hermes.
To confirm the gateway and dashboard are responding, open a new terminal window and run these two checks:
curl http://127.0.0.1:8642/health
curl http://127.0.0.1:9119/api/status
The first command checks the gateway, which returns {“status”:”ok”,”platform”:”hermes-agent”}.
The second command checks the dashboard. The fields that matter are “gateway_running”:true and an api_server state of “connected”, which confirms the gateway is running and its API server is connected.

You also need to check the run mode in the terminal running the services. A workspace log line that includes mode=zero-fork indicates that the gateway and dashboard paired.

How to set up Hermes Workspace on Hostinger
On Hostinger, Hermes Workspace is available as a one-click Docker template that automatically sets up the agent and workspace containers.
This saves you from running installation and configuration commands manually, which can lead to errors.
If you’re a new customer, open the Hermes Workspace template page, then choose your plan, billing period, and server location. After purchase, enter a workspace password and one API key.
The installation takes about five minutes. When it finishes, the system redirects you to the Docker Manager page. From there, click Open in the Access column to access the web UI.

If you already have a Hostinger VPS, you can still install the Hermes Workspace template through hPanel.
Important! Changing the OS erases all data on the server, so back up your files and configurations first.
- Go to hPanel → VPS → Manage → OS & Panel → Operating System.
- In the Change OS section, search for Hermes Workspace and select it.

- Enter a workspace password and an API key for your preferred provider.
- Click Next → Deploy.
Once deployment finishes, go to Docker Manager → Projects and click Open to access the workspace web UI.

Common Hermes Workspace setup errors
Most Hermes Workspace setup errors come from a few common causes, such as a missing API flag, missing gateway key, dashboard that didn’t start, or outdated agent build.
- Gateway HTTP API is off. The error “Could not reach Hermes gateway on 8645, 8642, or 8643” means the workspace can’t reach the gateway’s HTTP API. This happens when the gateway is running but only serving messaging platforms, with the HTTP API turned off. Add API_SERVER_ENABLED=true to ~/.hermes/.env, then restart the gateway with pkill -f “hermes gateway” and hermes gateway run.
- Missing API server key. The error “API_SERVER_KEY is required for the API server, including loopback-only binds on 127.0.0.1” means the gateway refuses to start its HTTP API. This happens when API_SERVER_KEY isn’t set, since the gateway requires that key even on a local setup. Generate one with openssl rand -hex 32, add it as API_SERVER_KEY in ~/.hermes/.env, and set the same value as HERMES_API_TOKEN in ~/hermes-workspace/.env.
- Dashboard isn’t running. The log line “mode=portable with missing=[…dashboard]” means the workspace fell back to portable mode, where sessions, skills, memory, and jobs aren’t available. This happens when the dashboard isn’t running on port 9119, usually because the startup command skipped it. Stop the running services with Ctrl+C, then start all three together with npx concurrently so the workspace boots with the dashboard and leaves portable mode.
- Messaging allowlist isn’t set. The warning “No user allowlists configured” means the agent blocks messages from users on any connected platform. This happens when a messaging platform like Telegram or Discord is enabled without an allowlist. Add GATEWAY_ALLOW_ALL_USERS=true to ~/.hermes/.env to accept everyone, or set per-platform allowlists to limit who can reach it.
- Hermes Agent is outdated. The log line “missing=[chatCompletions, models, streaming, …]” means the workspace can’t find the endpoints it expects, even though the gateway responds. This happens when the installed Hermes Agent is older than the workspace, so the agent doesn’t expose those endpoints. For a git install, update the agent with cd ~/hermes-agent && git pull && uv pip install -e . For a PyPI install, run a pip upgrade. Then restart the gateway with hermes gateway run.
How long does it take to set up Hermes Workspace?
Setting up Hermes Workspace takes about 15 to 30 minutes from start to finish, depending on whether you’re doing a clean install or you’ve set up Hermes Agent before.
Installing Node.js and pnpm takes under five minutes. The one-line installer then pulls the workspace and agent in about the same amount of time.
If you’ve never set up Hermes Agent before, this is usually the longest part. It takes around 10 minutes because you need to pick a provider, paste an API key, and confirm the settings.
If you’ve already installed Hermes Agent and only need to clone Workspace into your existing environment, the process should take about five minutes.
Editing the environment files takes another two to three minutes, and starting the services takes the final minute or two.
Can I run multiple Hermes Workspace instances on the same machine?
Yes, you can run more than one Hermes Workspace instance on the same machine. Each instance is a separate copy, so it needs its own gateway, dashboard, and UI.
The catch is that two services can’t share a port. Only one gateway can use port 8642, so give the second instance’s gateway a different port and point its HERMES_API_URL to that port.
Do the same for its UI by running it on a free port with PORT=3001 pnpm dev. Each instance also keeps its own configuration, so they won’t overwrite each other.
If you only want to run different agents in one Workspace, you don’t need a second instance. Add each one as a profile under ~/.hermes/profiles/profile-name, where profile-name is a label you choose. You can then switch between profiles from the web UI.
Next steps after setting up Hermes Workspace
With Hermes Workspace running, focus on these four next steps: secure remote access, explore the skills marketplace, schedule autonomous work, and install it as an app.
- Secure remote access. Replace the SSH tunnel with Tailscale or a reverse proxy. The tunnel only works while its terminal stays open, so it isn’t practical for daily access. For Tailscale, set API_SERVER_HOST=0.0.0.0 on the gateway, then update the gateway and dashboard URLs in the workspace environment file.
- Explore the skills marketplace. Hermes skills are reusable capabilities that teach the agent how to handle specific tasks. Adding them extends what the agent can do, from research to file management. Open the Skills tab, browse the marketplace, and enable the ones that fit your workflow.
- Schedule autonomous work. The built-in cron scheduler runs prompts on a schedule. It handles routine work, such as a daily report or an hourly check, without you starting each run. Set a prompt and its cadence, then track the runs from the Jobs view.
- Install it as an app. Install the workspace as a progressive web app (PWA). It then opens like a native app on your computer or phone without a browser tab. Use the Chrome install icon, or go to Share → Add to Home Screen on iOS Safari.
If you want ideas on what to automate, browse popular Hermes Agent use cases to see how other people use the agent.
All of the tutorial content on this website is subject to Hostinger's rigorous editorial standards and values.

Ariffud is a Technical Content Writer with an educational background in Informatics. He has extensive expertise in Linux and VPS, authoring over 200 articles on server management and web development. Follow him on LinkedIn.