How to make a Satisfactory server
May 21, 2026
/
Ariffud M.
/
9 min Read
Satisfactory is a first-person, factory-building game that mixes exploration and combat on an alien planet. If you’re looking to enhance your gaming experience, creating a dedicated Satisfactory server could be the ideal next step.
Unlike hosting a private game, where the session ends when the host logs off, a dedicated server allows players to collaboratively build a world without everyone needing to be online at the same time, ensuring seamless multiplayer gameplay.
In this article, you’ll learn how to set up a Satisfactory server on a Linux virtual private server (VPS). From the initial steps to advanced configurations, our guide will help you enjoy this game on a dedicated platform.
Prerequisites for setting up a dedicated Satisfactory server
Before setting up your Satisfactory server, ensure your system meets these minimum requirements:
- Operating system. A currently supported major Linux distribution.
- Processor. At least an i5-3570 or Ryzen 5 3600 processor.
- RAM. A minimum of 12 GB, though we recommend 16 GB to store larger game data or host more than four players.
- Storage. At least 25 GB of available space.
Besides meeting the system requirements, use a broadband internet connection for a smooth server installation process.
How to set up a Satisfactory server in Hostinger Game Panel
Hostinger’s Satisfactory server hosting is an excellent choice for setting up own game servers. The AMP-based Game Panel allows you to easily install, manage, and invite players to your server.
Thanks to its user-friendly graphical interface, this method is ideal for beginners or those who aren’t familiar with the complex, error-prone manual approaches.
Start by choosing a suitable game hosting plan. For Satisfactory, we recommend the Game Panel 4 plan, which includes 16 GB of RAM and a quad-core AMD processor for optimal performance, starting at $10.49/month.
Host smoother gameplay with low-latency servers
Once you’ve selected your plan, follow these steps to complete the setup:
- Follow the VPS setup wizard to choose the server location closest to your player base and create a strong password for your Game Panel profile.
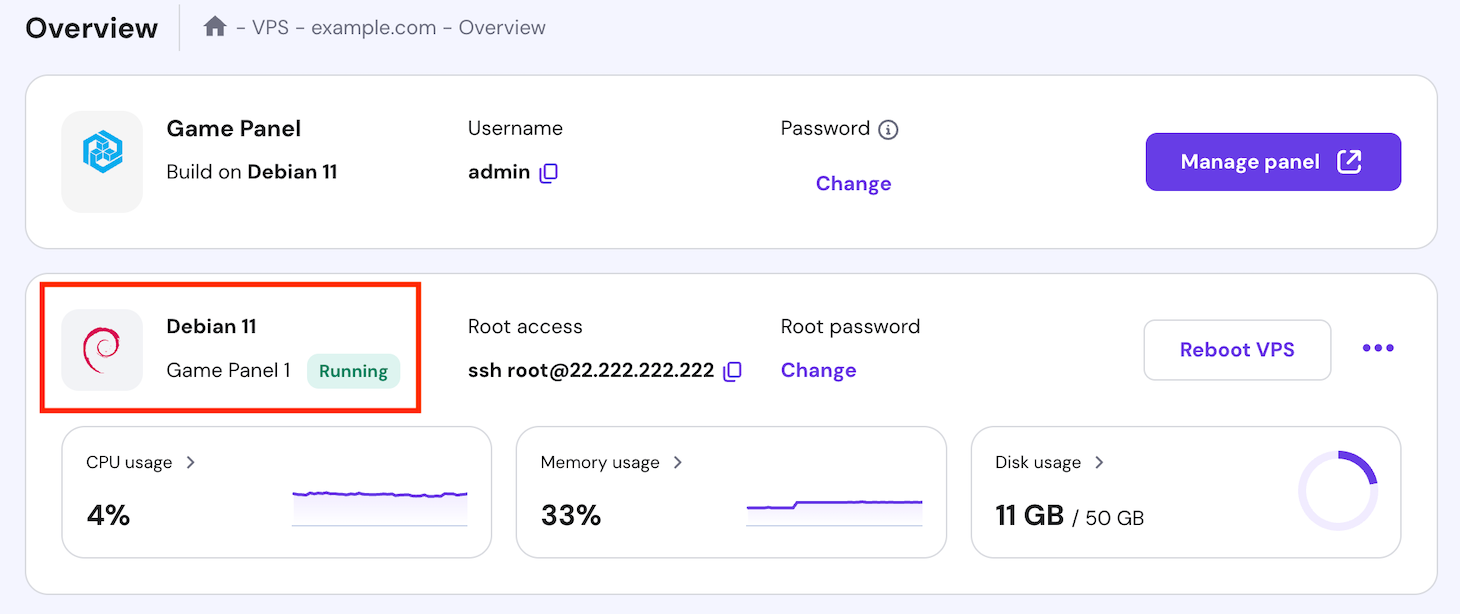
- Navigate to the VPS dashboard and ensure your server status is set to Running. If it isn’t, click the Start VPS button.
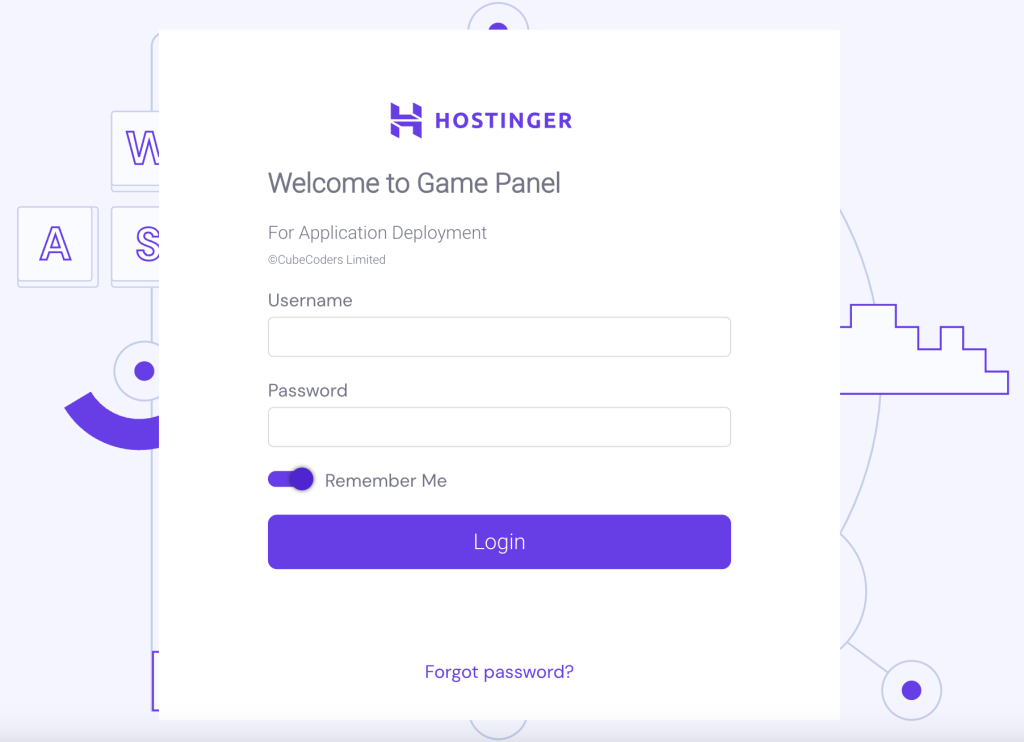
- Go to the top menu and click Manage Panel. Enter Game Panel using your credentials.
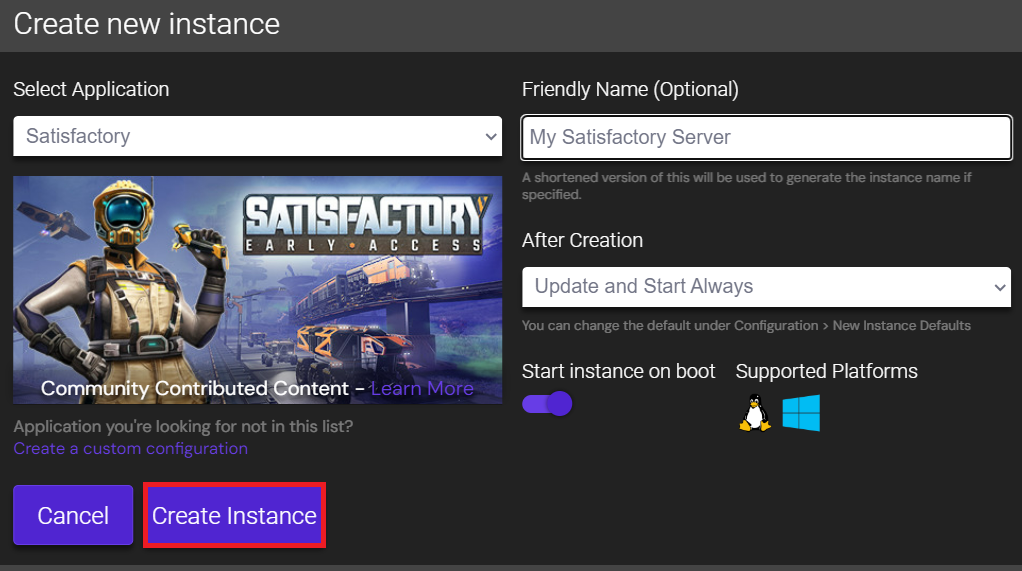
- In the main menu, select Create Instance. Choose Satisfactory from the drop-down menu, name your server, and click Create Instance.
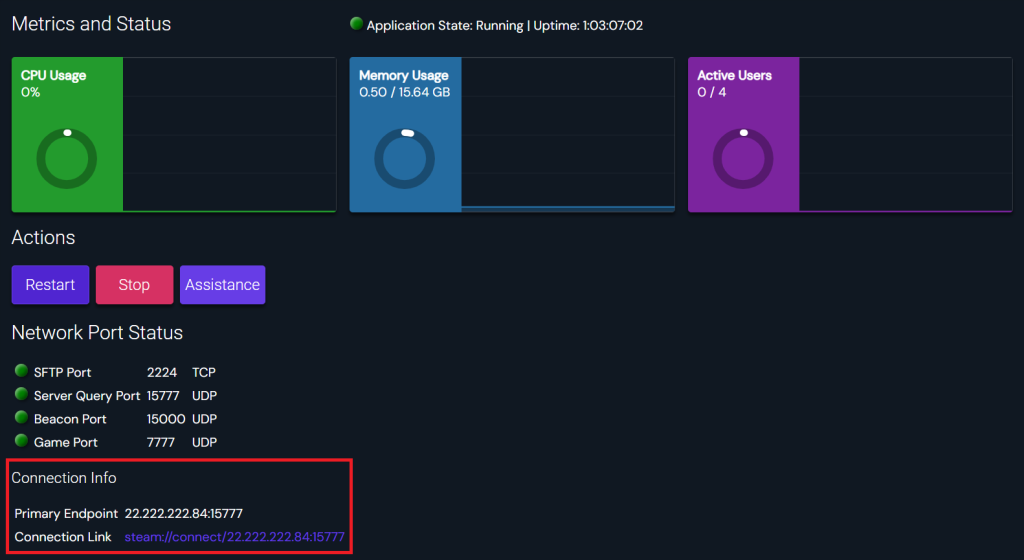
Once your server is running, invite friends by sharing your server’s public IP address and default port. To find these details, double-click your newly created instance and check the Connection Info section.
You can also fine-tune server settings, such as limiting player access or adjusting the number of autosaves, by going to Configuration → Server Settings.

Suggested reading
Did you know you can install multiple instances in Game Panel? This is useful for setting up another dedicated server for Palworld or other Steam-based games.
How to make a dedicated Satisfactory server manually
If you prefer a hands-on approach, you can manually set up a Satisfactory server using Linux commands. In this tutorial, we’ll use a Debian 12 distribution.
1. Purchase a game server hosting plan
Choosing the right game hosting service is essential for a smooth Satisfactory server experience. A powerful and reliable provider ensures your server can handle the game’s demands and deliver seamless gameplay.
As one of the top game hosting providers, Hostinger offers a strong infrastructure and multiple server locations worldwide. This means you can enjoy optimal performance with minimal latency, no matter where they are.
Our game hosting service includes advanced security features such as a malware scanner, DDoS protection, and automated weekly backups. These tools help safeguard your server and essential data, giving you peace of mind while gaming.
You can also use Kodee, our AI assistant, to guide you through managing your game server. Simply enter a prompt, and Kodee will help you complete your server configuration tasks effortlessly.
Additionally, our plans are scalable, allowing your server to grow alongside your gaming community. This ensures you can always deliver a top-tier experience as your player base expands.
2. Set up your VPS
After purchasing a VPS for Satisfactory, it’s time to configure your server. If you’re a Hostinger customer, access your credentials by navigating to the VPS details section within your VPS Overview menu.
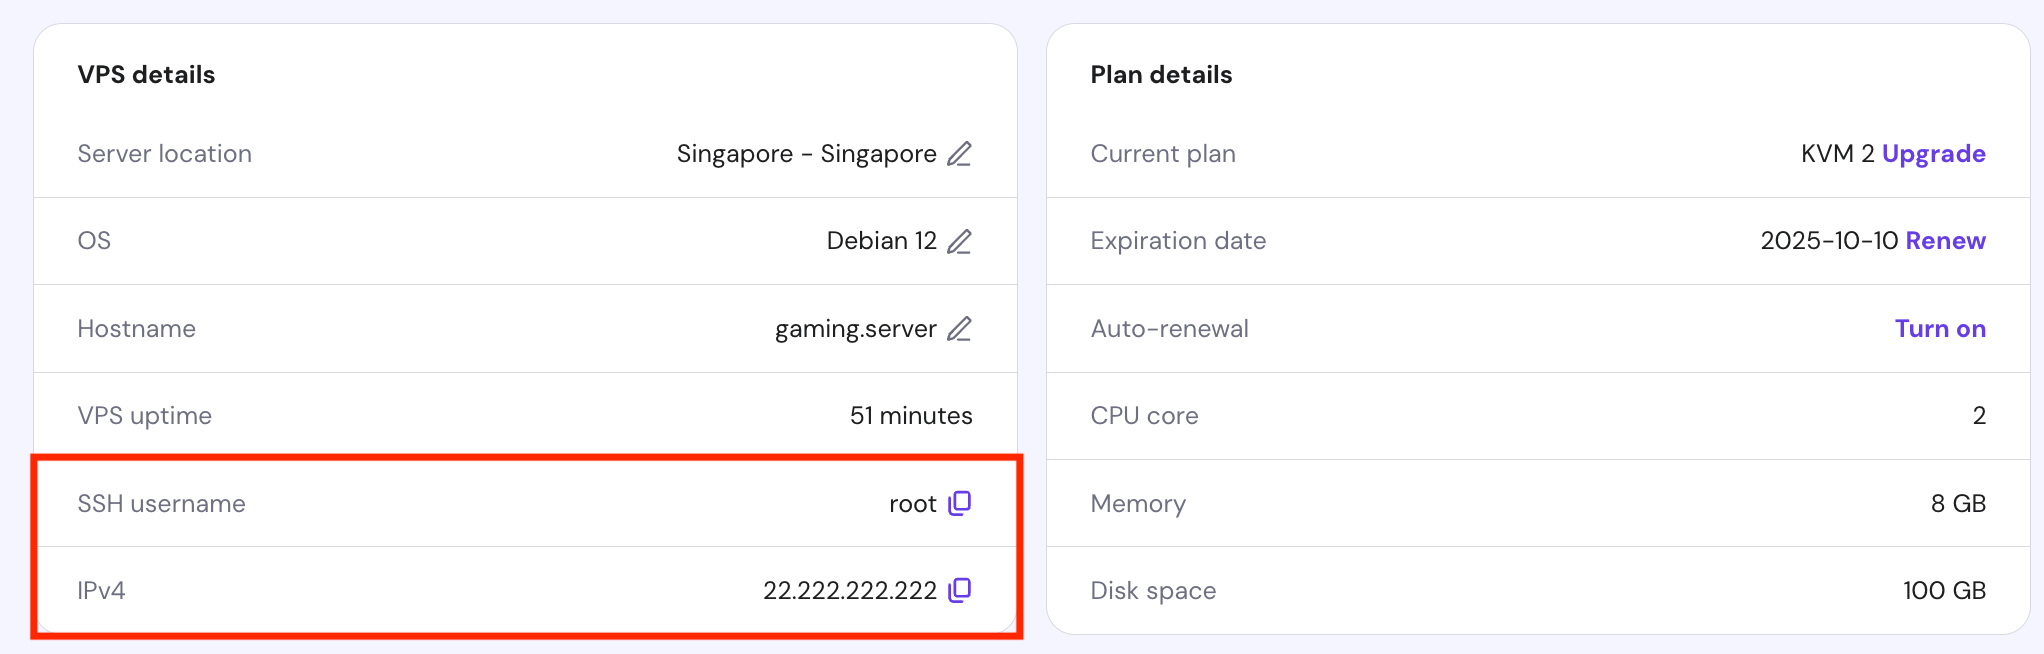
Next, connect to your server using an SSH client such as PuTTY, Terminal, or Hostinger’s Browser terminal feature. Once logged in, follow these steps:
- Update your package list and upgrade all system packages to the latest versions with the following commands:
sudo apt update && sudo apt upgrade
- Open the Debian package repositories file in the nano editor using:
sudo nano /etc/apt/sources.list
- Add third-party repositories by inserting these two lines at the end of the file:
deb http://mirrors.linode.com/debian bullseye main non-free
deb-src http://mirrors.linode.com/debian bullseye main non-free
- Save your changes and exit nano by pressing Ctrl + X → Y → Enter.
- Enable i386 architecture support on your Debian VPS:
sudo dpkg --add-architecture i386
- Refresh your local package cache to recognize the newly added repositories:
sudo apt update
Important! Every time you modify files or repository settings, make sure to update your package list by running the sudo apt update command to reflect the changes.
3. Install SteamCMD
SteamCMD is Valve’s official command-line version of the Steam gaming platform client. It’s essential for installing and updating various dedicated server applications without needing the full Steam graphical user interface.
Here’s how to install and set up SteamCMD:
- Download SteamCMD directly from the package manager:
sudo apt install steamcmd
- Create a new user to run your game server. In this example, we’ll name it steam:
sudo useradd -m steam
- Switch to the new user account:
sudo su - steam
- Navigate to the user’s home directory by typing:
cd
- Make SteamCMD more accessible by creating a symbolic link within your Steam account directory:
ln -s /usr/games/steamcmd steamcmd
4. Install the Satisfactory dedicated server
Next, use SteamCMD to download the necessary files for your Satisfactory dedicated server. You can choose between the stable and experimental versions, depending on whether you prioritize stability or accessing the latest features.
Here’s how to install the server:
- Start SteamCMD and log in anonymously:
./steamcmd.sh +login anonymous
- Download the basic server files by running this command:
+force_install_dir ~/satisfactory +app_update 1690800 validate +quit
For the experimental server version, use this one instead:
+force_install_dir ~/satisfactory +app_update 1690800 -beta experimental validate +quit
- Navigate to the Satisfactory server directory once the download is complete:
cd ~/satisfactory
- Launch Satisfactory by executing:
./FactoryServer.sh
You should see output similar to the following, indicating that the server is running:
[2024.03.31-15.46.32:739][ 0]Log file open, 03/31/24 15:46:32
[2024.03.31-15.46.32:739][ 0]LogInit: Display: Running engine for game: FactoryGame
[2024.03.31-15.46.33:123][ 0]LogOnline: Warning: OSS: Async task 'FOnlineAsyncTaskSteamCreateLobby' failed ...
To stop the game server, press Ctrl + C.
5. Run the server as a background service
By default, the Satisfactory server runs as a foreground service, meaning that closing the terminal will shut down the server. To prevent this, you can either use the screen command or create a dedicated service file.
Using screen
The Linux screen command is useful for interactive sessions where you can see the output or interact with the process. Follow these steps:
- Install screen with the following command:
sudo apt install screen
- Launch a new screen session for your Satisfactory dedicated server with a descriptive name:
screen -S satisfactory-server
- Start your Satisfactory server inside the screen session as usual:
./FactoryServer.sh
- Detach from the screen session to keep the server running in the background by pressing Ctrl + A → D.
- Reattach to the session anytime with:
screen -r satisfactory-server
Setting up a service file
Creating a service file is more recommended because it enables your server to start automatically upon boot if configured. Here are these steps:
- Create a new service file using nano:
sudo nano /etc/systemd/system/satisfactory.service
- Paste the following lines into the file, adjusting the User, Group, WorkingDirectory, and ExecStart paths as needed for your setup:
[Unit]
Description=Satisfactory dedicated server
Wants=network-online.target
After=syslog.target network.target nss-lookup.target network-online.target
[Service]
Environment="LD_LIBRARY_PATH=./linux64"
ExecStartPre=/usr/games/steamcmd +force_install_dir "/home/steam/satisfactory" +login anonymous +app_update 1690800 validate +quit
ExecStart=/home/steam/satisfactory/FactoryServer.sh
User=steam
Group=steam
StandardOutput=journal
Restart=on-failure
WorkingDirectory=/home/steam/satisfactory
[Install]
WantedBy=multi-user.target
- Save the file and exit nano by pressing Ctrl + X → Y → Enter.
- Enable the service to start on boot:
sudo systemctl enable satisfactory.service
- Start the Satisfactory service:
sudo systemctl start satisfactory.service
- Verify that the server is running:
sudo systemctl status satisfactory.service
If everything is set up correctly, you should see an output indicating that the server is active and running:
● satisfactory.service - Satisfactory dedicated server
   Loaded: loaded (/etc/systemd/system/satisfactory.service; enabled; vendor preset: enabled)
   Active: active (running) since Tue 2024-03-31 15:46:33 UTC; 1min 17s ago
 Main PID: 12345 (FactoryServer)
    Tasks: 9 (limit: 4915)
   Memory: 200.0M
      CPU: 10s
   CGroup: /system.slice/satisfactory.service
           └─12345 /home/steam/satisfactory/FactoryServer.sh
6. Connect to your server
With your Satisfactory dedicated server online, it’s time to configure it within the game client. Here’s how:
- Launch the Satisfactory game client and navigate to the Server Manager menu.
- In Satisfactory Server Manager, select Add Server and enter your server’s public IP address and port to establish a connection.
- After successfully connecting, you’ll be prompted to claim the server. Here, you can specify the server name and admin password.
- Go to the Server Settings tab to fine-tune your initial configurations, such as setting up a player password to restrict server access.
- Switch to Create Game to select a starting world and customize the session name. Check the Join option if you want the server to automatically join once the world loads.
- Click the Join Game button to launch your gaming session on the server.
After completing the setup, you’re ready to invite your friends to join your Satisfactory server.
7. Customize your Satisfactory server
Your Satisfactory server offers various customization options through INI configuration files, allowing you to improve gameplay and manage server operations. Before modifying these files, you must first gracefully shut down your server. Here’s how:
- Open Satisfactory and navigate to Server Manager → Server Console.
- Type quit and press Enter. This command saves the server’s current state to the INI files and exits the server gracefully.
- Navigate to your server’s configuration directory:
cd /home/steam/satisfactory
ServerSettings.ini configuration
The ServerSettings.ini file contains options to pause the server when no one joins and autosave the current gameplay when a player disconnects. You can access it using the following:
nano ./FactoryGame/Saved/Config/LinuxServer/ServerSettings.ini
Here’s a basic configuration to customize these settings:
[/Script/FactoryGame.FGServerSubsystem]
mAutoPause=False
mAutoSaveOnDisconnect=True
Engine.ini configuration
The Engine.ini file includes scripts that can improve server performance, which is crucial for a smooth Satisfactory multiplayer experience. Open the file with:
nano ./FactoryGame/Saved/Config/LinuxServer/Engine.ini
To disable server crash reporting, add these:
[CrashReportClient]
bImplicitSend=False
To customize the client disconnection timeout, add these lines, replacing xx with your desired timeout duration:
InitialConnectTimeout=xx.0
ConnectionTimeout=xx.0
To override the default number of autosave slots, use this:
[/Script/FactoryGame.FGSaveSession]
mNumRotatingAutosaves=xx
If you want to modify the server’s tick rate, adjust the following lines:
[/Script/OnlineSubsystemUtils.IpNetDriver]
NetServerMaxTickRate=xx
LanServerMaxTickRate=xx
[/Script/SocketSubsystemEpic.EpicNetDriver]
NetServerMaxTickRate=xx
LanServerMaxTickRate=xx
[/Script/Engine.Engine]
NetClientTicksPerSecond=xx
After editing these configuration files, restart the server with:
sudo systemctl restart satisfactory.service
Updates and monitoring
Currently, the Linux version doesn’t support automated Satisfactory server updates. However, you can manually update using the same SteamCMD command used during installation:
./steamcmd.sh +login anonymous +force_install_dir /home/steam/satisfactory +app_update 1690800 validate +quit
If your server runs as a background service and you want to monitor its performance without opening server logs, run the following:
sudo systemctl status satisfactory.service
Advanced Satisfactory server configuration tips
For advanced customization and control of your Satisfactory server, explore these best practices using server admin commands.
Set up a static IP for your server
Assigning a static IP address ensures your Satisfactory server remains accessible at the same address, which is useful for regular players joining your server. A static IP also simplifies other processes like port forwarding.
Here’s how to set it up:
- Open the network configuration file:
sudo nano /etc/network/interfaces
- Modify the file to establish a static IP address for your server. Here’s an example:
auto eth0
iface eth0 inet static
address 192.168.1.50
netmask 255.255.255.0
gateway 192.168.1.254
dns-nameservers 8.8.4.4
Ensure the interface name and IP address match those of your network.
- Restart the networking service to apply the changes:
sudo systemctl restart networking
Configure port forwarding if behind a router
Port forwarding is crucial for directing external traffic to your Satisfactory server, especially if it operates behind a router. This ensures players outside your local network can connect to your server.
Follow these steps:
- Log in to your router’s web interface, usually by typing its IP address into a web browser.
- Navigate to the Port Forwarding, Gaming, or Virtual Server section within the router settings.
- Set up port forwarding rules for the game port and query port your server uses.
- Input the local IP address and server ports you want to open.
- Save your router’s settings and restart it if required.
Enhance server security with a firewall and Fail2ban
Securing your server against unauthorized access and potential threats is essential. You can implement the Uncomplicated Firewall (UFW) and set up Fail2ban for enhanced protection.
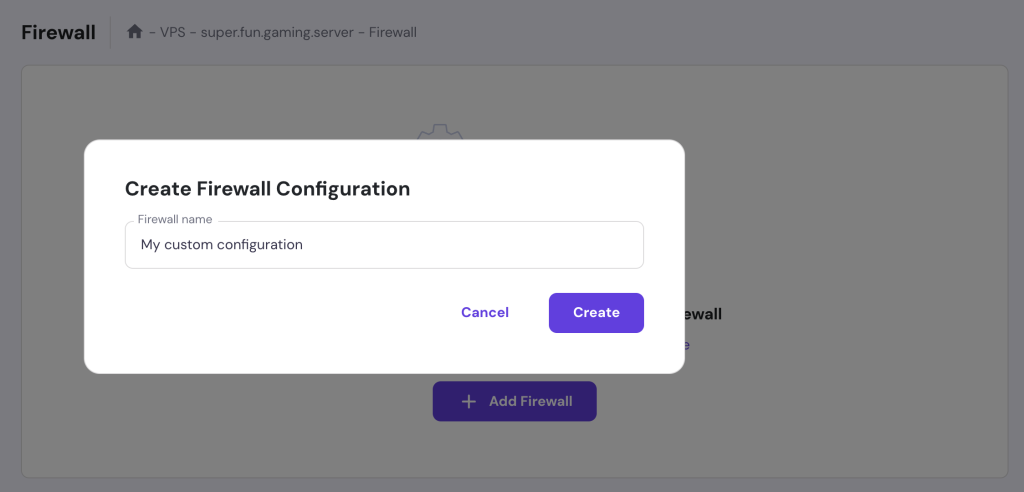
If you host your Satisfactory server on Hostinger, here’s how to set up UFW via hPanel:
- Log in to hPanel and go to VPS → Manage → Security → Firewall.
- Select Add Firewall and give your custom configuration a name.
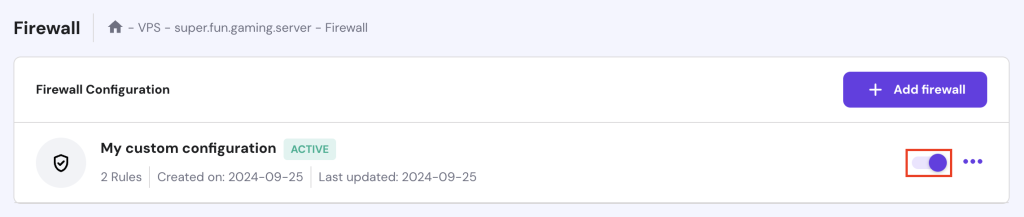
- Click the three-dot horizontal button and choose Edit.
- Add firewall rules by filling in the designated fields and click Add Rule.

- Once done, return to the Firewall page and activate your configuration by toggling it to the right.
Ask Kodee
You can ask Kodee to create a new firewall rule for your VPS. Simply ask "Create and activate a new firewall rule that opens port 7777 TCP/UDP to any IP address."
Alternatively, you can configure UFW manually:
- Install UFW if it’s not pre-installed with:
sudo apt install ufw
- Configure firewall rules to permit only necessary traffic, like your game and query ports. For example:
sudo ufw allow 7777/tcp
sudo ufw allow 7777/udp
Replace 7777 with your specific game port numbers.
- Activate UFW to enforce the firewall settings:
sudo ufw enable
Meanwhile, Fail2ban helps protect your server by monitoring logs and banning suspicious IPs. Here’s how to set it up:
- Install Fail2ban on your system:
sudo apt install fail2ban
- Copy the default configuration file for customization:
sudo cp /etc/fail2ban/jail.conf /etc/fail2ban/jail.local
- Edit the Fail2ban configuration:
sudo nano /etc/fail2ban/jail.local
- Restart the Fail2ban service to activate your settings:
sudo systemctl restart fail2ban
Conclusion
In this guide, you’ve learned how to set up and customize dedicated servers for Satisfactory, from the initial installation to implementing advanced security measures.
By following these instructions, you’re now well-prepared to launch your own server and provide a tailored, secure gaming environment for yourself and your fellow players. Enjoy your Satisfactory adventures!
How to make a Satisfactory server FAQ
How much does it cost to run a Satisfactory server?
The cost of running a Satisfactory server depends on the hosting service, server specifications, and usage. It typically ranges from $10 to $20/month, with costs increasing as you add more players or require higher specifications.
How can I manage my Satisfactory server remotely?
To manage a Satisfactory server remotely, use tools such as game server management software or SSH for direct access. These tools let you adjust settings, update the game, and monitor performance from any location.
Can I install mods on my Satisfactory dedicated server?
Yes, you can install mods on your Satisfactory dedicated server to enhance gameplay. However, ensure that the mods and customizations are compatible and kept up-to-date to prevent conflicts and guarantee a smooth experience for all players.
All of the tutorial content on this website is subject to Hostinger's rigorous editorial standards and values.

Ariffud is a Technical Content Writer with an educational background in Informatics. He has extensive expertise in Linux and VPS, authoring over 200 articles on server management and web development. Follow him on LinkedIn.


