What is a WordPress favicon and how to add one: 4 quick methods
Sep 15, 2026
/
By Aris S.
/
6 min Read
A WordPress favicon is the small site icon that appears in browser tabs, search results, and bookmarked pages. You can add or change it directly in WordPress using the Site Editor, the WordPress Customizer, a favicon plugin, or by editing your theme files manually.
In this tutorial, you’ll learn how to prepare a favicon image and add it to WordPress using each of these four methods. We’ll also explain which method fits block themes, classic themes, plugin-based setups, and users who prefer to edit WordPress files directly.
What is a WordPress favicon?
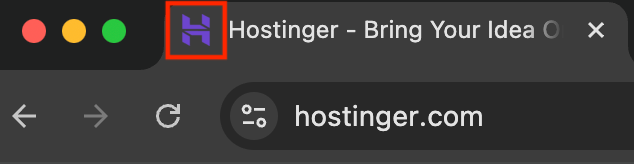
A WordPress favicon, also called a site icon, is the small image that represents your WordPress website in browser tabs, bookmarks, search results, and other supported locations. It typically uses a simplified version of your logo or another recognizable element of your brand.
In WordPress, you can set the favicon through built-in site editing features or add it using a plugin or your theme files. Once configured, the same site icon helps visitors identify your WordPress site when they have multiple tabs open or encounter it in search results.
How to generate a favicon image
To create a favicon for WordPress, use a graphic design tool or an online favicon generator such as Real Favicon Generator. Before uploading the image to WordPress, make sure it meets the recommended size, aspect ratio, format, and search engine requirements below.
So, consider the following:
- Resolution. Since your icon only appears on SERPs and browser tabs, an overly high-resolution image might not be necessary. The ideal WordPress favicon size is 512 x 512 pixels.
- Aspect ratio. Favicon on your WordPress site must display properly in a 1:1 aspect ratio. Otherwise, it might get cropped or warped, hurting the web page’s appearance.
- Color palette. Using a transparent background will make your favicon stand out more, especially if you use white elements or icons. Just remember to use the same palette as your brand to maintain a consistent site identity.
- File format. PNG format is necessary if your WordPress site’s favicon file contains a transparent background. Otherwise, you can use extensions like ICO, JPEG, or GIF that WordPress supports.
- Search engine requirements. Your WordPress website icon must adhere to Google’s favicon guidelines to display correctly on SERPs.
Favicon creation depends on the design tool you use, so keep this step focused on preparing a square image that meets WordPress and search engine requirements. If you need a simpler way to create the source image, you can use Hostinger AI Logo Generator.
Pro tip
We recommend not changing your WordPress favicon too often, as it is a key part of your site's identity. Frequent changes can prevent visitors from forming a strong brand association.
If you’re adding a favicon to a website that doesn’t use WordPress, see our guide on how to add a favicon to a website for platform-agnostic setup methods.
Ways to add a favicon to WordPress
There are four main ways to add a favicon to WordPress: using the Site Editor with a block theme, the WordPress Customizer with a classic theme, a favicon plugin, or manual theme-file editing. Choose the method that matches your WordPress theme and access level.
1. Use the Gutenberg block editor
Use the WordPress Site Editor to add a favicon if your site uses a block theme. This method is available in WordPress 5.9 and later and lets you set the uploaded image as the site icon from the Site Logo block.
To add a WordPress favicon with the Site Editor, follow these steps:
- Log in to your WordPress dashboard → Appearance → Editor.
- Hover over the area where you want to put the icon and click the plus (+) icon. While you can place it anywhere, we recommend one of the corners of the header.
- Search and select the Site Logo block.
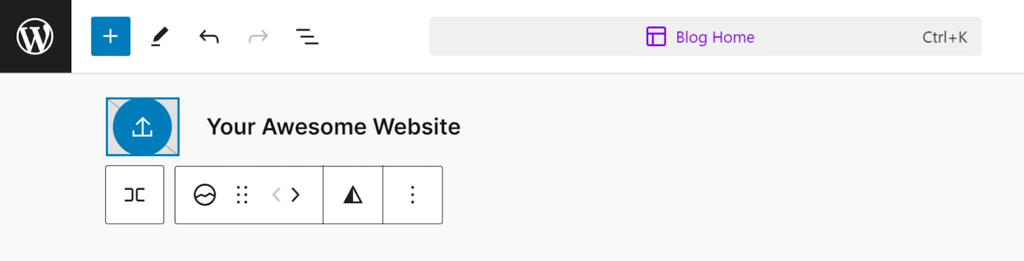
- Hover over the block and click the Upload icon.
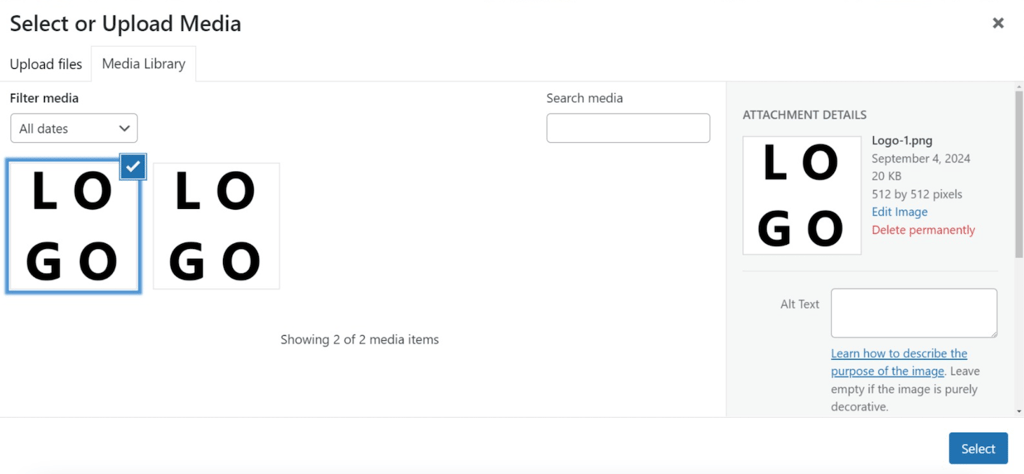
- Upload your favicon file or select one from your WordPress Media Library. Hit Select to confirm.
- Click the favicon and navigate to the block settings section on the right sidebar. If you don’t see the option, click the Settings button on the top right of your screen.
- From the sidebar, turn on the Use as site icon feature.
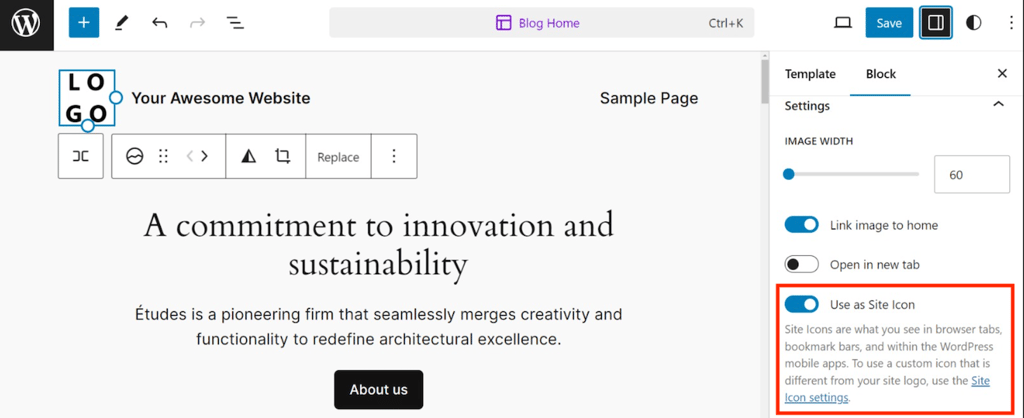
- Click Save on the top right to apply the changes.
After saving the changes, open your WordPress site in a browser and confirm that the new favicon appears instead of the default WordPress icon.
2. Access and configure through the WordPress Customizer
If your site uses a classic WordPress theme, add the favicon through the WordPress Customizer. This method is available in WordPress 4.3 and later and lets you set the favicon from the Site Identity settings.
- From your WordPress dashboard, go to Appearance → Customizer. If you can’t see the option, add wp-admin/customize.php to your website URL to open it manually.
- Navigate to the left sidebar → Site Identity. Click the Select site icon button.
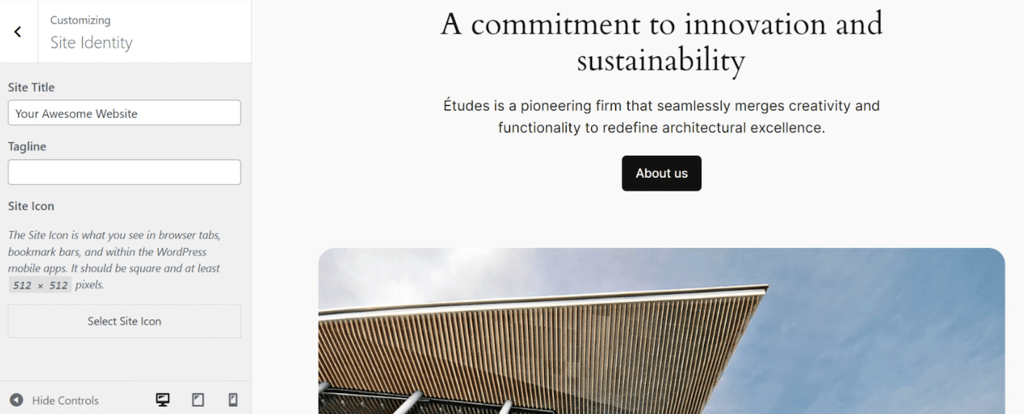
- Upload your image or select from the Media Library. Hit Select to confirm.
- Adjust the favicon dimension to your needs and click Crop image. To use the default settings, select Skip cropping.
- Preview the favicon under the Site Icon section, then click Publish to apply it to your WordPress site.
3. Utilize RealFaviconGenerator plugin
If you want more favicon customization options and device previews, use a WordPress favicon plugin. In this tutorial, we’ll use Favicon by RealFaviconGenerator to configure the site icon from the WordPress dashboard.
After installing and activating the plugin, follow these steps to create and apply the favicon to your WordPress site:
- From your WordPress admin dashboard, navigate to Appearance → Favicon.
- Click Select from the Media Library and upload a new image, or select an existing one from your WordPress library.
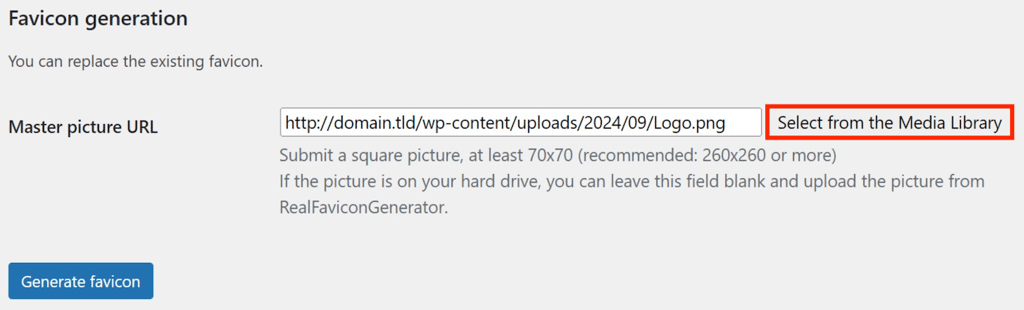
- Click Generate favicon, and the plugin will redirect you to a separate page.
- If you wish to keep the default image, select the Use the original image as is option. Otherwise, adjust settings like the backdrop color, radius, and image size.

- Scroll down to the Favicon Generator Options and click Generate your Favicons and HTML code to confirm.
That’s it! You will be redirected back to the Favicon menu in the WordPress dashboard. Click the Check your favicon button to check if your site icon works properly. To replace the current one, simply repeat the steps above.
Remember that this plugin must remain running to display the favicon. If you deactivate or uninstall it, your website icon will no longer be displayed.
Regularly update the plugin to avoid security risks and bugs. To simplify the task, Hostinger managed WordPress hosting users can enable the auto-update feature in Hostinger dashboard.

4. Manually edit theme files
You can also add a favicon manually by uploading the favicon files to your WordPress root directory and adding the required code to your theme files. This method is best suited to developers or users who are comfortable editing WordPress files directly.
Important! Ideally, you should check code snippets in a WordPress staging environment before adding them to the live site. This step ensures the new additions won’t cause potential serious errors.
Before doing so, create and activate a child theme to ensure your favicon code remains intact after an update. Then, follow these steps:
- Open the Real Favicon Generator website, click Select your Favicon image, and upload the favicon file from your computer.
- Scroll to the Favicon Generator Options section and click the Path tab. Choose where you want to put the favicon image. Ideally, you should pick the root directory.
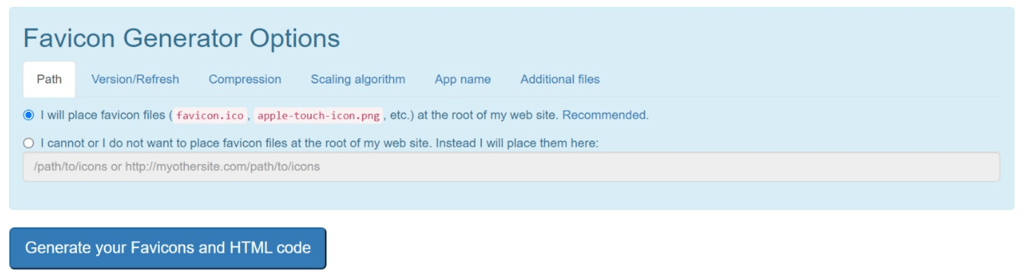
- Click Generate your Favicons and HTML code.
- You will get redirected to the installation manual page. Click the Favicon package button to download the favicon files.
- Copy the code snippet and keep it safe, For example, a TXT file. Alternatively, keep this tab open since we’ll need it later.
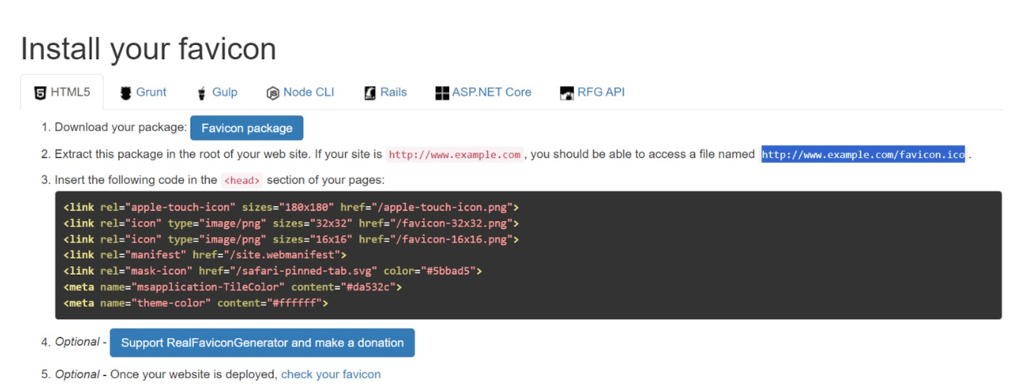
Once the favicon files and HTML code are ready, add them to your WordPress installation using the steps below:
- Access your WordPress website’s public_html root directory using a File Transfer Protocol (FTP) client like FileZilla or your hosting provider’s file manager.
- Upload and extract the downloaded archive into the public_html directory. Remember, public_html should contain only the favicon files, not the folder.
- Enter the following URL in your web browser to confirm that WordPress can read your favicon. Replace domain.tld with your actual domain name:
domain.tld/favicon.ico
- Open your WordPress dashboard and navigate to Tools → Theme File Editor.
- From the Theme Files menu on the right, select header.php. If your theme doesn’t have it, edit the functions.php file instead.
- Add the HTML code from Real Favicon Generator at the bottom of your file after the ?> tag. In our case, the snippet looks like this:
<link rel="apple-touch-icon" sizes="180x180" href="/apple-touch-icon.png">

<link rel="icon" type="image/png" sizes="32x32" href="/favicon-32x32.png">

<link rel="icon" type="image/png" sizes="16x16" href="/favicon-16x16.png">

<link rel="manifest" href="/site.webmanifest">

<link rel="mask-icon" href="/safari-pinned-tab.svg" color="#5bbad5">

<meta name="msapplication-TileColor" content="#da532c">

<meta name="theme-color" content="#ffffff">
- Click Update File to save the changes.
To remove the manually added favicon, delete the favicon code from the theme file and remove the corresponding image files from the WordPress root directory.
Which WordPress favicon method should you use?
Choose the favicon method that matches your WordPress setup. Use the Site Editor if your site runs on a block theme, the WordPress Customizer for a classic theme, a favicon plugin if you want additional customization and previews, or manual theme-file editing if you prefer direct control over the implementation.
For most users, the built-in WordPress options are the simplest because they avoid extra plugins and code changes. Use a plugin when you need more control over favicon formats or device previews, and choose the manual method only if you are comfortable editing WordPress theme files and managing favicon assets directly.
This article is a localized version of What is a WordPress favicon and how to add one: 4 quick methods, originally published in English.

Aris is a Content Writer specializing in Linux and WordPress development. He has a passion for networking, front-end web development, and server administration. By combining his IT and writing experience, Aris creates content that helps people easily understand complex technical topics to start their online journey. Follow him on LinkedIn.