How to set up email on Android: A step-by-step guide
Mar 10, 2026
/
Ariffud M. & Elvinas S.
/
4 min Read
Setting up email accounts on Android devices is essential for staying connected and managing your messages on the go. In this tutorial, you’ll learn how to set up email on Android.
Whether for a personal or business email, our instructions will help you configure your account in no time. By the end of this guide, you’ll be able to send and receive emails on your Android phone or tablet, just like on web or desktop applications.
How to Set Up Email on Android
This tutorial will guide you through setting up a Hostinger email account using the Gmail app on Android. It lets you create a custom email address, such as yourname@yourdomain.tld.
Hostinger’s email hosting service offers up to 50 GB of storage, enhanced antivirus and anti-spam features, and cloud-based infrastructure. Check out our complete guide if you’re interested in creating custom email addresses with Hostinger.

1. Open the Gmail App
Gmail offers a user-friendly interface and efficient syncing with Google services, making it ideal for managing your email accounts. This email app also allows you to set up emails from other providers, including Hostinger.
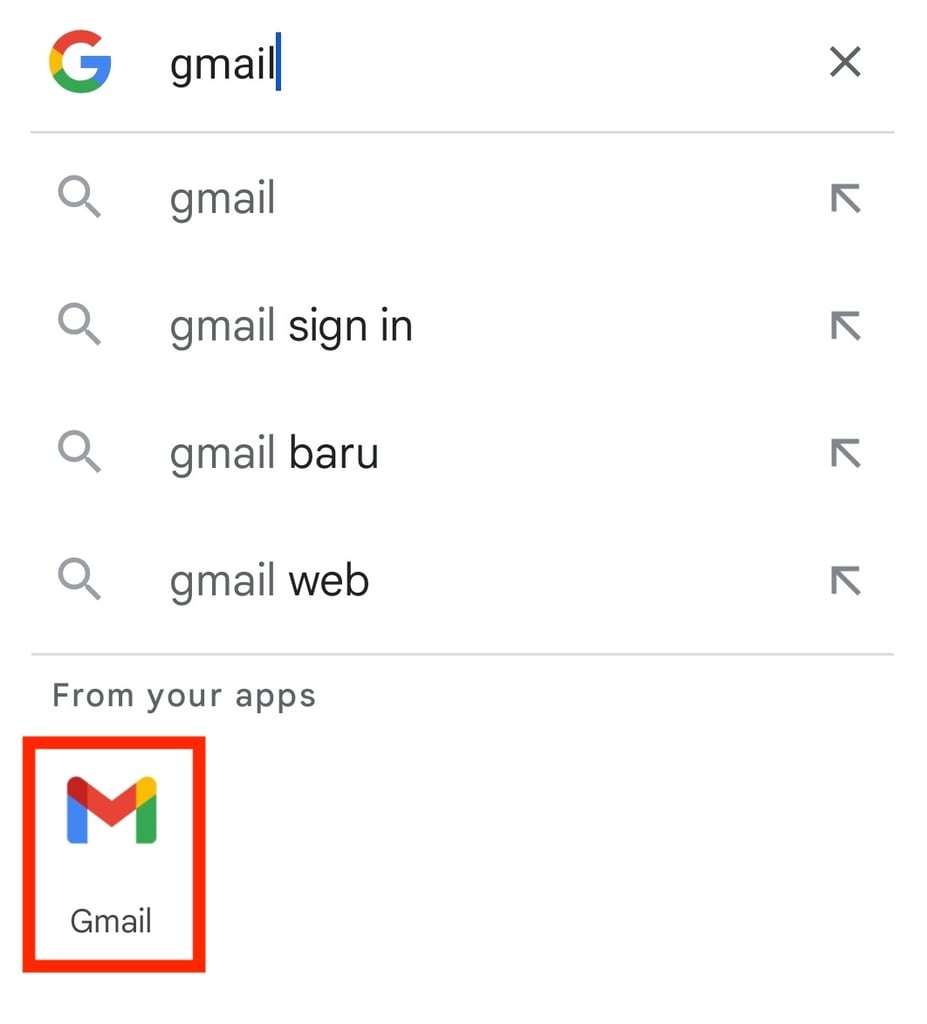
First, locate Gmail on your Android device. Find and tap the Gmail app icon on your home screen or in the app drawer. Alternatively, open the Google Search widget on your phone’s home screen, type Gmail, and tap the Gmail app icon from the search results.
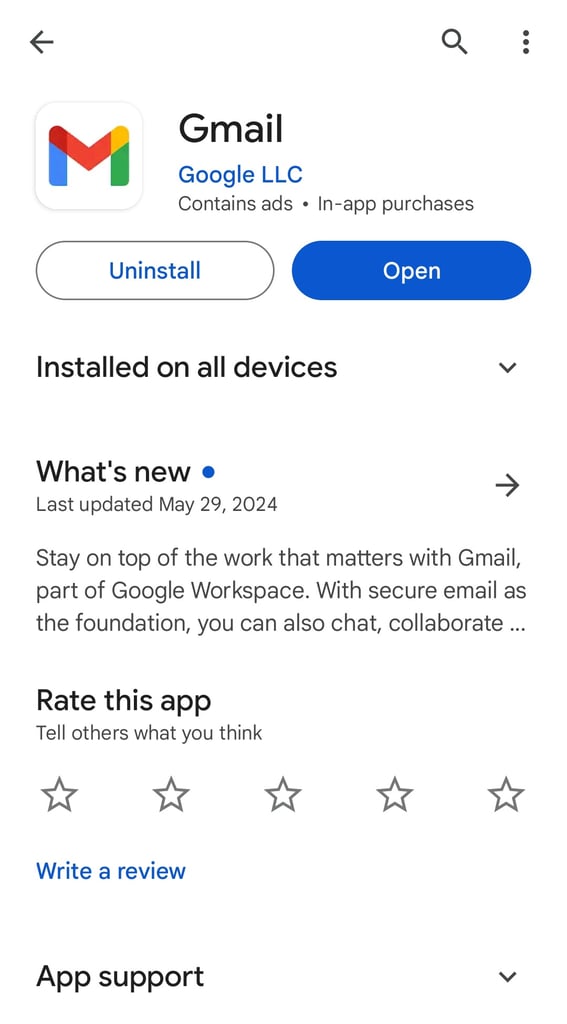
If you can’t find Gmail using the above methods, it means that the Gmail app is not pre-installed. Follow these steps to install Gmail on your phone:
- Open the Google Play Store app.
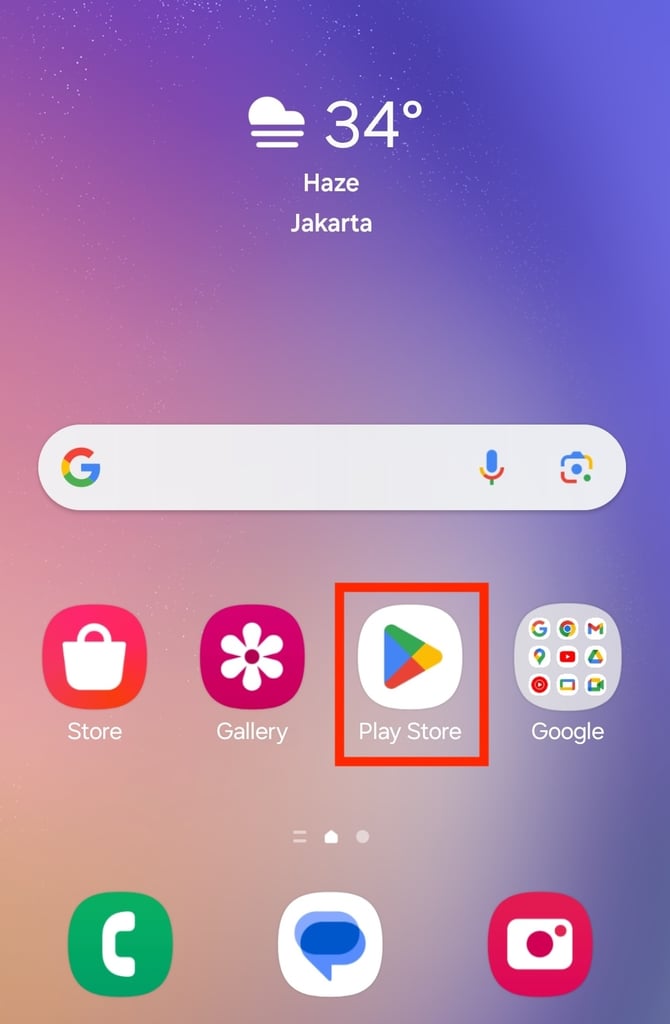
- Enter Gmail in the search bar.
- Tap Install to download its latest version.
Warning! Always use Google Play Store to install Gmail. Downloading Android apps from untrusted sources may compromise your device's security.
2. Add a New Email Account
Once you have the Gmail app open, it’s time to set up your email account:
- Tap the menu icon in the top-left corner of the screen.
- Go to Settings → Add account.
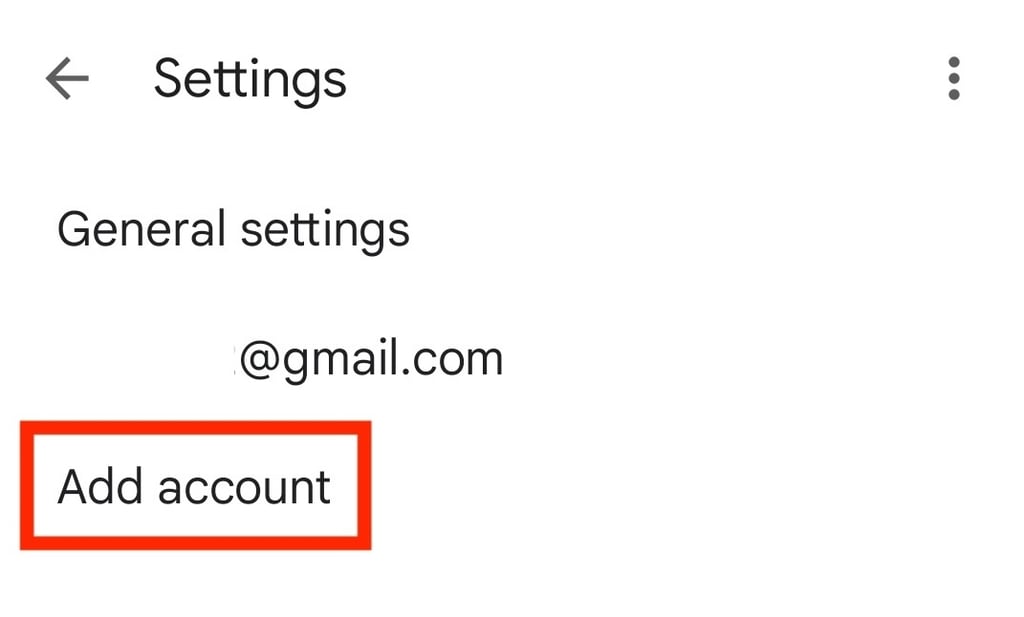
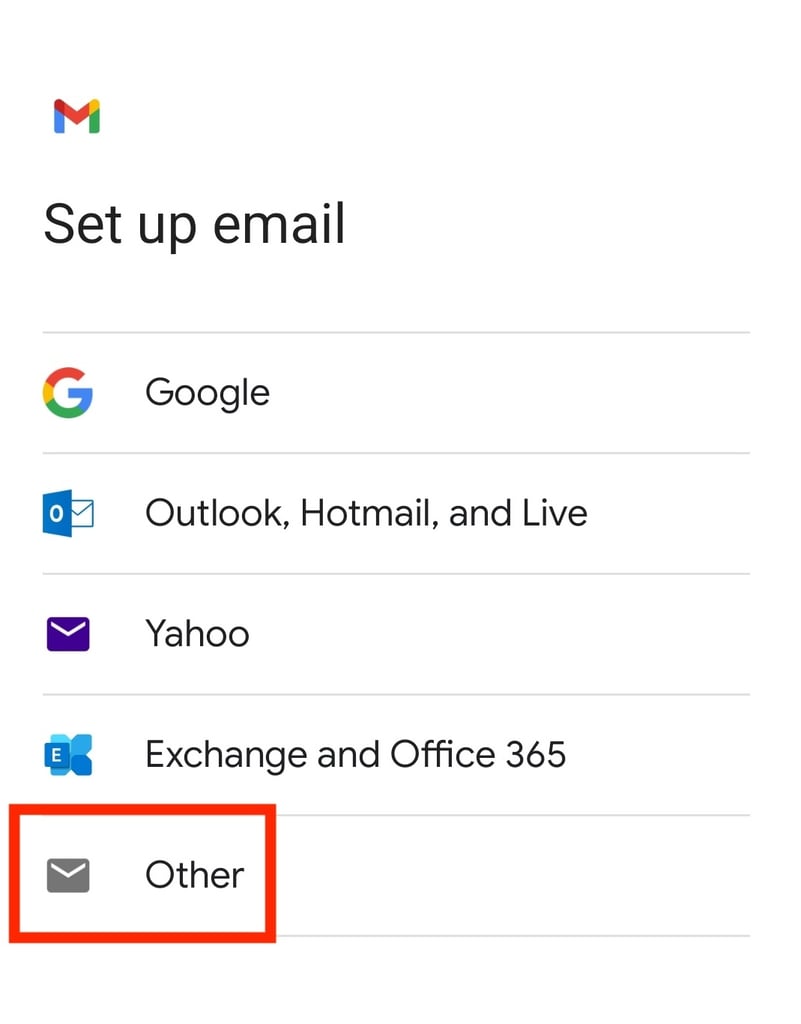
- Choose the email provider you want to add. Since we’ll configure a Hostinger email address, select Other.
3. Enter Your Email Details
After selecting the provider, enter your email details and select the account type:
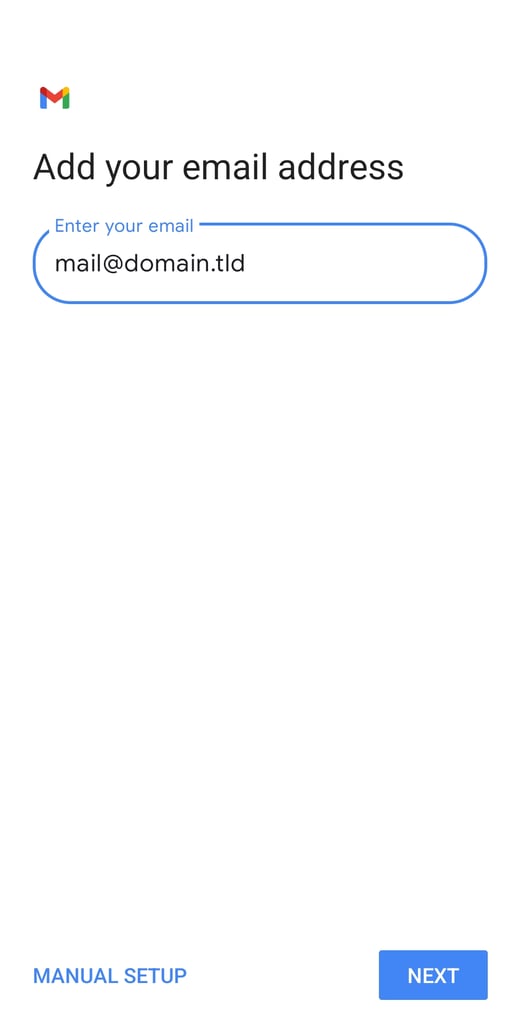
- Enter your full email address and tap NEXT.
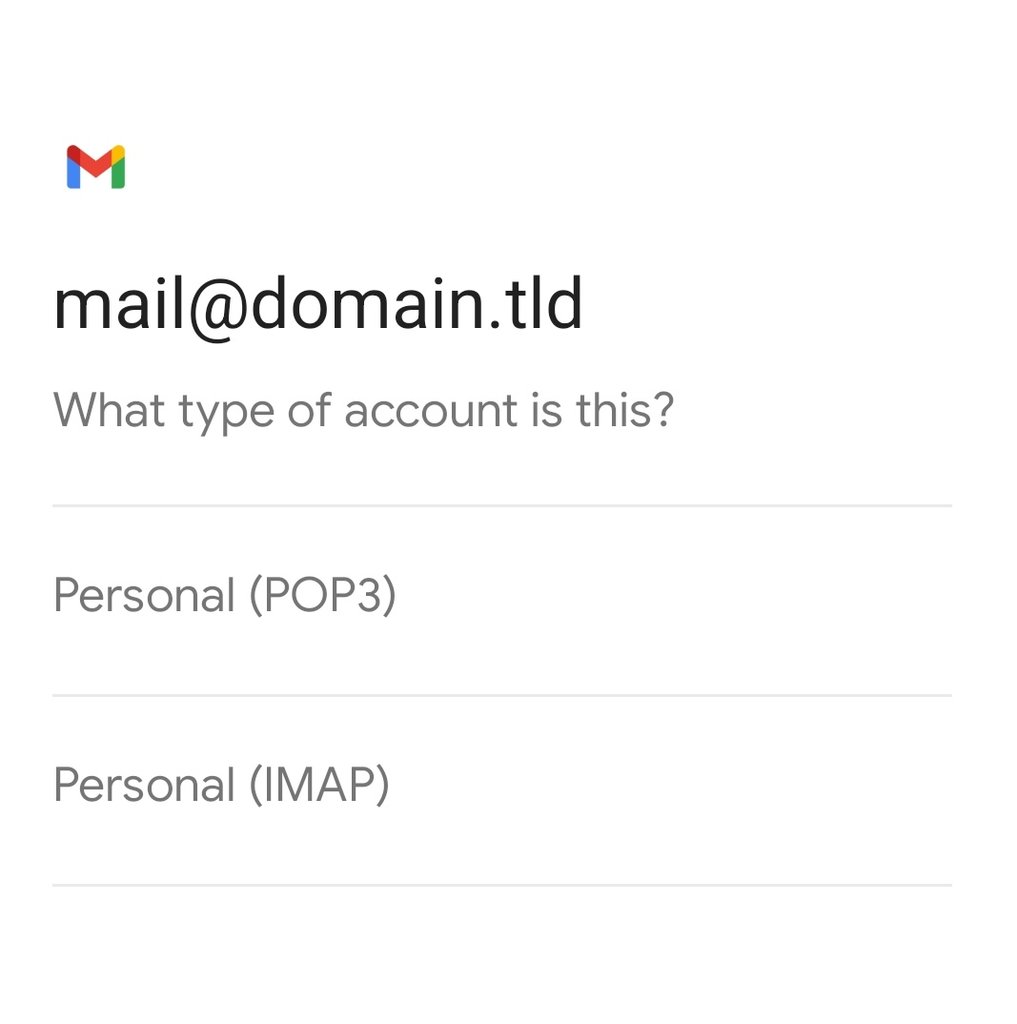
- Choose between POP3 and IMAP as your account type. We recommend IMAP because it syncs your email across multiple devices, so any changes you make will be reflected everywhere.
- Enter the password associated with your email account.
Suggested Reading
Check out our article to learn more about the differences between POP3 and IMAP.
4. Configure Server Settings
Configuring your server settings will ensure your email account works properly on your Android device. Here’s how to configure Hostinger email’s settings on Gmail:
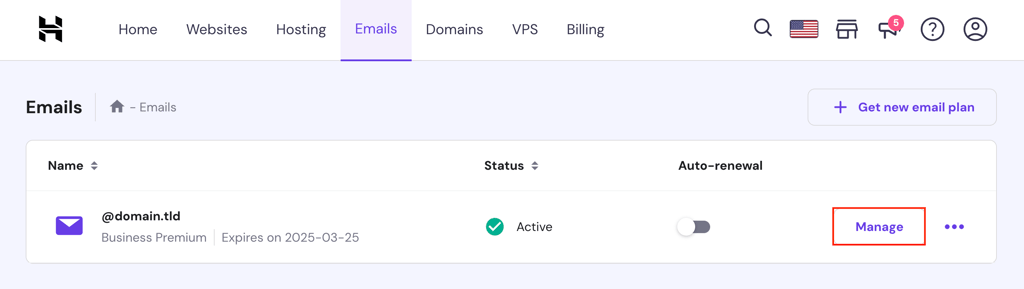
- Log in to hPanel and go to Emails → Manage next to your email account.
- Select Connect Apps & Devices from the email dashboard’s left sidebar.
- Look for the Manual Configuration section to find the incoming and outgoing server details.
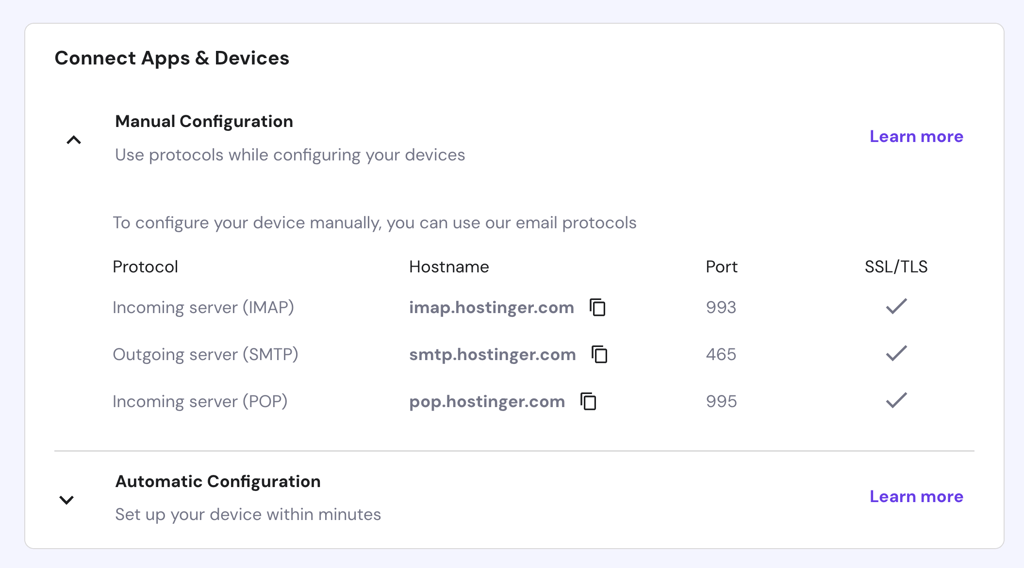
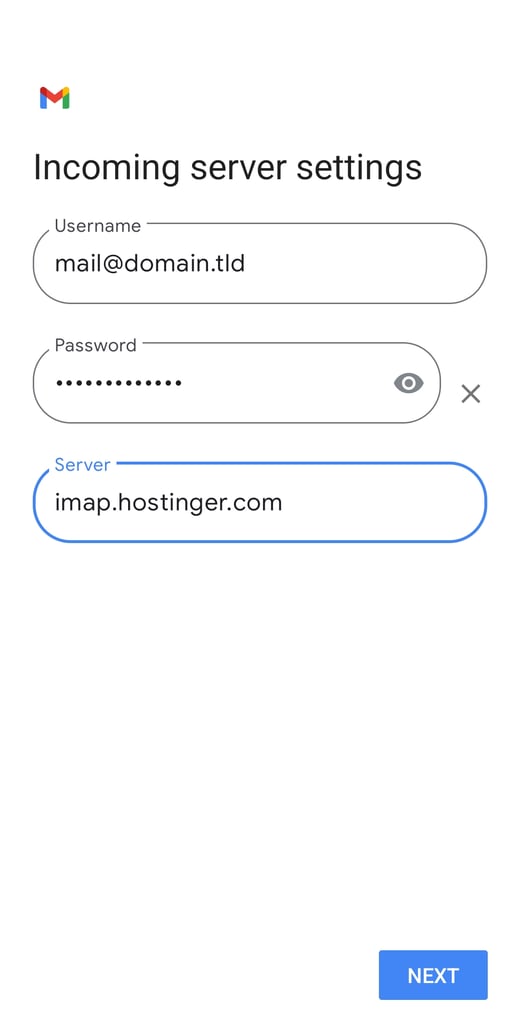
- On Gmail’s Incoming server settings screen, enter the incoming server’s hostname in the appropriate field.
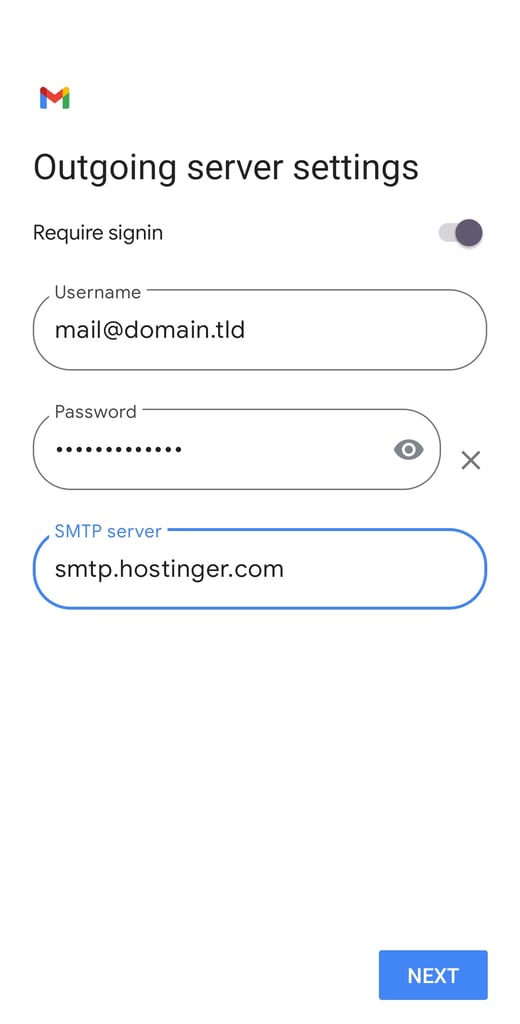
- Enter the outgoing server’s hostname in the SMTP server field and tap NEXT.
For other popular email providers, refer to these server configuration tables:
IMAP settings:
| Provider | Incoming server | Port | Security type | Outgoing server | Port | Security type |
| Gmail | imap.gmail.com | 993 | SSL | smtp.gmail.com | 587 | TLS |
| Yahoo | imap.mail.yahoo.com | 993 | SSL | smtp.mail.yahoo.com | 465 or 587 | SSL |
| Outlook | imap-mail.outlook.com | 993 | SSL/TLS | smtp-mail.outlook.com | 587 | TLS |
| Microsoft 365 | outlook.office365.com | 993 | SSL/TLS | smtp.office365.com | 587 | TLS |
POP settings:
| Provider | Incoming server | Port | Security type | Outgoing server | Port | Security type |
| Gmail | pop.gmail.com | 995 | TLS | smtp.gmail.com | 587 | TLS |
| Yahoo | pop.mail.yahoo.com | 995 | SSL | smtp.mail.yahoo.com | 465 or 587 | SSL/TLS |
| Outlook | pop-mail.outlook.com | 995 | SSL/TLS | smtp-mail.outlook.com | 587 | TLS |
| Microsoft 365 | outlook.office365.com | 995 | SSL/TLS | smtp.office365.com | 587 | TLS |
5. Customize Account Options
Customizing your account options helps your emails stay organized and responsive. Here are the key settings to configure:
- Email checking frequency. Choose how often your device checks for new emails. This can range from manual refresh to every 1 hour.
- Notifications. Enable notifications for new emails to stay informed.
- Sync email. Ensure your emails, folders, and read/unread status are updated across all devices.
- Attachment settings. Choose whether attachments are automatically downloaded when your device is connected to Wi-Fi.
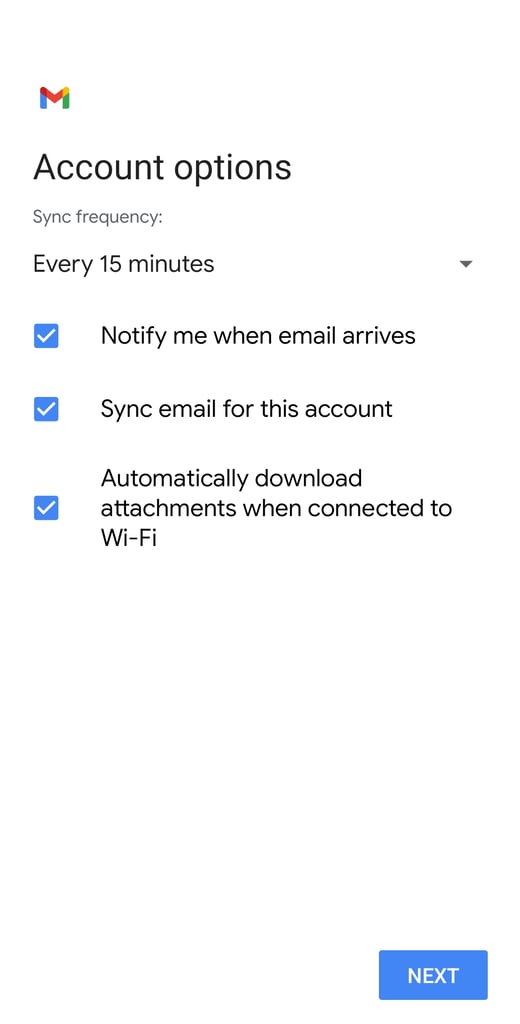
After setting up these options, tap NEXT.
6. Complete the Setup
Once you’ve customized your account options, follow these final steps to complete the setup:
- Enter your account and display name. Then, tap NEXT.

- Your email account setup is now complete, and you’ll be redirected to the Inbox screen.
- If you’ve previously configured another account, tap your profile icon in the top right corner and select the newly added email address to switch between accounts.
If you encounter any issues during setup, follow these troubleshooting tips:
- Recheck the email address and password. Ensure that you have entered the correct email address and password.
- Adjust server settings. Double-check that your incoming and outgoing server settings are correct.
- Update the Gmail app. Make sure you have the latest version of the Gmail app installed.
- Security permissions. Verify that the necessary security permissions are granted for the Gmail app.
Suggested Reading
After setting up your email, we advise you to learn how to back up emails with our guide.
Conclusion
In this guide, you’ve learned how to set up email accounts on Android devices using Gmail. From opening the app to configuring server settings and customizing options, these steps ensure your emails stay organized across different devices.
We hope you found this article helpful. If you have any questions or need further assistance, feel free to leave us a comment below.
How to Set Up Email on Android FAQ
This section answers the most common questions about setting up emails on Android phones and tablets.
Can I Set up Multiple Email Accounts on My Android Device?
Yes, you can set up multiple email accounts on your Android device. Simply tap Add account in the Gmail app, follow the same setup steps for each email, and switch between them using the profile icon.
Are There Any Specific Port Numbers or Security Protocols for Email Setup on Android?
Yes, for example, Hostinger Mail uses port 993 (IMAP), 995 (POP), and 465 (SMTP), all with SSL/TLS protocols. Meanwhile, Gmail, Outlook, and Microsoft 365 use port 993 (IMAP) with SSL/TLS, 995 (POP) with SSL/TLS, and 587 (SMTP) with TLS.
Is It Possible to Set up a Custom Signature for Outgoing Emails on Android?
Yes, you can set up a custom signature for outgoing emails on Android. Open Gmail → Settings, select your email account and tap Mobile signature. Create your desired signature, and it will be added to all emails you send.

Ariffud is a Technical Content Writer with an educational background in Informatics. He has extensive expertise in Linux and VPS, authoring over 200 articles on server management and web development. Follow him on LinkedIn.

Elvinas is a senior server administrator at Hostinger. He monitors the infrastructure’s well-being and keeps the uptime at a maximum. Besides server management, web development has always been one of his biggest passions.


Comments
42 responsesMarch 04 2020
i tried this process...but it gives error
March 12 2020
Hi John, What is the error?
August 04 2020
Thank you for the good explanation. it worked
August 25 2020
After connecting hostinger webail to the outlook app in android, after a while it says it is not on a secure connection and is recommened to be removed?
November 11 2020
Hey there Sam! :) Certain apps and platform combinations require the emails to use different encryption method. Some require SSL, some TLS, some NONE :) If you are using NONE, you may get the message you receive. This may be necessary though. You can try with the other encryption methods, but you may have to use the one that you are currently using, depending on the app version.
September 01 2020
thank you for the tutorial. It worked well!
September 09 2020
Hello, when I send a test email, it is not receiving from Gmail or Hotmail. Please check and advise. I used https://webmail1.hostinger.com/
November 11 2020
Hey Emad. Sending a "TEST" email, especially if the name, the content, or both, are listed as "test" or "hey" may get caught by the spam filter. Use something like "If this message arrives, the email works" as message title or content.
September 15 2020
Hey whenever i try it it says couldn't open a connection to server?
November 11 2020
Hey, Ishan. Try with all possible encryption method. Depending on the app version, phone type, etc, the encryption options may be different. Play with the SSL/TLS/NONE settings and one of them should work.
September 19 2020
Hi, i tried this process...but it gives error "couldn't open connection to server gmail"
November 18 2020
Hey Pradeep. The emails shouldn't be connecting to gmail. Are you trying to login your gmail email? The tutorial is for the Hostinger emails only, as the SMTP and IMAP used is Hostinger's info :)
September 21 2020
I am getting error of username or password is incorrect.
November 18 2020
Hey there Nikunj. Change your email password, and try again. If this doesn't help, drop our Success team a message and they will h elp you out.
October 03 2020
I could set it up without any issues. But, Now how do I access this over web app of Gmail?
November 18 2020
Hey Belkero. Check this article out.
October 04 2020
Thanks for the elaborate explanation. I am able to set up the email on the android phone. But I am unable to send any emails from my phone. It remains in the outbox. I can see new emails and other data gets synced though. Only sending/reply is the issue - is there any additional setting that needs to be done?
February 02 2021
Hi there! Outgoing inbox is related to SMTP, so I'd suggest checking that out - try different encryption methods (SSL/TLS/NONE) and I'm sure you'll succeed!
November 03 2020
Hi Putting correct user ID and password but getting " User Id /password incorrect error"
February 02 2021
Hi, Maria! The error indicates an issue with the login details you're using. Make sure to use the full email address for username and try resetting your email password to make sure it's correct.
November 07 2020
I have my Hostinger account emails sync to my phone and macbook and they work fine however when an email is read on one platform it does not register as read on the others - ie open email on phone it still states unread on MacBook. Is there anything i haven't set up properly to rectify this issue? Thanks!
February 02 2021
Hi there! It sounds like your devices aren't synchronising often enough; I'd suggest to have a look into your synchronisation settings for the app on both your phone and your MacBook ;)
November 07 2020
Hi, I followed everything in your guide, but I keep getting "could not open connection to server" error. Please help.
February 02 2021
Hi! The most often reason would be that different apps and even versions of apps require different encryption settings. I would suggest trying different out SSL/TLS/NONE settings on your app. If anything, you can always contact our Customer Success team to help you out!
November 11 2020
Hi, I setup my emails on my motorola phone a while ago and all was working fine. Now suddenly I cannot send emails and it wont connect to the server. I have tried different settings but none seem to want to connect.
February 02 2021
Hi, Glenn! I'd suggest trying out different SSL/TLS/NONE settings for encryption as well as different ports. To be sure, I'd suggest to change the email password as well - then you can be 100% certain it's correct. If that fails, don't hesitate to drop a message to our Customer Success team!
February 03 2021
Worked perfectly thank you
April 10 2021
this article helped me... thank you... team.
April 23 2021
Worked really well. Thank you
May 15 2021
Hi! I tried setting up the username on my Android-based smartphone for my Webmail account (step 8 of this tutorial), but I get my email address "emails@myfreesuccess.xyz" in the sender's description. If I send through my desktop PC, all is fine and show's up as "Leks' Account". Please advise.
May 19 2021
Hi Oleksandr, Please contact Customer Success (here) so they can help you solve this ASAP :)
June 01 2021
How to set aliases for the same email account created in hostinger panel?
September 21 2021
Hi Ram, you can create aliases for your Hostinger email following this guide :)
June 04 2021
Getting Error "Couldn't open a connection to server"
September 14 2021
Generally "Couldn’t open a connection to server" suggests an issue with connection - it looks like this is a fairly common issue with Android devices. Try resetting your network settings on your device via Settings > Connections > More connection settings > Reset network connections. Additionally, make sure to check your email IMAP/POP and SMTP settings. Good luck!
June 15 2021
it's login successfully in my phone in Gmail, but it shows can't sync I have tried to sync then show not enough space but my phone have 3 GB space and I have also tried another phone but show the same error for can't sync so cant sync then do not able to mail from Gmail. How to solve it?
September 14 2021
Hello! Make sure that your email account isn't bigger than the amount of space you have left on your device. Also, make sure you have some space on your inbox itself - otherwise you will not be able to receive emails. If you still run into any issues with it, feel free to contact our Customer Success team!
July 01 2021
What a straightforward explanation! I appreciate.
May 04 2022
Thank you so much for this thorough explanation on how to setup Hostinger email on my Android device! These instructions worked like a charm, you guys are the best! ?
May 04 2022
Happy to hear you were able to set your email up well!
December 03 2024
My domain in Wix, and I set it up. but now i want to transfer it to Hostinger and set it up again. if I transfer and set it again, Will I lose an excess to the old Gmail everything?
December 04 2024
Hey! Transferring your domain from Wix to Hostinger won’t affect your Gmail setup as long as the DNS settings are configured correctly after the transfer. If you’re unsure about anything, feel free to contact our Customer Success team—they’ll guide you through the process! ;)