How to create an online course platform
Jul 24, 2026
/
Justina B. & Nadia
/
10 min Read

An online course platform is a web application where students can sign up, access lessons, complete quizzes, and track their progress. Building one used to require a developer or coding skills, but AI-powered no-code tools now make it possible to create a working platform by describing what you want in plain language.
To create an online course platform, you need to validate your topic, plan the course content, choose the right tool, design the interface, test everything, and publish it live.
I recently built my own photography course platform using Hostinger Horizons, and the whole process took about a week from planning to publishing. Here’s every step I followed.
1. Start with market validation
Market validation confirms that people are actively searching for and paying to learn the topic you want to teach. Skipping this step can lead to spending weeks creating a course that has little or no demand.
I wanted to create a photography course, so I started by researching similar courses and educational content. I searched platforms like YouTube, Udemy, and Skillshare using keywords like “photography for beginners,” “portrait photography tips,” and “photo editing basics.”
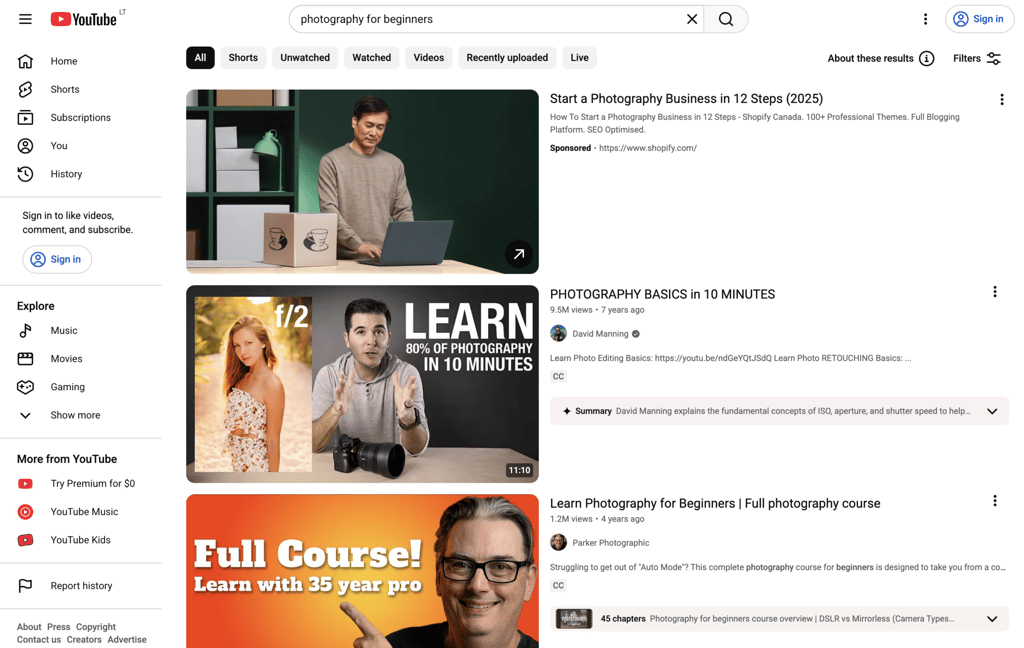
On Udemy, I checked which courses had the highest number of enrollments and reviews, since both are publicly displayed on each course page. I also checked Skillshare, where I used student counts and ratings to identify popular classes. While it provides less detailed data, it was still useful for spotting trending topics.
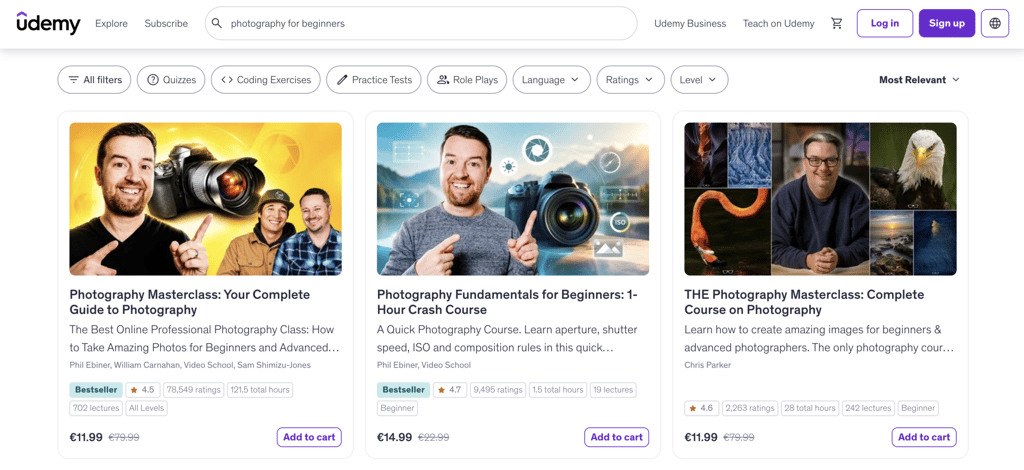
Reading the comments on both platforms helped me understand what learners struggled with and what they wanted to learn next. Questions like “how do I edit without expensive software?” came up repeatedly, which showed me there was demand for lessons on free editing tools. Even 30 minutes of browsing can reveal patterns in what learners ask for but don’t get.
Here are a few ways to validate your course idea:
- Search YouTube, Udemy, and Skillshare for your topic. Analyze the most popular courses, paying attention to their topics, student engagement, and any gaps in their content.
- Use Google Trends to see whether interest in your topic is growing, stable, or declining.
- Look at subreddits, Facebook groups, or forums where your target audience hangs out. Pay attention to the questions people ask repeatedly and the challenges they face.
- Check if competing courses have gaps you could fill. Outdated content, missing topics, or poor production quality can all be opportunities to create a better course.
If you find active demand and room to add something new, your topic is worth pursuing.
2. Define your course goals
Clear goals determine what your course teaches, how in-depth it goes, and what learners should know after completing it. They also keep you focused so you don’t try to teach everything at once.
For my photography course, I set three goals: to teach learners to understand manual camera settings, to compose stronger photos, and to edit their images with confidence. Those learning objectives shaped every lesson I created.
To define your own course goals, ask yourself:
- What specific skill should learners have after completing the course?
- What problem does this course solve?
- Can I break the main goal into three to five measurable milestones?
- Is the scope realistic for the course length I’m planning?
With clear goals, you can show potential students exactly what they’ll get from your course. For example, “Learn to shoot in manual mode in 7 days” is far more compelling to prospective students than “learn photography.”
3. Break the course into modules and lessons
Course structure turns your goals into a clear learning path. Start by dividing the content into modules, each covering a major topic. Then break each module into shorter lessons focused on a single concept or skill.
For my photography course, I created four modules:
- Camera fundamentals like aperture, shutter speed, ISO, and how they work together.
- Composition and lighting, including framing techniques, natural light, and golden hour shooting.
- Editing essentials, from importing photos and making basic adjustments to exporting in Lightroom.
- Building a portfolio by selecting your best work, creating a cohesive look, and sharing it online.
Each module included four to six lessons, each focused on one specific concept or skill. I kept lessons under 15 minutes so learners could finish one in a single sitting and maintain steady progress.
When building your structure, arrange lessons so each one builds on the previous one. A learner shouldn’t encounter advanced techniques like layer masking before they’ve learned basic skills such as cropping and straightening.
4. Decide on course materials
The right mix of content formats helps learners understand and apply what they learn. Video tutorials, downloadable guides, quizzes, and practical assignments each serve a different purpose.
For my photography course, I created short video demonstrations showing camera settings and editing techniques. I also added downloadable cheat sheets for exposure settings, a composition checklist, and a progress tracker.
Practice assignments where learners submit photos for self-review gave them a way to apply each lesson right away.
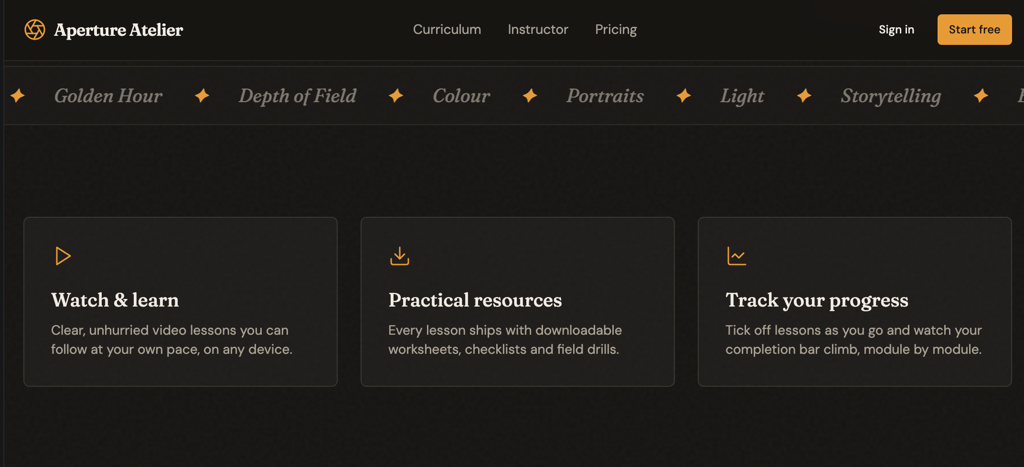
When choosing your course materials, consider which formats best match your topic:
- Video works well for demonstrations, walkthroughs, and anything that benefits from showing a process rather than explaining it.
- Downloadable resources like PDFs, templates, and cheat sheets give learners references they can use while practicing.
- Quizzes help learners check their understanding and keep them active between lessons.
- Assignments encourage practice and reinforce what they learn.
You don’t need professional equipment to create these materials. A screen recording tool, a decent microphone, and good lighting are enough to start.
5. Choosing the right platform for building an online course
The platform you choose affects how much control you have over your course, what features you can offer, and how much you’ll spend.
There are three main approaches. Marketplace platforms like Udemy provide a built-in audience but take a cut of revenue and limit customization.
Self-hosted platforms like WordPress, with a learning management system plugin, offer more control but require technical setup. AI-powered tools like Hostinger Horizons sit in between, offering full customization without requiring code.
Here are the features that matter most for an online course platform:
- User registration and login so students can create accounts, save progress, and return to lessons where they left off.
- Content organization with modules, lessons, and a logical progression that mirrors your course structure.
- Video hosting and playback to deliver your main course content smoothly.
- Downloadable file management so learners can access PDFs, templates, and other resources.
- Progress tracking to show students how far they’ve come and keep them motivated.
- Payment integration if you plan to sell the course directly from your platform.
- Mobile-responsive design, so learners can access the course from their phones and tablets.
I chose Hostinger Horizons because it covered every feature on that list without requiring code. The AI-powered chat interface let me describe what I needed, and Horizons built it.
Plans start from £5.99/month billed annually, and you keep full control over your platform without giving up a percentage of each sale.
6. Define the app’s logic
App logic defines how your platform works from a user’s perspective. Before building anything, decide what happens at each step: sign-up, course browsing, lesson playback, progress saving, and payment processing.
For my photography course, I mapped the full flow. A visitor lands on the homepage, sees the course overview, and signs up. From the dashboard, they navigate through modules, watch video lessons, download resources, and track their completion process.
I described this to Hostinger Horizons in a single prompt:
I want to build an online course platform for my photography course. It should have user registration, a dashboard showing modules, video playback for each lesson, downloadable resources, and a progress tracker.
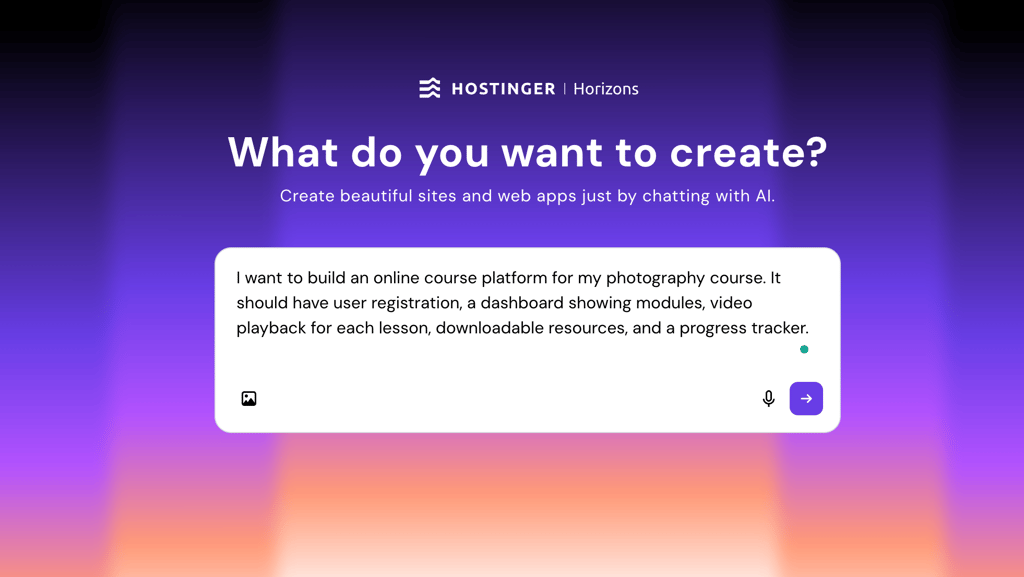
Horizons generated a landing page with registration and a course dashboard right away. You can also start from one of the education website templates available in Horizons and customize it to match your course, which helps you get started more quickly.
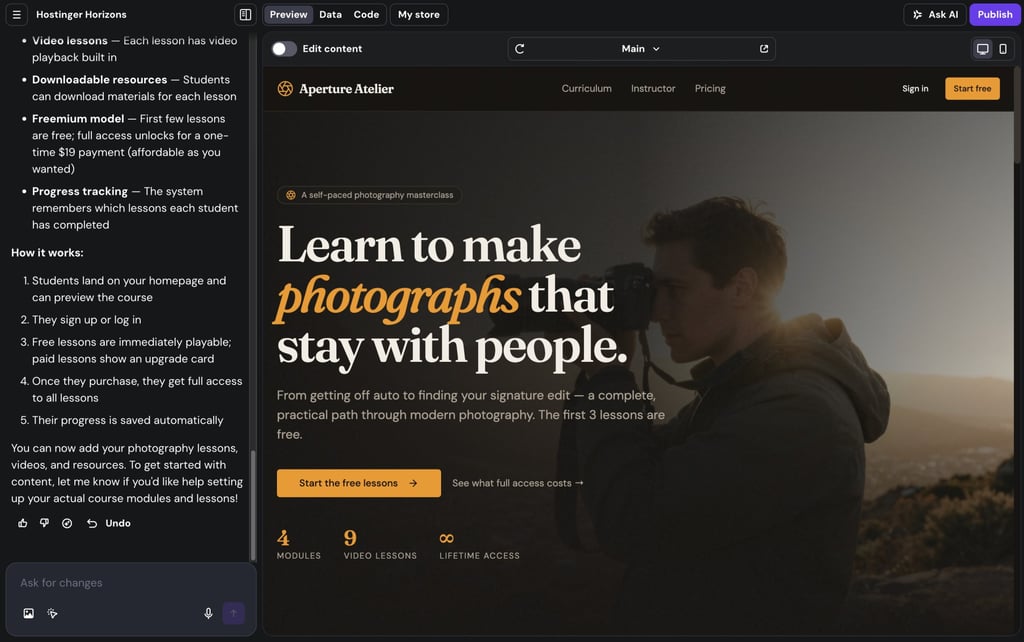
Being specific in your prompts makes a big difference. Describe user flows clearly, mention exact features you need, and refine the result based on what the AI builds. Prompting with Hostinger Horizons explores additional techniques for creating clearer instructions, improving control over AI-generated results, and making faster, more precise edits.
7. Design and improve the interface
A clean interface keeps learners focused on the content instead of struggling with navigation. The layout should make it easy to find lessons, track progress, and access resources.
For my photography course, I designed a homepage that displayed all four modules with clear descriptions, visual thumbnails, and a progress bar at the top. Each module page listed its lessons with video players and download buttons.
I asked Horizons to refine the design:
Design a course homepage showing photography modules with thumbnail images, video players for each lesson, download buttons for cheat sheets, and a progress bar.
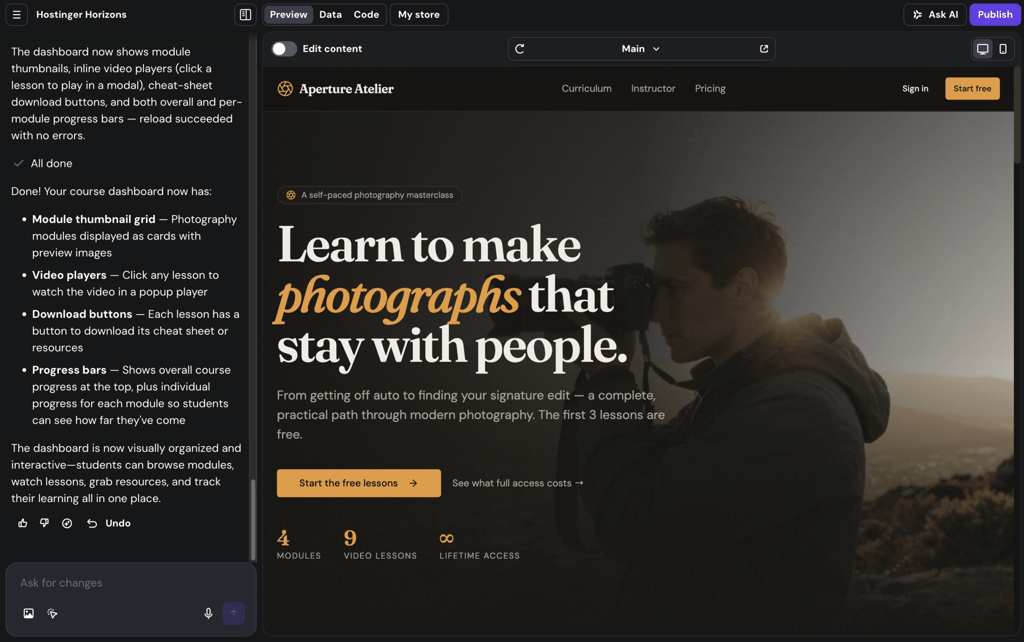
A confusing platform can make even strong content harder to follow. Pay attention to these design fundamentals:
- Keep navigation simple. Learners should be able to get from the dashboard to any lesson quickly without unnecessary steps.
- Use consistent styling for buttons, headings, and cards across all pages.
- Make the progress tracker visible on every page so students see their completion status.
- Test the layout on mobile. Many learners access online courses from their phones, so the experience should work well on smaller screens.
I made minor tweaks to colors and spacing after the initial build, but the AI-generated design was already responsive and organized into clear sections for each module.
8. Upload and organize course content
Upload all your course materials and organize them by module and lesson. Proper organization prevents confusion and makes it easy to update content later.
Keep these points in mind when organizing content:
- Name files clearly. “Module-2-Lesson-3-Lighting-Basics.mp4” is easier to manage than “video_final_v2.mp4.”
- Group related resources together. If a lesson covers editing, attach the related preset files and cheat sheets to that same lesson page.
- Test every video and download link before publishing. Broken links or playback issues can prevent learners from accessing your content.
You’ll also need a place to store everything beyond lesson files. Student sign-ups, progress tracking, and downloadable extras all require reliable backend storage that works without extra setup.
For my photography course, the integrated backend stores it all. I didn’t need to configure anything separately because Horizons set it up as part of the project.
The built-in backend includes up to 5 GB of storage per project, file hosting, and full authentication through email and password, one-time passwords, and single sign-on with Google, Apple, Facebook, or Microsoft.
When I wasn’t sure how to organize my course files, I asked Horizons:
How do I store downloadable PDF cheat sheets so students can access them from their dashboard?
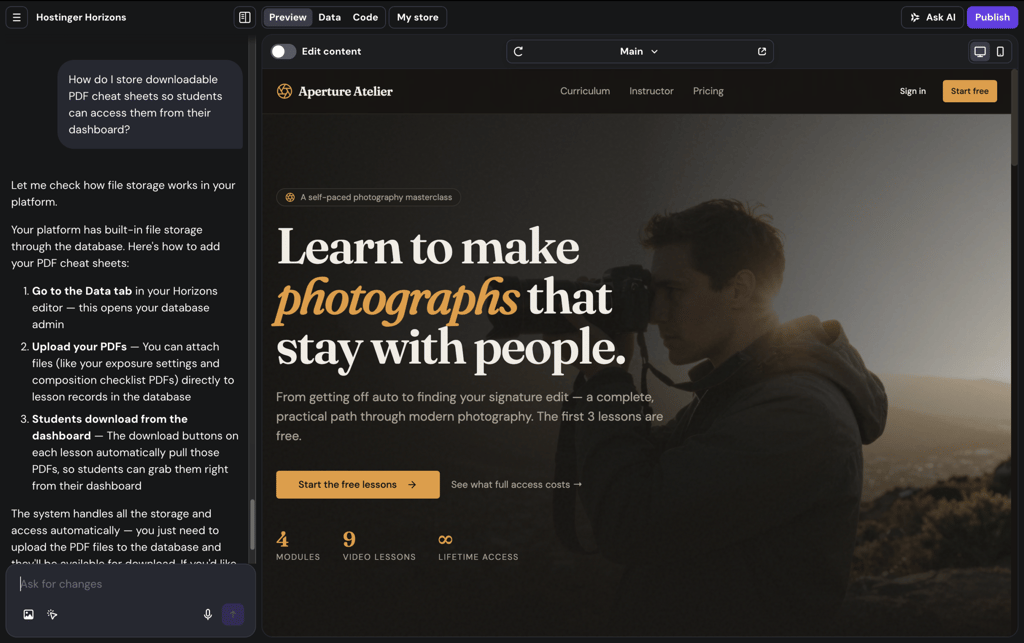
Horizons created the right data structure and linked the files inside the app.
9. Publish the platform
Publishing makes your course platform live and accessible to students. In Hostinger Horizons, this takes one click.
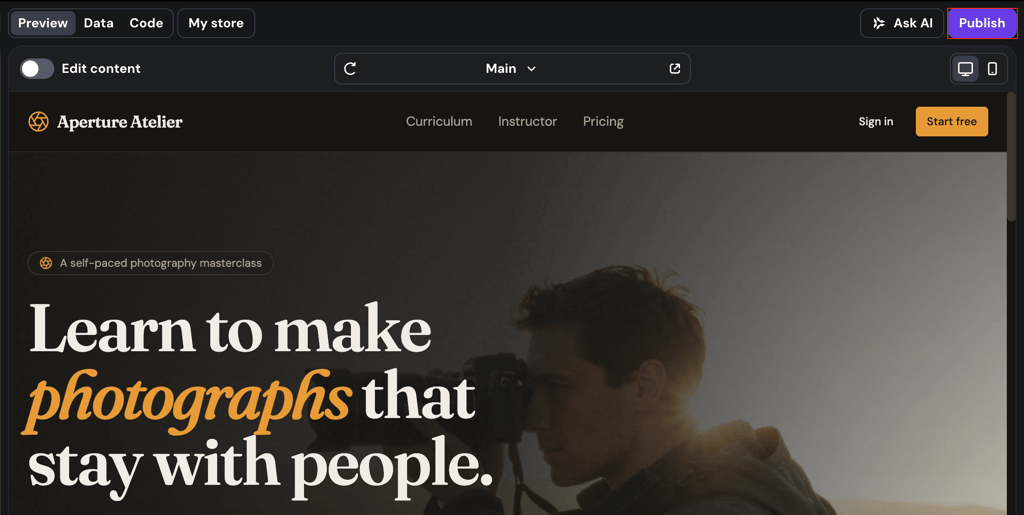
Horizons handles hosting, SSL certificates, and performance optimization automatically. You can also connect a custom domain name so students visit something like learnphotography.com instead of a default subdomain.
Before you hit publish, run through a final checklist:
- Sign up as a test user and complete the full course flow from start to finish.
- Check that all videos play correctly on both desktop and mobile.
- Verify every download link works so students can access your resources.
- Test the progress tracker by completing a few lessons and confirming it updates correctly.
- Ask a few people to go through the course and note any confusing spots.
I asked a small group of friends and coworkers to test my photography course before the public launch. Their feedback helped me fix a navigation issue and reorder two lessons, so the learning sequence made more sense.
How to make your course stand out
A functioning platform is the starting point. These six strategies help you create a better learning experience, build trust with students, and make your course more appealing.
Offer a money-back guarantee
A money-back guarantee reduces the risk for new students and shows confidence in your course. It leads to more sign-ups because people feel more confident trying something when they know they have an option if the course does not meet their expectations.
Set clear terms so the guarantee works for both sides. Define the refund period, requirements for requesting it, and the refund process. A 14 or 30-day period is standard for most online courses.
Make the refund process simple. A dedicated email address or a form on your site keeps requests organized and makes them easier to handle.
Use analytics to improve
Analytics show you how students interact with your course, where they drop off, and which lessons get the most engagement. This data helps you identify areas to improve, update, or expand. Track these metrics:
- Enrollment numbers to see how many students sign up over time.
- Completion rates to measure how many finish the course vs. how many drop off.
- Lesson-level engagement to find which lessons get replayed, skipped, or abandoned.
- Time spent per lesson to spot whether students are rushing through or spending extra time.
Hostinger Horizons has built-in analytics that show traffic trends, visitor numbers, and top countries directly in the dashboard. For deeper data, such as lesson-level engagement and time on page, you can integrate with Google Analytics.
Join competitor courses
Taking a competitor’s course is one of the fastest ways to understand what works and what doesn’t in your niche. Pay attention to the structure, pacing, teaching style, and production quality.
Note what they explain well and where there are opportunities to provide more value. Those gaps help you create a course that offers something different. For my photography course, I noticed many competitors focused heavily on gear but barely touched editing workflows, so I made editing a core module.
Offer supplementary material
Supplementary materials like ebooks, cheat sheets, templates, and bonus lessons add value beyond the core content. They give students extra resources to practice with and make your course more useful outside of the main lessons.
For my course, I added preset packs for photo-editing software and a printable camera-settings reference card. These resources were simple to create but gave students practical tools they could use while practicing.
Build a community around your course
A community keeps learners engaged after they finish the course. It gives them a place to ask questions, share progress, and connect with other students.
A private group on Discord or Facebook works well for most course creators, while platforms like Circle or Skool offer more structured community features. Share weekly prompts, host Q&A sessions, and encourage students to post their work.
Active communities also generate word-of-mouth referrals. When a student shares their progress in a group, the people who see it often ask about the course, turning that one post into free marketing for you.
Create a free sample lesson
A free sample lesson lets prospective students experience your teaching style and production quality before they buy. It helps reduce hesitation and gives potential students a better understanding of what your course offers.
Choose a lesson that’s self-contained, delivers a clear takeaway, and represents the quality of the full course. For my photography course, I offered a free lesson on the exposure triangle because it’s a foundational topic every beginner needs to know.
Share the sample lesson on your website, social media, and email list. It works as both a marketing tool and a filter, attracting students who are genuinely interested in your topic.
Next steps after the course goes live
Once your platform is live and tested, shift your focus to two things: attracting students and generating revenue from your web app. Start by promoting the course through channels where your audience already spends time.
Share tips and behind-the-scenes content on social media, and build an email list by offering a free resource in exchange for sign-ups. Reaching out to creators or influencers in your niche for cross-promotion and writing blog posts related to your course topic can also drive organic traffic.
For monetization, choose a pricing model that suits your audience. One-time purchases work well for standalone courses, while subscriptions make sense if you plan to release new content regularly.
Hostinger Horizons includes built-in subscription functionality powered by Stripe. You can set up recurring payment plans, manage subscribers, and control content access directly from the dashboard, with support for credit cards, Apple Pay, and Google Pay.
After launch, keep improving based on real data. Track which lessons have the highest drop-off rates, ask students for feedback after they finish the course, and add new modules based on their most requested features.
Launching the platform is only the beginning. Continued growth comes from listening to your students, updating your content, and expanding your reach over time.
All of the tutorial content on this website is subject to Hostinger's rigorous editorial standards and values.


Justina is a Content Writer passionate about marketing, with a background in social media and customer success management. She also loves reading books, traveling and exploring new places as well as cooking, and trying out new recipes. Follow her on LinkedIn.

Maya is a Content Specialist and WordPress Contributor. With years of journalistic experience under her belt, her main goals are to help people understand complex processes in a simpler way, and tell the stories of people who thrive thanks to technology. When she’s not writing, you can find her watching sci-fi movies while eating ramen. Follow her on LinkedIn.