How to start an online clothing store in 11 steps
Jul 24, 2026
/
Simon L. & Auksė Å.
/
15 min Read
To start an online clothing store, choose a clear niche, decide how the clothing will be supplied, calculate your costs, prepare the products, build the ecommerce store, and plan how you’ll attract customers.
Print on demand and dropshipping let you begin without buying and storing a full inventory. Wholesale, private-label, and custom manufacturing require more upfront investment, but they give you greater control over the clothing, branding, packaging, and customer experience.
- Define what you’ll sell. Focus on a specific type of clothing, customer group, and need, rather than trying to serve every shopper.
- Choose how you’ll source and fulfill orders. Compare models based on your budget, stock requirements, and the amount of control you want.
- Work out the numbers. Estimate startup expenses, regular costs, product prices, and the sales needed to recover your investment.
- Set up the brand and business. Choose a name, check that it’s available, register the business, and separate its finances from your own.
- Prepare the first collection. Find suppliers or manufacturers, order samples, test the products, and keep the opening range manageable.
- Select the selling platform. Check that it supports clothing sizes, colors, stock tracking, payments, shipping, returns, and sales reporting.
- Create the customer-facing store. Add clear navigation, product photos, sizing information, care details, and descriptions that help shoppers choose.
- Configure store operations. Set up payment methods, stock updates, delivery charges, packaging, exchanges, and refunds.
- Build interest before opening. Collect email signups, share the product-development process, and give potential customers a reason to follow the launch.
- Test the buying process. Place test orders, check the store on different devices, and fix checkout or delivery errors before opening publicly.
- Use sales data to improve. Track profit, returns, marketing costs, repeat orders, and which products should be restocked or removed.
1. Choose a clothing niche and target customer
Choose a specific type of clothing to sell and decide who’s most likely to buy it.
A broad idea like “women’s clothing” covers too many products and shoppers to guide clear decisions. A more focused idea, such as petite workwear, modest activewear, or vintage denim, makes it easier to choose products, set prices, and plan your marketing.
You can narrow the idea with this formula:
Type of clothing + target customer + need
For example, “activewear for women” could become “strength-training leggings for petite women who struggle with long inseams.”
Before spending money on samples or stock, look for signs that people want the product:
- Check search trends. Compare product searches in Google Trends and look for steady or growing interest.
- Search social platforms. Read posts, comments, and hashtags on TikTok, Instagram, Pinterest, and Reddit to see what shoppers request or complain about.
- Study marketplaces. Compare popular products, prices, review counts, and the fabrics, fits, or features competing sellers emphasize.
- Read customer reviews. Look for repeated concerns about sizing, comfort, fabric quality, delivery, or returns.
This research should show both whether demand exists and where current products disappoint shoppers.
For example, reviews for petite leggings might repeatedly mention fabric gathering at the ankles. You can turn that complaint into a clear requirement when comparing products and ordering samples.
Then describe the person most likely to buy from you. Consider their budget, location, preferred style, and what matters most when they shop, such as price, fit, fabric, or delivery speed. Note where they discover new clothing, too.
You don’t need to know everything about your customer yet. You need evidence that a clear group of shoppers wants the product and will pay a price that covers your costs.
With the product idea and customer defined, decide how the clothing will be produced, stored, and shipped.
2. Choose an online clothing business model
Choose a business model based on your budget, whether you want to keep stock, and how much responsibility you want for product quality, packaging, and delivery.
The model determines when you pay for the clothing and who handles each order:
Business model | How it works | Stock needed upfront? | Main drawback |
Print on demand | A supplier prints your design and ships the item after each order. | No | Each item costs more to produce |
Dropshipping | A supplier ships ready-made clothing directly to the customer. | No | You rely on the supplier for quality and delivery |
Wholesale | You buy finished clothing in bulk and resell it. | Yes | Unsold items tie up your money |
Private label | A supplier adds your branding to an existing clothing design. | Usually | You normally have to buy a set number of items |
Custom manufacturing | A manufacturer makes clothing from your designs and measurements. | Yes | Samples and production cost more and take longer |
Resale | You source and resell vintage, secondhand, or unsold clothing. | Yes | Popular items can be difficult to replace |
Can you start an online clothing store without inventory?
You can start an online clothing store without holding stock by choosing print on demand or dropshipping.
With either model, you pay the supplier after a customer places an order. This reduces the upfront cost, but it also leaves you dependent on the supplier to inspect the clothing, pack it correctly, and deliver it on time.
Dropshipping works when you want to select ready-made clothing from a supplier. Print on demand makes more sense when customers are buying your artwork, slogans, or other original designs.
When launching a print-on-demand clothing business, you can test designs without ordering stock first. T-shirts are a straightforward starting product because sizing is simpler than it is for trousers or fitted dresses. Starting a specialized T-shirt business also lets you test several designs without launching a large collection.
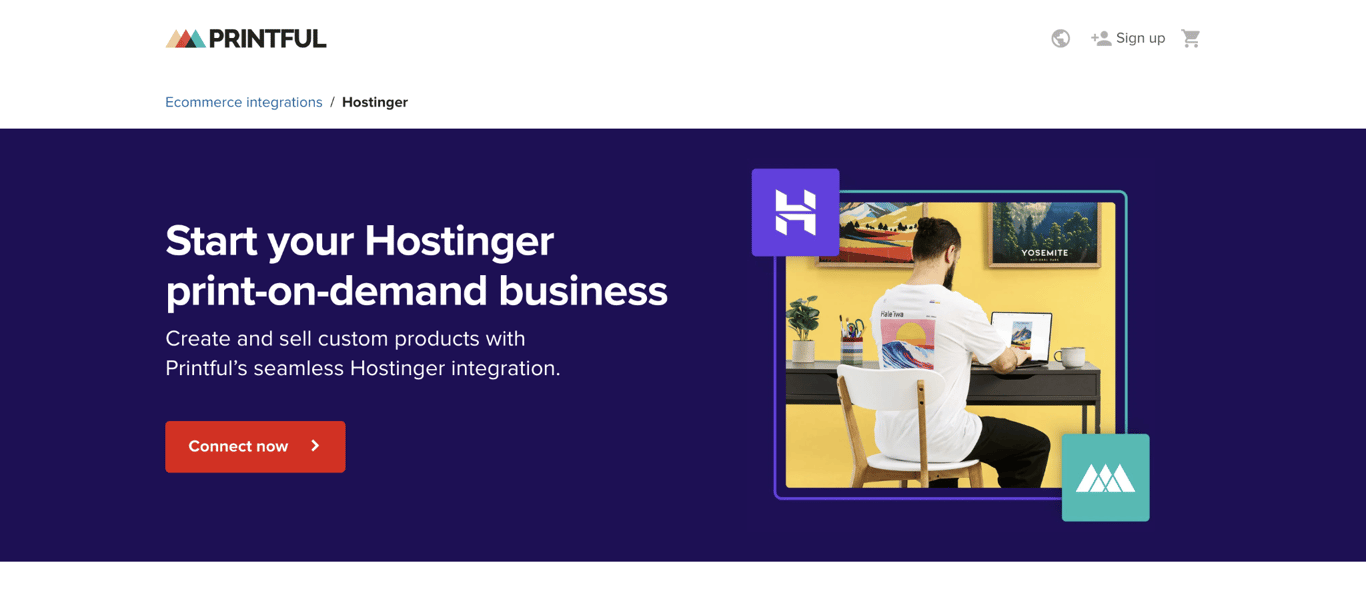
If you choose print on demand, you can build your store with Hostinger Website Builder and connect it to Printful. Printful receives each order and handles the printing, packing, and shipping.
Buying stock upfront makes more sense when the fit, fabric, or construction is central to your idea. For example, a petite activewear store built around exact inseam lengths needs a supplier that can follow those measurements. Private label or custom manufacturing gives you more say over those details.
After choosing a model, calculate how much you’ll need to launch it.
3. Write a business plan and calculate startup costs
Write a simple business plan that shows what you’ll sell, how the store will operate, and how much money you’ll need.
The plan doesn’t need to be long or formal. A short document or spreadsheet should answer:
- What will you sell, and why would someone buy it?
- Which products will you launch with?
- Where will you sell them?
- How will customers find the store?
- Who will store, pack, and ship the orders?
- How much will it cost to launch and keep the store running?
Separate setup costs from regular expenses. Setup costs include samples, business registration, branding, photography, and your first stock order. Regular expenses include your ecommerce plan, advertising, storage, bookkeeping, and software.
How much does it cost to start an online clothing store?
The amount depends on your business model, supplier, materials, order size, and location.
Use these example scenarios to begin building your own estimate. Replace each figure with quotes from your suppliers and the fees that apply in your area:
- Print on demand. A $550 budget could cover $100 in samples, $150 for store setup and branding, and $300 for launch content and promotion.
- Wholesale. A $2,000 budget could include $1,200 for 60 items at $20 each, plus $300 for packaging and $500 for store setup and promotion.
- Private label. A $4,000 budget could include $2,500 for the first branded order, $500 for samples and labels, and $1,000 for packaging, photography, and promotion.
- Custom manufacturing. A $7,500 budget could include $2,000 for patterns and samples, $4,000 for the first production run, and $1,500 for packaging, photography, and launch costs.
Work out the full cost of each item before setting its selling price. Suppose a printed T-shirt costs $14 to make, $1 to package, $1 in payment fees, and $1 toward shipping. The total cost is $17.
If you sell it for $30, you’ll have $13 left before paying for advertising, refunds, taxes, and regular business expenses. When calculating a profitable retail price, include production, packaging, payment fees, any shipping you cover, and the expected cost of returns.
Use the same figures to set a sales target. If launching the store costs $900 and you keep $13 per order, you’ll need around 70 sales to earn back the setup costs.
Once the figures work for your budget, choose a name and complete the business setup.
4. Create the clothing brand and register the business
Create a recognizable brand, then complete the legal and financial setup required in your area.
Choose a name that reflects what you sell without limiting future product categories. Northline Activewear would still work if the store expanded from leggings into tops and jackets. Northline Petite Leggings would be harder to use for a wider range.
Before committing to the name, check:
- Business names. Search online and across business name registries for clothing businesses using the same or a similar name.
- Domain availability. Use a domain name checker to find a short web address that’s easy to say, spell, and type.
- Social handles. Check the platforms you plan to use so customers can find you under the same name.
- Trademarks. Search the relevant trademark databases for similar registered names.
An available domain or social handle doesn’t confirm that no one holds trademark rights to the name, so check for that as well.
Complete these checks before spending money on labels, packaging, photography, or advertising.
Then decide how the brand should look and sound. Choose a logo, colors, fonts, photography style, and tone that reinforce what makes the store different.
Universal Standard provides a clear example of a brand built around one promise. It offers every style in sizes 00–40, rather than separating larger sizes into a separate collection. Its name, messaging, product range, sizing information, and photography all reinforce that position.
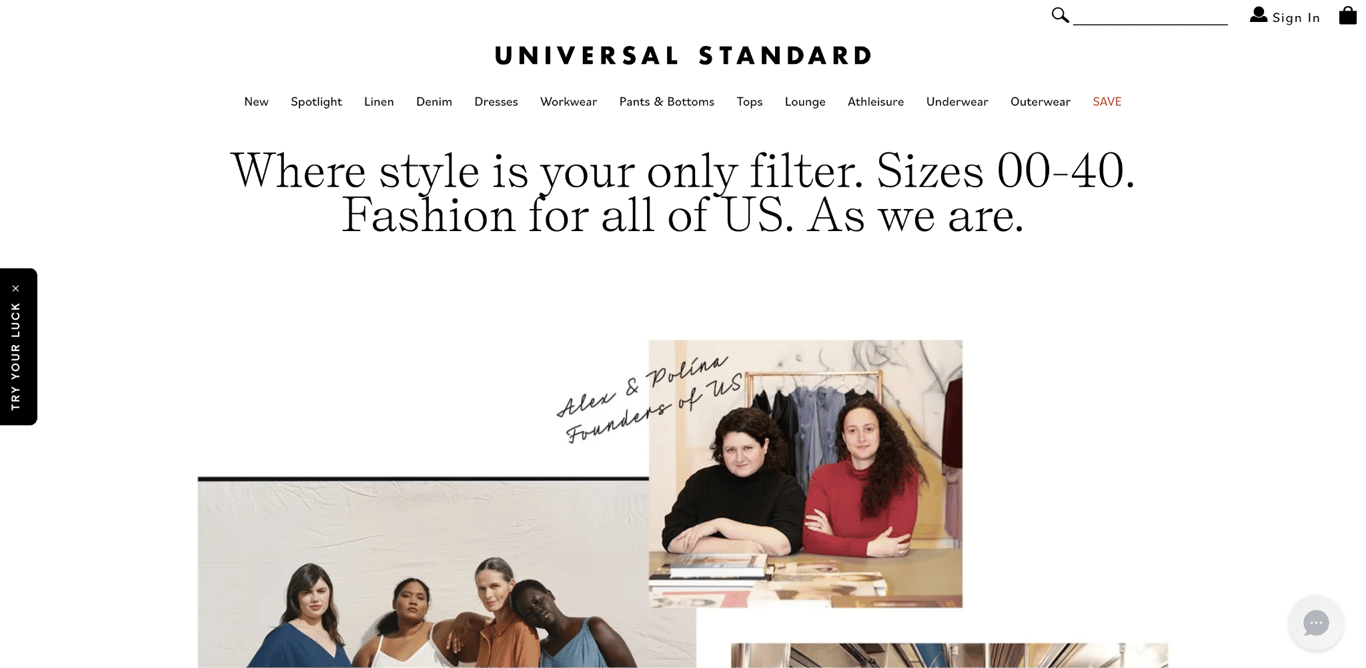
Your own brand doesn’t need such a broad product range, but shoppers should be able to understand what it stands for just as quickly. Using the same name, colors, photography, and tone across your store, packaging, emails, and social posts helps with building a recognizable clothing brand.
The business setup depends on your location. It could include registering the company, registering for required taxes, obtaining licenses, and opening a separate business bank account. Confirm the business license requirements for online sellers with the government office responsible for businesses in your area.
Keep business and personal money separate from the beginning. When managing your store’s financial records, record sales, refunds, supplier payments, platform fees, shipping expenses, and taxes.
With the business registered, you can finalize the clothing you’ll sell.
5. Design or source the clothing products
Choose the products for your first collection, then find a supplier or production partner that can meet your quality, price, and minimum-order requirements.
What you need from that partner depends on the business model you chose. Print-on-demand sellers need consistent print quality and reliable order fulfillment. Wholesale sellers compare finished clothing, size ranges, and bulk prices. Private-label and custom-manufacturing businesses work more closely with suppliers on branding, fabrics, measurements, and construction.
Resale works differently because each item can vary in size, condition, and availability. For example, when selling vintage clothing online, inspect every piece for damage, record its measurements, and photograph any visible wear before publishing the listing.
Before committing to a supplier, ask about:
- Samples. Can you order one item before placing a larger order?
- Materials and quality. What fabrics are used, and how does the clothing hold up after washing?
- Minimum order. What’s the smallest number of items you must buy?
- Production and delivery time. How long will it take for the products to reach you or your customers?
- Total cost. Does the quote include labels, printing, packaging, and shipping?
- Faulty products. Will the supplier replace or refund damaged, misprinted, or incorrectly sized items?
Test samples as a customer would. Try the clothing on, wash it, inspect the stitching, and compare the real color with the supplier’s photos. For fitted items, ask people with different body shapes to check the sizing, comfort, and movement.
Mockups show how a design is intended to look, but they don’t show the real fabric, print quality, or fit. Print-on-demand sellers should still order physical samples before launch.
Limit the first collection to three to six related products. A smaller range makes sizes and colors easier to manage and reduces the amount spent on products that haven’t proved they can sell.
For example, a petite activewear store could begin with two leggings styles, one top, and a lightweight jacket rather than launching a complete gym collection.
After approving the products, choose the platform you’ll use to sell them.
6. Choose the ecommerce platform
Choose an ecommerce platform that can handle clothing options, stock, orders, payments, shipping, and sales data.
Platforms such as Hostinger Ecommerce, Shopify, Wix, Squarespace, and WooCommerce all let you sell online, but their setup and management tools differ.
Compare these ecommerce platforms based on the work your store will require:
- Size and color variations. You should be able to create combinations such as a small black T-shirt or a medium blue T-shirt.
- Stock tracking. Each size and color should have its own stock count so shoppers can’t order an option that has sold out.
- Product images. The displayed photo should change when a shopper selects another color.
- Payments and shipping. The available methods must work in the countries and currencies you plan to use.
- Returns and refunds. You need a way to record returned items, update stock, and refund customers.
- Customer accounts. If shoppers need to view past orders or save their details, confirm that the platform supports it.
- Sales data. Look for reports showing orders, revenue, average order value, and best-selling products.
Also consider how many places you plan to sell from. When selling clothing through stores and marketplaces, determine whether prices, stock, and orders are updated in a single system or must be managed separately.
Running several storefronts through separate systems creates extra work. Changing a price or stock count means repeating the update in each store, while new orders appear in different dashboards.
A platform like Hostinger Ecommerce brings those tasks into one place. You manage products, orders, categories, and sales data there, then choose the type of storefront customers will use to shop.
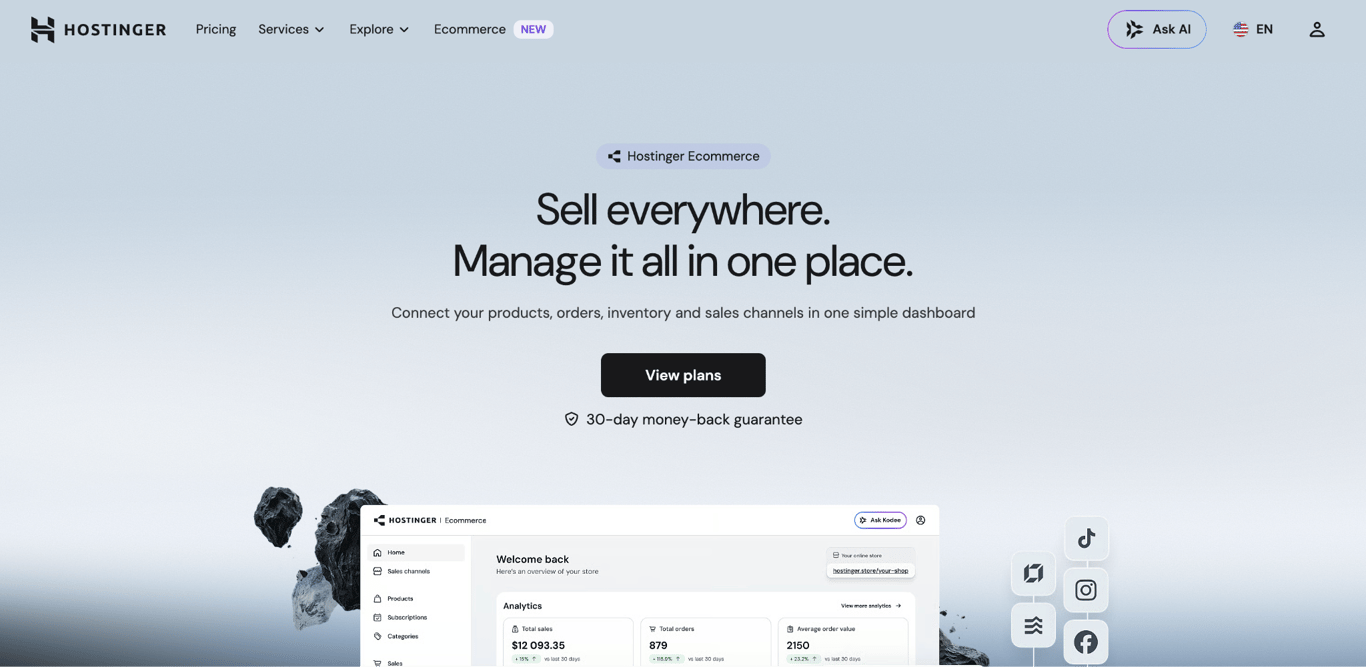
For the simplest setup, use a Quick Link Store to start selling without building a full website.
For a branded website, Hostinger Website Builder lets you design the pages, navigation, and product layout customers see, while Hostinger Ecommerce keeps the products and orders organized in the background.
Hostinger Horizons is another option if you’re building a custom web app with store features.
Once you’ve chosen the platform and storefront, you can build the pages customers will use.
7. Build the online clothing storefront
Build the storefront so shoppers can find a product, select the right size and color, and understand what they’re ordering.
Add each product to your chosen ecommerce platform with its name, price, photos, sizes, colors, stock count, and category.
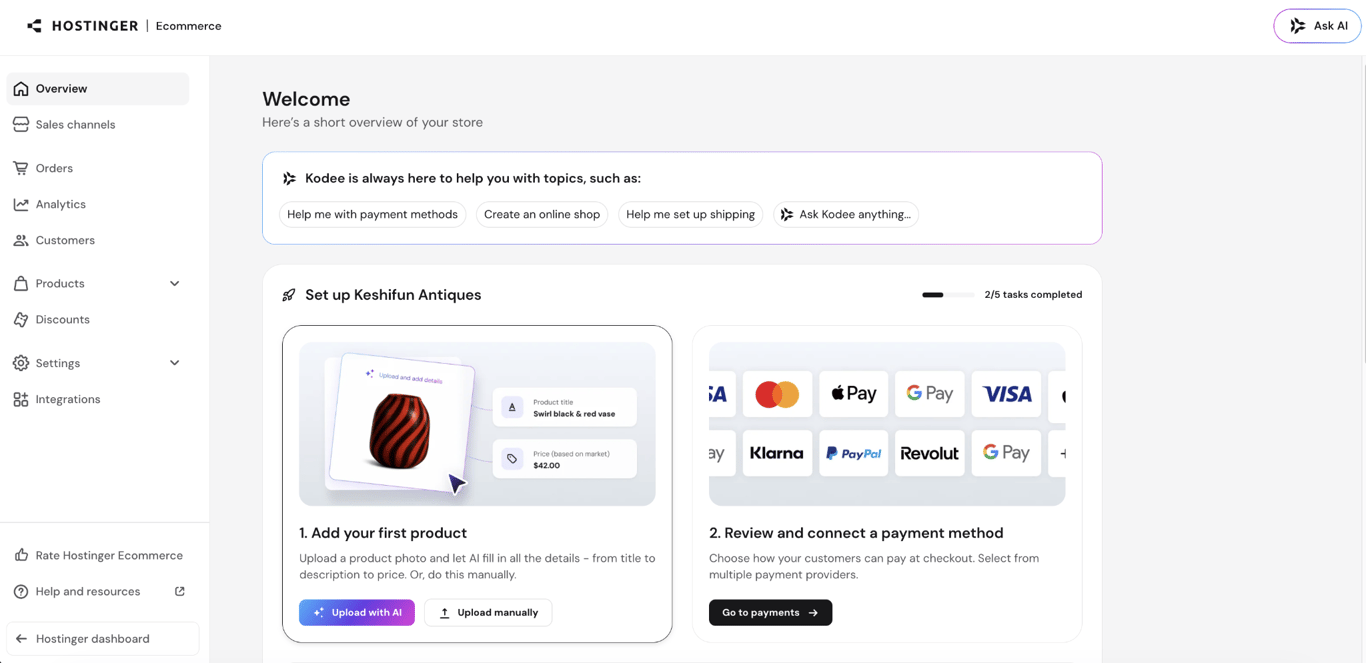
If you’re using Hostinger Ecommerce, enter this information in Store Manager. Then use your selected storefront to arrange the pages customers see.
Apply the logo, colors, fonts, and photography style you chose for the brand. Organize the menu around how customers shop.
For the petite activewear example, the main links could be Leggings, Tops, Jackets, About, and Shipping and returns. When organizing clear store navigation, use familiar labels. “Leggings” tells shoppers what they’ll find, while “The Motion Collection” doesn’t.
Each product page should include:
- Clear photos. Show the front, back, fabric, and details such as pockets, seams, or fastenings.
- Photos for every color. Display the exact color a shopper selects.
- Fit and sizing. Add a size chart, the model’s measurements, the worn size, and whether the item runs small, true to size, or large.
- Fabric and care. Explain what the material feels like, how much it stretches, and how to wash it.
- Return details. Place the return-policy link close to the sizing information.
Sizing deserves extra attention. Research based on large-scale testing across 14 countries found that better size guidance reduced returns caused by poor fit.
When designing effective clothing product pages, place the size chart, model measurements, fit details, and return link near the size selector and purchase button. Shoppers shouldn’t have to leave the page to choose a size.
Avoid descriptions such as “high-quality workout leggings.” Explain the waistband, fabric thickness, stretch, pocket position, and whether the leggings are made for strength training, running, or everyday wear. These details give shoppers useful information when you’re writing detailed clothing descriptions.
Preview each page on a phone and a computer. Open the menu, select every size and color, and confirm that the correct photo, price, and stock level appear.
With the storefront in place, configure how orders will be paid for, shipped, and returned.
8. Set up payments, inventory, shipping, and returns
Set up how customers will pay, how stock will change after a sale, and how you’ll handle delivery and returns.
Check which payment methods your chosen platform supports in the countries and currencies you’ll use. When choosing a secure payment gateway, compare its fees, payout times, and available payment methods.
Payment-processing and platform fees are separate. A payment provider charges for handling the transaction. Some ecommerce platforms add another fee to each sale. Include both when calculating how much money you’ll keep from an order.
Track every size and color separately. Ten medium black T-shirts and ten large black T-shirts should have different stock counts. A system for tracking stock by size and color prevents customers from ordering an option that has sold out.
For shipping, decide:
- Delivery areas. Choose the countries or regions where you’ll accept orders.
- Shipping charges. Set free shipping, a flat rate, or rates based on the order value or weight.
- Delivery times. Show how long processing and shipping should take.
- Packaging. Protect the clothing without increasing the parcel’s size or weight.
When choosing packaging for clothing orders, consider weather protection, shipping cost, and how the parcel will look when the customer opens it.
Your return policy should state how long customers have to return an item, whether you offer size or color exchanges, who pays for return shipping, which products can’t be returned, and when refunds are sent.
Once these rules are entered into the store, you can promote it knowing customers will see clear payment, delivery, and return information.
9. Build an audience before launch
Start promoting the store before it opens so people are ready to visit, subscribe, or buy on launch day.
Create a coming-soon page that explains what you’ll sell and who it’s for. Add an email signup form and offer a clear reason to join, such as early access, a launch discount, or first choice of limited sizes and colors.
Use short-form content to introduce the brand and products. A simple pre-launch sequence could include:
- Introduce the idea. Explain who the clothing is for and what need it addresses.
- Show the process. Share design sketches, sample checks, packaging, or behind-the-scenes work.
- Preview the products. Post close-ups of the fabric, fit, colors, and key details.
- Count down to launch. Announce the date and post reminders during the final week.
Oddli used Instagram Close Friends to share sample try-ons, explain the ideas behind its products, and ask followers for input on details such as colors. That audience later became Oddli Club, where members receive behind-the-scenes updates and early access to products before public launches.
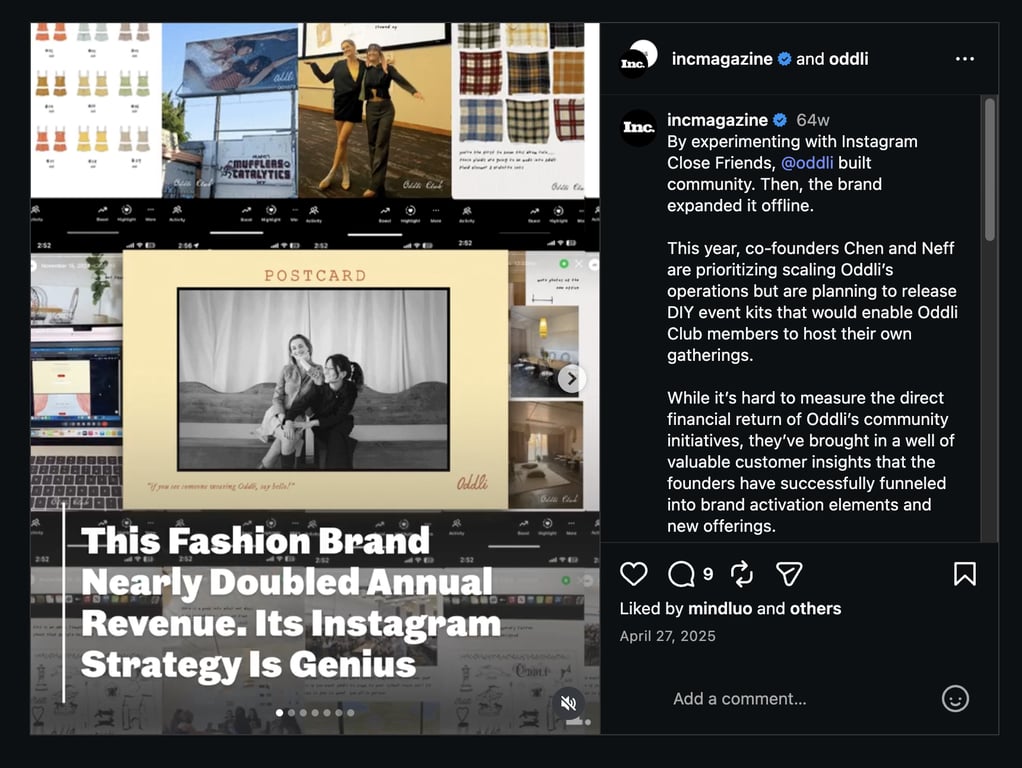
You don’t need to create a private membership program to use the same approach. Share real samples, ask followers one specific product question, collect email signups, and give subscribers early access when the store opens.
Focus on platforms your target customers already use. For a clothing brand, selling on social platforms could involve short videos, product photos, polls, and responses to sizing or fit questions.
You can also send samples to a small number of social media creators whose audience matches your target customer. Give them enough time to wear and photograph the clothing, but don’t require positive feedback. Honest reactions give their audience a clearer picture of the product.
If the full store isn’t ready, test one product or a limited collection with a direct product link. Accepting orders through payment links lets you share the item through social posts, messages, or email without directing shoppers through a large catalog.
During the final week, send your waitlist the launch date, early-access details, and one reminder. Don’t email every day unless subscribers signed up for a daily countdown.
By launch day, your first visitors should know what the store sells, who the products are for, and when they can order.
10. Test and launch the store
Test the full buying process before inviting customers to place real orders.
Place a test order on both a phone and a computer. As part of preparing an ecommerce store for launch, confirm:
- Checkout. Select a size and color, add the item to the cart, and complete the purchase.
- Payment. Make sure the test payment succeeds and appears in your order records.
- Shipping and taxes. Enter addresses from the areas you’ll sell to and verify the charges.
- Stock. Confirm that the purchased size and color are reduced by 1 unit without changing other stock counts.
- Emails. Open the order confirmation and check the product, price, address, and links.
- Phone checkout. Make sure photos, size charts, menus, and checkout buttons are easy to view and tap.
When optimizing the store for mobile shoppers, complete the full order rather than checking only how the homepage looks.
After the tests pass, choose between a soft launch and a public launch.
A soft launch opens the store to your waitlist, friends, or a small group of customers. Their orders can expose unclear sizing, missing emails, or delivery errors before more shoppers arrive.
A public launch opens the store to everyone and begins the wider campaign planned in the previous step. Use it after checkout, stock updates, and order emails work correctly.
How long does it take to start an online clothing store?
The timeline depends on how the products are sourced and how many sample rounds are needed:
- Print on demand or dropshipping. Several weeks for samples, store setup, product pages, and launch content
- Wholesale. Around one to two months for supplier comparisons, samples, delivery, and store preparation
- Private label. Around three to five months for product decisions, labels, samples, production, and shipping
- Custom manufacturing. Around four to six months or longer for designs, fabric sourcing, samples, revisions, production, and delivery
Printful produces most items within two to five business days after receiving an order, but this doesn’t include shipping or the work required to prepare the store. Private-label and custom clothing take longer because the process includes sourcing fabric, creating samples, revisions, bulk production, quality checks, and delivery.
Set the public launch date only after the products are ready and the full order test works.
Once the store is open, use real order data to decide what needs attention.
11. Measure sales and grow the business
Track a few sales numbers to see which products make money, where customers leave, and what needs attention.
Metric | What it means | What to check when it’s weak |
Conversion rate | How many visitors place an order | Review photos, pricing, sizing, shipping costs, and checkout errors |
Average order value | How much customers spend per order | Offer matching products, bundles, or free shipping above a set amount |
Customer acquisition cost | How much marketing costs for each new customer | Stop ads that cost more than the orders they produce |
Gross margin | How much sales income remains after direct product costs | Raise prices, reduce costs, or remove products with little profit |
Return rate | How many sold items customers send back | Check sizing, descriptions, photos, and product quality |
Inventory turnover | How quickly stock sells | Buy fewer slow-selling options and restock proven products |
Repeat purchase rate | How many customers order again | Send relevant restock updates and offers |
Is an online clothing store profitable?
An online clothing store is profitable when the money left from its sales covers marketing, returns, storage, software, taxes, and other running expenses.
Regular orders don’t guarantee profit. A product might leave $13 after production, packaging, and payment fees, but lose money if advertising costs $15 to gain the customer.
Print-on-demand sellers should focus on designs that already sell, test whether customers will accept a higher price, and stop promoting products that leave too little money after costs. These changes can improve the profit potential of print on demand.
Use store reports and website analytics together. Store reports show what sold, how much customers spent, and which products were returned. Google Analytics 4 shows how visitors found the website and which pages they viewed before buying or leaving.
Review the results at the same time each week or month and change one area at a time. For example, if a product page receives many visits but few orders, improve its photos, sizing details, price, or delivery information, then check whether sales improve.
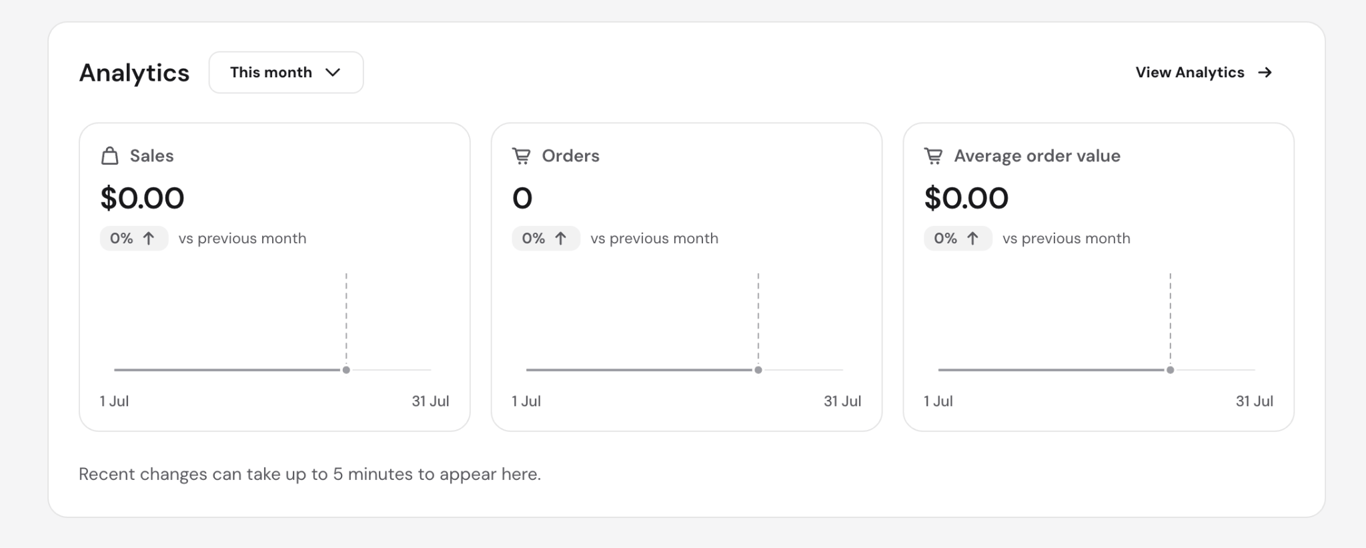
Hostinger Ecommerce provides sales metrics, period comparisons, and results for each storefront through its Overview analytics.
Start with the clearest warning. If returns are rising, find out which products are being returned and why before spending more money on advertising.
What should you do next to launch your online clothing store?
Choose the action that matches your business model. The aim is to finish with something concrete: an approved sample, a buying plan, or the complete product details a manufacturer needs.
- Print on demand. Choose two or three designs, order physical samples, and approve the print quality, fabric, and sizing.
- Wholesale. Request samples and prices from several suppliers, then plan the first order by size and color.
- Private label. Choose one main product, request a branded sample, and confirm the labels, packaging, unit price, minimum order, and production date.
- Custom manufacturing. Send the manufacturer your drawings, measurements, fabric choice, and construction details so they can create the first sample.
Completing that action gives you a real product to photograph, price, publish, and promote rather than an idea that still depends on assumptions.
Only expand once the first range is selling reliably. From there, scaling your online clothing business could involve adding more products, increasing stock, or opening another storefront.
As that happens, check whether your current ecommerce setup still gives you a clear view of stock, orders, and sales. Managing this information separately becomes more difficult when the same products appear in multiple storefronts.
If you need to bring that work together, Hostinger Ecommerce lets you manage your catalog, orders, sales data, and connected storefronts from one place.
All of the tutorial content on this website is subject to Hostinger's rigorous editorial standards and values.


Simon is a dynamic Content Writer who loves helping people transform their creative ideas into thriving businesses. With extensive marketing experience, he constantly strives to connect the right message with the right audience. In his spare time, Simon enjoys long runs, nurturing his chilli plants, and hiking through forests. Follow him on LinkedIn.

Auksė Žirgulė is the Head of Website Builder at Hostinger, where she focuses on creating real value for customers. With a career that started in QA, her journey into product management broadened her perspective and deepened her understanding of what it takes to build a successful product. Auksė is known for her energetic approach and a passion for leading teams to achieve impressive growth. Follow her on LinkedIn.