How to increase the maximum file upload size in WordPress
Oct 15, 2026
/
By Jordana A.
/
4 min Read
To increase the maximum file upload size in WordPress, you can change your PHP settings through your hosting control panel, edit configuration files such as .htaccess or php.ini, or use a plugin that supports larger uploads.
Before making changes, check your current upload limit in WordPress. The best method depends on your hosting environment, and you can’t increase PHP settings beyond the limits allowed by your hosting provider.
This tutorial covers four methods, starting with the easiest option for most hosting users.
How to check your WordPress upload limit
Before changing your WordPress upload settings, check the maximum file size your website currently allows.
- Log in to your WordPress dashboard.
- Navigate to Media → Add New Media File.
- Look for the maximum upload file size displayed below the upload area.
If the limit is smaller than the file you want to upload, follow one of the methods below to increase it.
How to increase the maximum upload size in WordPress
To modify WordPress’ file upload size, you need to access your hosting control panel and WordPress administrator dashboard. Make sure you have access to both of them before diving into the tutorial below.
Here are four ways to increase WordPress’ maximum file upload size:
2. Change PHP limits through your hosting control panel
The easiest way to increase your WordPress upload limit is through your hosting control panel, if your provider allows PHP configuration changes.
For Hostinger users:
- Log in to your Hostinger account and navigate to Websites → Dashboard.
- Open PHP Configuration from the sidebar.
- Select the PHP Options tab.
- Find
upload_max_filesizeand increase it to your desired limit, such as 128M. - Set
post_max_sizehigher thanupload_max_filesize, such as 160M, and save your changes.
The available values depend on your hosting plan. If you can’t select a higher limit, check the maximum PHP settings supported by your provider.
2. Modify the .htaccess File
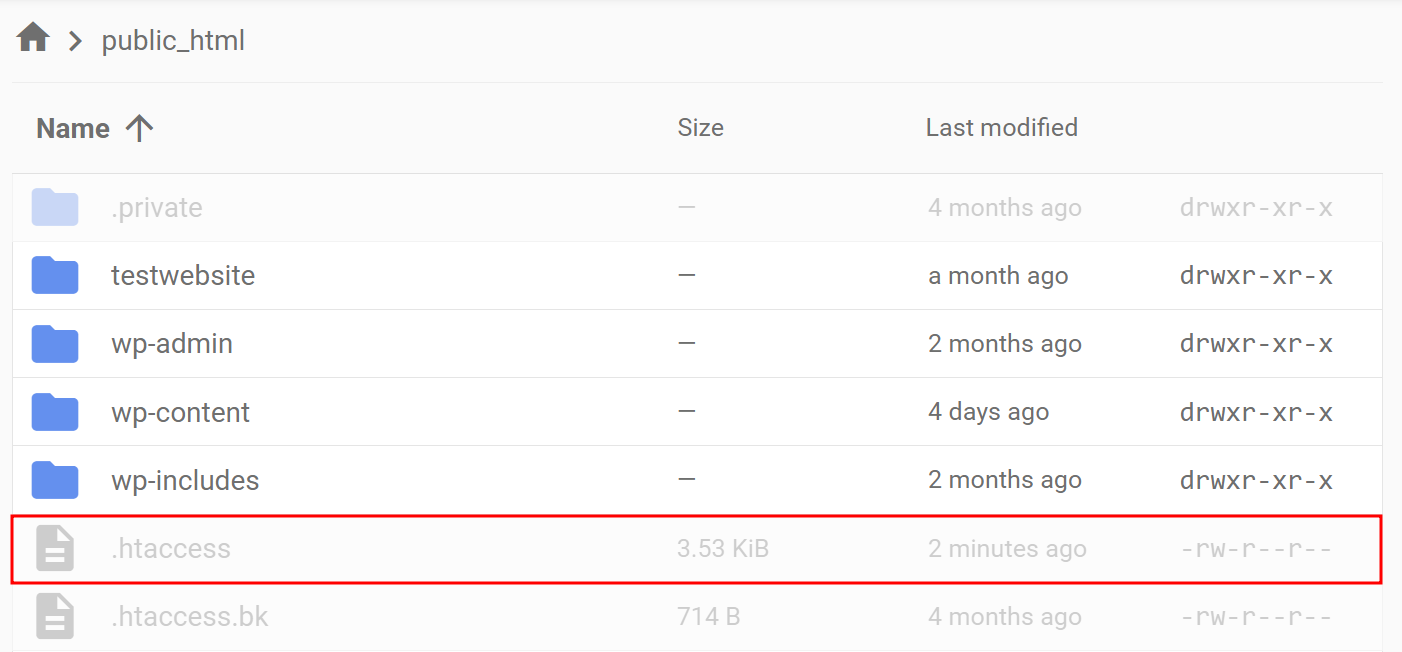
Many hosting providers allow you to change the PHP settings via .htaccess file. You can take advantage of this ability to apply php_value upload_max_filesize rule in this file.
Here’s how this method works:
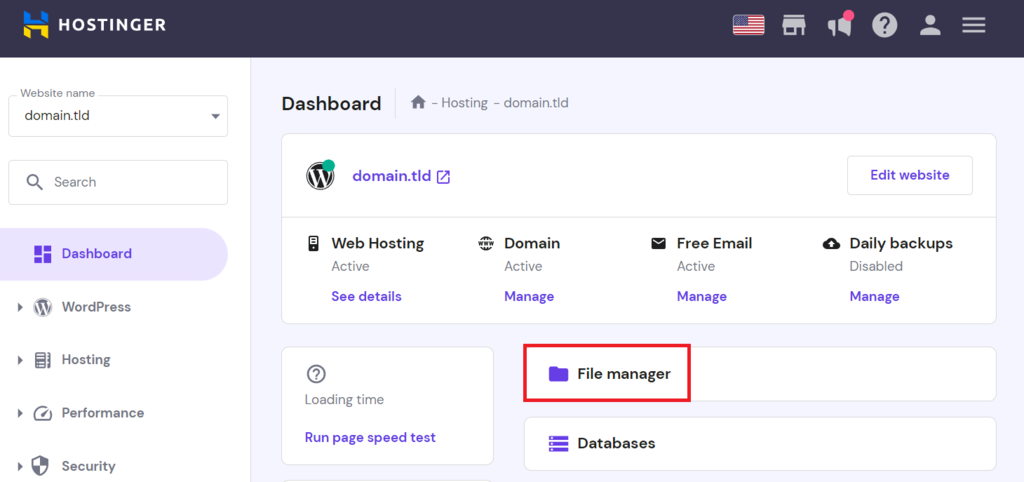
- Access the WordPress root directory (public_html) via an FTP client or File Manager. For Hostinger users, you can access the File Manager in your Hostinger dashboard.
- Open the .htaccess file and add the following code to the bottom of the file. Once you’re done, save the changes.
php_value upload_max_filesize 128M
php_value post_max_size 160M
3. Configure php.ini File
This method is most suitable for WordPress sites with VPS hosting as shared hosting providers generally don’t allow editing the php.ini file. If you’re running on shared hosting, make sure to contact your hosting support team and clarify whether or not you can modify the php.ini file.
Here’s how to increase the maximum file upload size by configuring php.ini file:
- Access the WordPress root directory (public_html) via an FTP client, File Manager, or SSH (if it’s supported), then open the php.ini file. If you cannot find the file, create one under the same name and filetype in the root directory.
- Add the following code to the php.ini file and save the changes.
php_value upload_max_filesize 128M
php_value post_max_size 160M
max_execution_time = 300
4. Upload larger files using a WordPress plugin
If you prefer not to edit PHP configuration files, you can use a WordPress plugin such as Big File Uploads to handle larger media uploads.
- Open your WordPress dashboard and navigate to Plugins → Add New Plugin.
- Search for Big File Uploads, then install and activate it.
- Go to Settings → Big File Uploads.
- Set your preferred maximum file size and save the changes.
- Try uploading a larger file through the WordPress Media Library.
The plugin uploads files in smaller chunks, helping you work around PHP’s per-request upload restrictions. However, it doesn’t increase your hosting plan’s storage capacity or change your server’s PHP configuration.
How to verify your new WordPress upload limit
After updating your PHP settings, return to Media → Add New Media File in WordPress and check whether the maximum upload size has increased.
Try uploading a file larger than your previous limit but smaller than the new one. If the upload still fails, review your upload_max_filesize and post_max_size settings and check whether your hosting plan imposes a lower limit.
If you’re using a chunked-upload plugin, check its configured file size limit and test an upload through the supported WordPress media uploader.
Reasons to Increase WordPress Maximum File Upload Size
WordPress provides a built-in media uploader. It saves you time as you don’t have to connect with FTP clients or use a File Manager from your hosting provider. Despite so, the PHP-based uploader has an upload limit for maximum file size. The upload file limit may vary depending on your hosting provider and WordPress configuration.
You can check your WordPress upload file limit by navigating to Media -> Add New from the administrator dashboard.
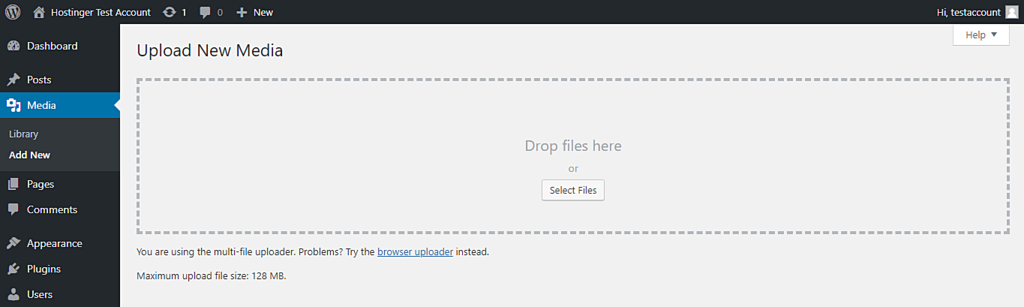
While the maximum upload file limit is more than enough to accommodate regular use, there are cases where you may need to upload large files. This can be problematic as uploading files bigger than the allowed size results in ‘the uploaded file exceeds the upload_max_filesize directive in php.ini’ error.

Next steps: Test your WordPress uploads
Once you’ve increased your WordPress upload limit, test the changes by uploading the files that previously exceeded the restriction.
If large uploads continue to fail, check your hosting plan’s PHP and storage limits before increasing additional settings. For media-heavy websites, consider optimizing large images and videos instead of uploading unnecessarily large files, as this can help reduce storage usage and improve page loading speed.
This article is a localized version of How to increase the maximum file upload size in WordPress, originally published in English.
All of the tutorial content on this website is subject to Hostinger's rigorous editorial standards and values.

Jordana is a Senior Content Writer with a background in Information Systems. She has over five years of experience in WordPress and is casually dabbling with PHP and MySQL. Her passion for writing and technology drives her to create tutorials for anyone wanting to build their online presence. Follow her on LinkedIn.