How to use the chown command in Linux
Dec 05, 2025
/
Ignas R. & Aris S.
/
6min read
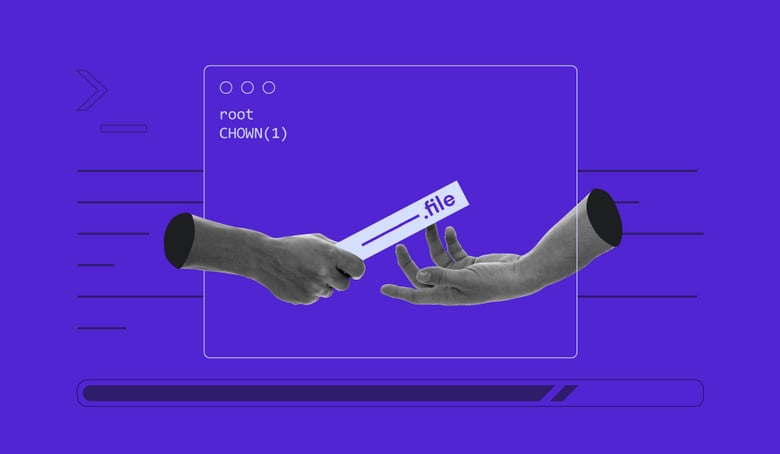
The chown command in Linux is used to change the owner and/or group of files and directories. Managing ownership is a fundamental aspect of Linux system administration, ensuring that only authorized users and processes can access or modify sensitive data on your virtual private server (VPS).
Understanding how to manage file ownership is essential for maintaining system security and stability. To use the chown command effectively, here are key concepts to keep in mind:
- Command structure. The chown command’s syntax comprises the owner, group, target file, and specific options.
- Ownership verification. Checking the current owner and group of a file is a necessary step before applying changes.
- File ownership transfer. Reassigning a file to a different user is often required when handing off projects or securing files.
- Group management. Changing group ownership allows multiple users to share access permissions for collaborative work.
- Directory modifications. Updating the ownership of a directory folder requires specific syntax to avoid errors.
- Recursive changes. Applying ownership changes to a directory and all its contents simultaneously improves efficiency.
- Symbolic link handling. Managing ownership for symbolic links ensures that shortcuts point to the correct locations without permission errors.
Let’s explore this concept in more detail to better understand how to use the chown command for managing ownership in your Linux environment. We’ll cover the syntax first and move on to its practical usage.
Chown command syntax
The syntax of the chown command is defined by the new owner, the group, the target file, and any modifying flags. The structure looks like this:
chown [OPTIONS] OWNER[:GROUP] FILE
Here is a breakdown of the components:
- [OPTIONS] – flags that modify how the command executes. We’ll discuss the most common ones later.
- OWNER – the username or numeric user ID (UID) of the new owner. This specifies which user account has the owner rights over the file or folder.
- [:GROUP] – the group name or ID (GID) that identifies the set of users who share access rights to the file or folder. The colon (🙂 is mandatory to distinguish the group from the individual owner.
- FILE – the name of the target file or directory. For items in another location, it also includes the full path, like /path/to/target/file.txt.
Like other Linux commands, chown supports various options. Among them, some of the most common ones are:
- –help – prints the chown command manual, including its usage, syntax, and all supported options. You can simply run it by using chown –help.
- -R – operates chown recursively, changing the ownership of a directory and its contents. For example, running chown -R user /var/www/html updates the ownership for the html folder and every file inside it.
- -v – enables the verbose mode, which outputs a diagnostic for every file that the command processes. If you run chown -v user file.txt, your terminal will print a confirmation message to verify the processing status of file.txt.
- -h – changes the ownership of a symbolic link itself rather than the file it points to. A command like chown -h user symlink updates the symlink shortcut rather than the destination file.
You would use these options when you want to perform specific operations with chown. In the following sections, we’ll explain their usage in more detail.
How to check file ownership in Linux
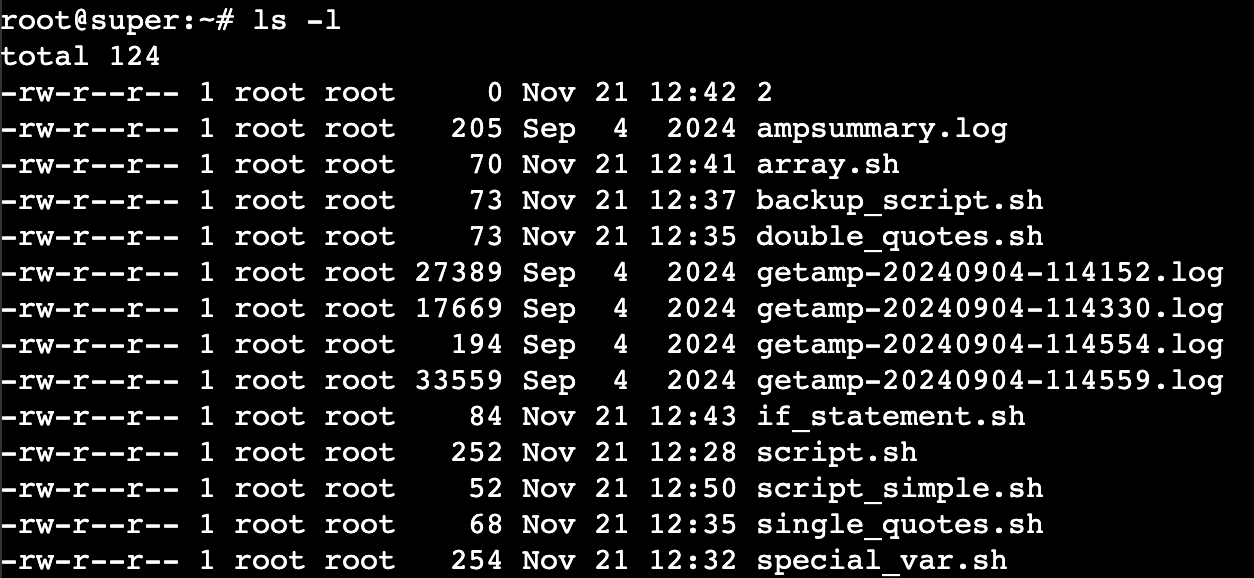
To check who owns a file in Linux, use the ls command with the -l option and the file name, like so:
ls -l filename.txt
The output will display the detailed file information. For instance, the following example shows that the file is owned by the admin account and the hostinger group:
-rw-r--r-- 1 admin hostinger 0 May 23 06:58 filename.txt
Important! In the context of chown, the group is a collection of users who share the same access permissions to a file. While in the example above, the hostinger group owns file.txt, it doesn’t mean that all users within it are the owners.
You can also run ls -l without specifying the file name to check the ownership of all content within the current directory. The structure of the output will remain the same.
Checking who owns a file in Linux is a best practice before running chown, as it verifies the current ownership and prevents the loss of necessary permissions.
How to change the owner of a file
Changing file ownership in Linux is helpful when you need to transfer files between user accounts or machines. This ensures that the application or user trying to access the file has the correct authority to complete the task.
Note that only the root user or an account with sudo privileges can change the ownership of a file. Regular users cannot give away ownership of their files to others for security reasons.
To change the owner of a file, use the following syntax:
chown new-owner filename
For example, to assign the file report.txt to the user alex:
chown alex report.txt
If you need to change the owner of a script file named backup.sh to the root user:
chown root backup.sh
You can also simultaneously change the ownership of multiple files by listing them like this:
chown root backup.sh log.txt
How to change group ownership
In Linux, changing the group ownership of a file is useful for granting access to a specific team without making the file public. While the owner permission applies to a single user, the group permission applies to every user who is a member of that group.
For example, a web server usually requires files to belong to the www-data group so that the web service can read them, regardless of which individual user owns the file.
To change both the owner and the group, separate them with a colon:
chown user:group-name filename
For example, the following command will set the ownership of project.php to the user alex and the group developers:
chown alex:developers project.php
If you want to keep the original owner and only change the group, simply remove the user name. In this example, we set the group owner of project.php to developers while keeping the original user owner.
chown :developers project.php
You can check members of a group by running getent, which is usually used to list all users in your linux system. Here’s how the command looks:
getent group group-name

How to change ownership of a directory
To change ownership of a directory in Linux, use the same syntax for individual files. You commonly need to do this when setting up a new project folder or configuring a home directory that many users will use.
Here’s an example of a command to change the ownership of a directory.
chown user /path/to/directory
Important! By default, the chown command changes the ownership of the folder itself, but not the files or subfolders inside it.
To verify the change, simply run the ls -l command. Remember to add the -d option because you are checking a directory:
ls -ld /path/to/directory
If you want to change the group ownership of a folder, follow the same syntax as the file, like this:
chown user:group /path/to/directory
How to use recursive chown
The recursive mode of the chown command changes the ownership of a directory and all its content, including subdirectories and files. This is helpful when granting access or fixing permission errors in bulk.
To use recursive mode, include the -R flag in your chown command. Mind the capitalization since Linux commands are case-sensitive:
chown -R user:group /path/to/directory
For example, to assign the hostinger user and the users group as the owner of the public_html directory and everything inside it:
chown -R hostinger:users public_html
Warning! Be cautious when using recursive chown, especially with system and root directories. Changing ownership of critical folders can render the OS unusable because it might block essential services from accessing necessary files.
How to change the owner of a symbolic link
The chown command also lets you change the ownership of a symbolic link (symlink) – a file that acts as a shortcut pointing to another file or directory. While uncommon, this operation is helpful when resolving errors or unusual system behaviors.
By default, running chown on a symbolic link changes the ownership of its target file. For example, your symlink-name points to target-file.txt, and you run this command:
chown user:group symlink-name
This changes the ownership of target-file.txt, not symlink-name. To change the ownership of the actual symbolic link, use the -h flag:
chown user:group -h symlink-name
Using the command above, the symlink-name ownership will change to the specified user and group.
How to change Linux permissions and ownership
The chown command allows you to control who owns files and groups on your Linux system, ensuring proper access management and security. Mastering this utility is especially critical when using a VPS hosting environment where multiple users maintain the server.

However, maintaining proper access control involves tasks beyond modifying ownership. You’ll also need to understand how to change Linux permissions using the chmod command because these concepts work closely together. For example, you want a specific group of users to read but not modify a file. In this case, you can simply grant the group ownership over the file. However, if you haven’t set the correct permissions, they might still be able to modify it and cause security issues.
All of the tutorial content on this website is subject to Hostinger's rigorous editorial standards and values.

Ignas takes great satisfaction in helping people tackle even the most complex technical issues. His current goal is to write easy-to-follow articles so that these issues will not happen at all. During his free time, Ignas likes to play video games and fix up things around his house.

Aris is a Content Writer specializing in Linux and WordPress development. He has a passion for networking, front-end web development, and server administration. By combining his IT and writing experience, Aris creates content that helps people easily understand complex technical topics to start their online journey. Follow him on LinkedIn.