If you have a website developed locally or backup files from a previous hosting provider (including expired Hostinger plans), this guide will walk you through uploading and restoring your website from scratch.
Step 1 – Add the website to the new hosting plan/hosting account
- In hPanel, go to Websites, find the preferred hosting plan, click on Add website, and select Custom PHP/HTML website as the preferred platform
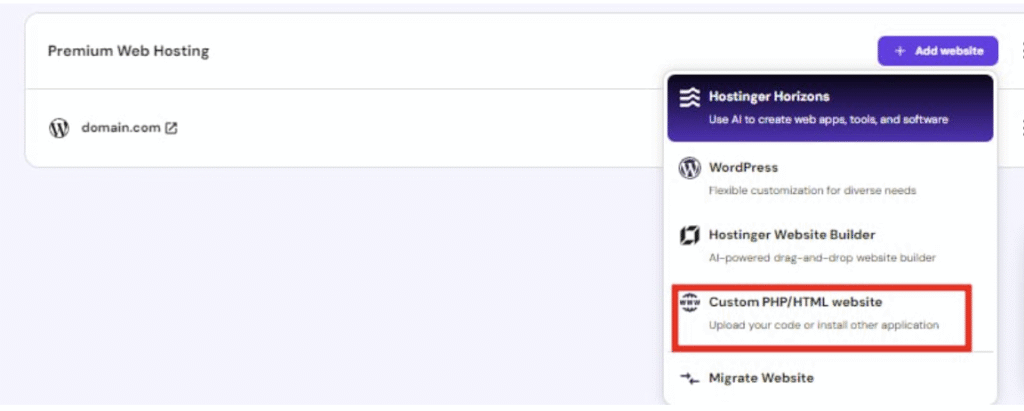
- Insert the required details. Finally, specify the preferred domain name and click on Continue.
That’s how you add your website to another hosting plan. Now, all you need to do is upload your website’s files and databases.
Step 2 – Upload your website’s backup
There are multiple ways to upload backups, but the easiest one is to use the file manager. The upload limit is 100 GB. It makes no difference if you upload the website’s files or its database first.
Upload the website’s files
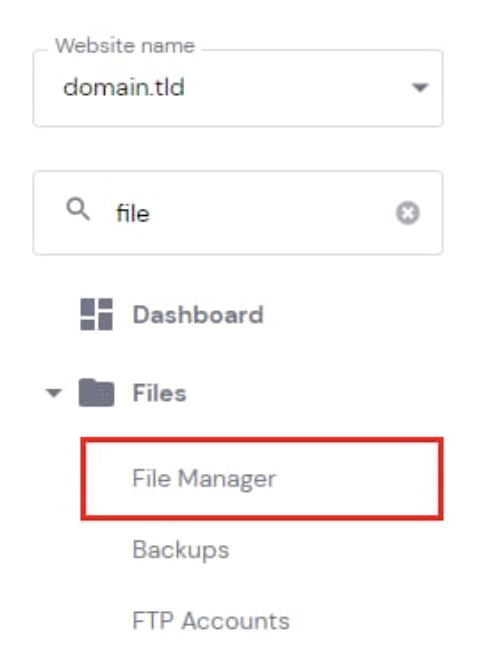
- Go to Websites → Dashboard → File Manager:
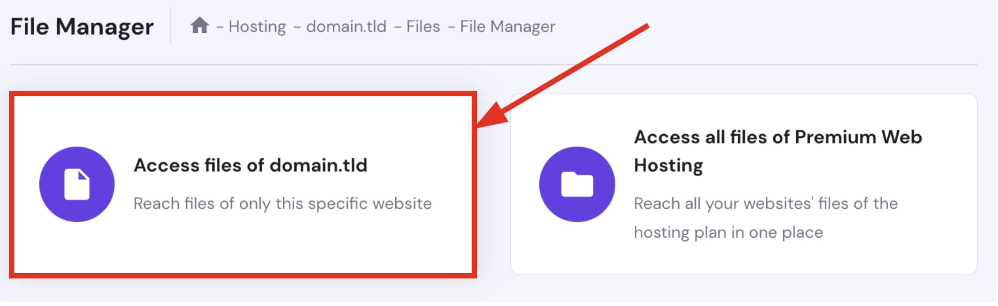
- Access the files of the specific website:
- Open your website’s public_html folder, and click on Upload in the top-right:

- Then, select File and upload the backup of your website’s files (.tar.gz). Sit back and give it some time: depending on the size of the backup and the internet speed, it may take up to an hour.
- Once the upload is complete, right-click on the file name and choose Extract, or click on Extract in the top-right:
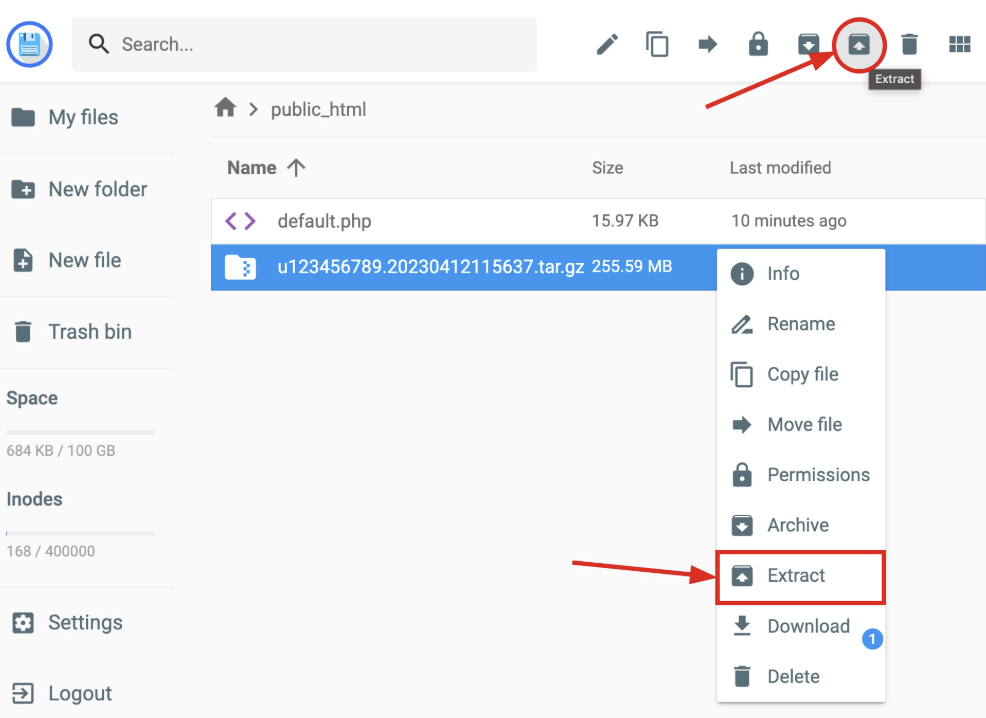
- Enter a folder name, e.g., backup, and click on Extract:
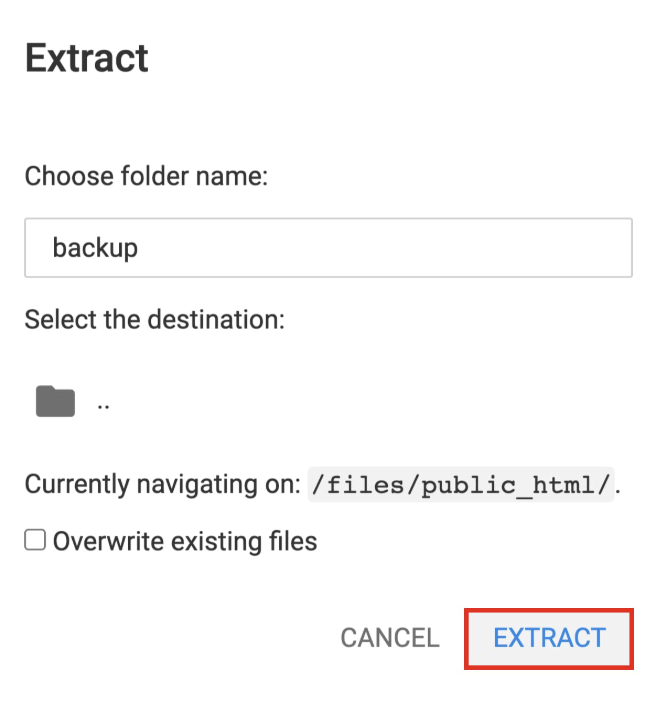
tar.gz Files generated by Hostinger include the files of all the websites hosted on the hosting plan, so make sure to keep all the needed files and folders in the public_html folder. Once the website files are extracted into a dedicated folder, you may delete the backup .tar.gz file 🧹Now, let’s move your website files to the correct folder.
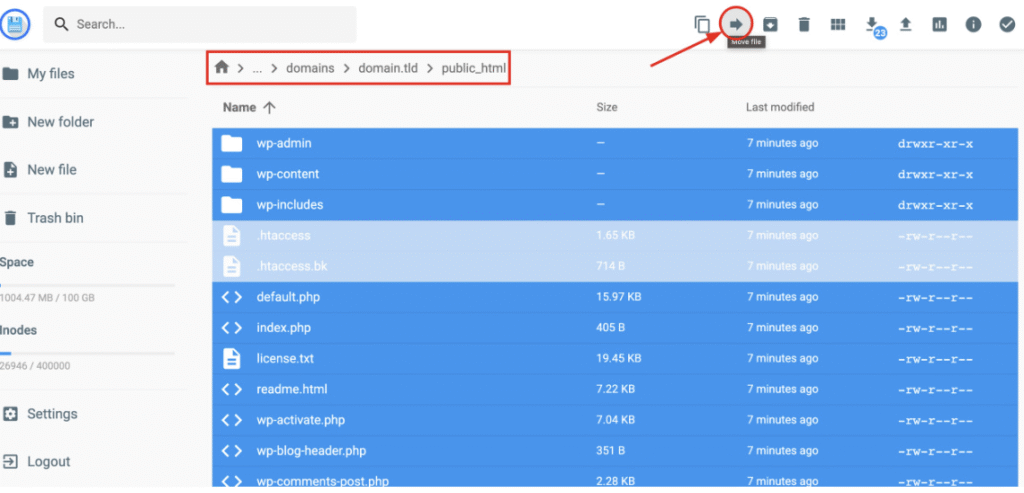
- To do this, open the folder containing the extracted website files (in our case, it’s called backup) → domains → select the domain in question → open its public_html folder, select all the files, and click on Move file in the top-right:
- Double-click on .. to go to the parent directory so that the destination would be /public_html, and click on Move:
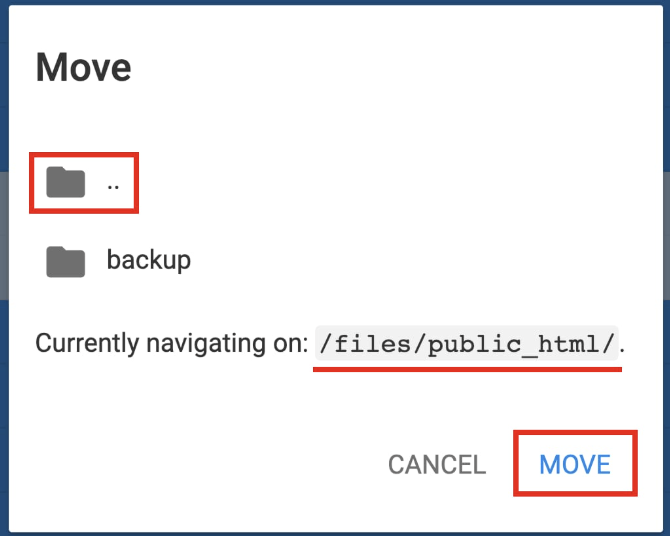
The goal is to have all the website files in the public_html folder.
Step 3 – Import and connect your database
Create a new database
- Before uploading the database, you will need to create a new database where to import your database backup. Go to Websites → Dashboard → Databases → Management on the sidebar:
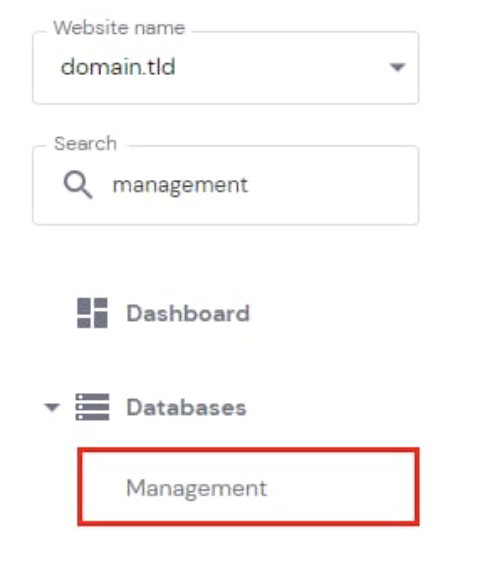
- Make sure the correct website (the one you want to upload the database to) is selected in the left drop-down menu:
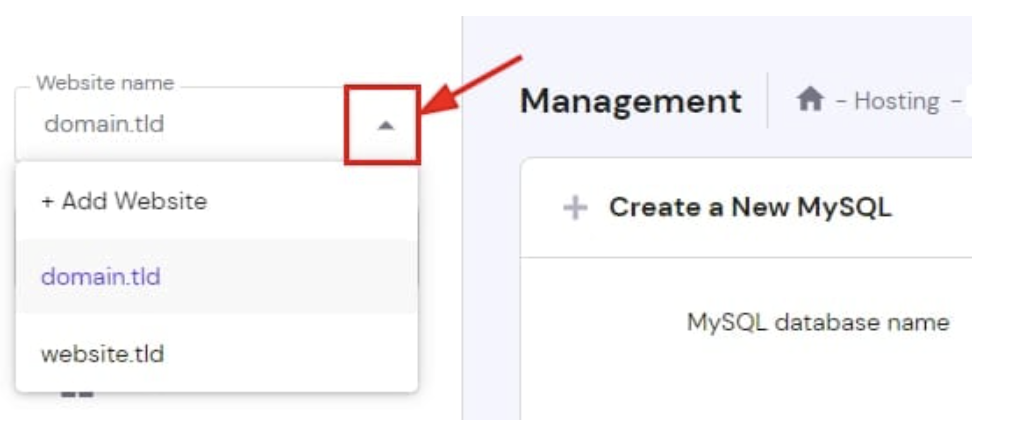
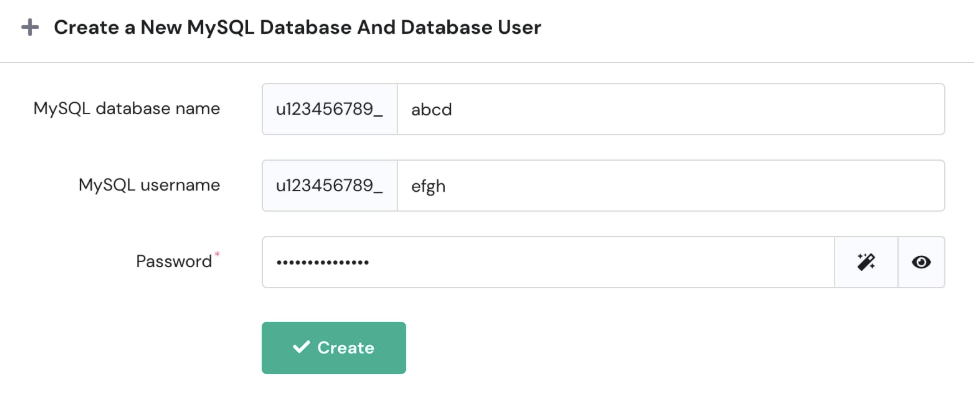
- In the section Create a New MySQL Database And Database User, enter the name, username, and password of your database.
It’s recommended to use the same name and password as in the original database. You can find and copy those details by opening your website’s configuration file in the file manager.
For WordPress websites, it’s in the public_html → wp-config.php file:
- DB_NAME = MySQL database name, e.g., u123456789_abcd
- DB_USER = MySQL username, e.g., u123456789_efgh
- DB_PASSWORD = your preferred password
- Once you fill in the details, click on Create:
This way, a new database is automatically assigned to the selected domain. It appears in the List of Current MySQL Databases And Users section, where you can manage it.
Import the database backup
- Click on Enter phpMyAdmin next to the newly created database. On phpMyAdmin, your database will be selected by default, so click on Import:

- Select the database backup that you’ve downloaded previously (.sql.gz):
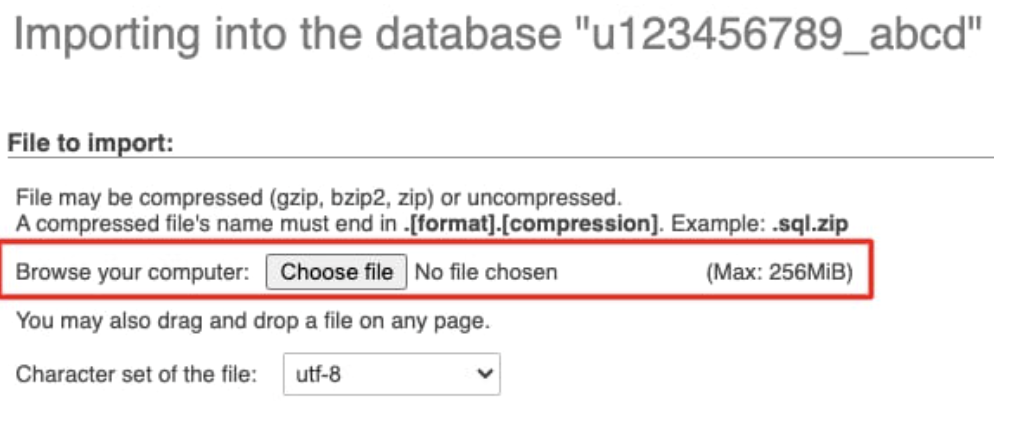
- Proceed further without changing anything on the settings and click on Go or Import.
If you encounter issues importing the .sql.gz file, extract it to the .sql format and try uploading it again; learn more about possible issues when importing a database 💡
Connect the database with your website
The final step is to make sure that your database connection details (name, username, password) match the details in your website’s configuration file: How to find MySQL database details 💡
- Open your website’s configuration file and update those details to match those of the new database. Make sure to update the username, as it will definitely be different!
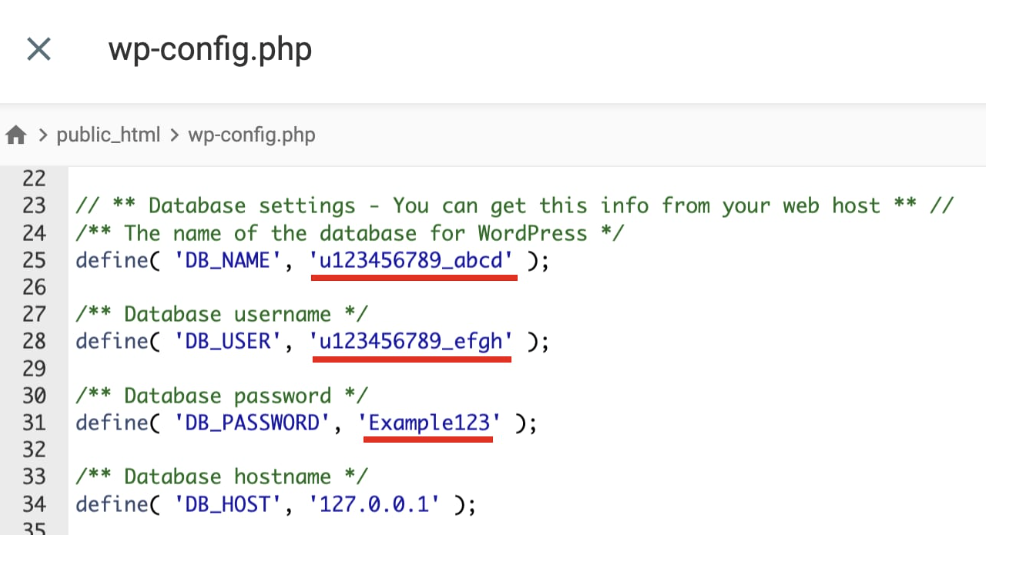
For WordPress websites, it’s in the public_html → wp-config.php file:
- DB_NAME = MySQL database name, e.g., u123456789_abcd
- DB_USER = MySQL username, e.g., u123456789_efgh
- DB_PASSWORD = your preferred password
After connecting the database, the process is completed, and your website is now hosted on another Hostinger account using the same domain.
Test the website
- Clear your browser cache
- Visit your website
- Check that: • All pages load correctly • Images and media display properly • Forms and interactive features work • Login functionality works (if applicable)
Fixing common issues after uploading a backup
If your website doesn’t work after following the steps above, check these common issues:
Files not properly extracted or located
- Make sure you extracted the backup archive (right-click → Extract in File Manager)
- Verify files are directly in
public_html(or subdomain folder), not nested in additional folders - Confirm
index.phporindex.htmlis at the root level
Database connection problems
- Double-check that database credentials in your config file match the new ones from hPanel
- Update the database password if you created a new one during setup
- Ensure database name and username include the account prefix (e.g.,
u123456_dbname)
WordPress permalink issues
- Log in to WordPress admin and go to Settings → Permalinks
- Click Save Changes without modifying anything to regenerate rewrite rules
Cache
If you are still not seeing the correct content, this might be related to browser cache. There are some steps you can take to see your website working, starting with the easiest ones:
- Access your website using Incognito mode
- Then, clear your browser’s cache: How to Clear Browser Cache
- Use a different device/computer/mobile connectivity (3G/4G/5G) instead of Wi-Fi
- Turn off your modem/router for 2 minutes and reboot it
- Clear your DNS cache by following this guide