The Hostinger MCP (Model Context Protocol) allows you to connect your local IDE to your Hostinger account using an API key. Once configured, your IDE can retrieve hosting data, list domains, manage resources, and more — directly from your development environment. Hostinger provided some popular IDEs like Claude Code, Cursor, JetBrains, and Windsurf.
This guide will walk you through setting up Hostinger MCP server in Cursor IDEs.
⚠️ Before you begin
You will need your Hostinger generated JSON file from hPanel.
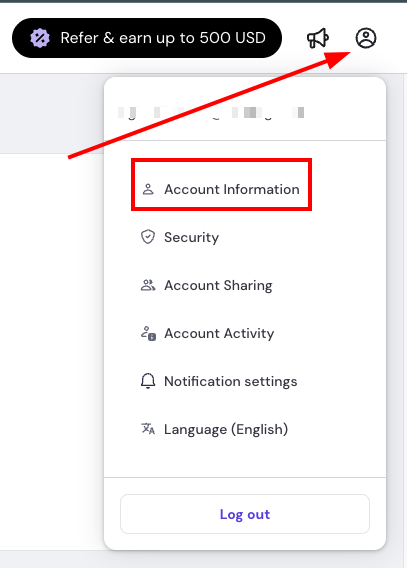
Click on your Account Profile, then choose Account Information
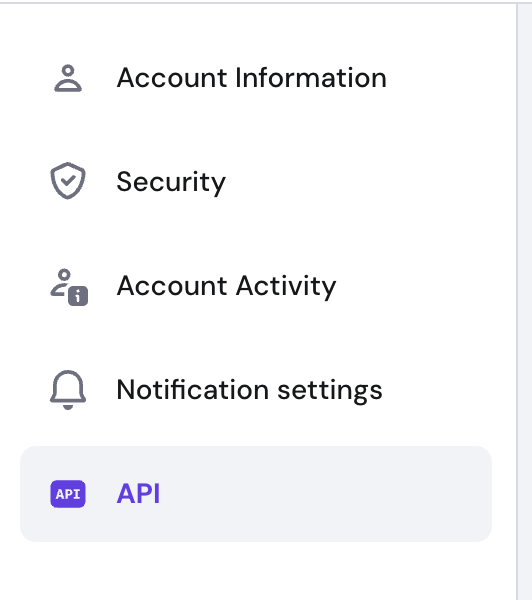
Then navigate to API
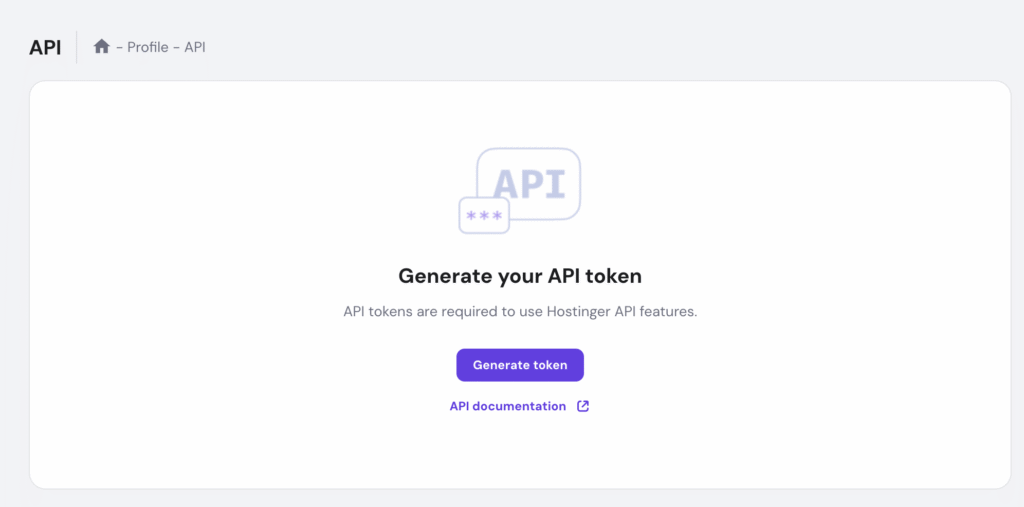
Generate the API key
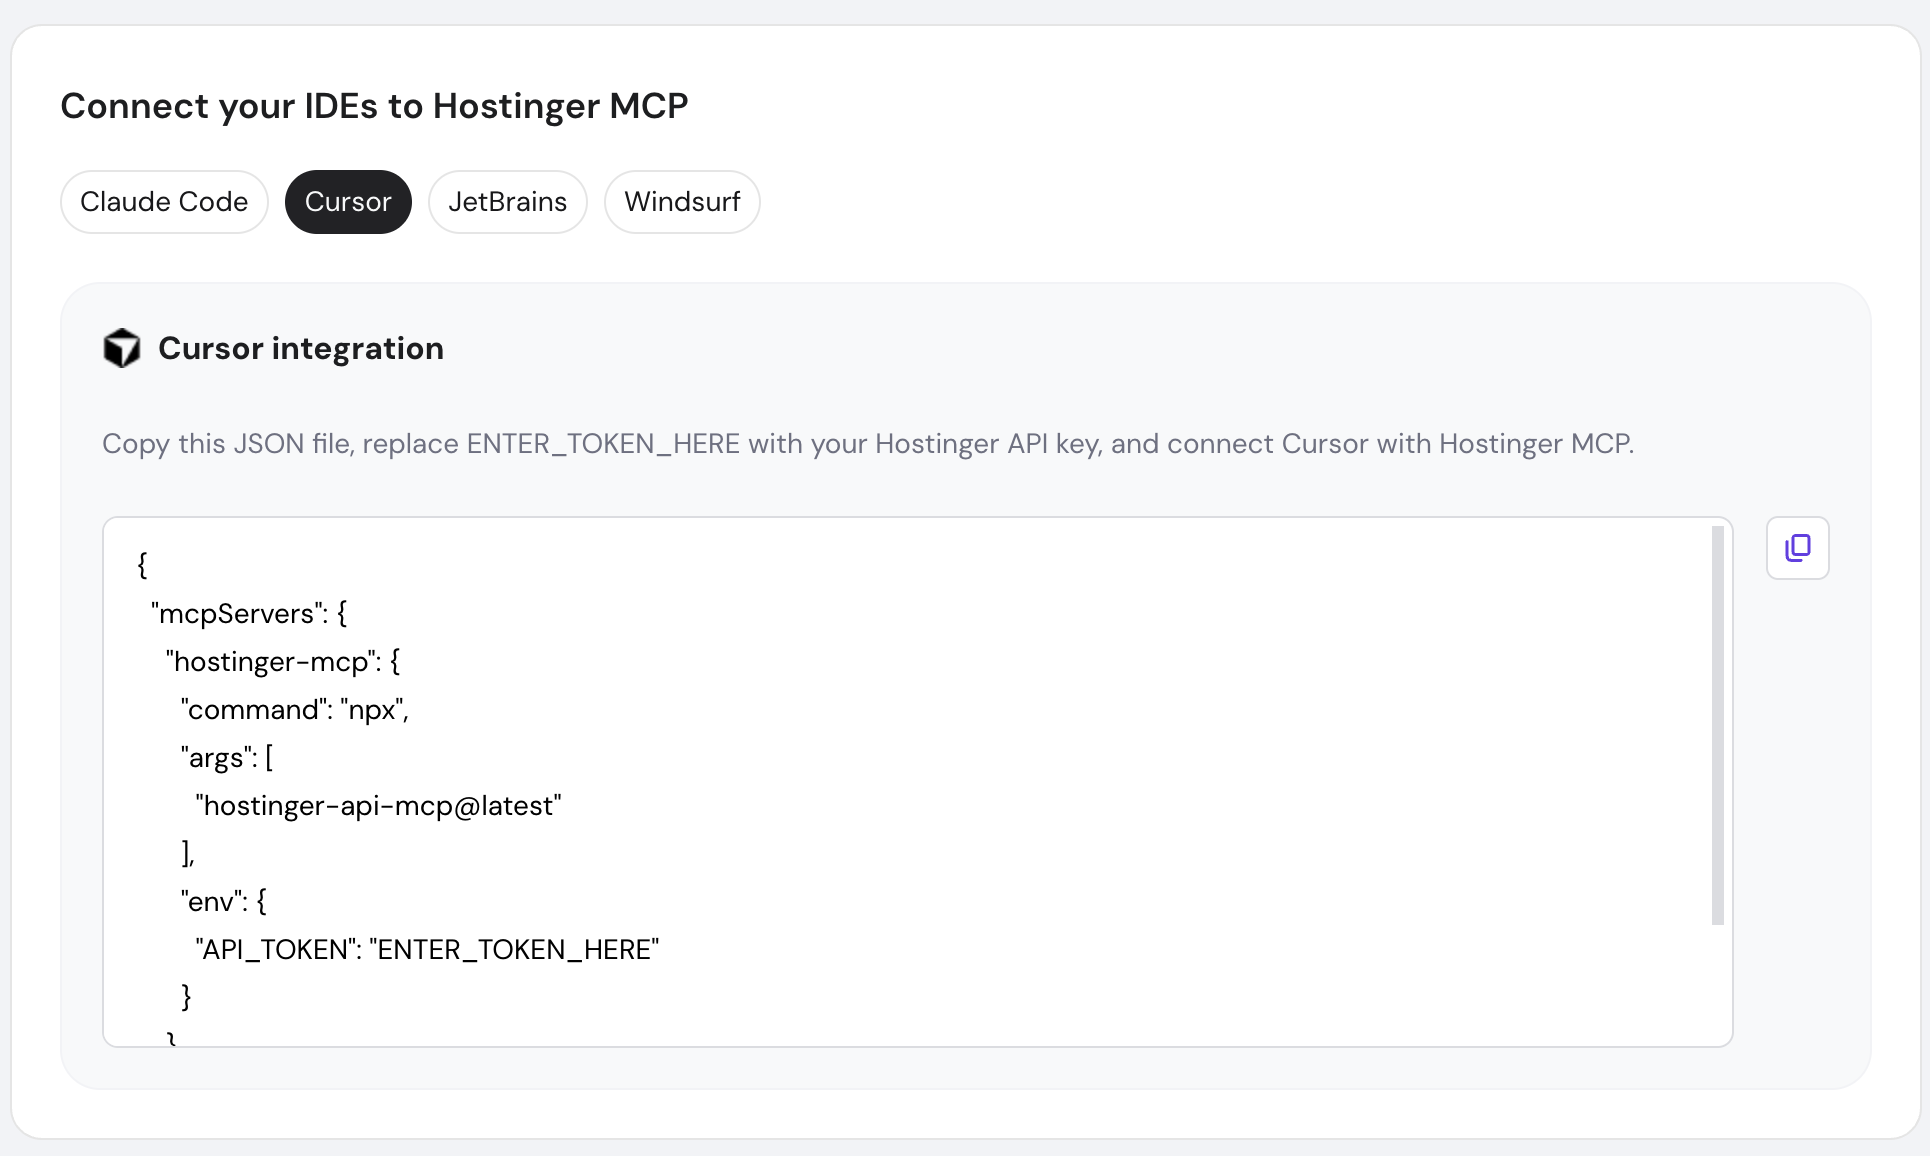
The API key will be automatically placed inside JSON file to be copied. In this tutorial, you will use Cursor
Method 1: Manual Setup on Your IDE
Step 1: Locate Cursor’s Configuration Directory
- Mac/Linux:
~/.cursor/mcp.jsonor~/.cursor/config.json - Windows:
C:\Users\YourUsername\.cursor\mcp.jsonorC:\Users\YourUsername\.cursor\config.json
Step 2: Open the Configuration File
You can open the file using several methods.
Option A – Using Cursor’s Command Palette
- Press
Cmd + Shift + P(Mac) orCtrl + Shift + P(Windows/Linux) - Type: “Open User Settings (JSON)” or “Preferences: Open Settings (JSON)”
- Select it from the dropdown
Option B – Manual Navigation
Mac/Linux:
# Open in Cursor
cursor ~/.cursor/mcp.json

# Or open in a text editor
nano ~/.cursor/mcp.json
code ~/.cursor/mcp.json
Windows:
# Open in Notepad
notepad %USERPROFILE%\.cursor\mcp.json

# Or navigate manually
# Press Win + R, type: %USERPROFILE%\.cursor\
# Then open mcp.json or config.json
Option C – Using Finder/File Explorer
- Mac: Press
Cmd + Shift + Gin Finder, paste:~/.cursor/ - Windows: Press
Win + R, type:%USERPROFILE%\.cursor\ - Look for
mcp.jsonorconfig.json
Step 3: Create or Edit the Configuration File
If the file doesn’t exist, create a new file named mcp.json in the .cursor directory and paste this configuration
{
"mcpServers": {
"existing-server": {
// existing config
},
"hostinger-mcp": {
"command": "npx",
"args": ["hostinger-api-mcp@latest"],
"env": {
"API_TOKEN": "MyHostingerAPIKey"
}
}
}
}
If the file already exists, add the hostinger-mcp section inside the existing mcpServers object
{
"mcpServers": {
"existing-server": {
"command": "...",
"args": ["..."]
},
"hostinger-mcp": {
"command": "npx",
"args": [
"hostinger-api-mcp@latest"
],
"env": {
"API_TOKEN": "YOUR_HOSTINGER_API_KEY"
}
}
}
}
Step 4: Save and Restart Cursor
- Save the file (
Cmd + Son Mac orCtrl + Son Windows/Linux) - Completely quit Cursor:
- Mac:
Cmd + Qor Cursor menu → Quit Cursor - Windows: File → Exit (don’t just close the windows)
- Mac:
- Restart Cursor
Step 5: Verify the Setup
- Open a project in Cursor
- Open Cursor’s AI chat (
Cmd + Lon Mac orCtrl + Lon Windows/Linux) - Try a test command such as:
- “Can you access my Hostinger account?”
- “List my Hostinger domains”
If the setup is correct, Cursor will use the Hostinger MCP connection.
Method 2: Using Cursor’s AI Assistant to Configure
Cursor can automatically create or update your MCP file.
Step 1: Open Cursor Composer
- Press `Cmd + I` (Mac) or `Ctrl + I` (Windows/Linux) to open Composer
- Or press `Cmd + L` (Mac) or `Ctrl + L` (Windows/Linux) for regular chat
Step 2: Paste This Configuration Request
I need to set up the Hostinger MCP server in Cursor. Please help me:

1. Create or open the file at ~/.cursor/mcp.json (Mac/Linux) or %USERPROFILE%\.cursor\mcp.json (Windows)

2. Add this configuration to the file:

{

"mcpServers": {

"hostinger-mcp": {

"command": "npx",

"args": [

"hostinger-api-mcp@latest"

],

"env": {

"API_TOKEN": "MyHostingerAPIKey"

}

}

}

}

If the file already has mcpServers configured, just add the hostinger-mcp entry to the existing mcpServers object.

Please create/update the file and let me know when it's done.
Step 3: Review and Apply
- Cursor will show you what it’s going to do
- Review the changes
- Approve and let Cursor create/update the file
Step 4: Restart Cursor
Completely quit and restart Cursor for changes to take effect.
Once Cursor restarts, your Hostinger MCP integration is ready to use. If you run into any issues, feel free to contact our Support team — we’re always here to help you get the most out of your hosting tools.