You can redeploy your Node.js application on Hostinger at any time. Redeploying is useful when you need to apply configuration changes, update environment variables, change build settings, or deploy a new version of your application.
There are two ways to start the redeployment process.
You can initiate redeployment from either of the following locations:
-
From the Website Dashboard
-
From the Deployments section
Both options lead to the same redeployment flow.
Option 1 — Redeploy from the Website Dashboard
- Open the Website Dashboard for your Node.js application
- Click Settings and redeploy.
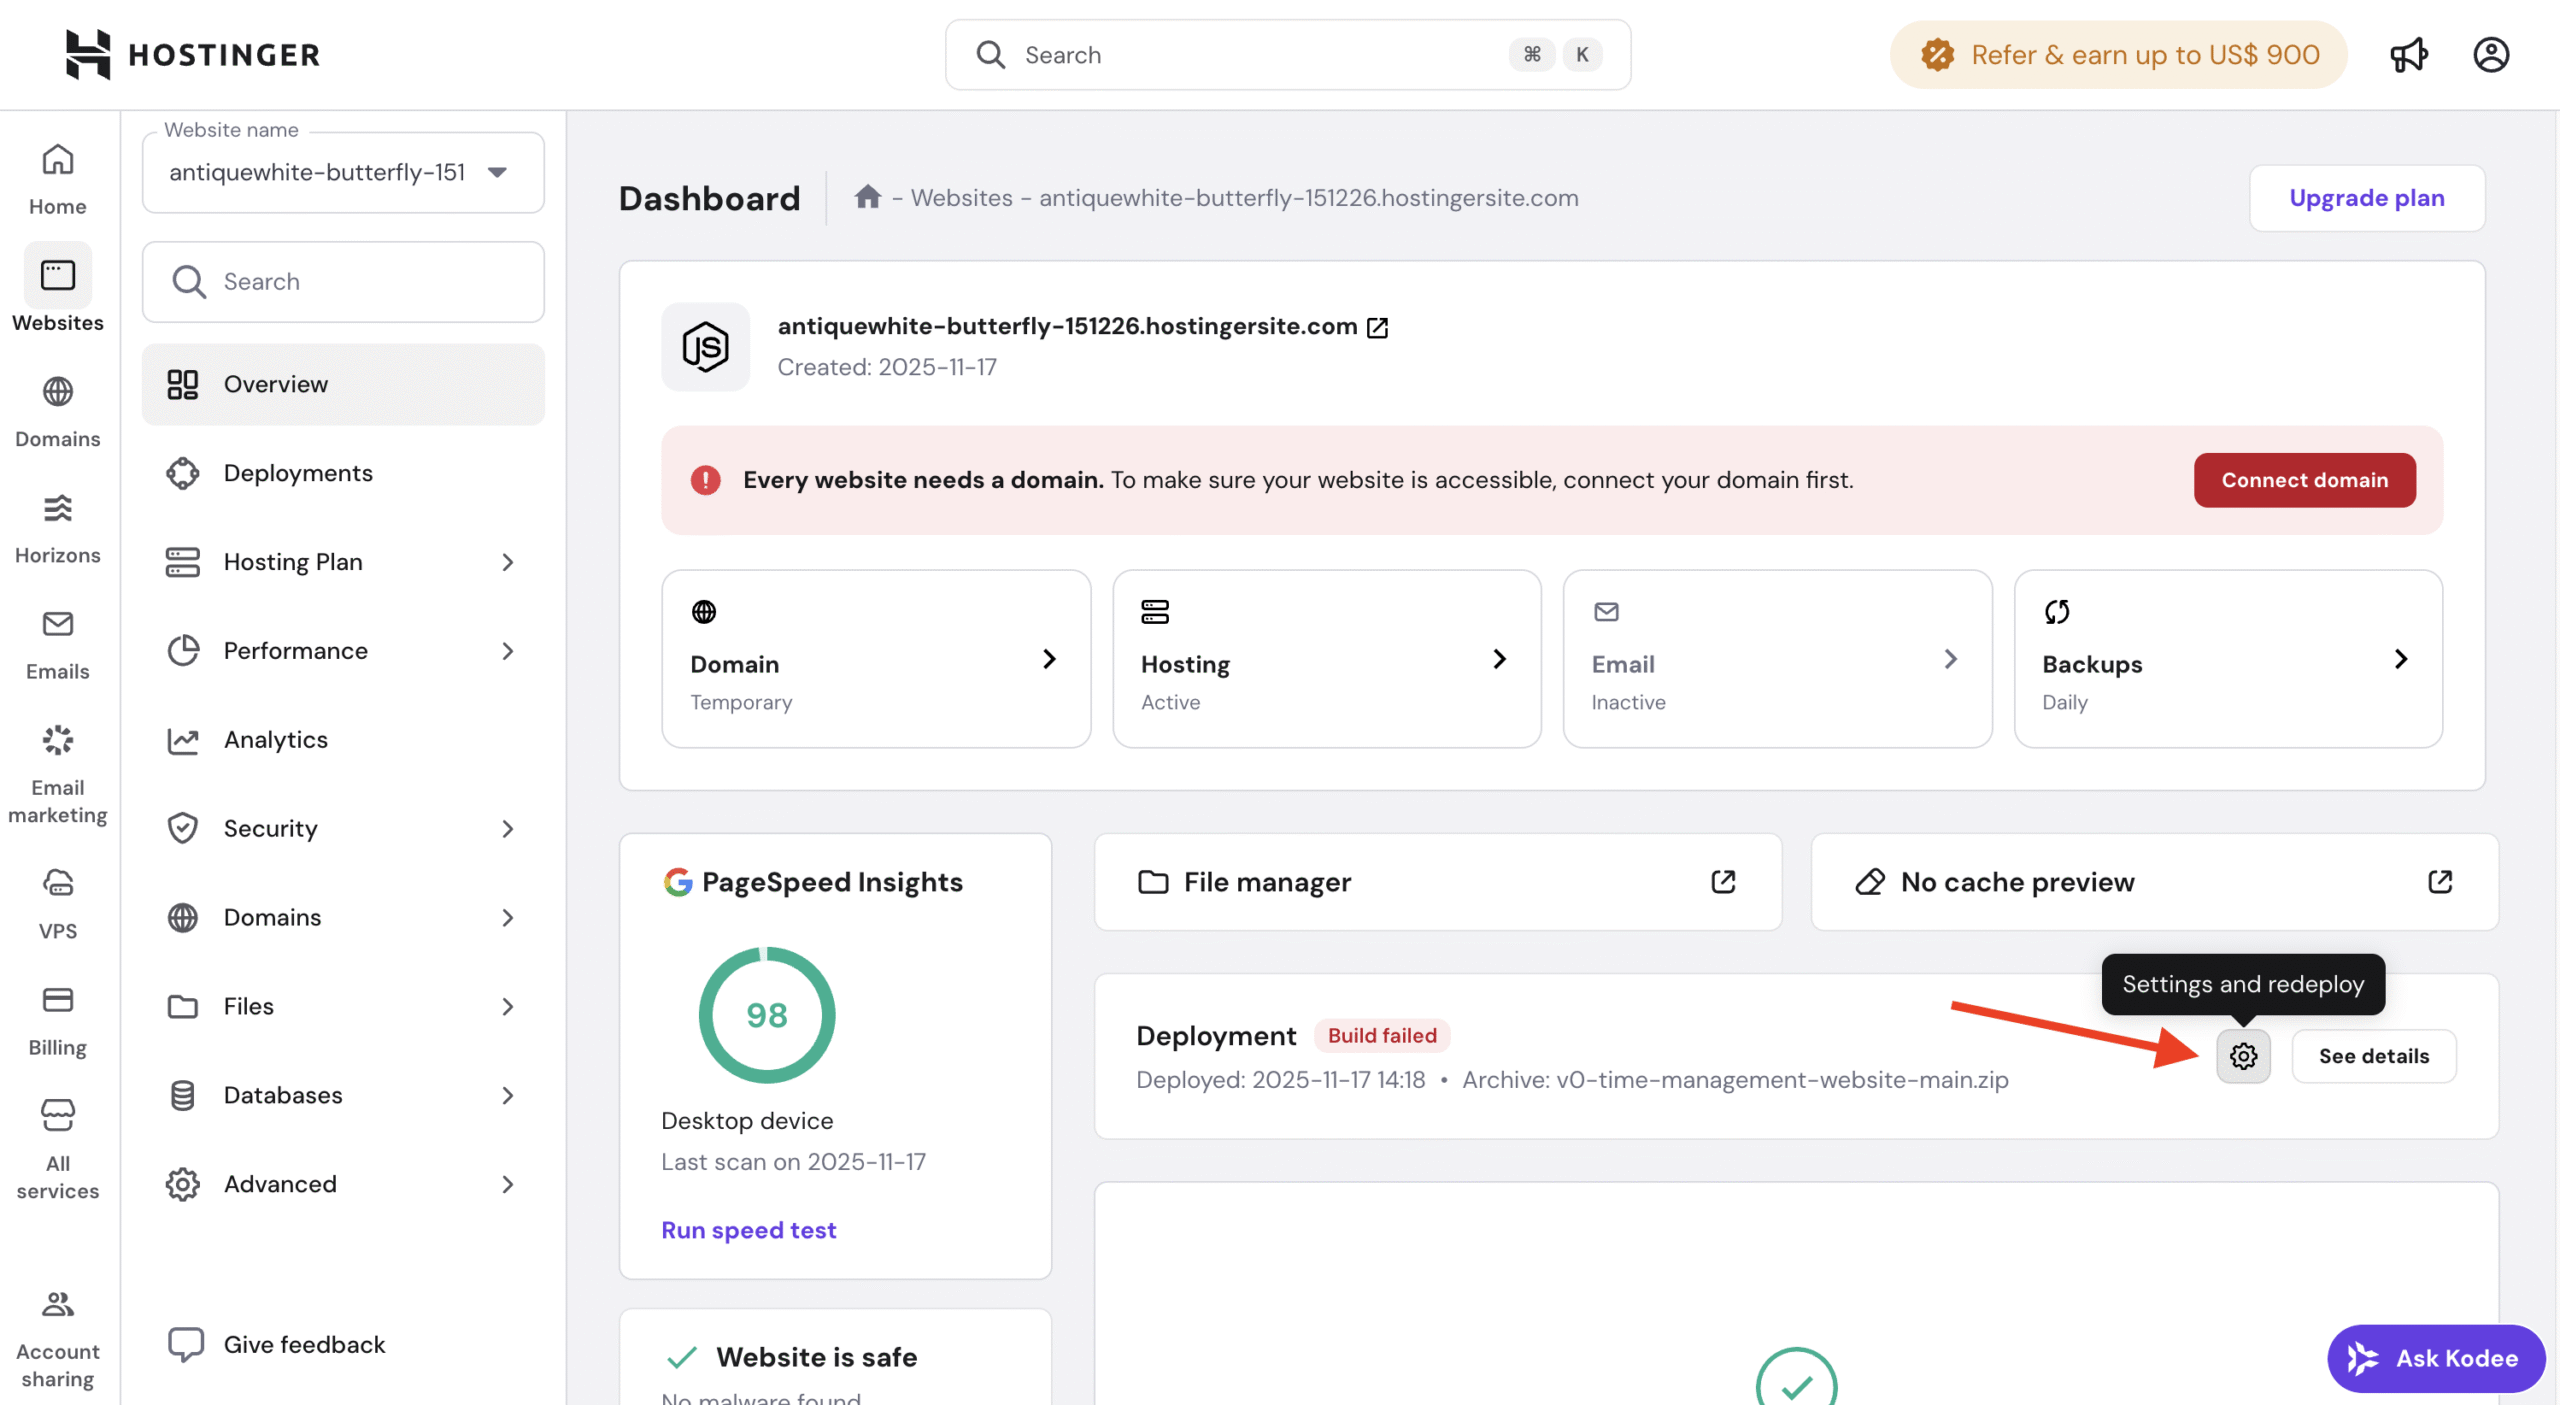
You will be redirected to the redeployment settings page.
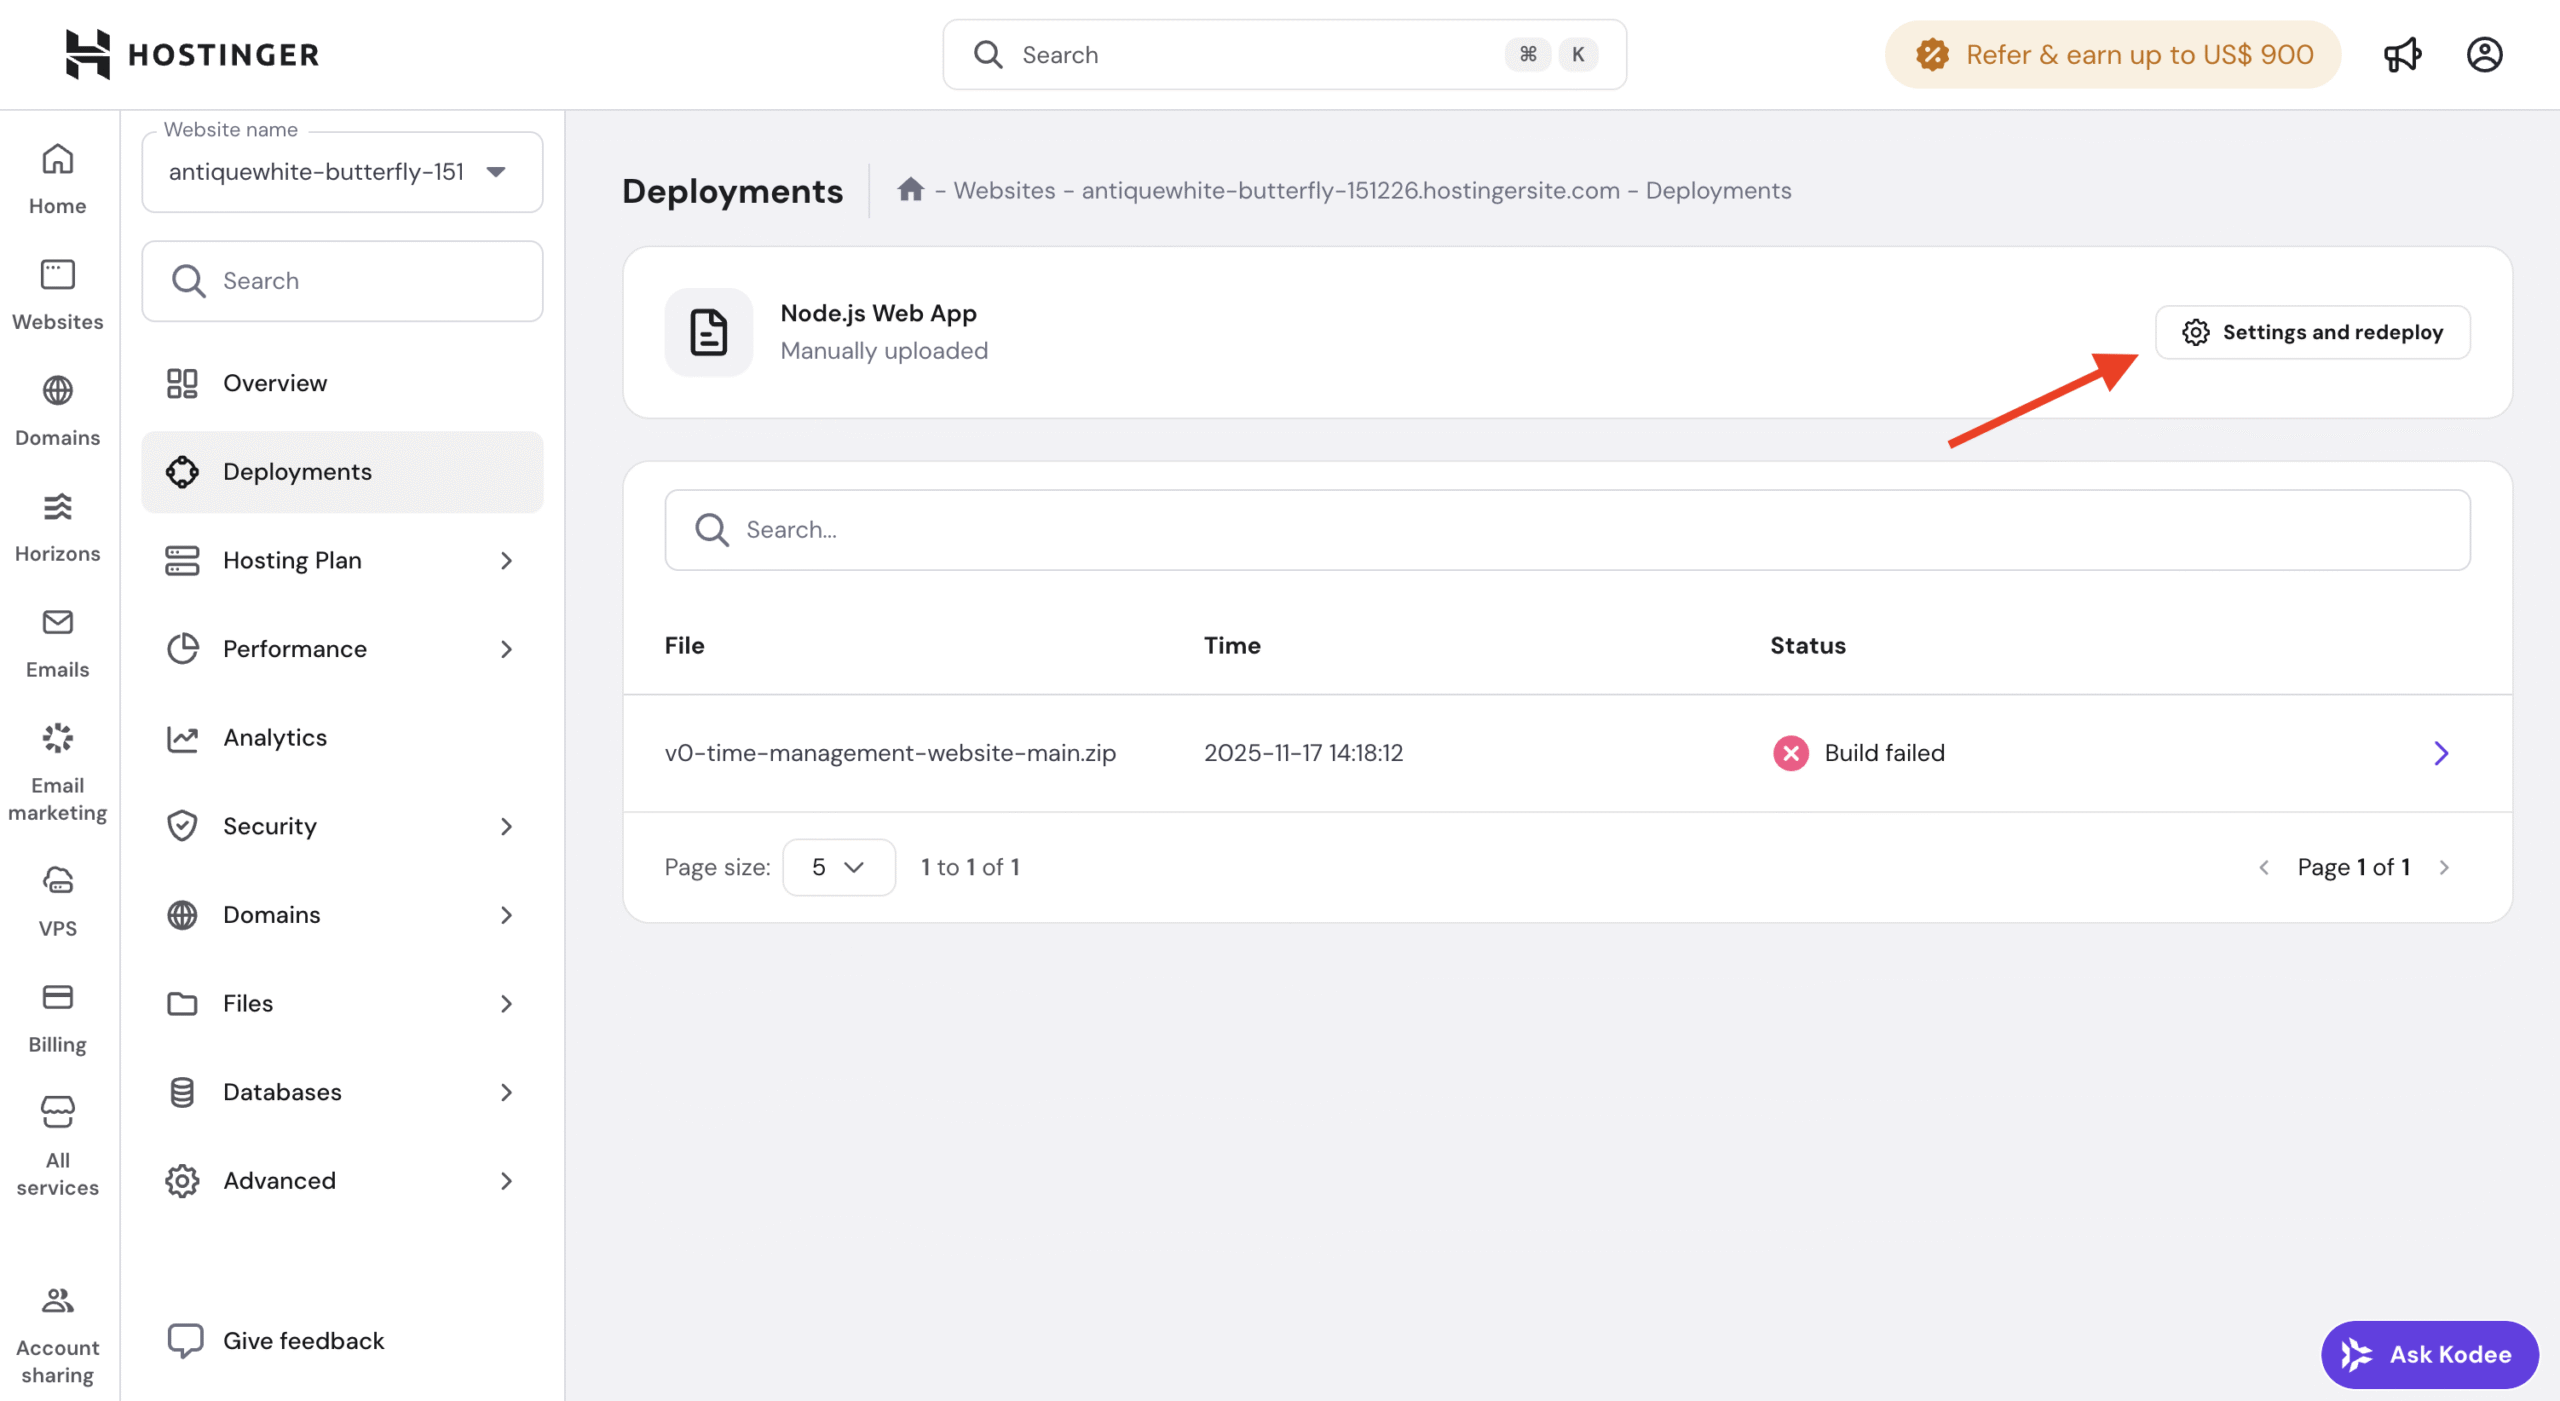
Option 2 — Redeploy from the Deployments section
- Open your Website Dashboard
- Navigate to the Deployments section
- Click Settings and redeploy.

This will also open the redeployment settings page.
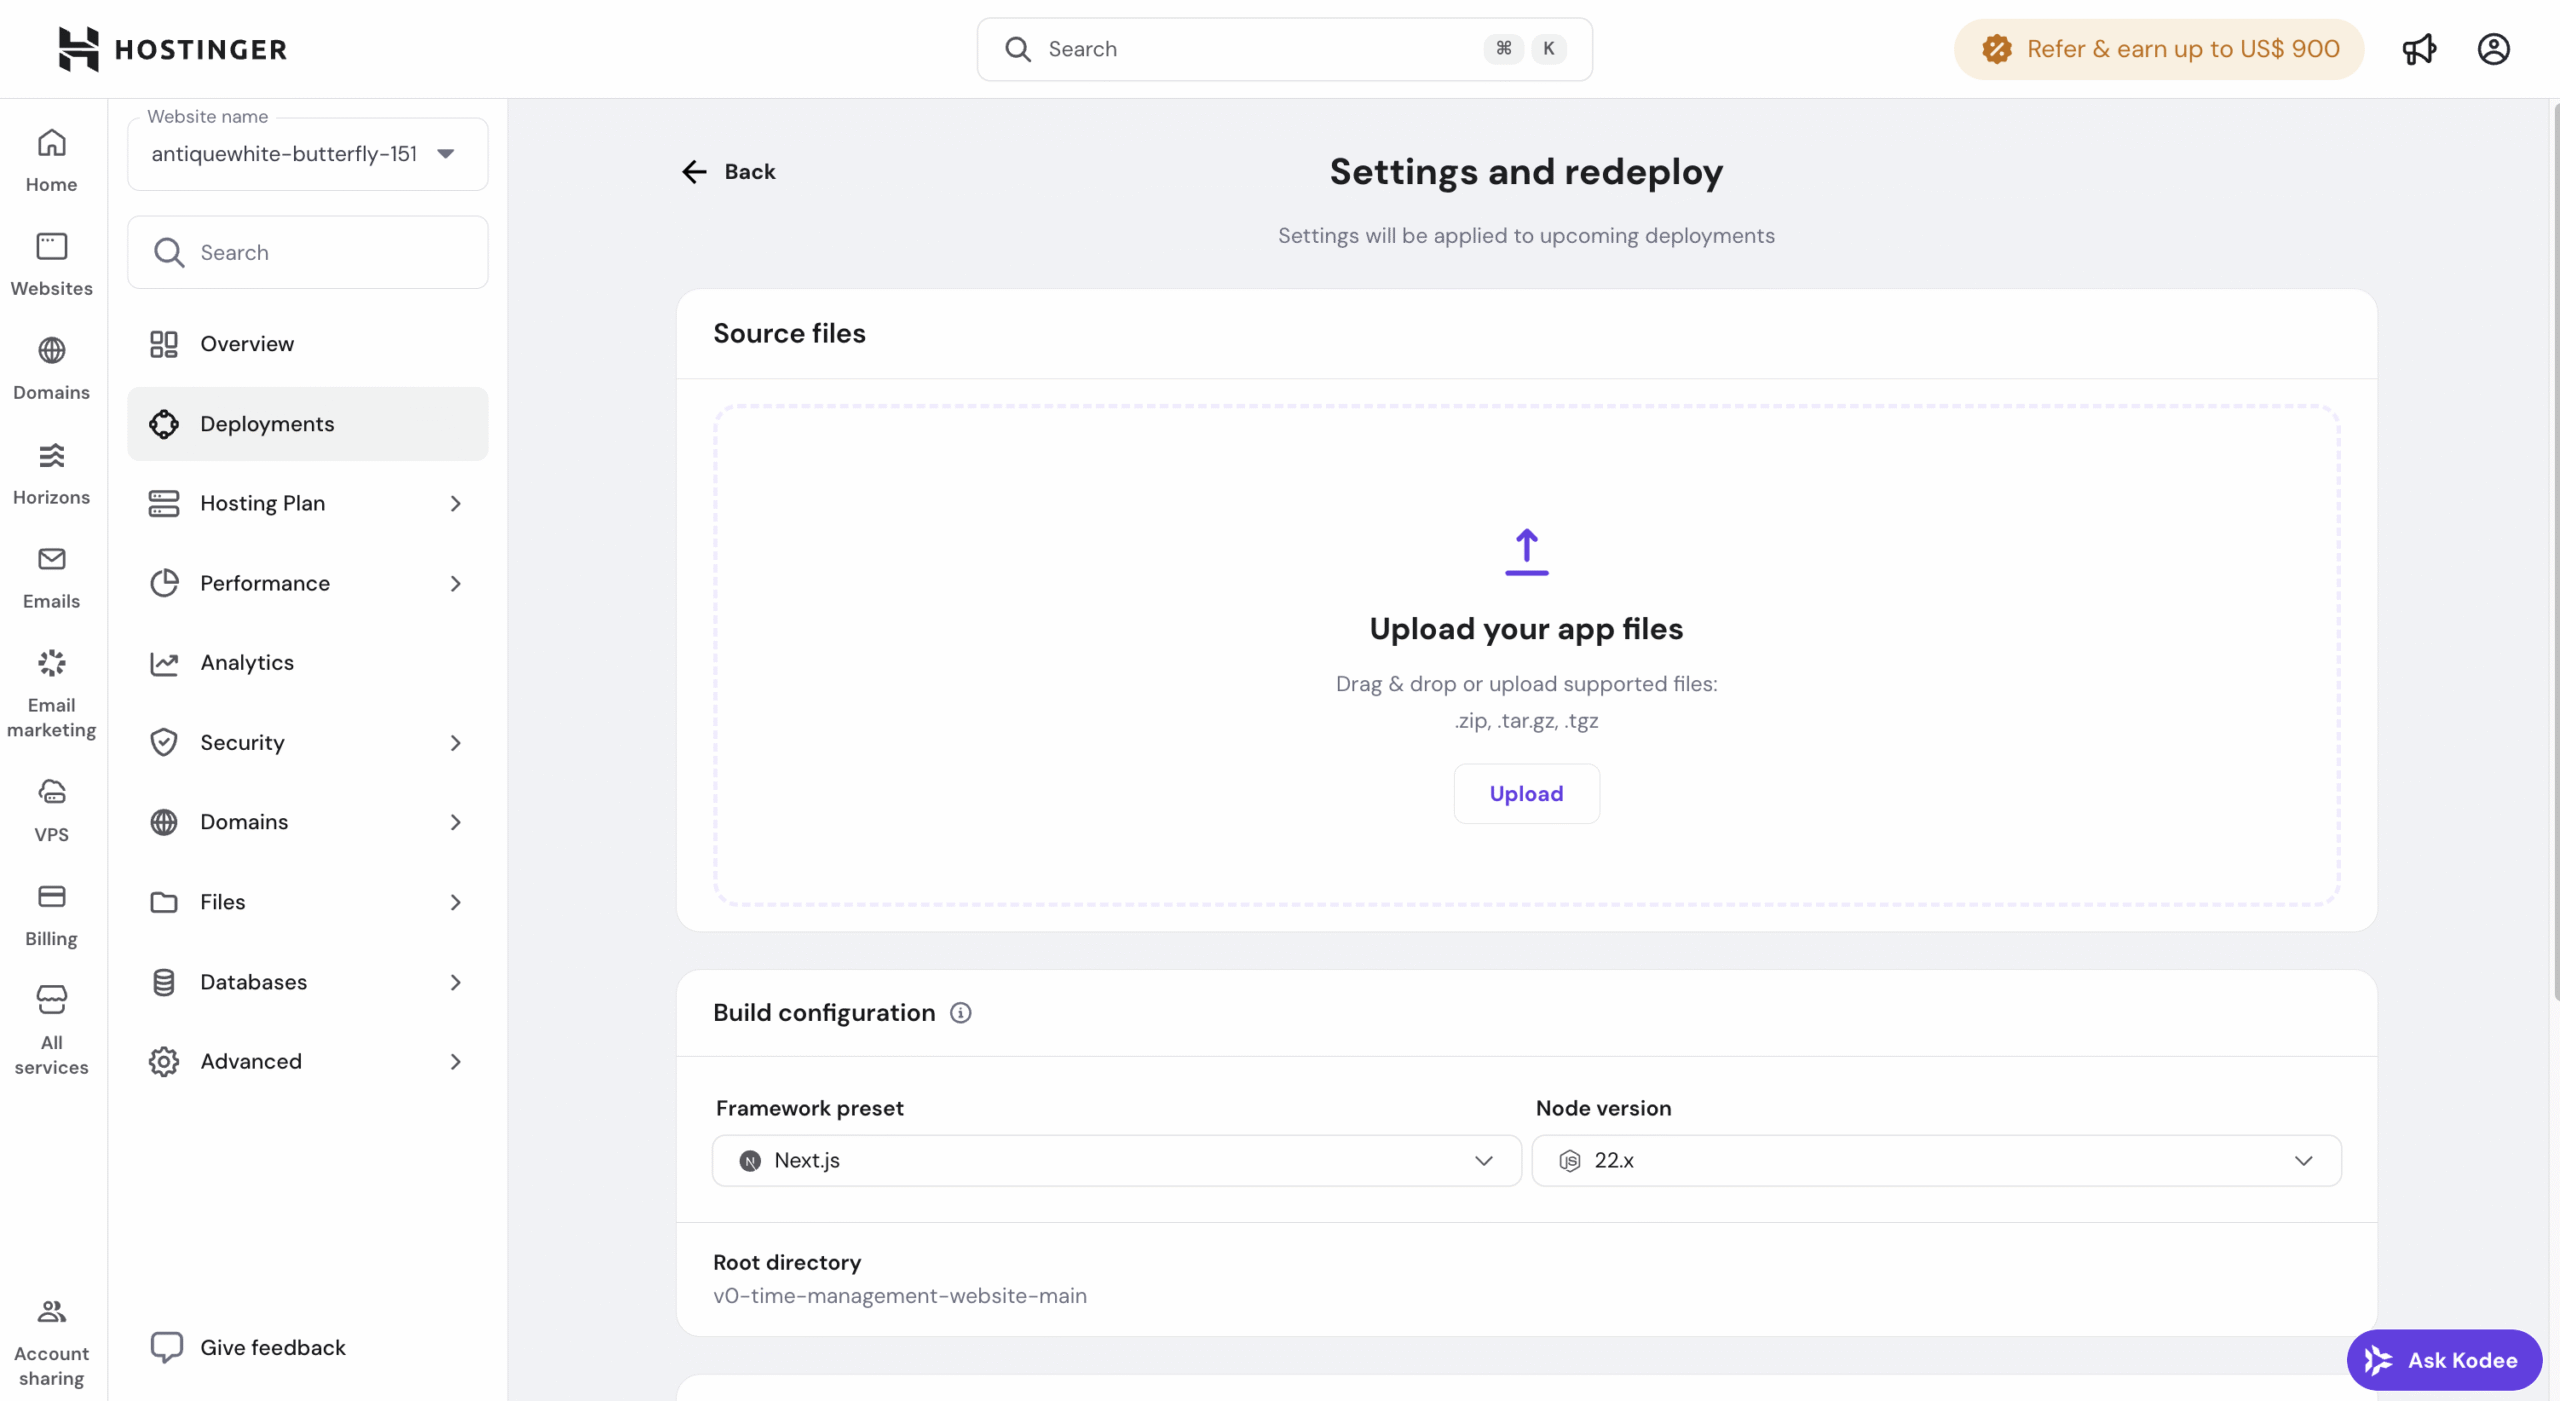
Review and update redeployment settings
Once you enter the redeployment flow, you can review and update your build settings, including:
-
Node.js version
-
Build command
-
Start command
-
Environment variables
Make any required changes before continuing.
Start the redeployment
After reviewing or updating the build settings:
- Confirm the settings
- Click Redeploy to start the deployment process
Your application will be rebuilt and redeployed using the updated configuration.
Redeployment based on deployment source
The redeployment behavior depends on how your application was originally deployed.
For ZIP-based deployments:
If your application was deployed using a .ZIP file:
-
You must re-upload the ZIP file during redeployment
-
The system cannot reuse the previously uploaded archive
This ensures the latest version of your files is deployed.

For GitHub-based deployments:
If your application is connected to GitHub:
-
You do not need to re-upload any files
-
The latest code from the selected branch will be used automatically
This makes redeployments faster and easier when using GitHub integration.