After deploying a Node.js application on Hostinger, you can edit existing environment variables or add new ones at any time. Changes to environment variables require a redeployment to take effect.
You can access environment variable settings from two locations in the control panel:
-
Website Dashboard
-
Deployments section
Option 1 — Edit from the Website Dashboard
-
Open the Website Dashboard for your Node.js application.
-
Click Settings & Redeploy.
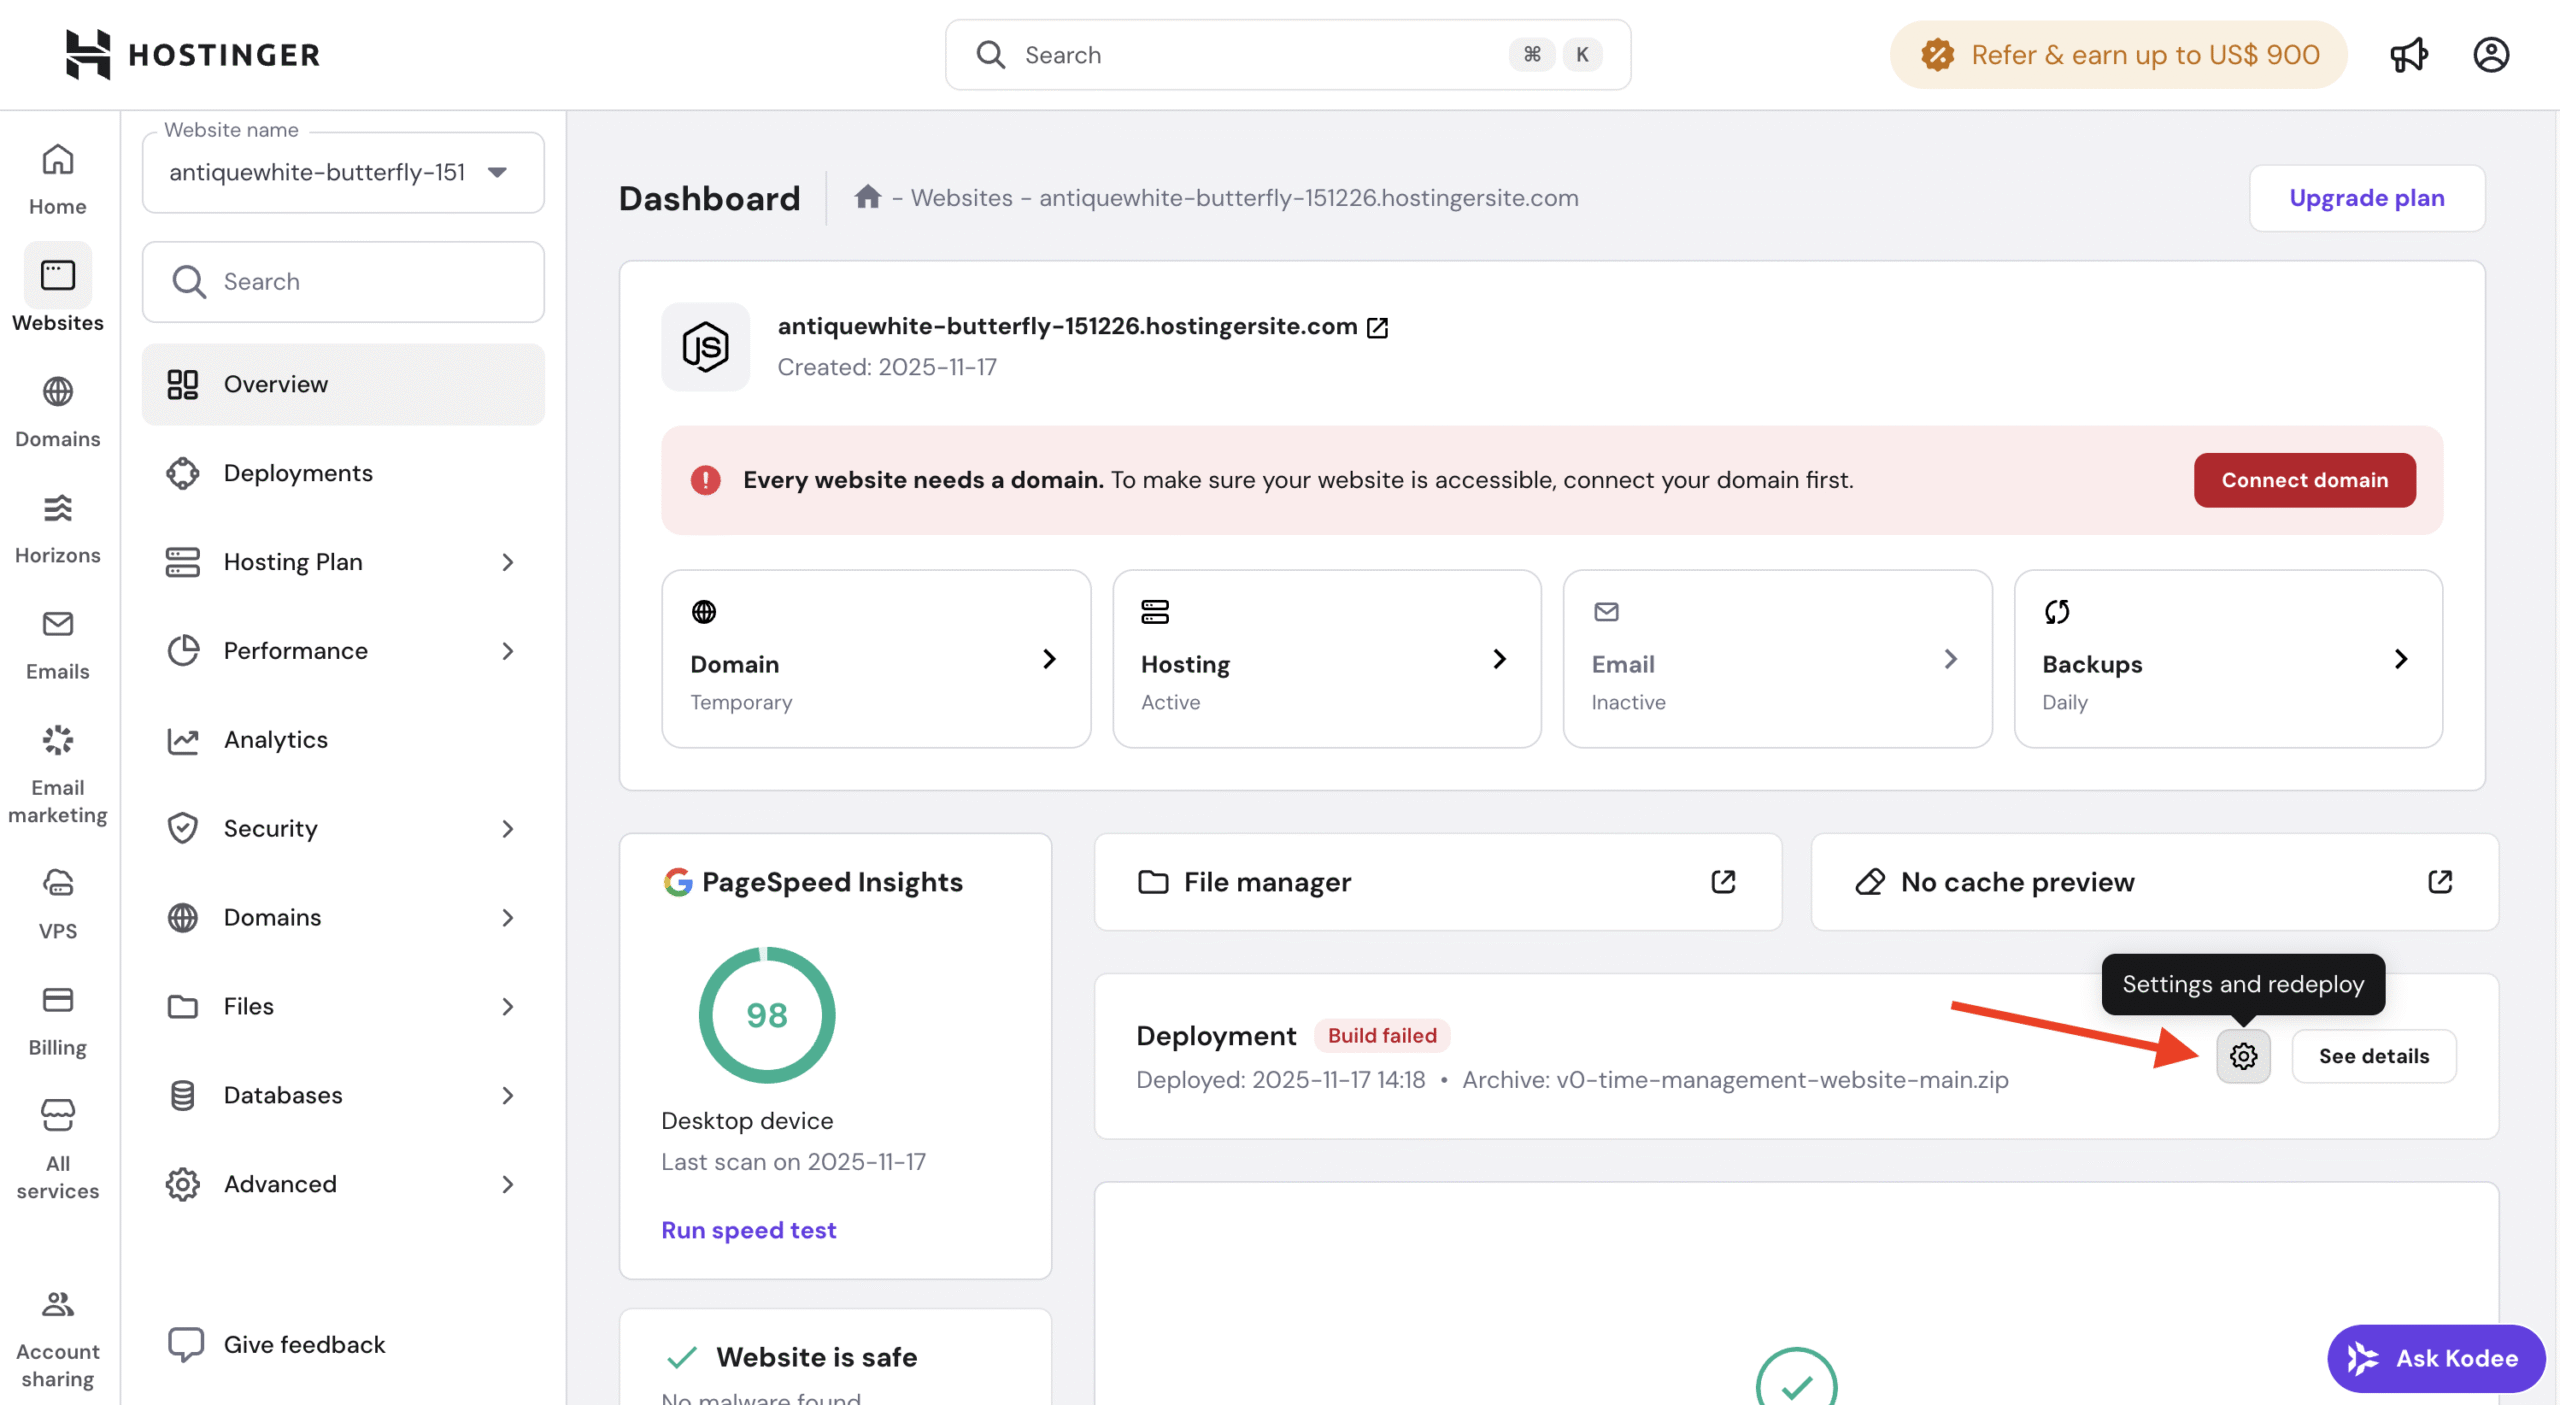
You will be redirected to the redeployment settings page.
Option 2 — Edit from the Deployments section
-
Open your Website Dashboard.
-
Navigate to the Deployments section.
-
Click Settings & Redeploy.
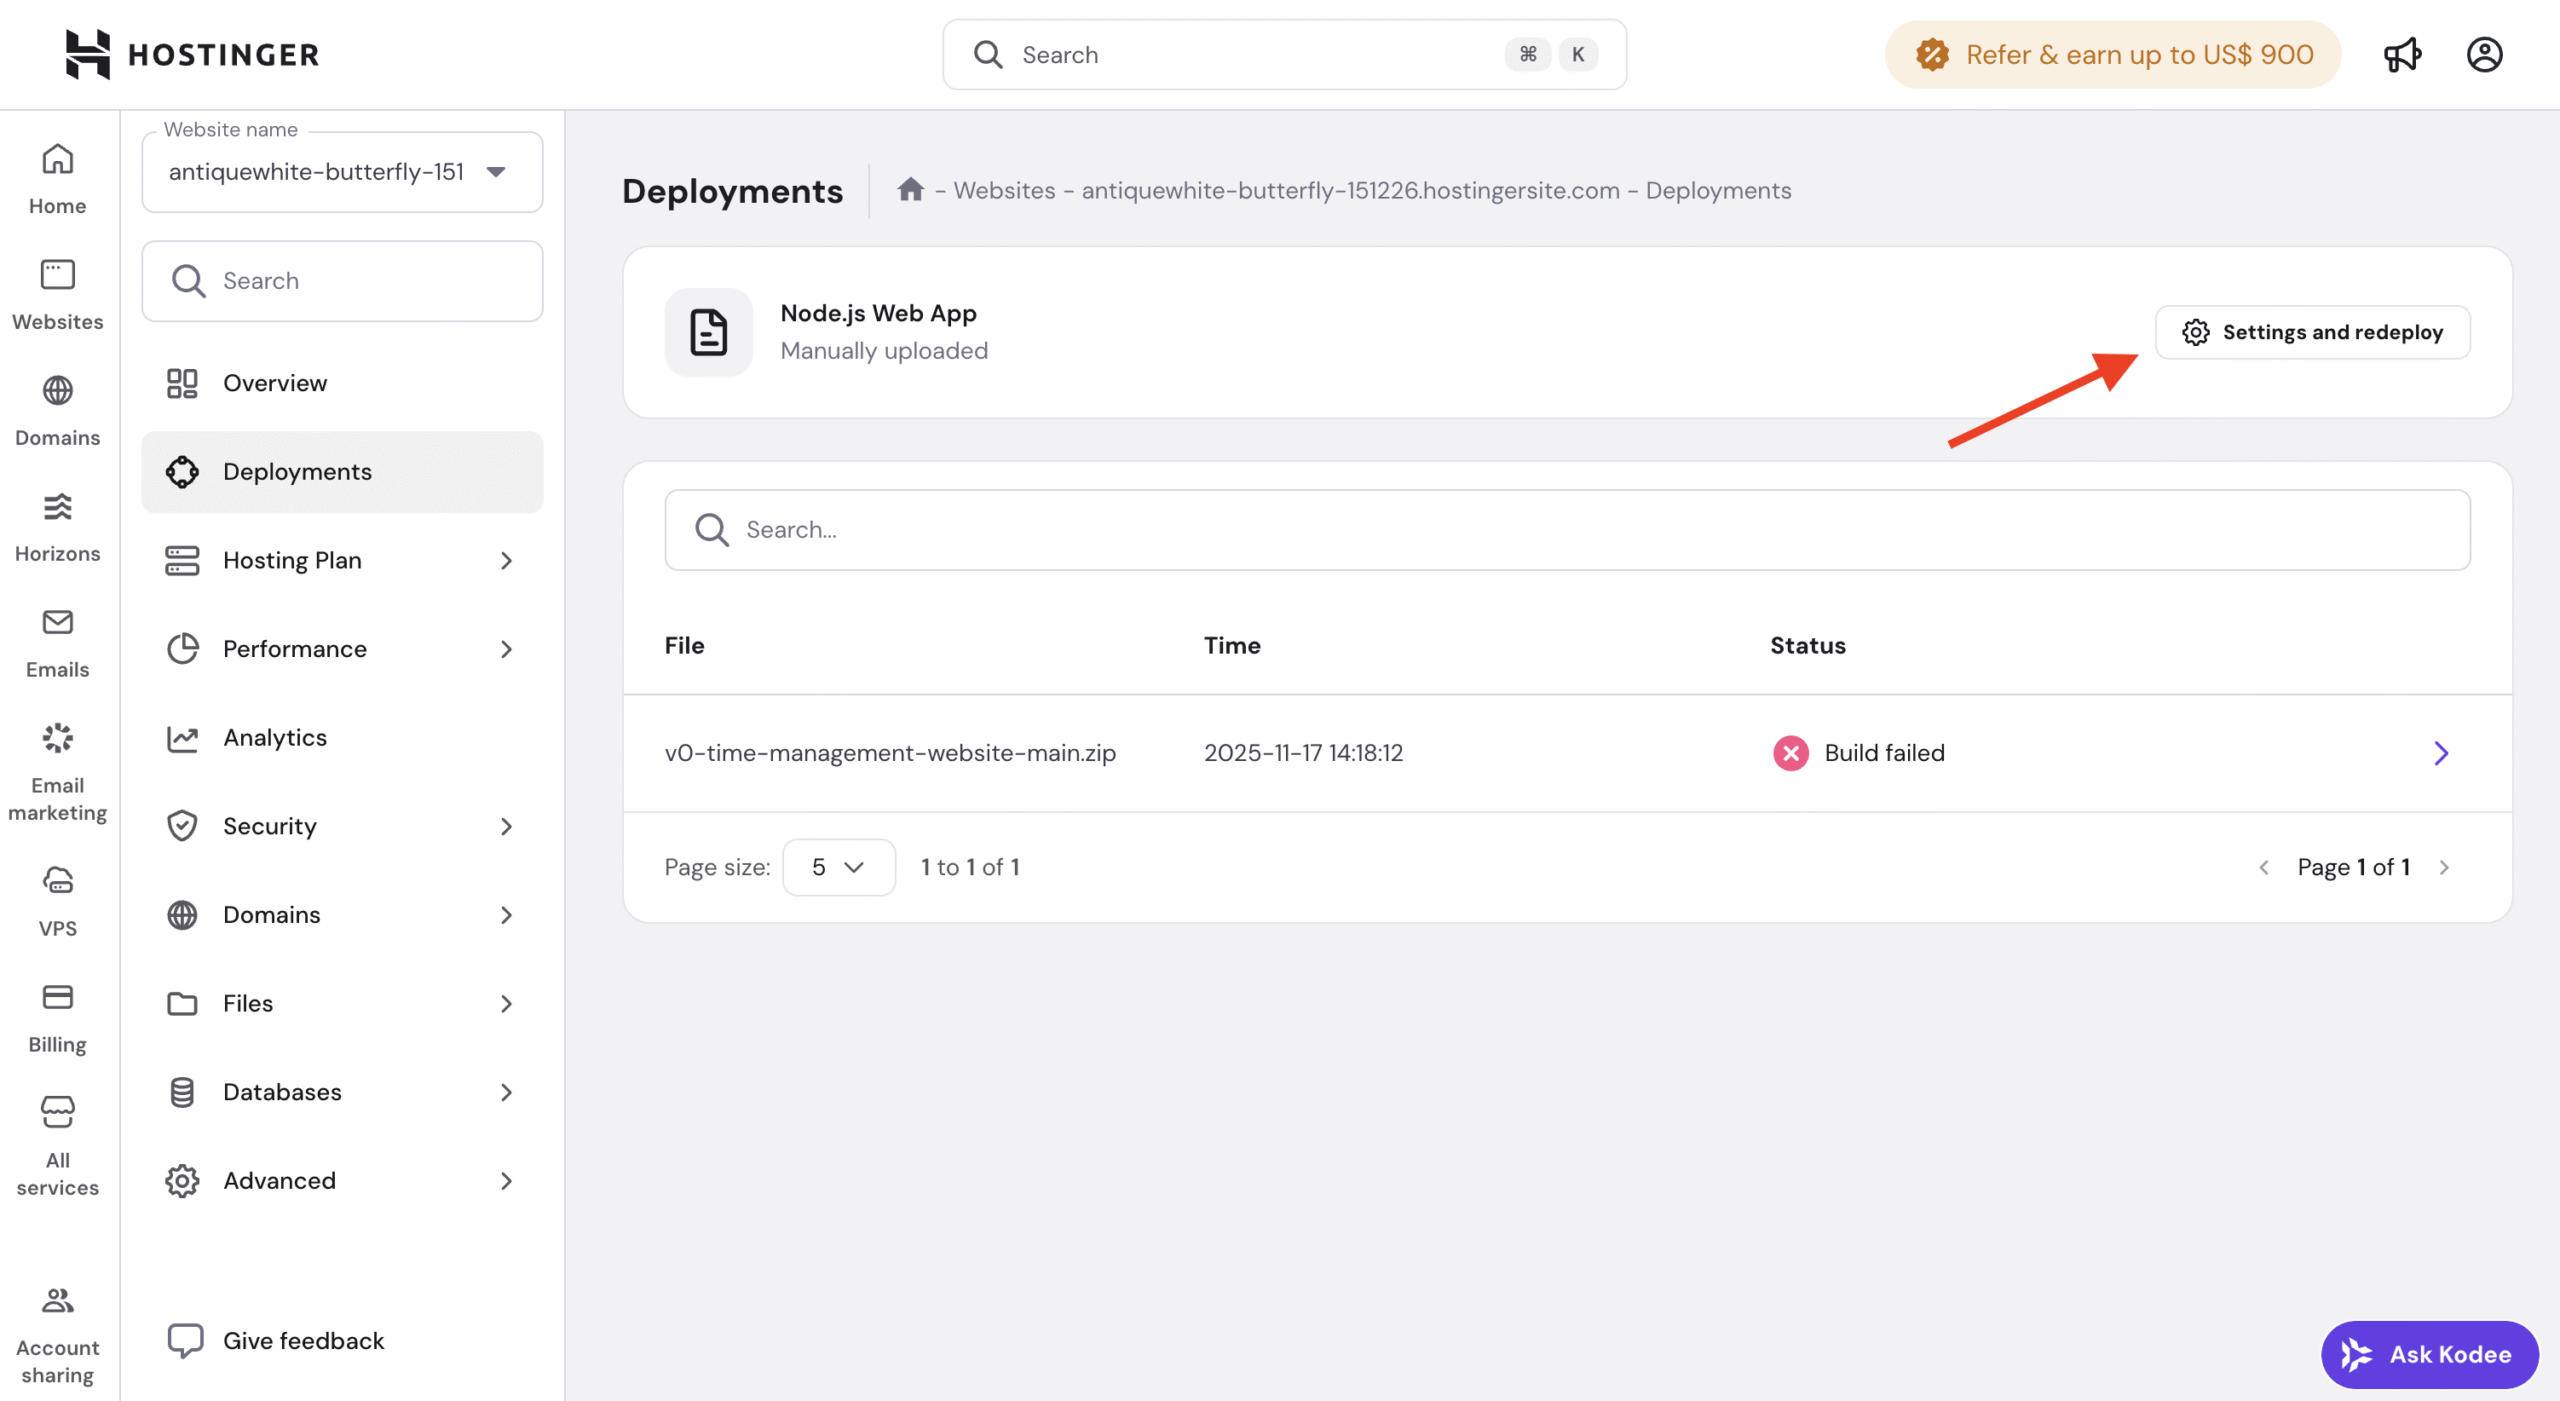
This will also open the redeployment settings page.
How to edit or add environment variables
Once you are in the Settings & Redeploy flow:
-
Navigate to the Environment variables section.
-
Edit existing variables or add new ones as needed.
Review all environment variables to ensure values are correct.
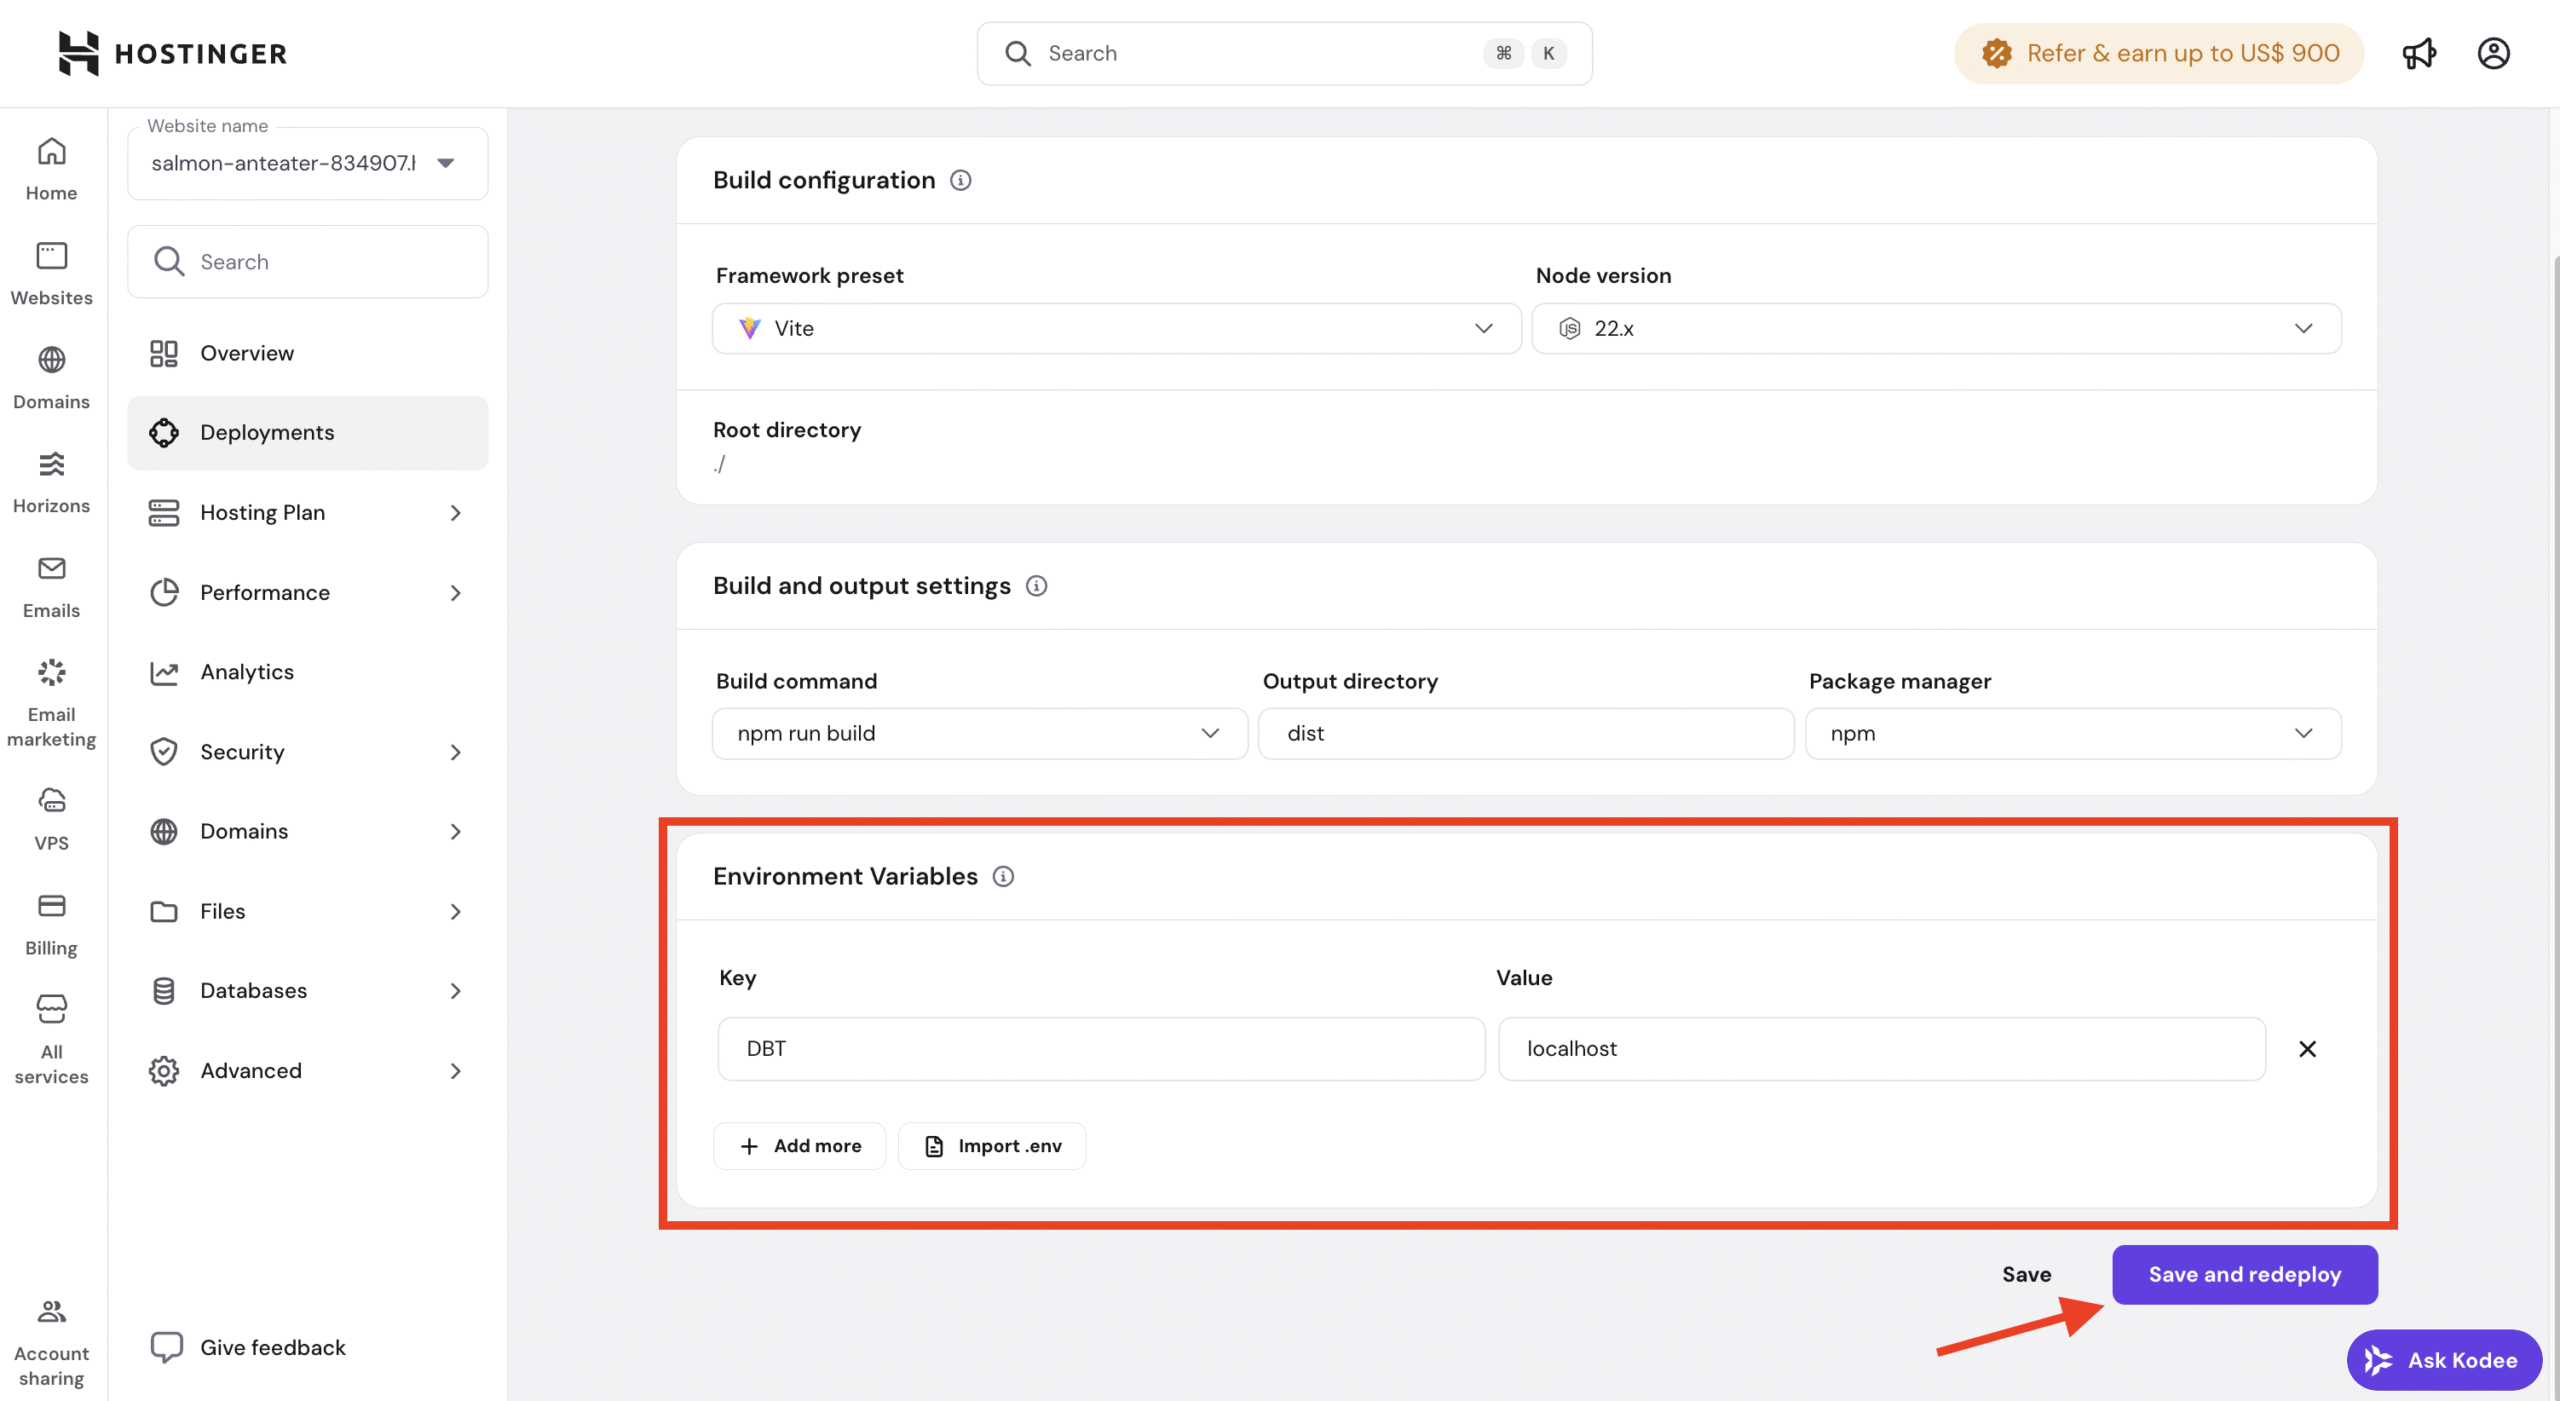
Rebuilding applications
After modifying environment variables:
-
Confirm the changes.
-
Proceed with rebuilding the application.
The application must be rebuilt for updated environment variables to be applied.
Important note about ZIP-based deployments
The redeployment process differs depending on how your application was originally deployed.
If your application was deployed using a ZIP file:
-
You must re-upload the ZIP file during redeployment
-
The previously uploaded archive cannot be reused
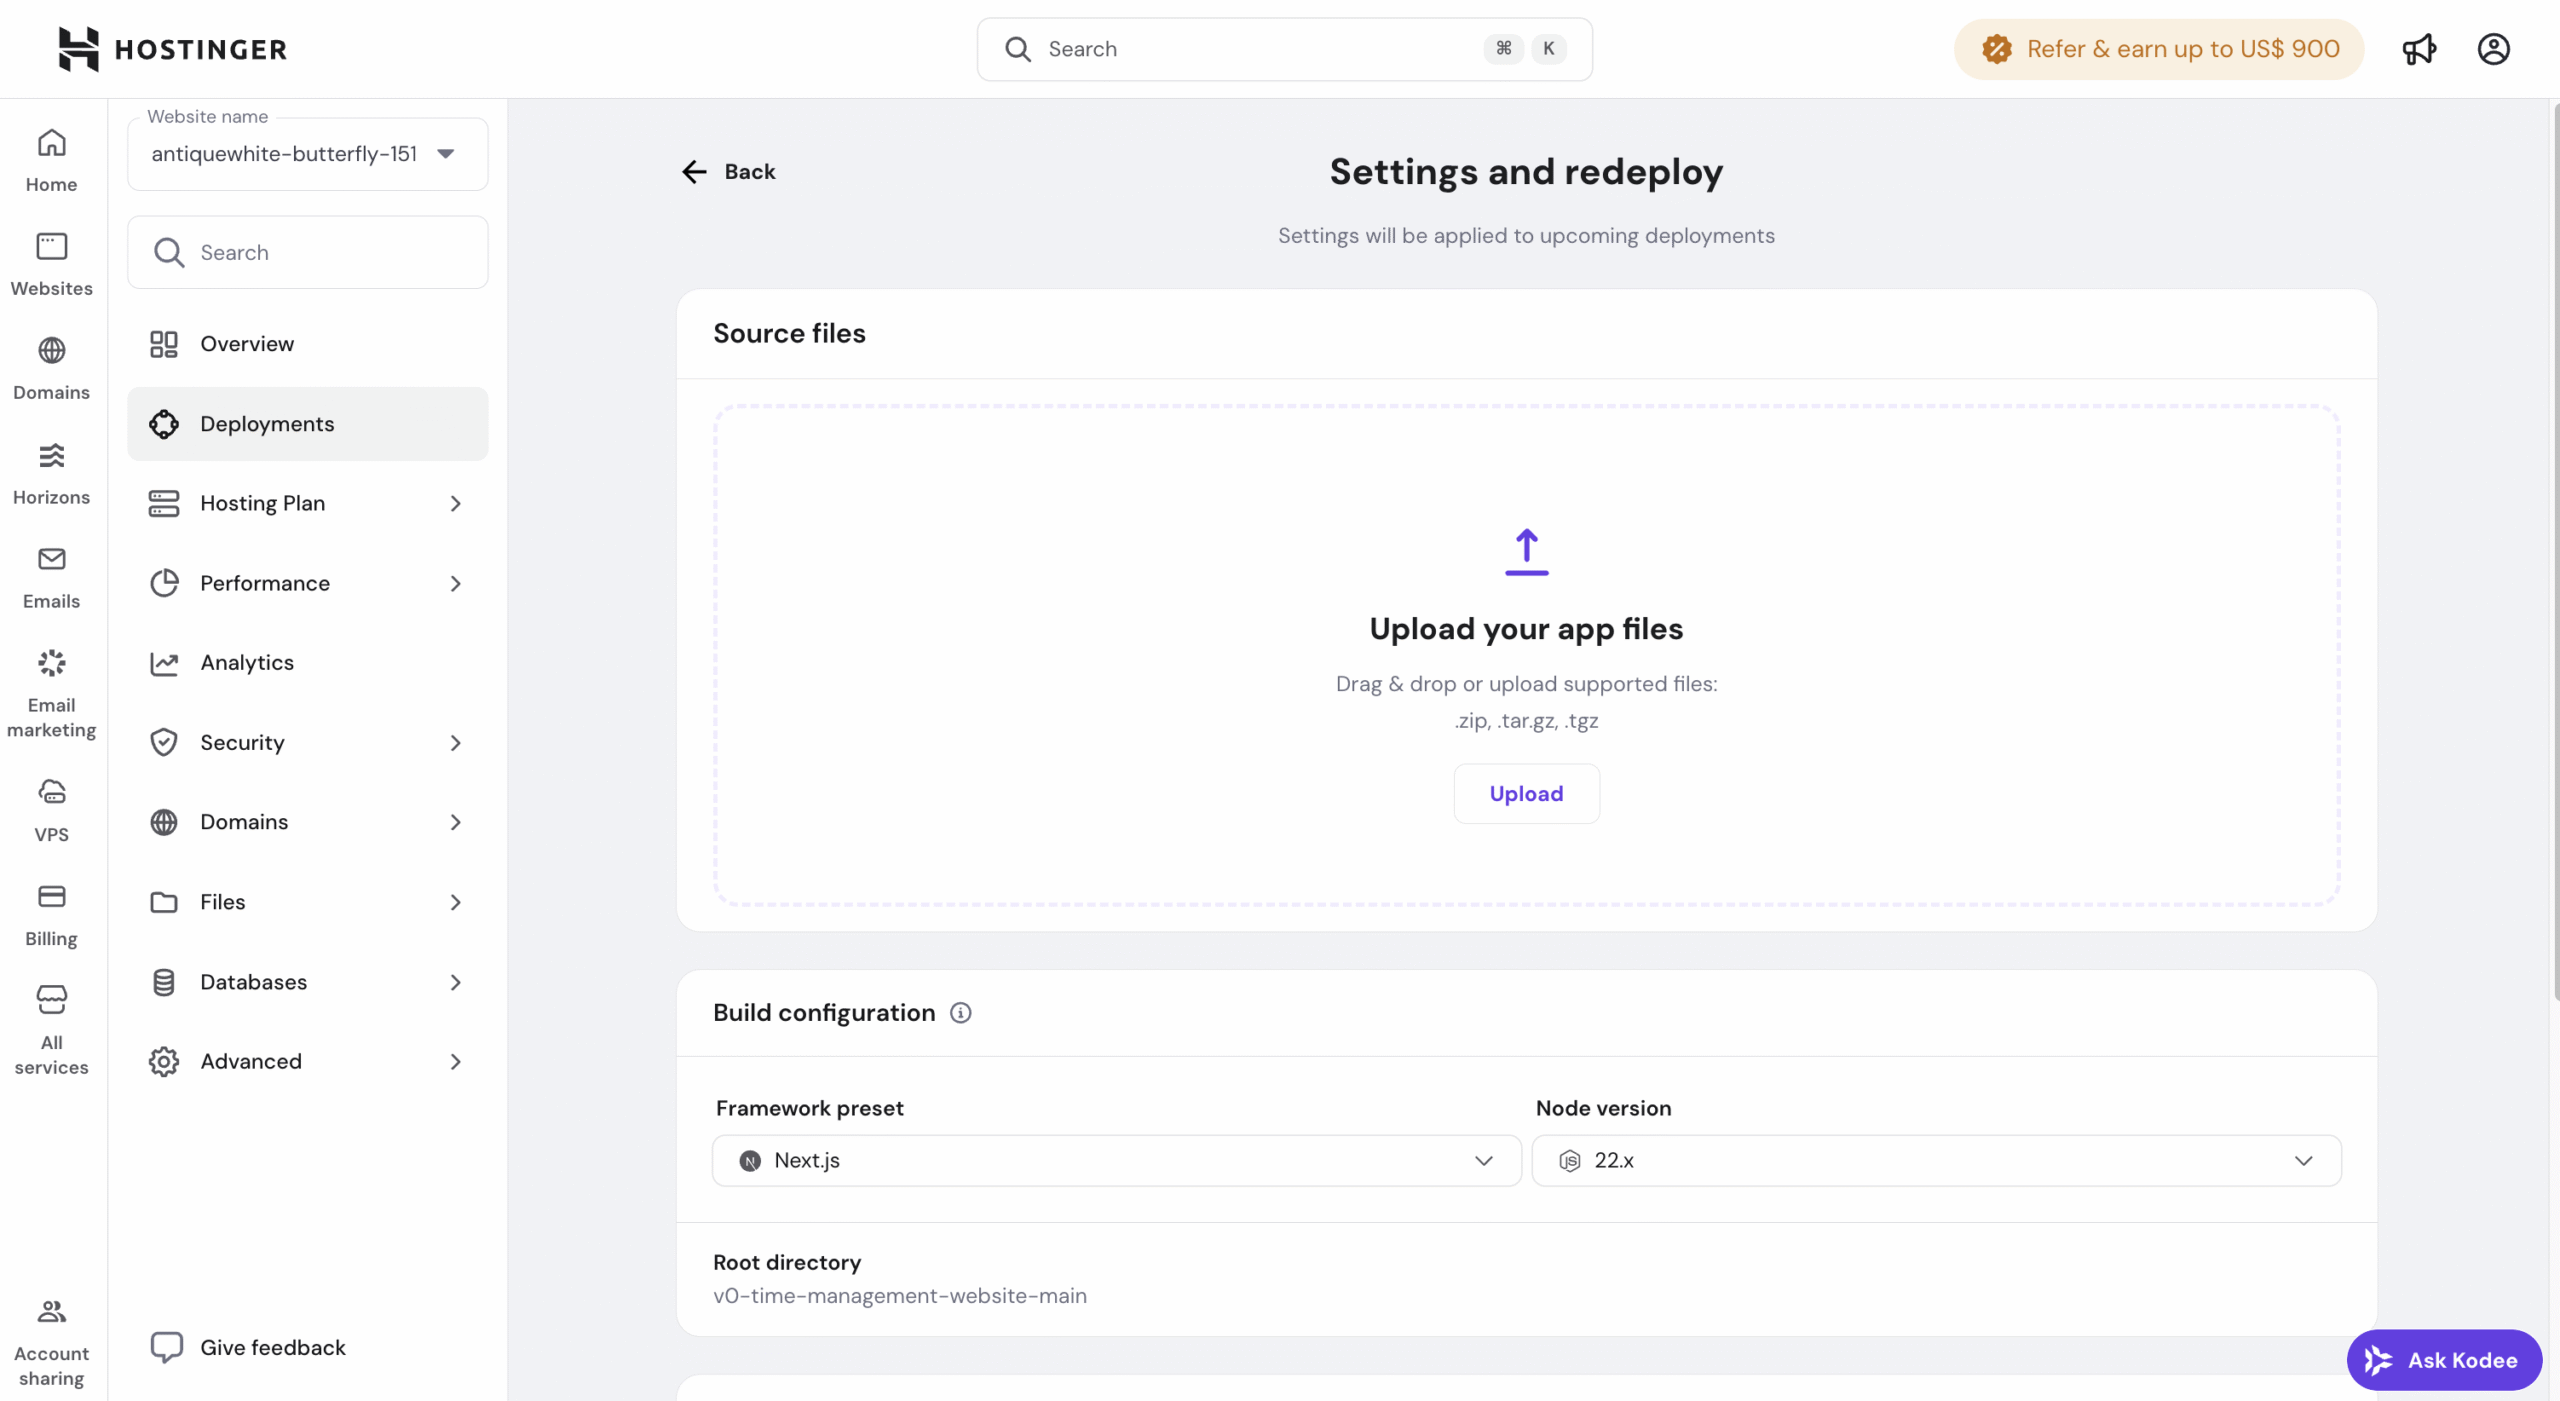
This ensures the correct application files are included in the rebuild.
When to update environment variables
You may need to update environment variables when:
- Adding new configuration values
- Updating database credentials
- Rotating API keys or secrets
- Changing environment-specific settings