This guide explains how to connect a Supabase project to a Node.js application hosted on Hostinger using the Supabase JavaScript client.
Before we start, ensure:
-
You already have a built Node.js application
-
Your database is hosted on Supabase (third-party provider)
When using a third-party database provider (like Supabase), Hostinger supports Node.js applications to connect to externally hosted databases such as:
-
PostgreSQL
-
MySQL
-
MongoDB
Step 1: Get Supabase Project Credentials
-
Log in to the Supabase Dashboard
-
Open your Supabase project
-
Navigate to Project Settings → API
-
Locate:
-
Project URL
-
anon public API key
-
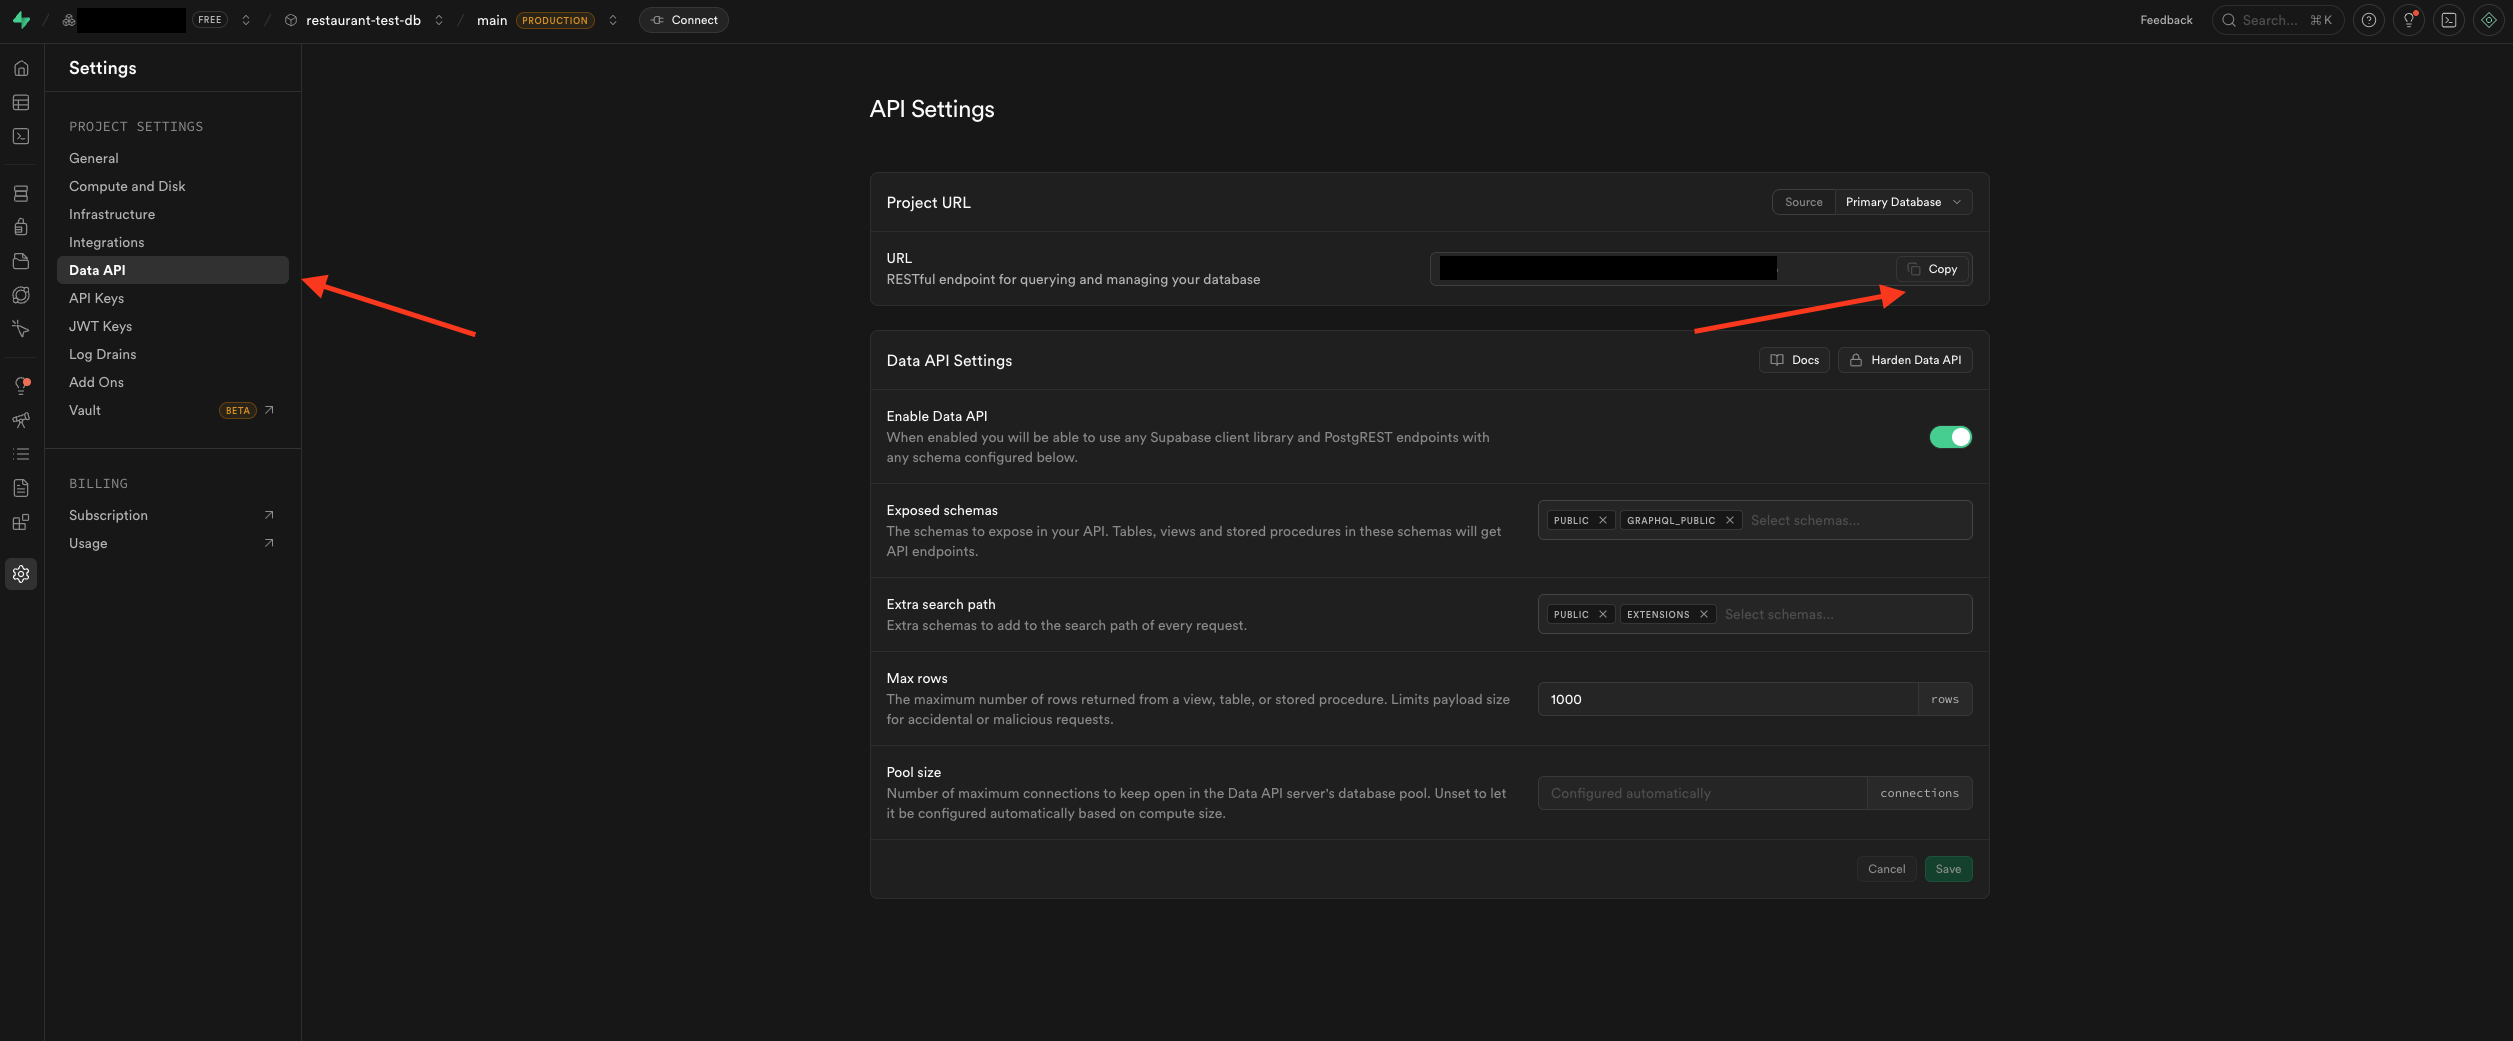
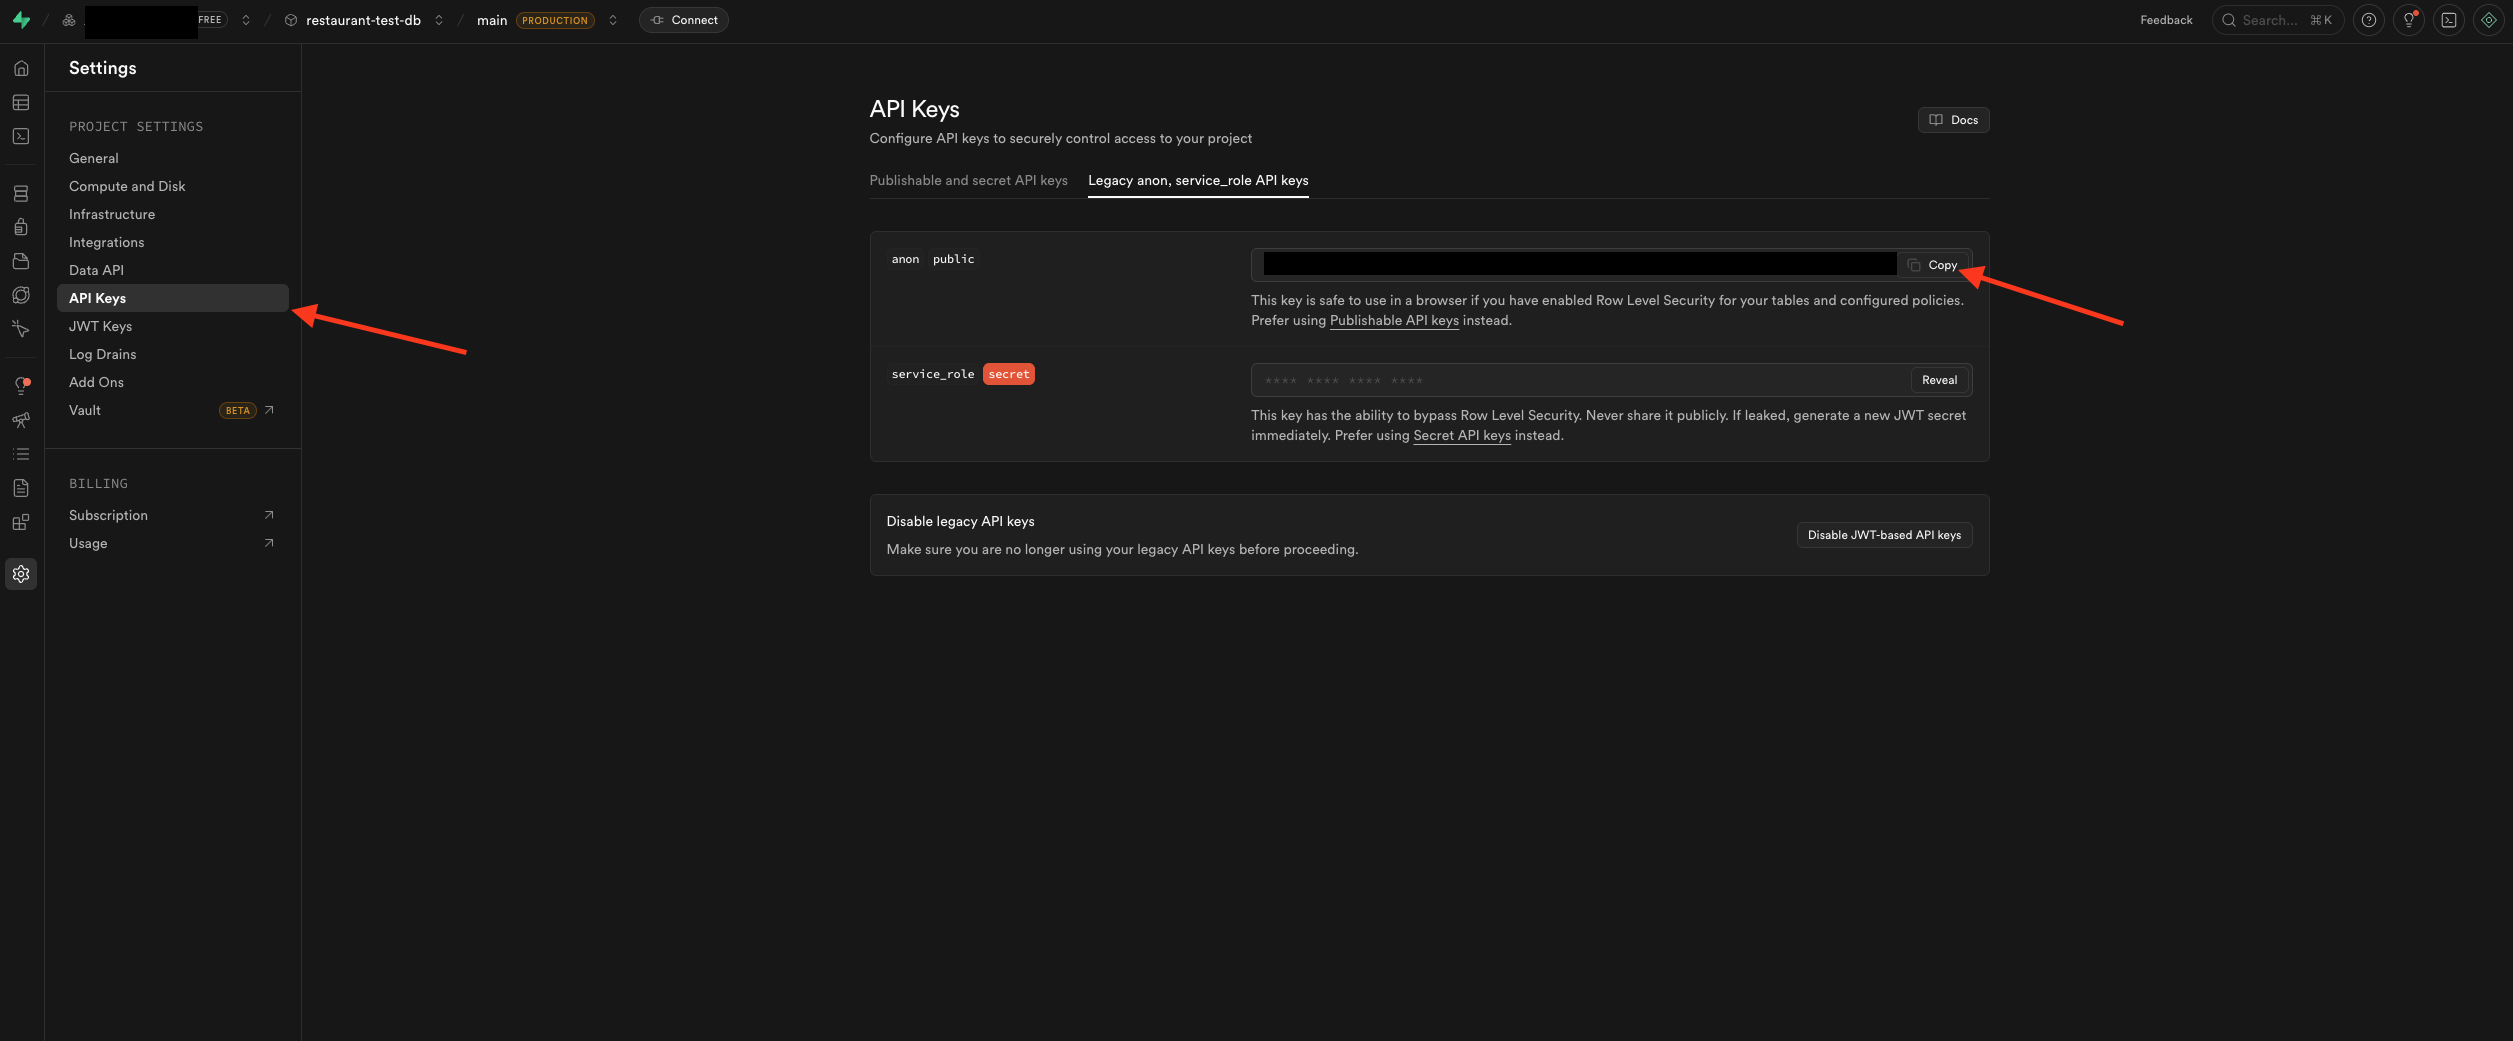
You will use these values as environment variables.
Step 2: Configure Environment Variables
To connect quickly to Supabase, use the following environment variables.
Create or update your .env file:
SUPABASE_URL=https://your-project-id.supabase.co
SUPABASE_ANON_KEY=your-public-anon-keyEnvironment variable explanation
-
SUPABASE_URL – Your Supabase project URL
-
SUPABASE_ANON_KEY – Your Supabase anonymous (public) API key
Step 3: Ensure Your Website Contains a Supabase Connection File
Your Node.js application should include a dedicated Supabase client file to handle database communication.
This file is commonly located in:
-
config/supabase.js
-
lib/supabaseClient.js
-
supabase.js
Default Supabase Client Example (Node.js)
import { createClient } from "@supabase/supabase-js";

const supabase = createClient(
process.env.SUPABASE_URL,
process.env.SUPABASE_ANON_KEY
);

export default supabase;
This client:
-
Authenticates using your Supabase project credentials
-
Allows access to the database, authentication, and storage APIs
-
Requires no direct database connection handling
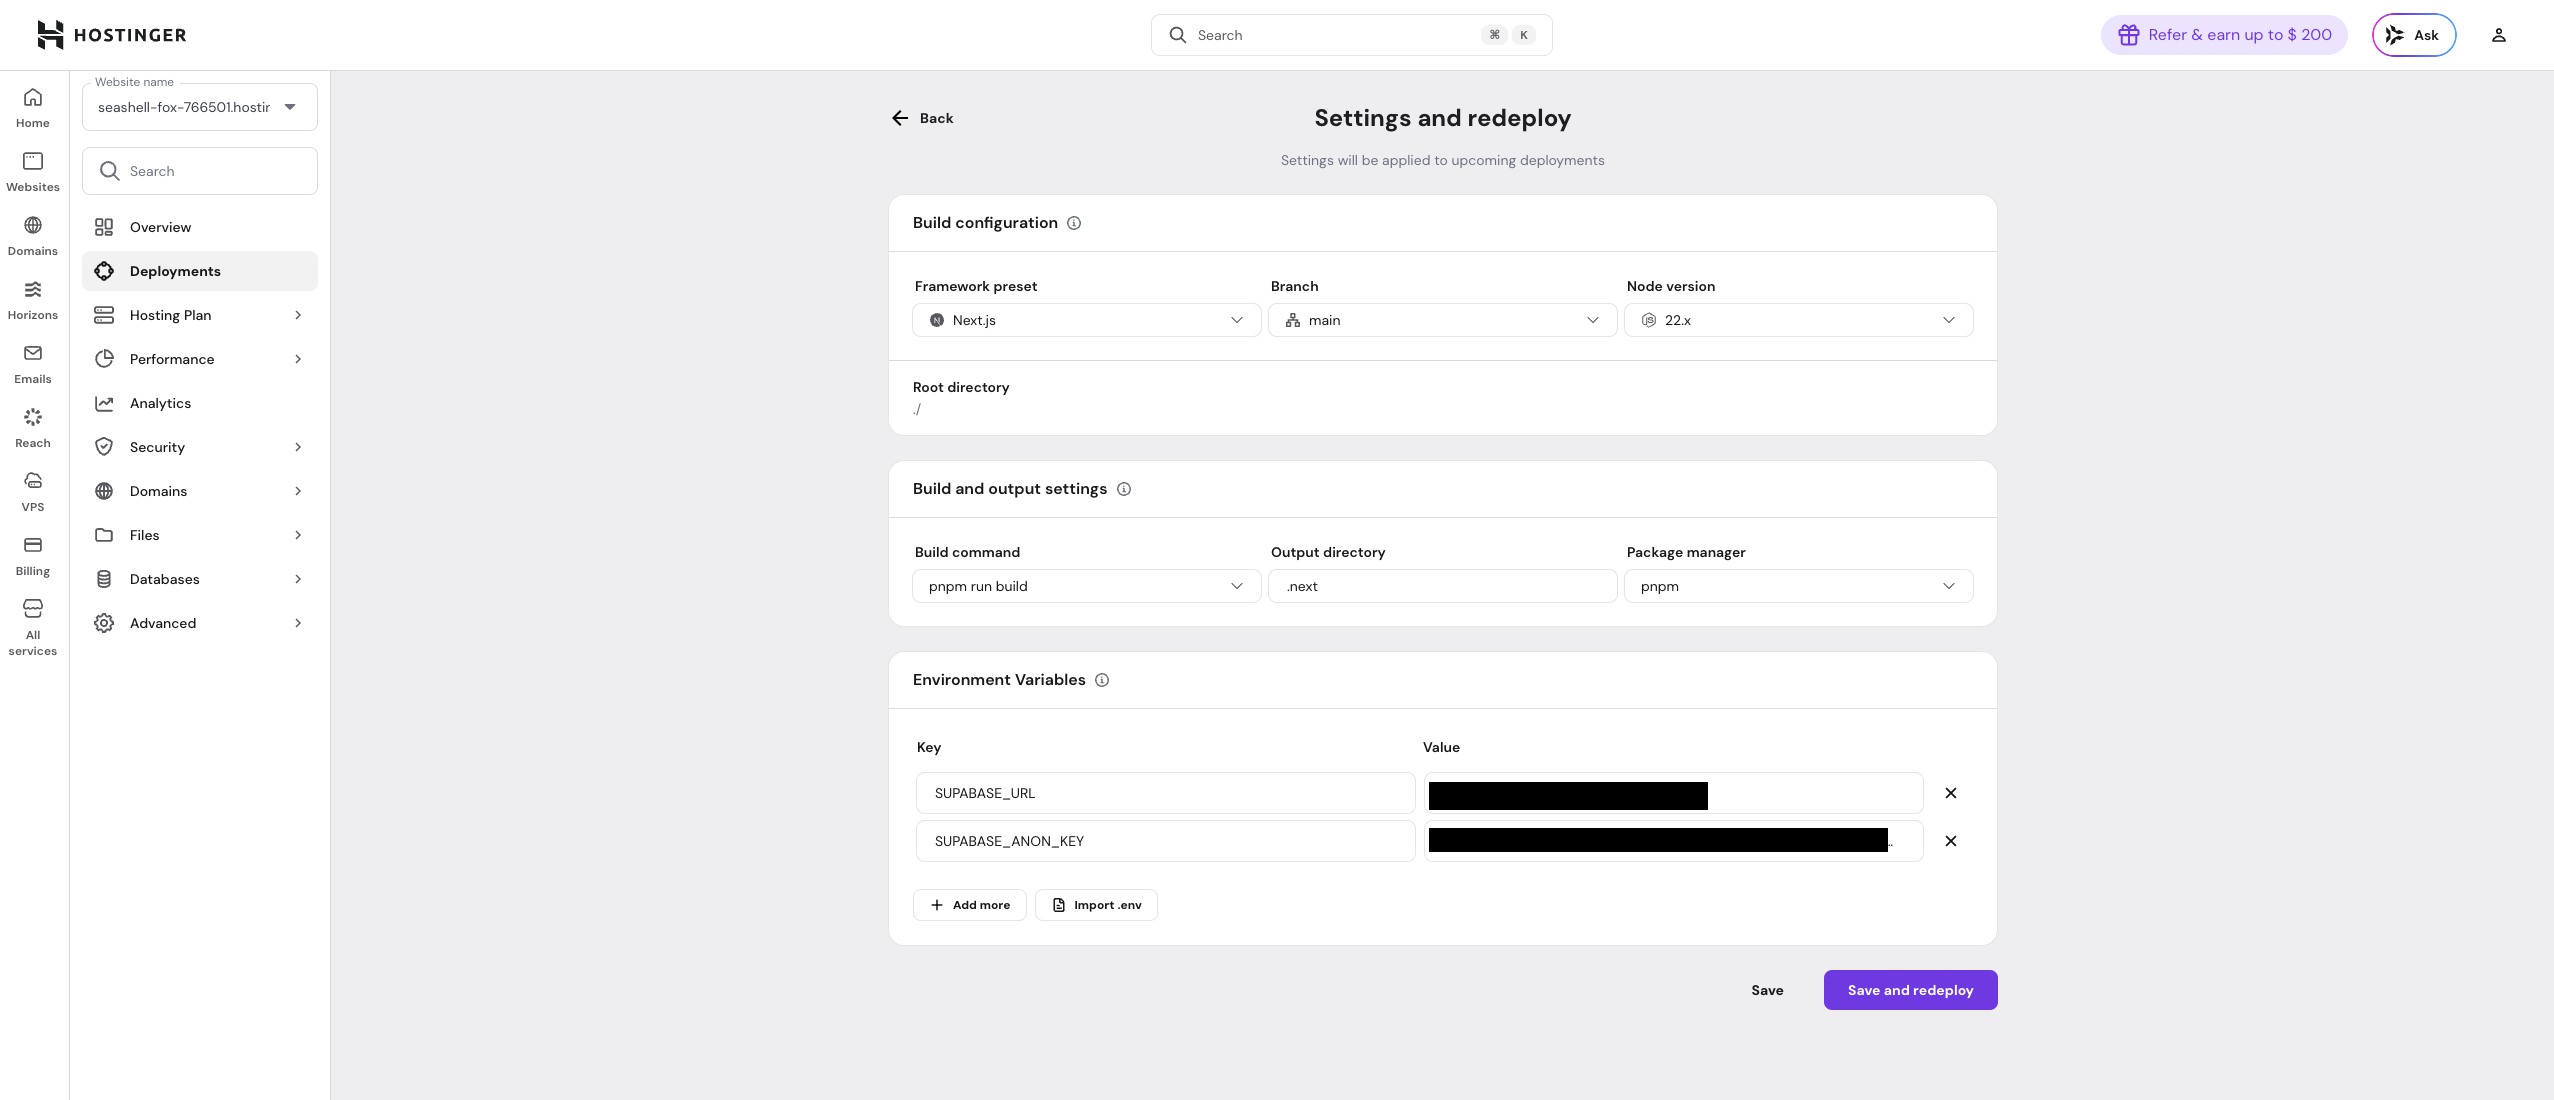
Step 4: Deploy application with environment variables
-
Go to hPanel > Deployments
-
Select Settings and redeploy
-
Create SupaBase environment variables
-
Click save and redeploy
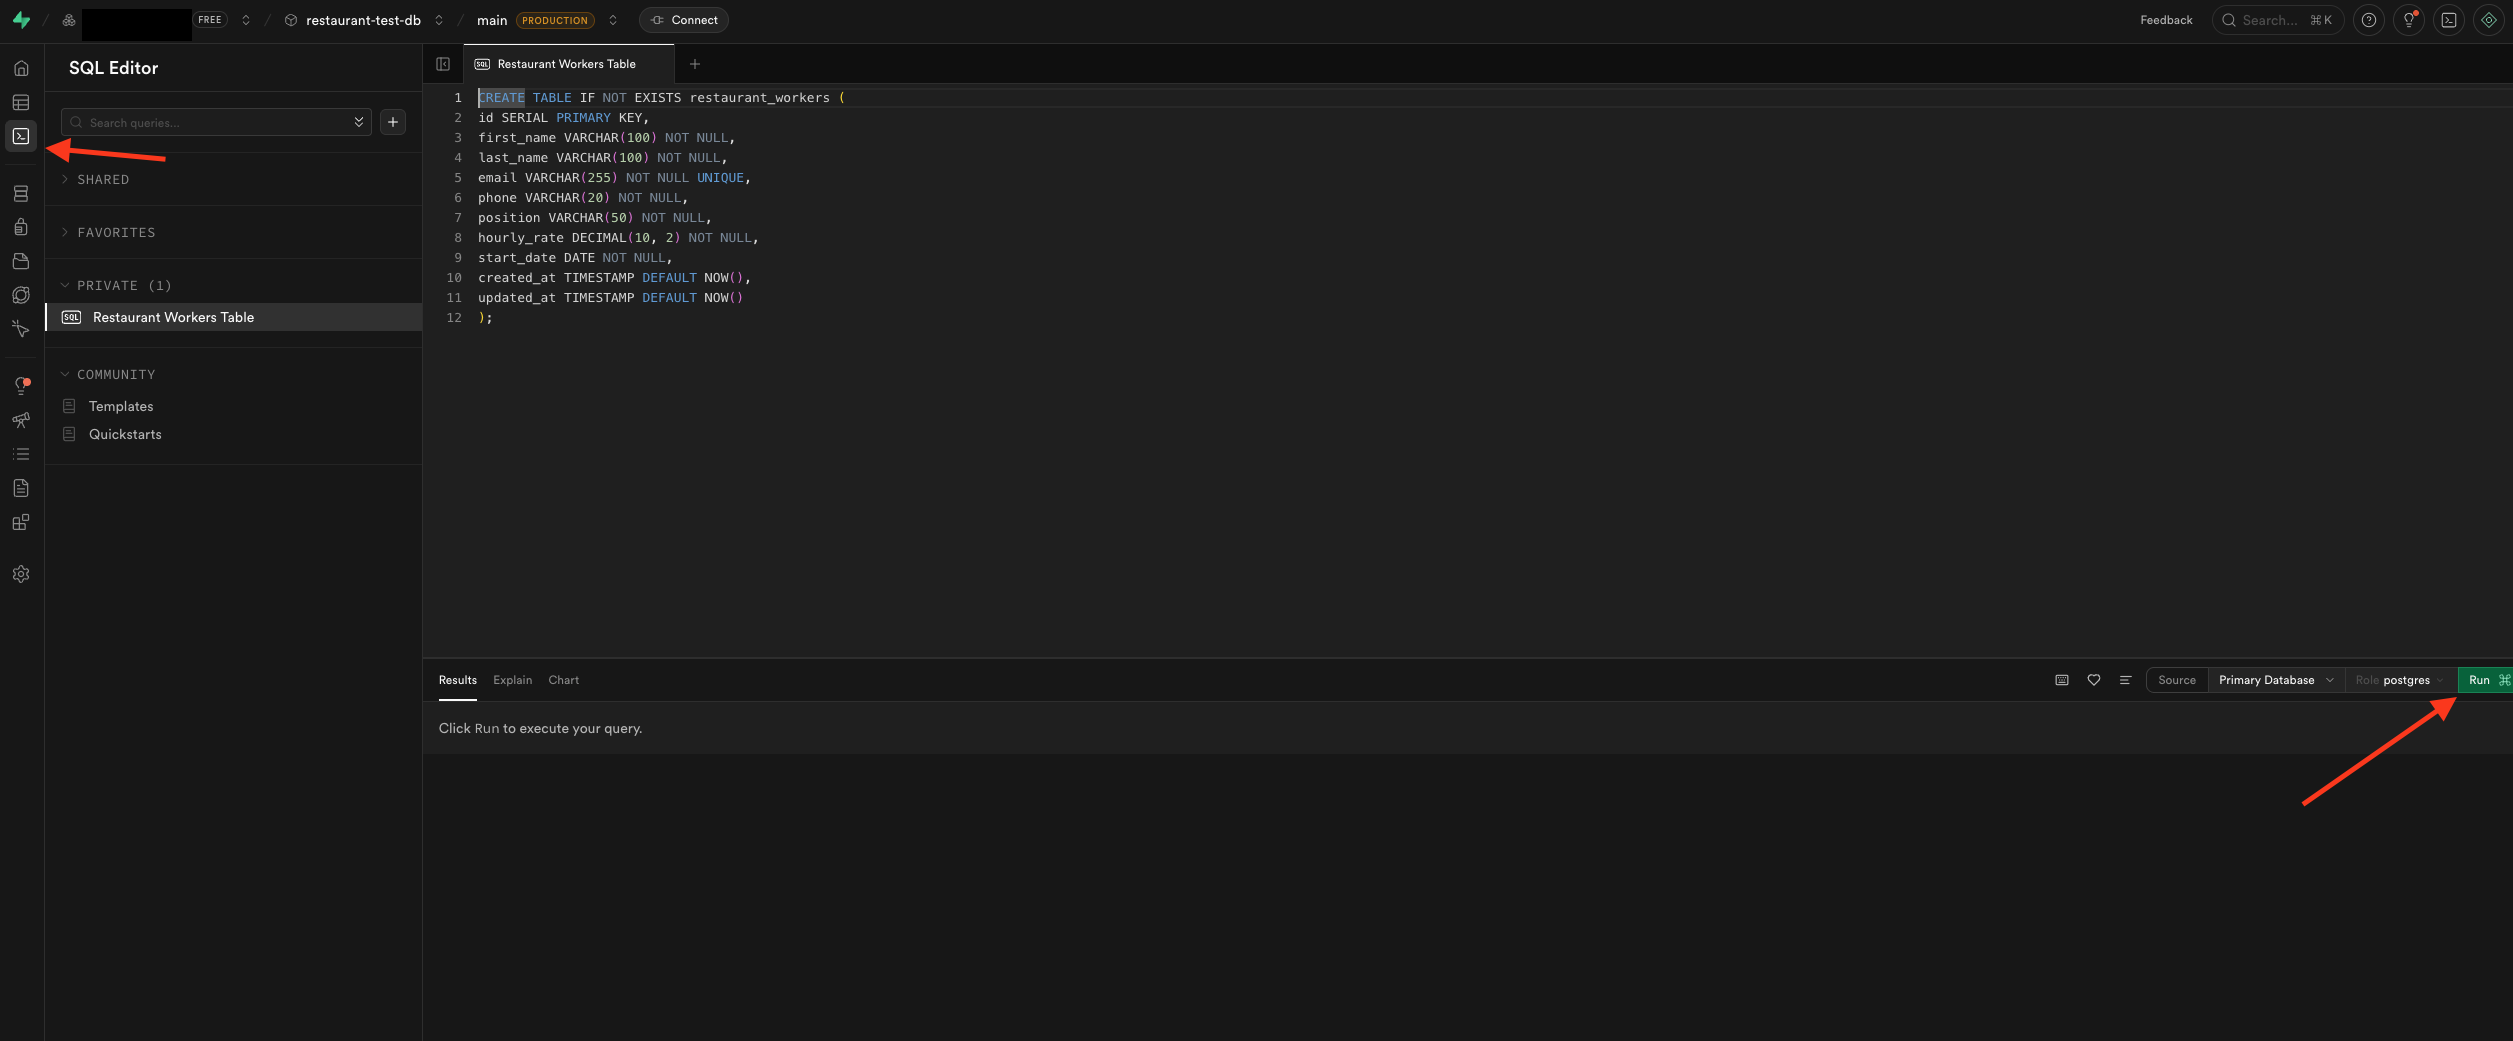
Step 5: Create Database Tables in Supabase
-
Go to Supabase Dashboard → SQL Editor
-
Enter SQL query based on the information you’ll be storing
-
Ensure column names match what your application expects
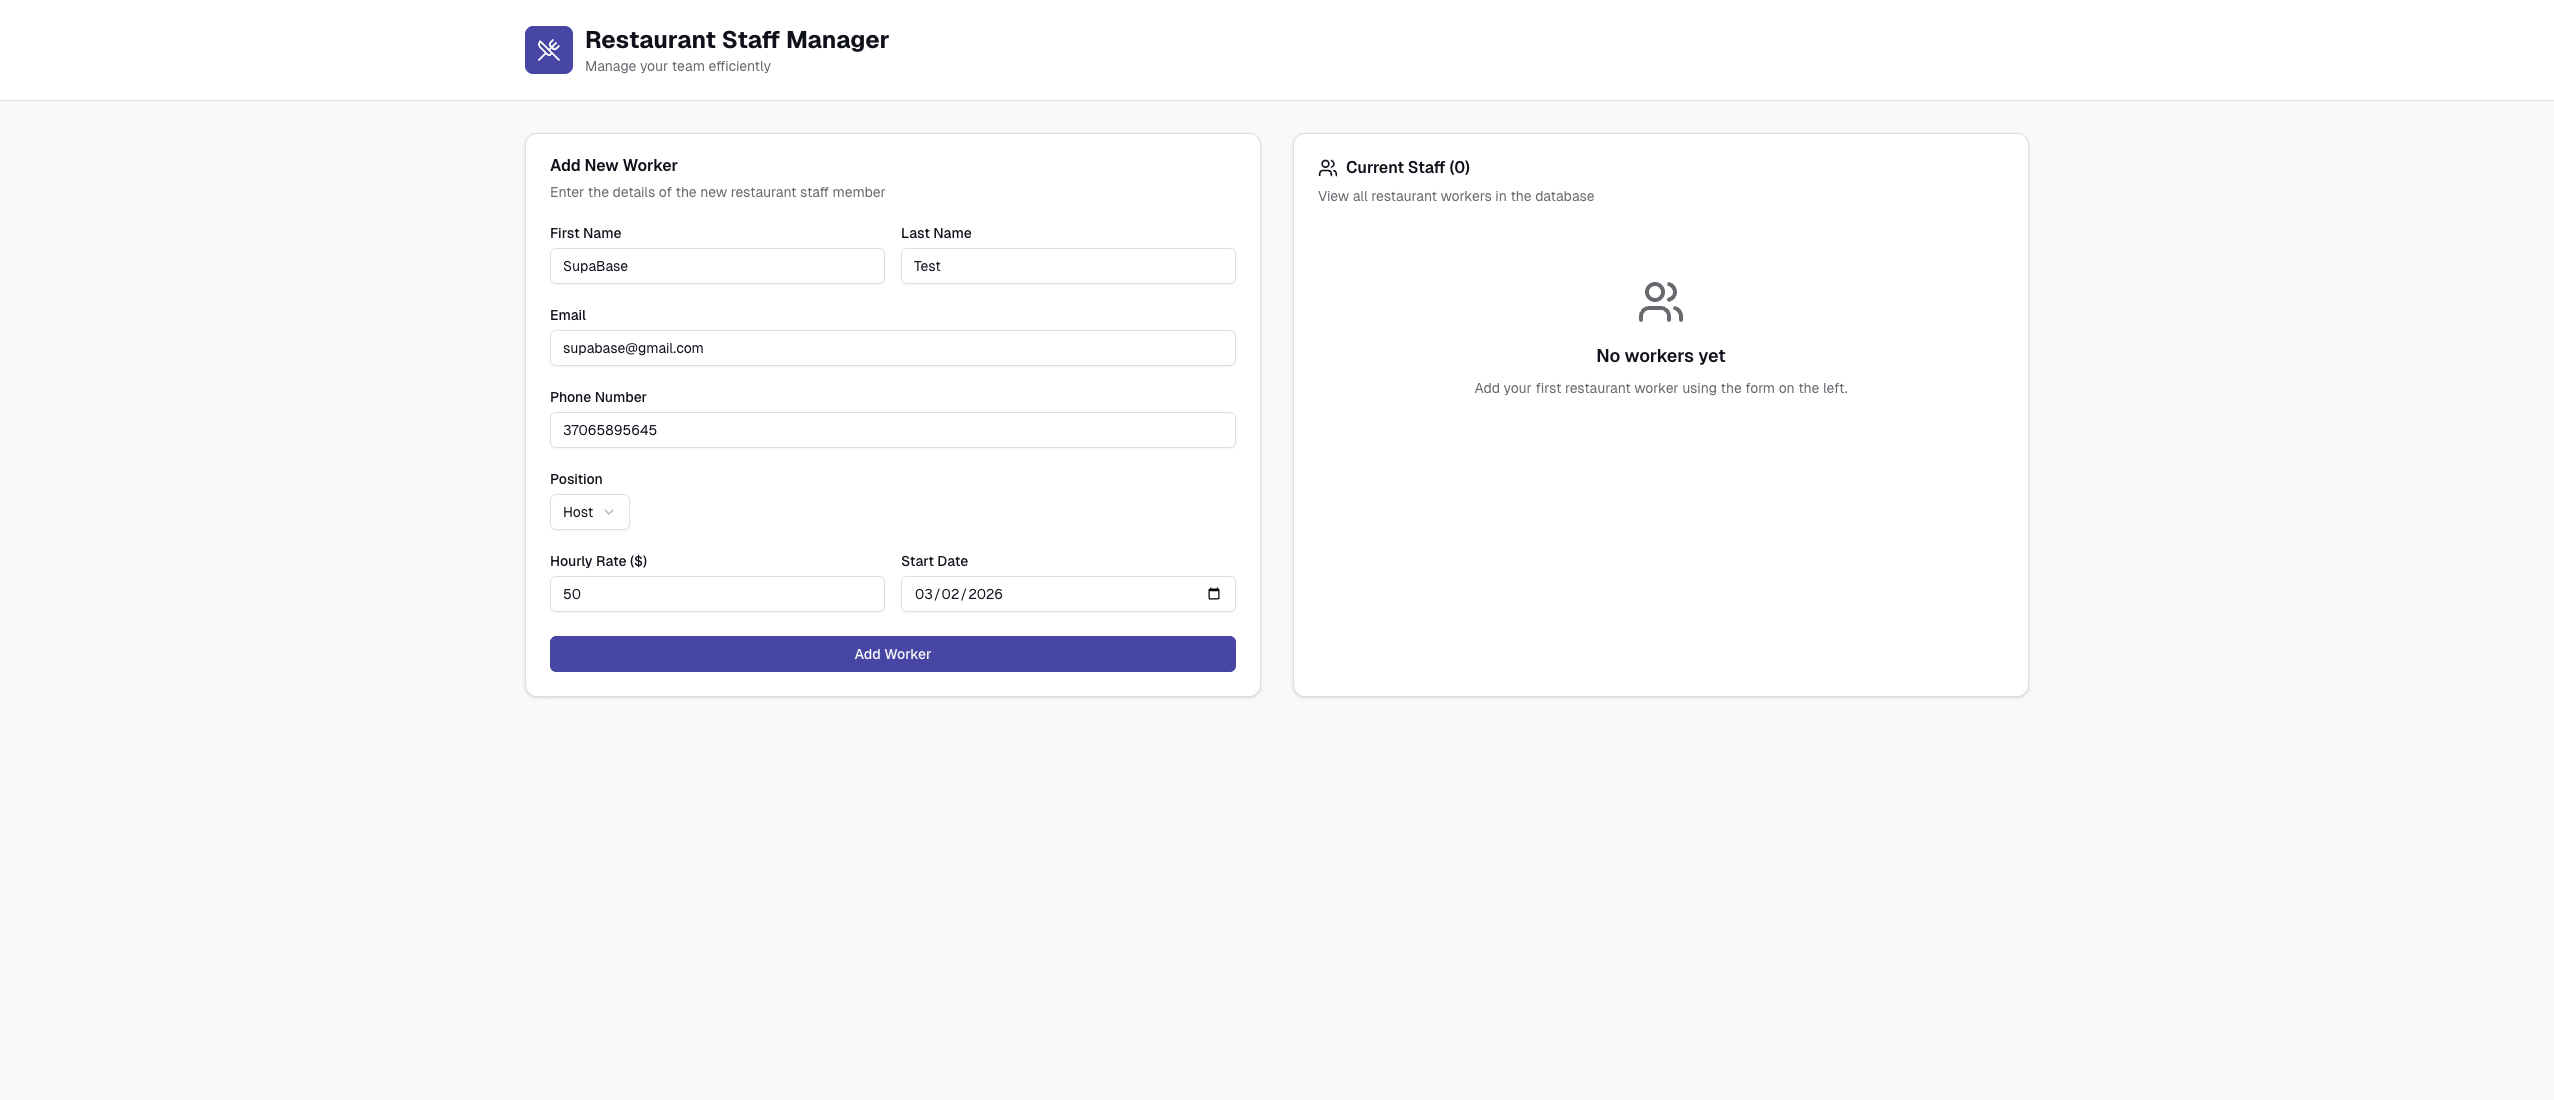
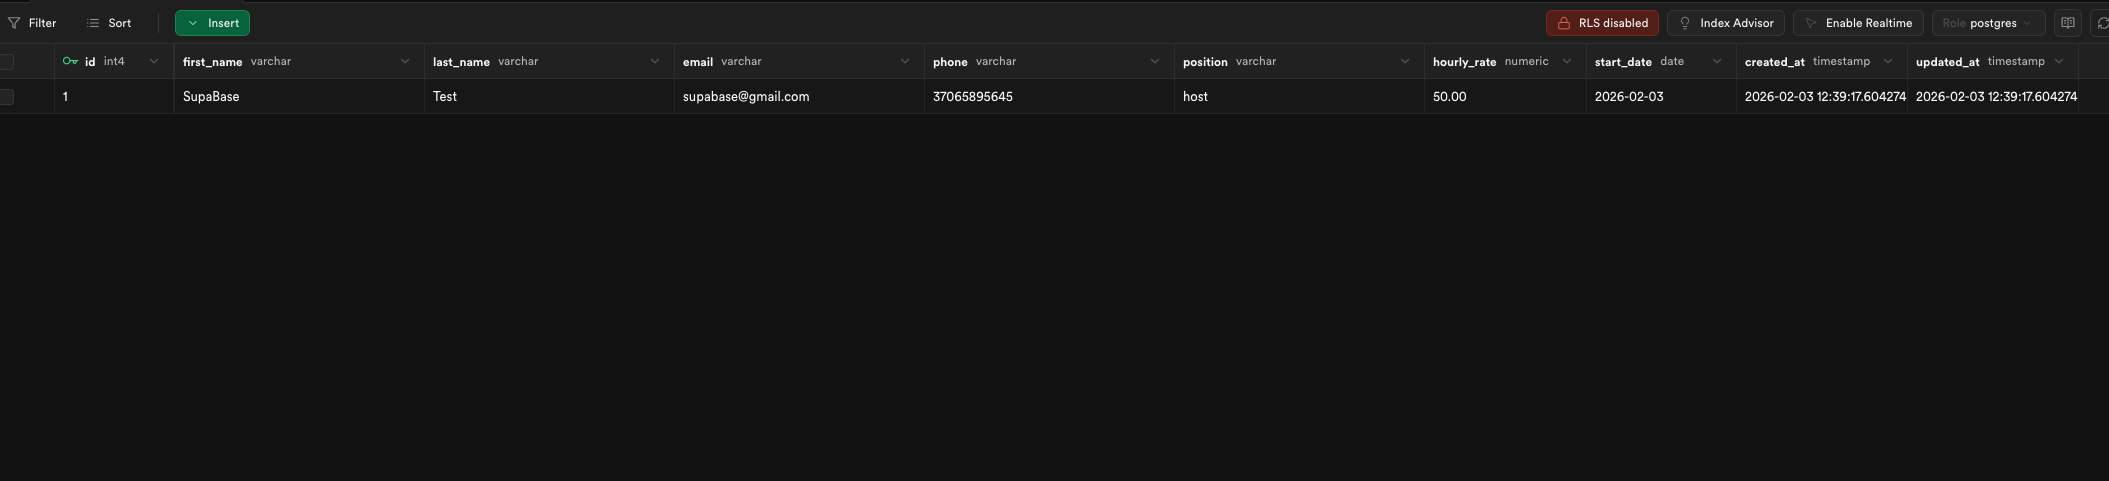
Step 6: Test Database Operations in Production
Example query using the Supabase client:
const { data, error } = await supabase
.from("restaurant_workers")
.insert([
{
first_name: "John",
last_name: "Doe",
email: "john@example.com",
},
]);

if (error) {
console.error(error);
}
-
Trigger the operation from your live website
-
Check the Supabase Table Editor
-
Confirm the record was inserted successfully
Congratulations, you’ve successfully connected your SupaBase external database to your Hostinger Node.js application.