Objective: Transfer email data from one cPanel account to another, ensuring all mailboxes, settings, and messages remain intact.
📌 Applies to: Users transferring email data between cPanel hosting accounts.
Note: This is a manual method and can only be performed by the user.
What You’ll Need Before You Start
- ✅ File Manager access in both cPanel accounts or full Backup from old cPanel hosting – Watch: How to Download cPanel backups easily.
- ✅ The domain is already added to the destination cPanel – Learn: How to Create and Manage Email Accounts on cPanel at Hostinger
Step 1 – Prepare the Backup in the Source cPanel
- Access File Manager in the source cPanel account.
- Navigate to the root directory:
/home/your-username/ - Locate the
mailandetcfolders.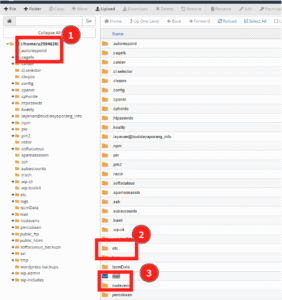
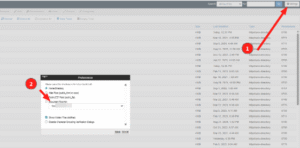
💡 If you don’t see them, click the Settings button (top-right) and enable Show Hidden Files (dotfiles).
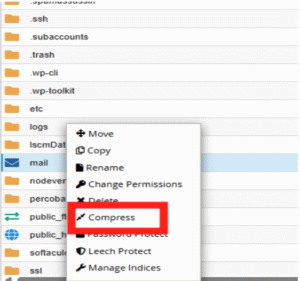
- Right-click on each folder → Compress → Choose Zip Archive → Confirm compression.
- First compress
mail - Then compress
etc
- First compress
- Right-click on each
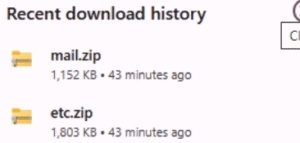
.zipfile and download them to your computer.
Step 2 – Restore the Backup in the Destination cPanel
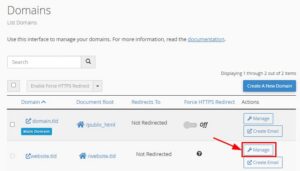
- In the destination cPanel, make sure your domain is added (check under Domains section).
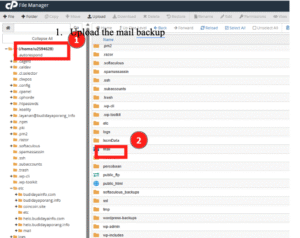
- Open File Manager and go to:
/home/your-username/(Optional): If
mailoretcfolders already exist, and you want to override them, rename them tomail-OFFandetc-OFFfor backup. - Upload
etc.zipandmail.zipto the File Manager.
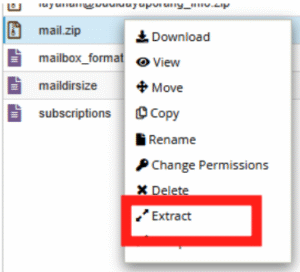
- Extract both mail
.zip and etc.zipfiles.
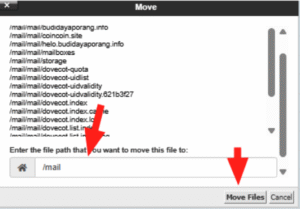
- If the folder structure looks like
/etc/etcor/mail/mail, move the contents to the correct root-level folders:/home/your-username/mail and /home/your-username/etc

- Delete the now-empty
etcandmailfolders.
Step 3 – Confirm Migration Success
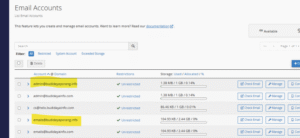
- Go to Email Accounts in your destination cPanel.
- You should see the email addresses listed. Try logging into one via Webmail to verify email data is accessible.
Related Articles