PrestaShop is an open-source e-commerce platform that allows businesses to create online stores and sell products or services. It provides a user-friendly interface, extensive customization options, and a range of features, making it a popular choice for building and managing online shops.
At Hostinger, we have an Ubuntu 24.04 VPS template, which comes with PrestaShop already installed, so you can easily start creating your online shop with just a few clicks.
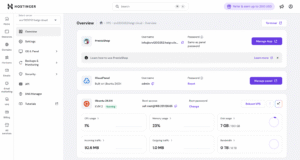
To start, install the PrestaShop template and check the following information:
How to Log In to PrestaShop
After installing the Ubuntu 24.04 with PrestaShop template, use the following credentials to access the PrestaShop admin panel, by clicking on the Manage App button:
-
Email: info@server-hostname
-
Password: The one you set during the OS installation. If needed, you can change it by clicking on the Reset panel password button
After your first login, PrestaShop automatically generates a unique Admin URL (for security). It will look similar to: https://your-hostname.hstgr.cloud/admin5242wyn0t5su4dfuvrd/
Make sure to save or bookmark this URL – you’ll need it to access the PrestaShop Admin panel later.
Important Security Measures
After successfully logging in to the PrestaShop admin panel, change the administrator user’s email and password to enhance security.
Make sure to use strong, unique passwords and consider implementing two-factor authentication for added protection.
How to Change the PrestaShop Domain
Log in to CloudPanel and enter the following address on your browser:
http://vps-ip-address:8443Replacing vps-ip-address with your own VPS IP address.
If you wish PrestaShop to run on your domain, point it to your VPS IP address, change the server hostname, and reinstall the server 💡