Starting a Minecraft Server on your Minecraft VPS at Hostinger is simple – all you have to do is follow these steps:
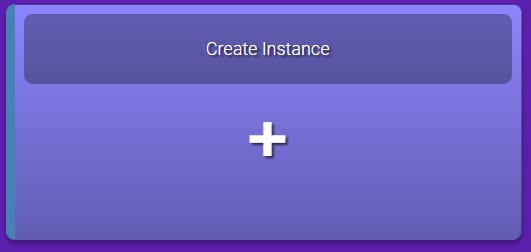
Log in to your Game Panel and click on the Create Instance button:
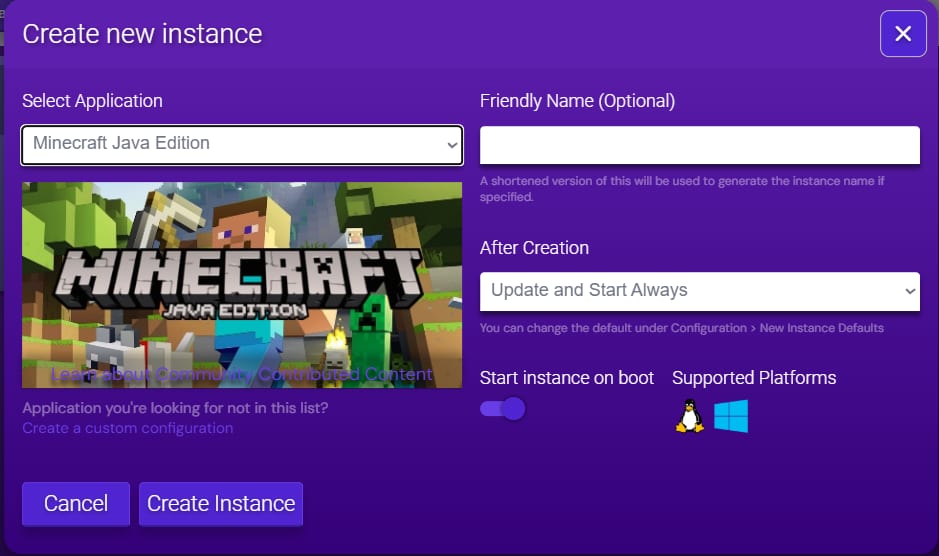
Then choose the preferred Minecraft Edition and press Create Instance:
The following editions are available:
|
Minecraft Edition |
Platform |
Features |
|
Java Edition |
PC |
Best for servers with plugins or mods when you and your friends are playing on computers only |
|
Bedrock Edition |
Any (computer, console, smartphone) |
Best for playing with your friends or family without having to worry about what platform they are on |
|
BungeeCord Proxy |
Spigot/Craftbukkit on PC only |
Perfect for large servers that offer several different modes, such as minigames and factions, or servers that just want to keep things separated |
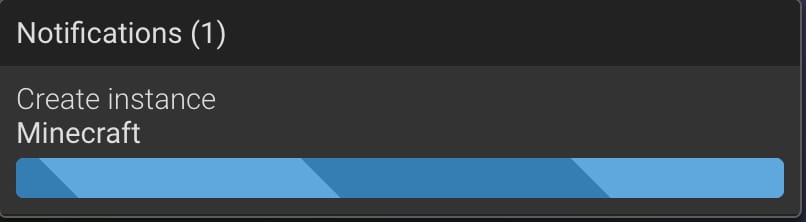
Once the preferred Edition has been selected, allow a few minutes for the server to be set up (you will see the loading icon in the right-hand corner):
When the server’s setup process is done, double-click to Manage on your instance:
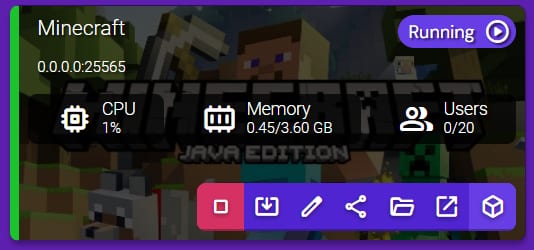
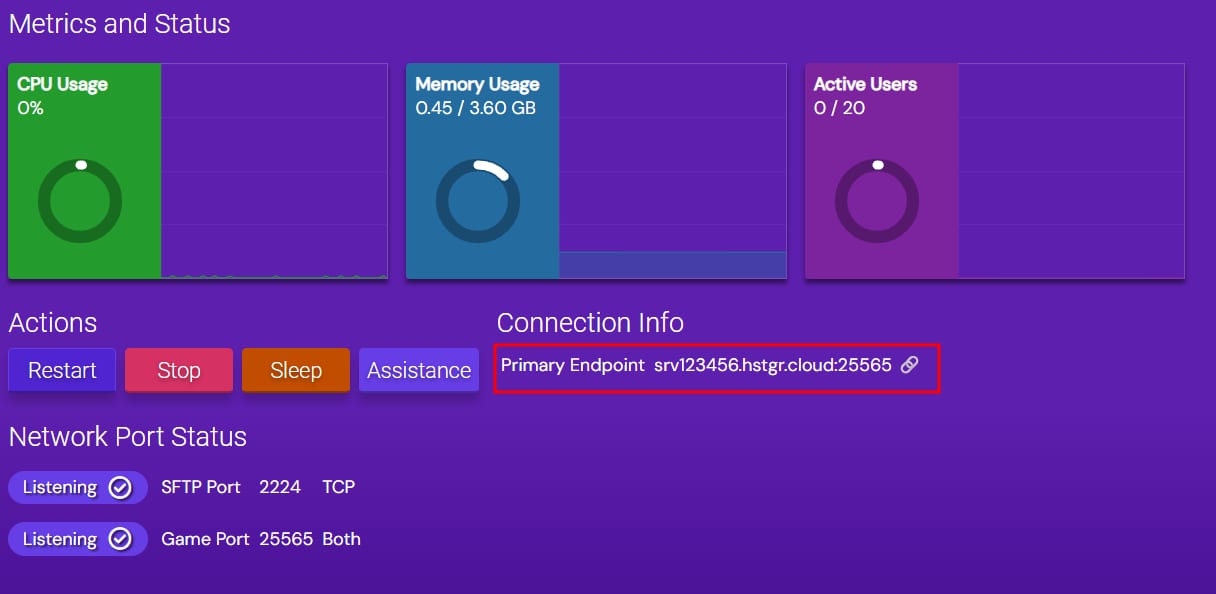
The server will start, and you will be able to connect to it by using Endpoint information:
That’s it! Now you know how to set up your first Minecraft server 😊