If you have a hosting plan, you can easily create redirects from hPanel. In case you have purchased a domain name only, and your domain is pointing to Hostinger nameservers, you can set up a redirect without a hosting plan by following the steps below.
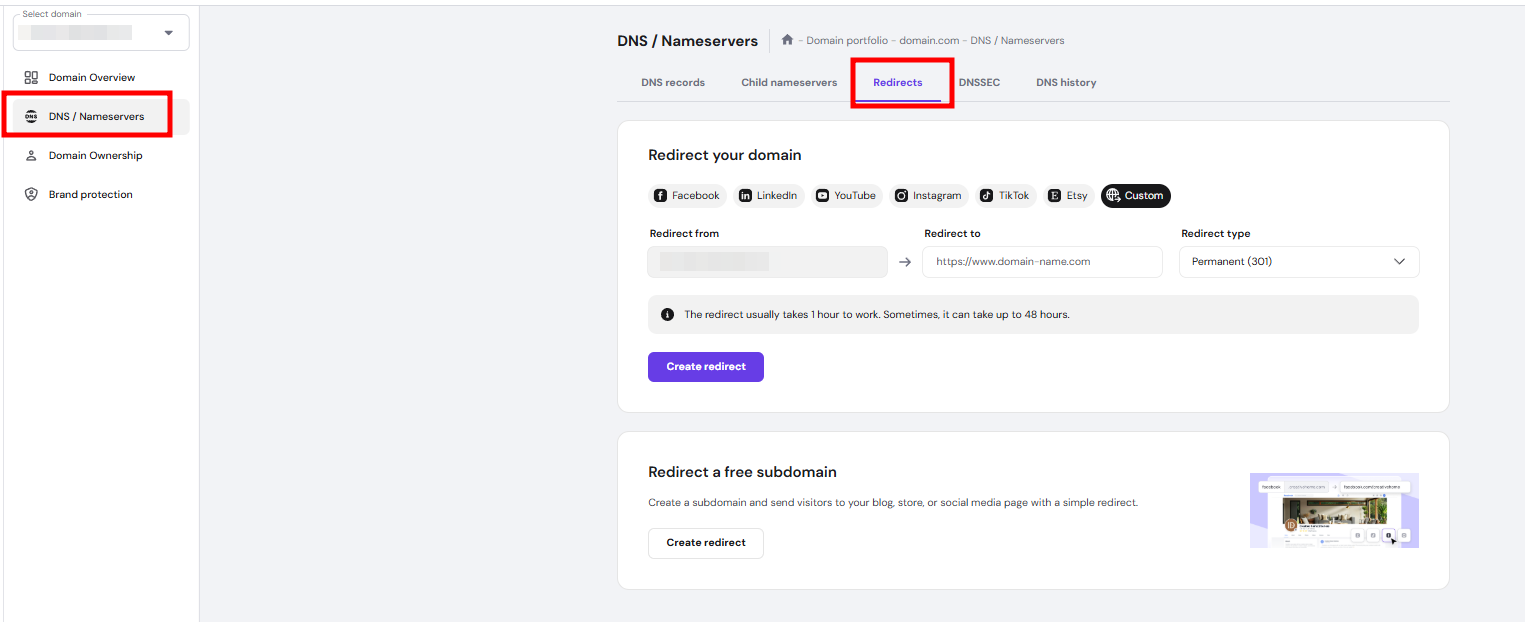
1. Log in to hPanel, navigate to Domains on the sidebar, and click Manage next to the domain you want to redirect. Then, go to DNS / Nameservers and open the Redirects tab:
If the domain you wish to redirect is currently connected to Hostinger Website Builder, the Redirects option will not be shown. You will need to redirect the domain via Cloudflare.
2. In the Redirect from field, the selected domain displayed automatically. Enter the full destination URL in the Redirect to field, where you want visitors to be sent, including https:// (for example, https://new-domain.tld).
3. Under Redirect type, select Permanent (301) for a permanent redirect, then click Create redirect.
For convenience, you can also use the quick redirect buttons for popular platforms like Facebook, LinkedIn, YouTube, Instagram, TikTok, Etsy, or enter a custom URL.
What type of redirect to choose?
The main difference between the two types of redirection lies in their purpose and how search engines handle them:
|
Type |
SEO |
Use case |
|
301 — Permanent |
Search engines will transfer the SEO value from the old page to the new one |
A permanent change in the website name or due to a requirement from your hosting provider |
|
302 — Temporary |
Search engines do not transfer the SEO value to the new page |
When a website is undergoing maintenance or for testing a new page |
NOTES
- The redirect usually takes 1 hour to work. Sometimes, it can take up to 48 hours to fully propagate. Before testing, clear your local cache to ensure you’re getting the latest version of your website.
- You can also redirect a free subdomain to your blog, store, or social media page using the same method.