Deploying your first Docker container with Hostinger’s Docker manager is straightforward and takes just a few minutes. This guide will walk you through the entire process, from accessing the Docker manager to running your first containerized application.
Before you begin, ensure you have:
-
A Hostinger VPS with Docker template installed
-
Either a Docker Compose file or a URL to a Docker Compose repository
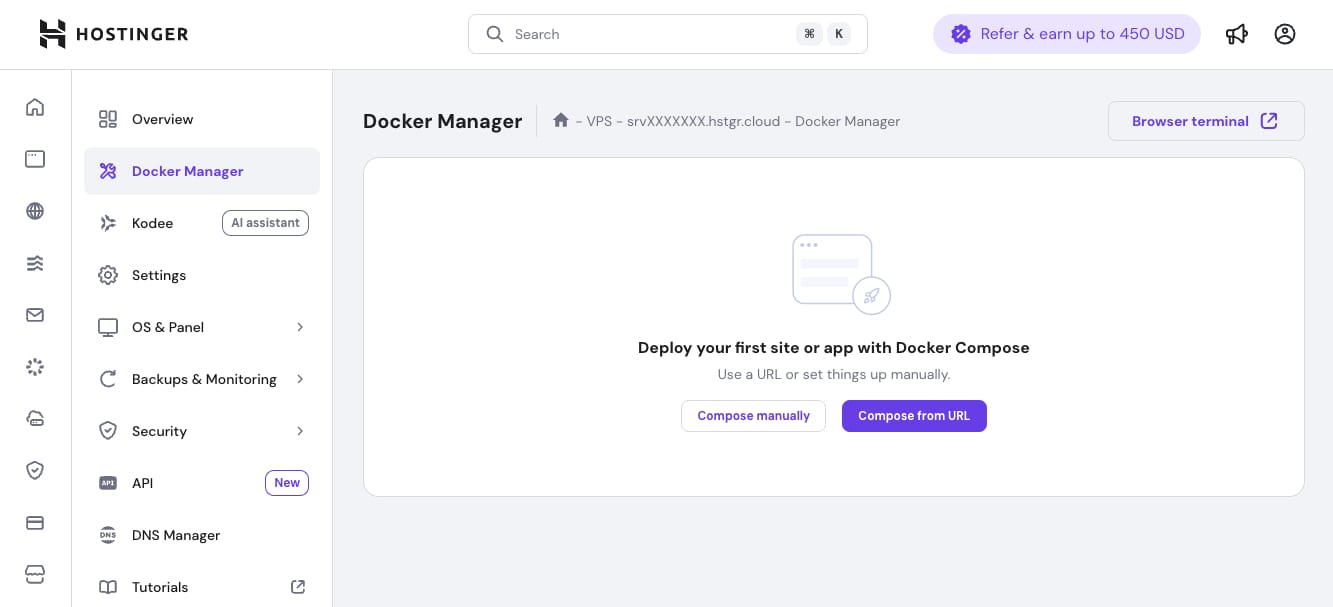
Step 1: Access Docker manager
-
Log in to your Hostinger control panel
-
Navigate to your VPS dashboard
-
Click on Docker Manager in the left sidebar
You’ll see the main Docker manager interface with options to deploy your first application.
Step 2: Choose your deployment method
Docker manager offers two deployment methods:
Option A: Compose from URL (recommended for beginners)
Perfect for deploying pre-configured applications from GitHub, GitLab, or other repositories.
-
Click the Compose from URL button
-
In the URL field, paste your Docker Compose file URL
-
Example:
https://github.com/username/project/docker-compose.yml
-
-
The system supports GitHub, GitLab, and direct links to Docker Compose files
Option B: Compose manually
Ideal when you want to write or paste your Docker Compose configuration directly.
-
Click the Compose manually button
-
You’ll see a form-based editor to configure your container
Step 3: Configure your container
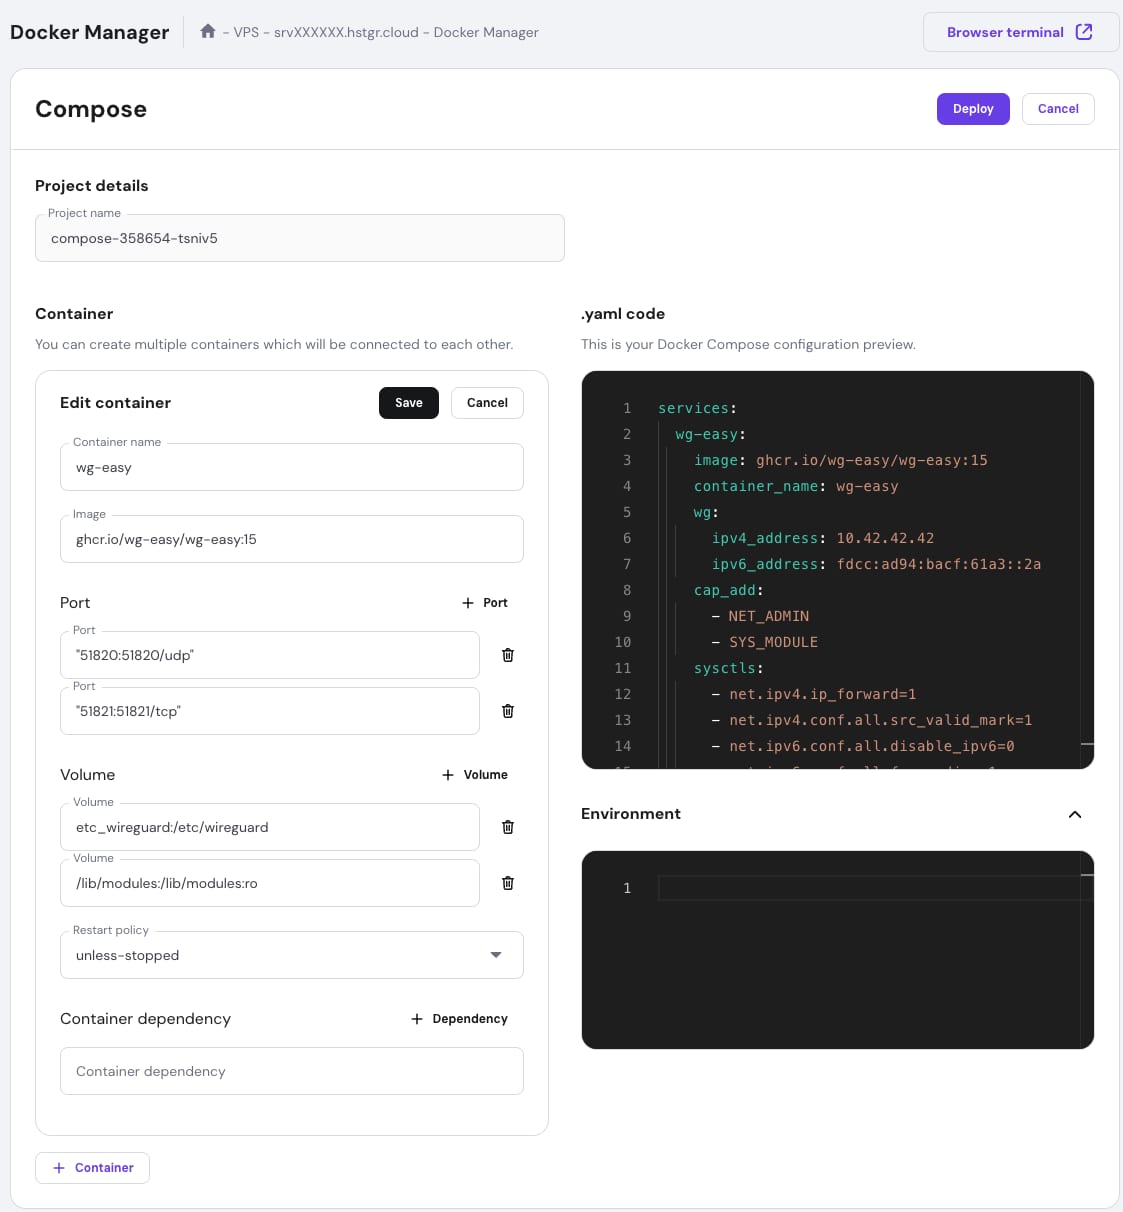
When using manual compose:
-
Project name: Enter a descriptive name for your project
-
Example:
my-wordpress-siteornodejs-api
-
-
Container settings:
-
Container name: Give your container a unique identifier
-
Image: Specify the Docker image (e.g.,
nginx:latest,wordpress:6.0) -
Ports: Map container ports to VPS ports
-
Format:
VPS-port:Container-port -
Example:
8080:80(access container’s port 80 via VPS port 8080)
-
-
-
Volumes (optional):
-
Add persistent storage for your container data
-
Example:
/home/mydata:/var/www/html
-
-
-
Environment variables (optional):
-
Set configuration variables
-
Common examples:
-
NODE_ENV=production -
PORT=3000
-
-
-
-
Restart policy:
-
Choose from the dropdown:
-
always: Container restarts automatically -
unless-stopped: Restarts unless manually stopped -
on-failure: Restarts only on errors -
no: No automatic restart
-
-
Step 4: Review your configuration
The right panel shows a live preview of your Docker Compose YAML configuration. This helps you:
-
Verify your settings are correct
-
Understand the Docker Compose format
-
Make quick edits if needed
Step 5: Deploy your container
-
Once satisfied with your configuration, click the Deploy button
-
Docker manager will:
-
Validate your configuration
-
Pull the required Docker images
-
Create and start your containers
-
Set up networking and volumes
-
-
Deployment typically takes 30 seconds to 2 minutes, depending on image size.
Step 6: Verify your deployment
After successful deployment, you’ll be redirected to the projects list where you can see:
-
Your project name with a green “Running” status
-
Container details including:
-
Container ID
-
Port mappings
-
Current status
-
Step 7: Access your application
To access your deployed application:
-
Note the port mapping from your container settings
-
Open your browser and navigate to:
-
http://your-vps-ip:port -
Example:
http://123.45.67.89:8080
-
Managing your deployment
From the projects list, you can:
-
Edit: Modify container configuration
-
Stop/Start: Control container state
-
Delete: Remove the entire project
Remember, Docker manager is designed to make container deployment simple. Start with basic deployments and gradually explore more advanced features as you become comfortable with the platform.