Web2Agent is an experimental feature developed and operated by Hostinger. It transforms your website into a fully AI-compatible agent that can be easily discovered, understood, and accessed by AI tools. It currently works best with Claude, Cursor and tools supporting MCP protocol and we’re working on integrating it with ChatGPT, Gemini, and other autonomous AI agents.
As the internet shifts toward an agent-driven future, this feature helps position your website as a first-class participant in that ecosystem – intelligent, accessible, and interoperable.
Why opt in?
By enabling Web2Agent, Hostinger transforms your website into an AI-ready agent, making it easier for other AI systems to access, process, and interact with your content. Any updates to your site – such as new articles or structural changes – are automatically tracked and synchronized, ensuring AI tools always work with the most up-to-date version.
This process is fully automated, happening seamlessly in the background without altering your site’s design or requiring manual management. It also future-proofs your online presence as AI becomes a more common way for users to explore the web.
Designed with privacy in mind, Web2Agent respects industry standards like robots.txt and llms.txt, keeping you in full control. Participation is entirely optional, and you can turn it off at any time with no impact on your site’s visible content.
How to opt in?
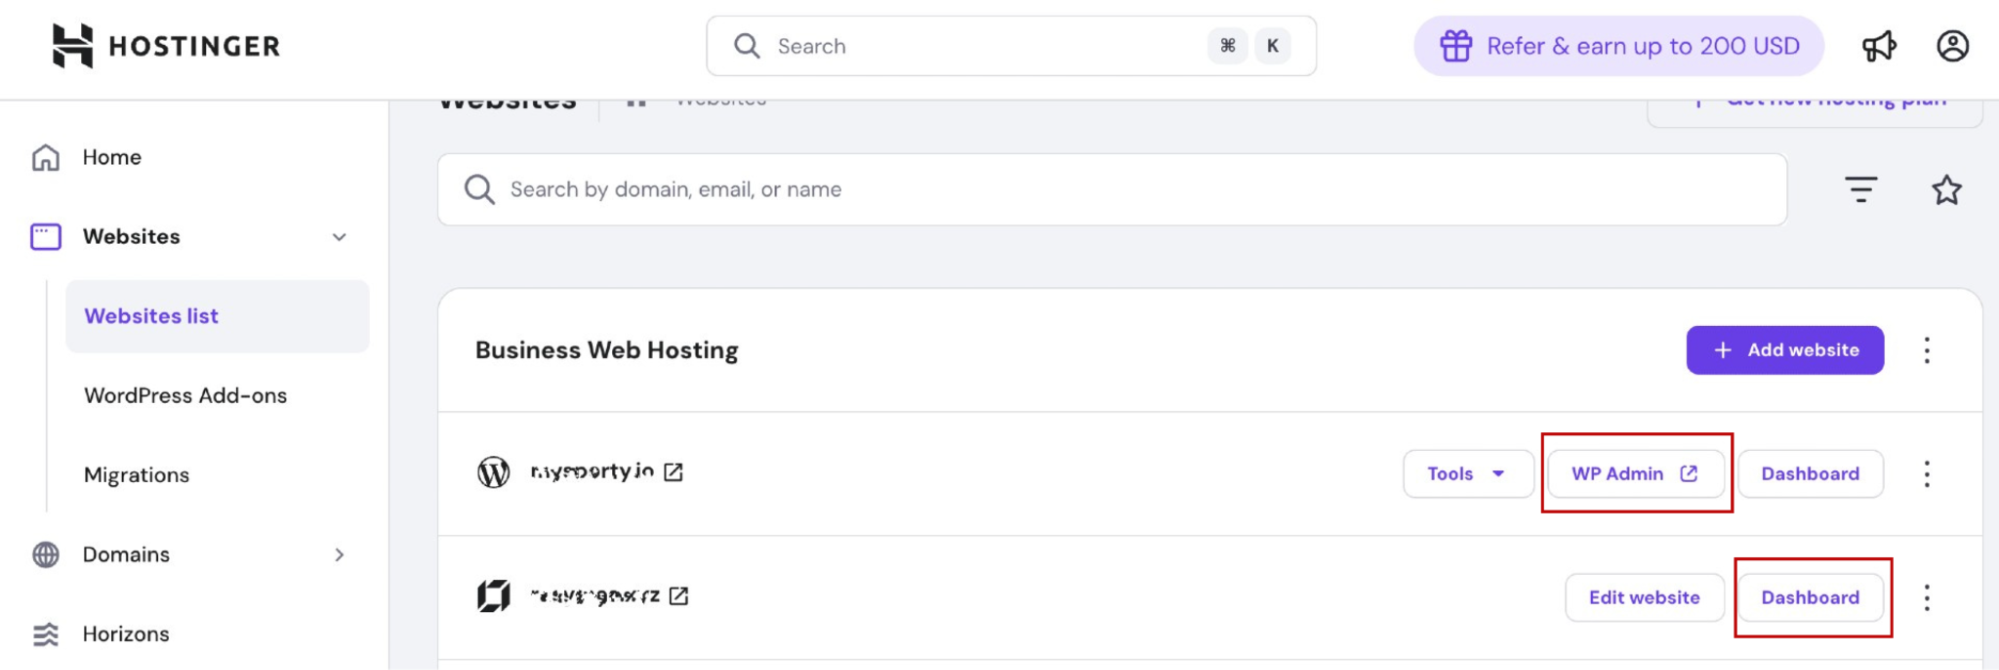
To opt in, visit your website dashboard from Websites → Website list
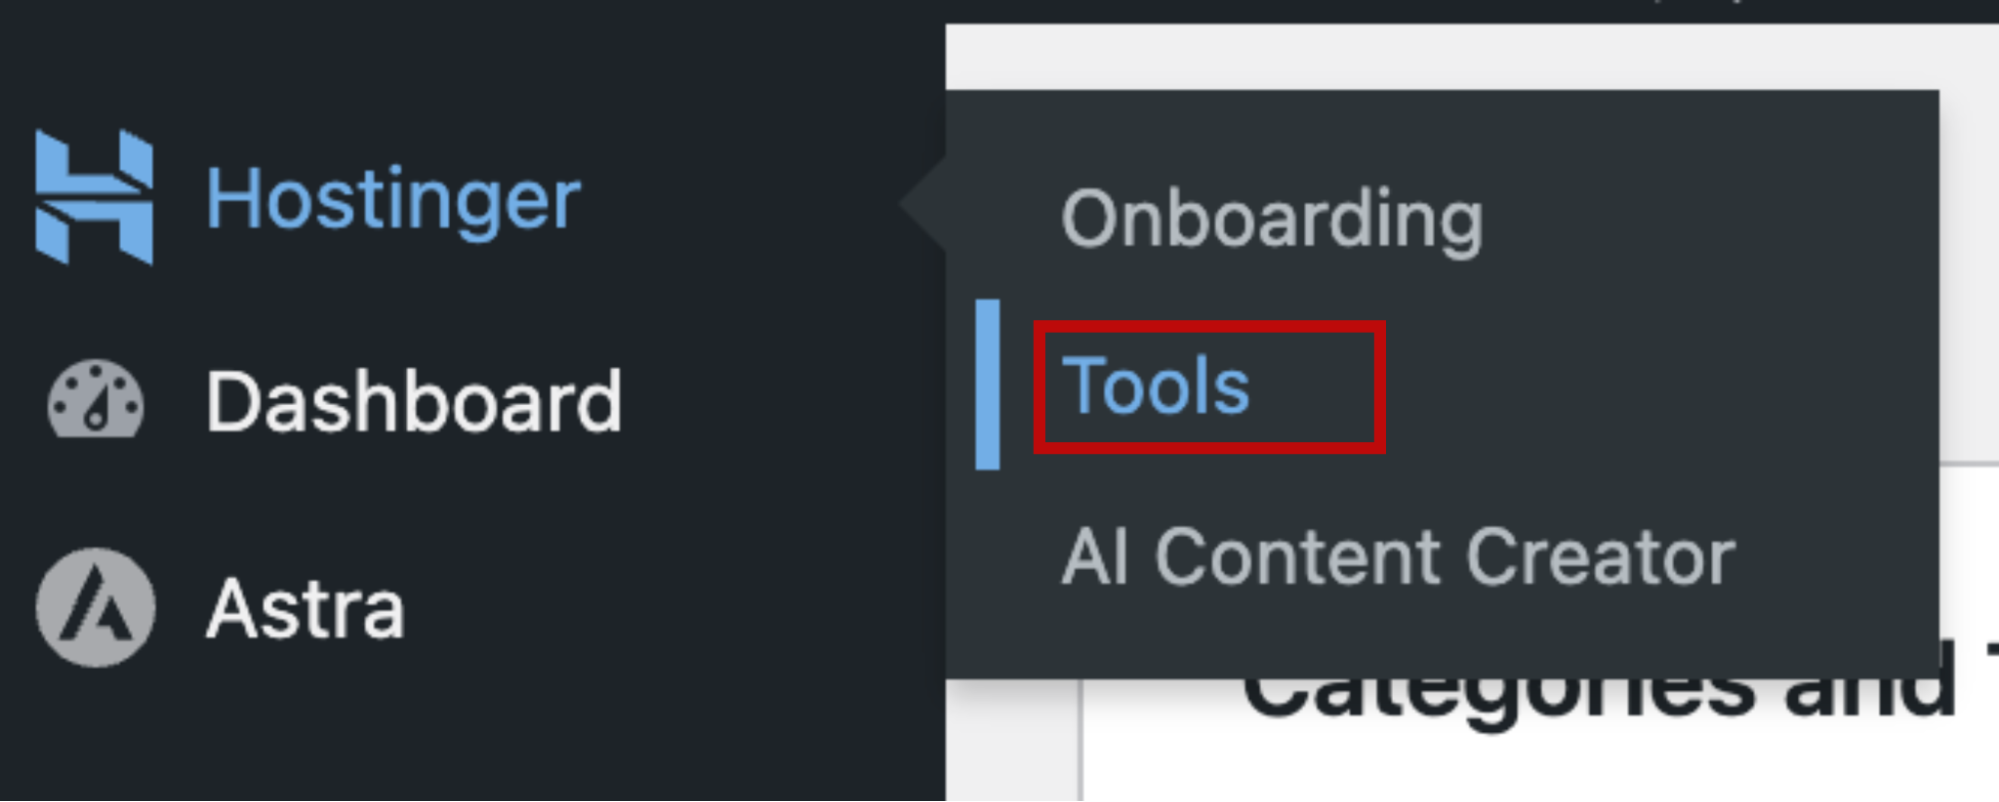
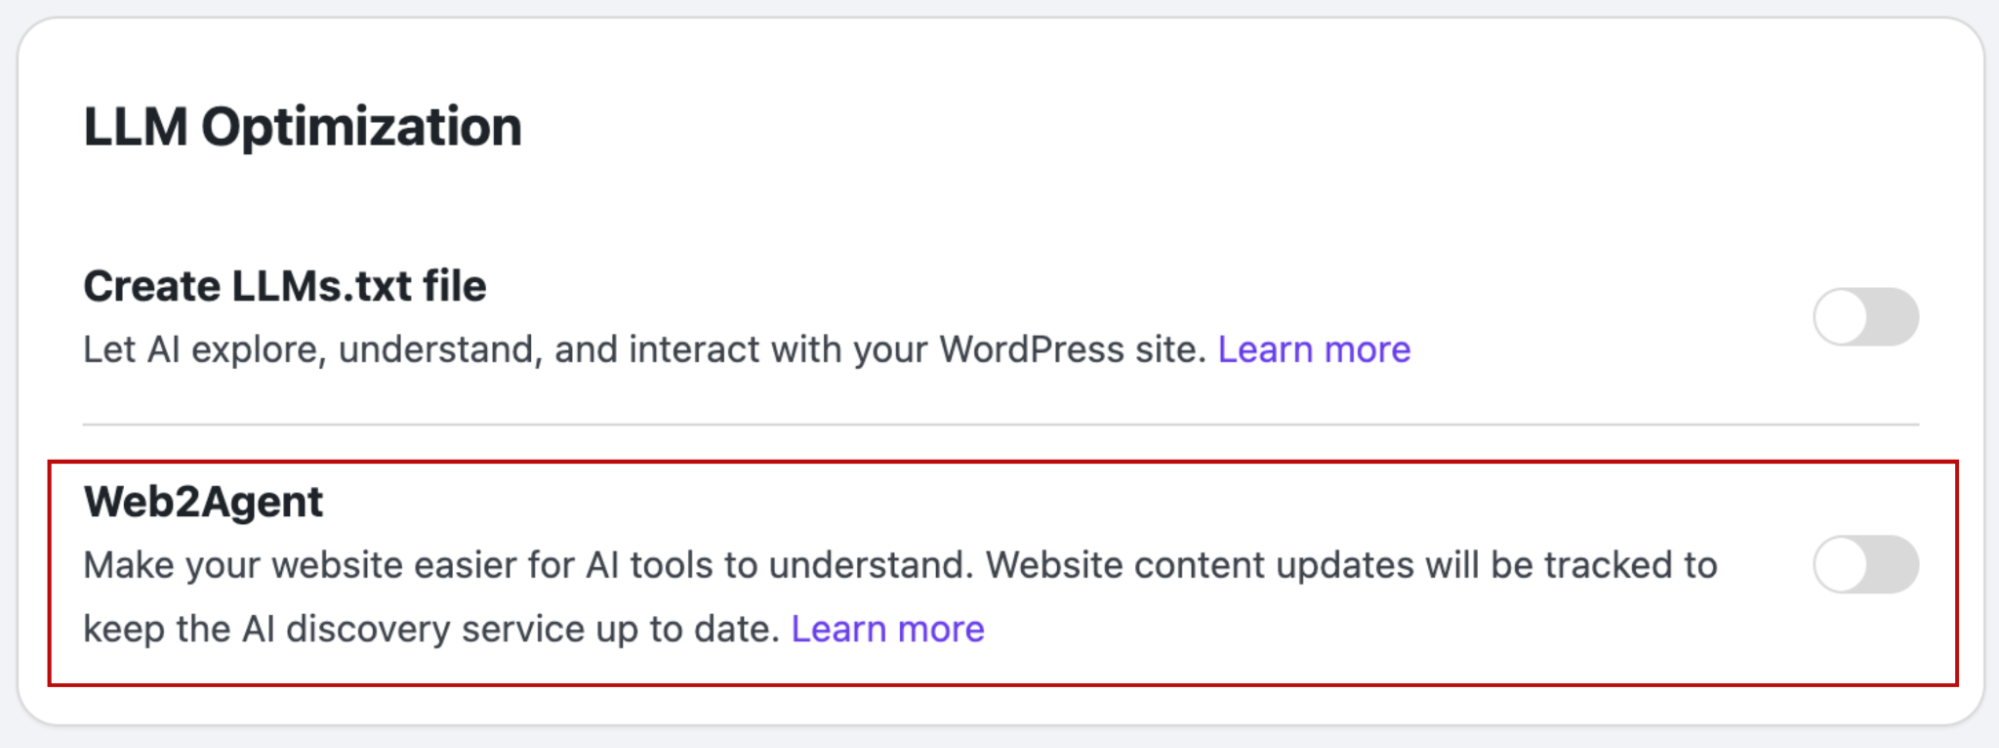
In the case of WordPress, go to WP Admin and navigate to Hostinger → Tools. Locate the LLM Optimization section, and enable the Web2Agent feature.
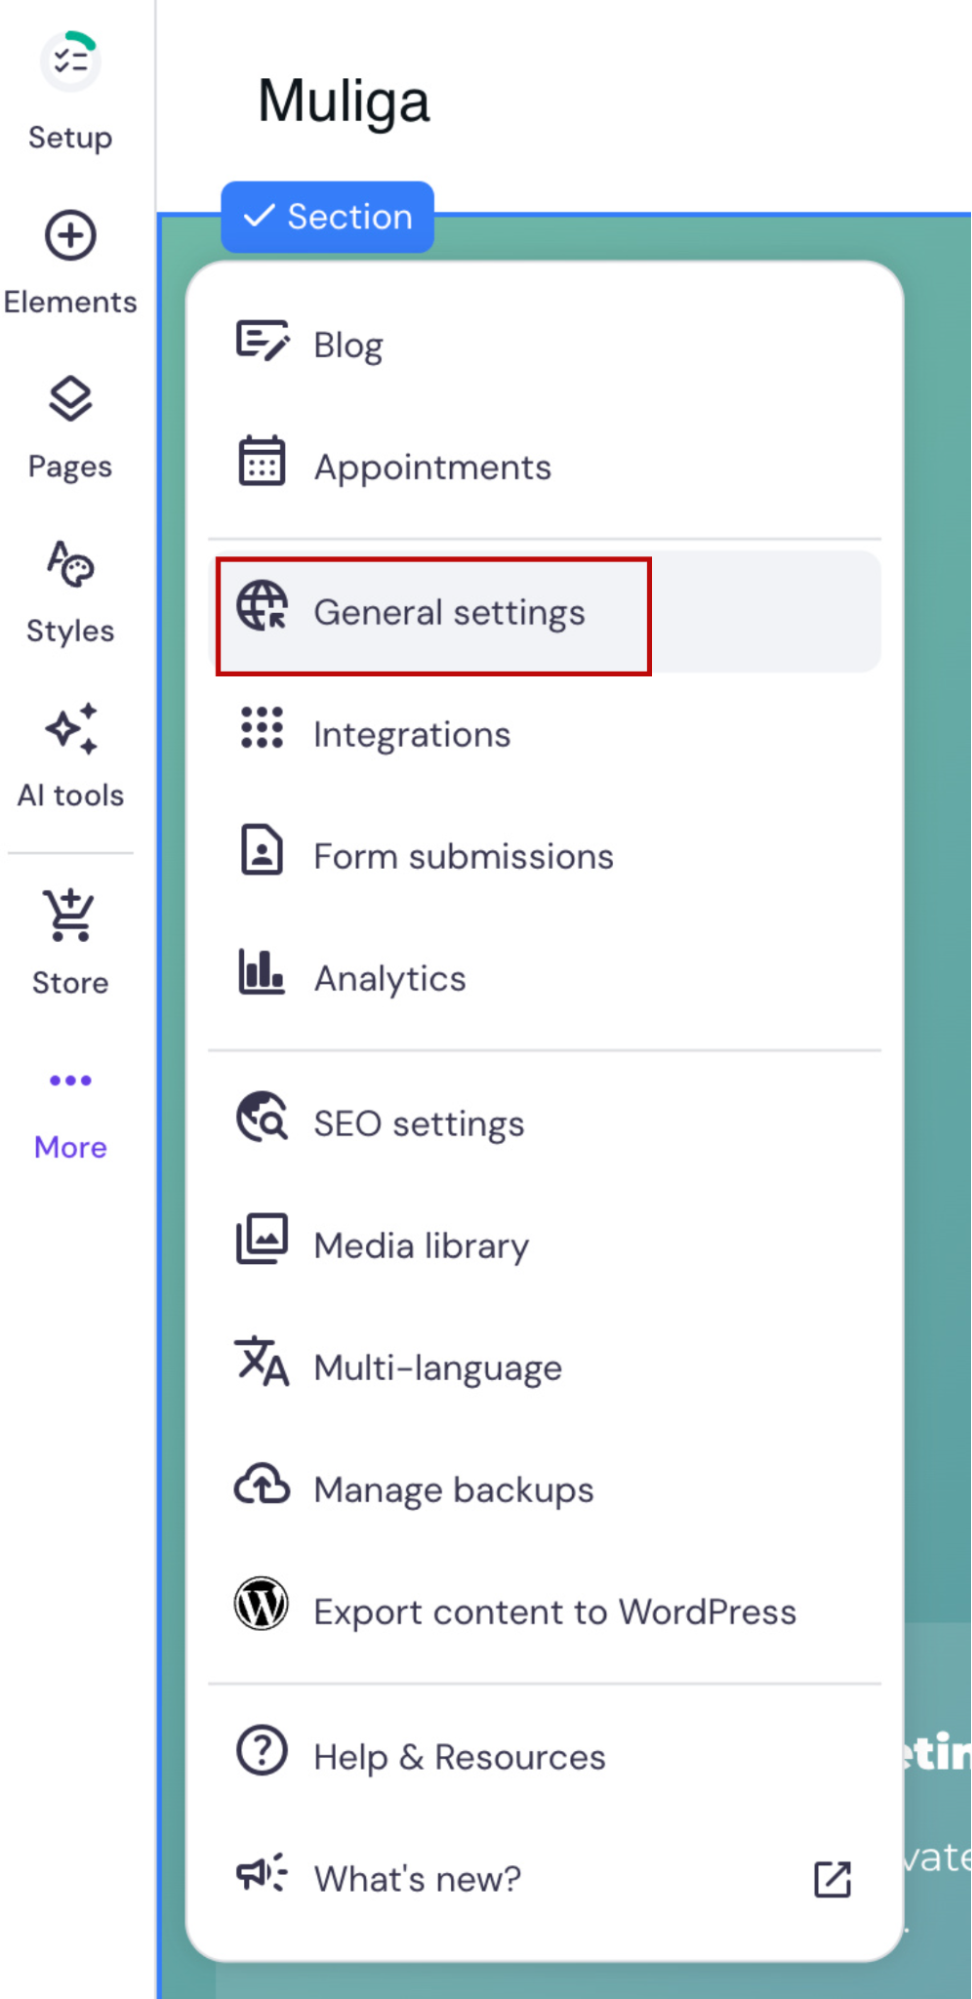
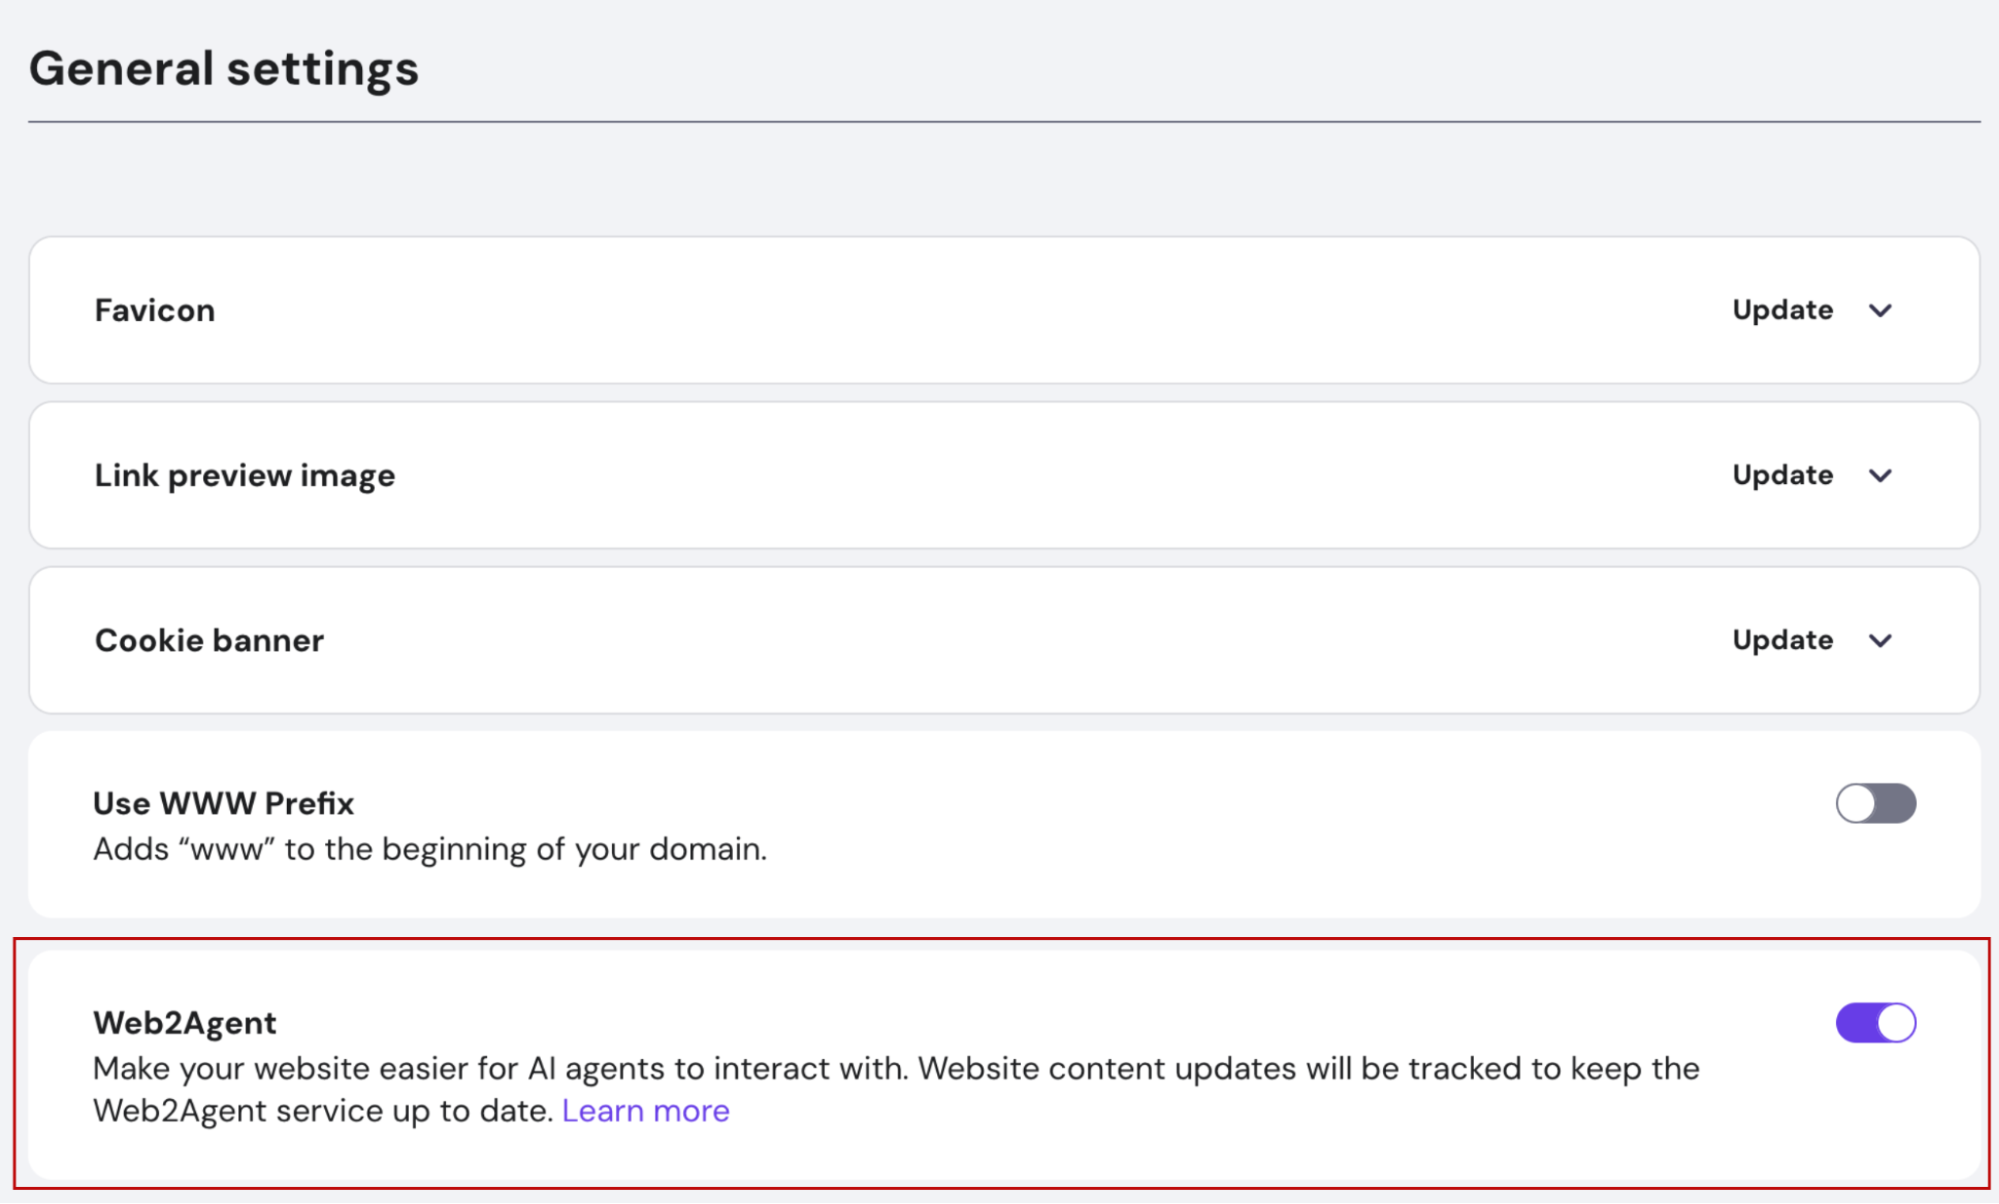
The process is similar for Hostinger Website Builder. Go to your website’s general settings and enable the Web2Agent feature there.
Using Web2Agent with AI Tools
Activating the Web2Agent service initiates a crawl of your website to gather its context. This process usually takes 2–15 minutes, depending on your site’s size. Once crawling is complete, your website is ready to handle AI agent requests.
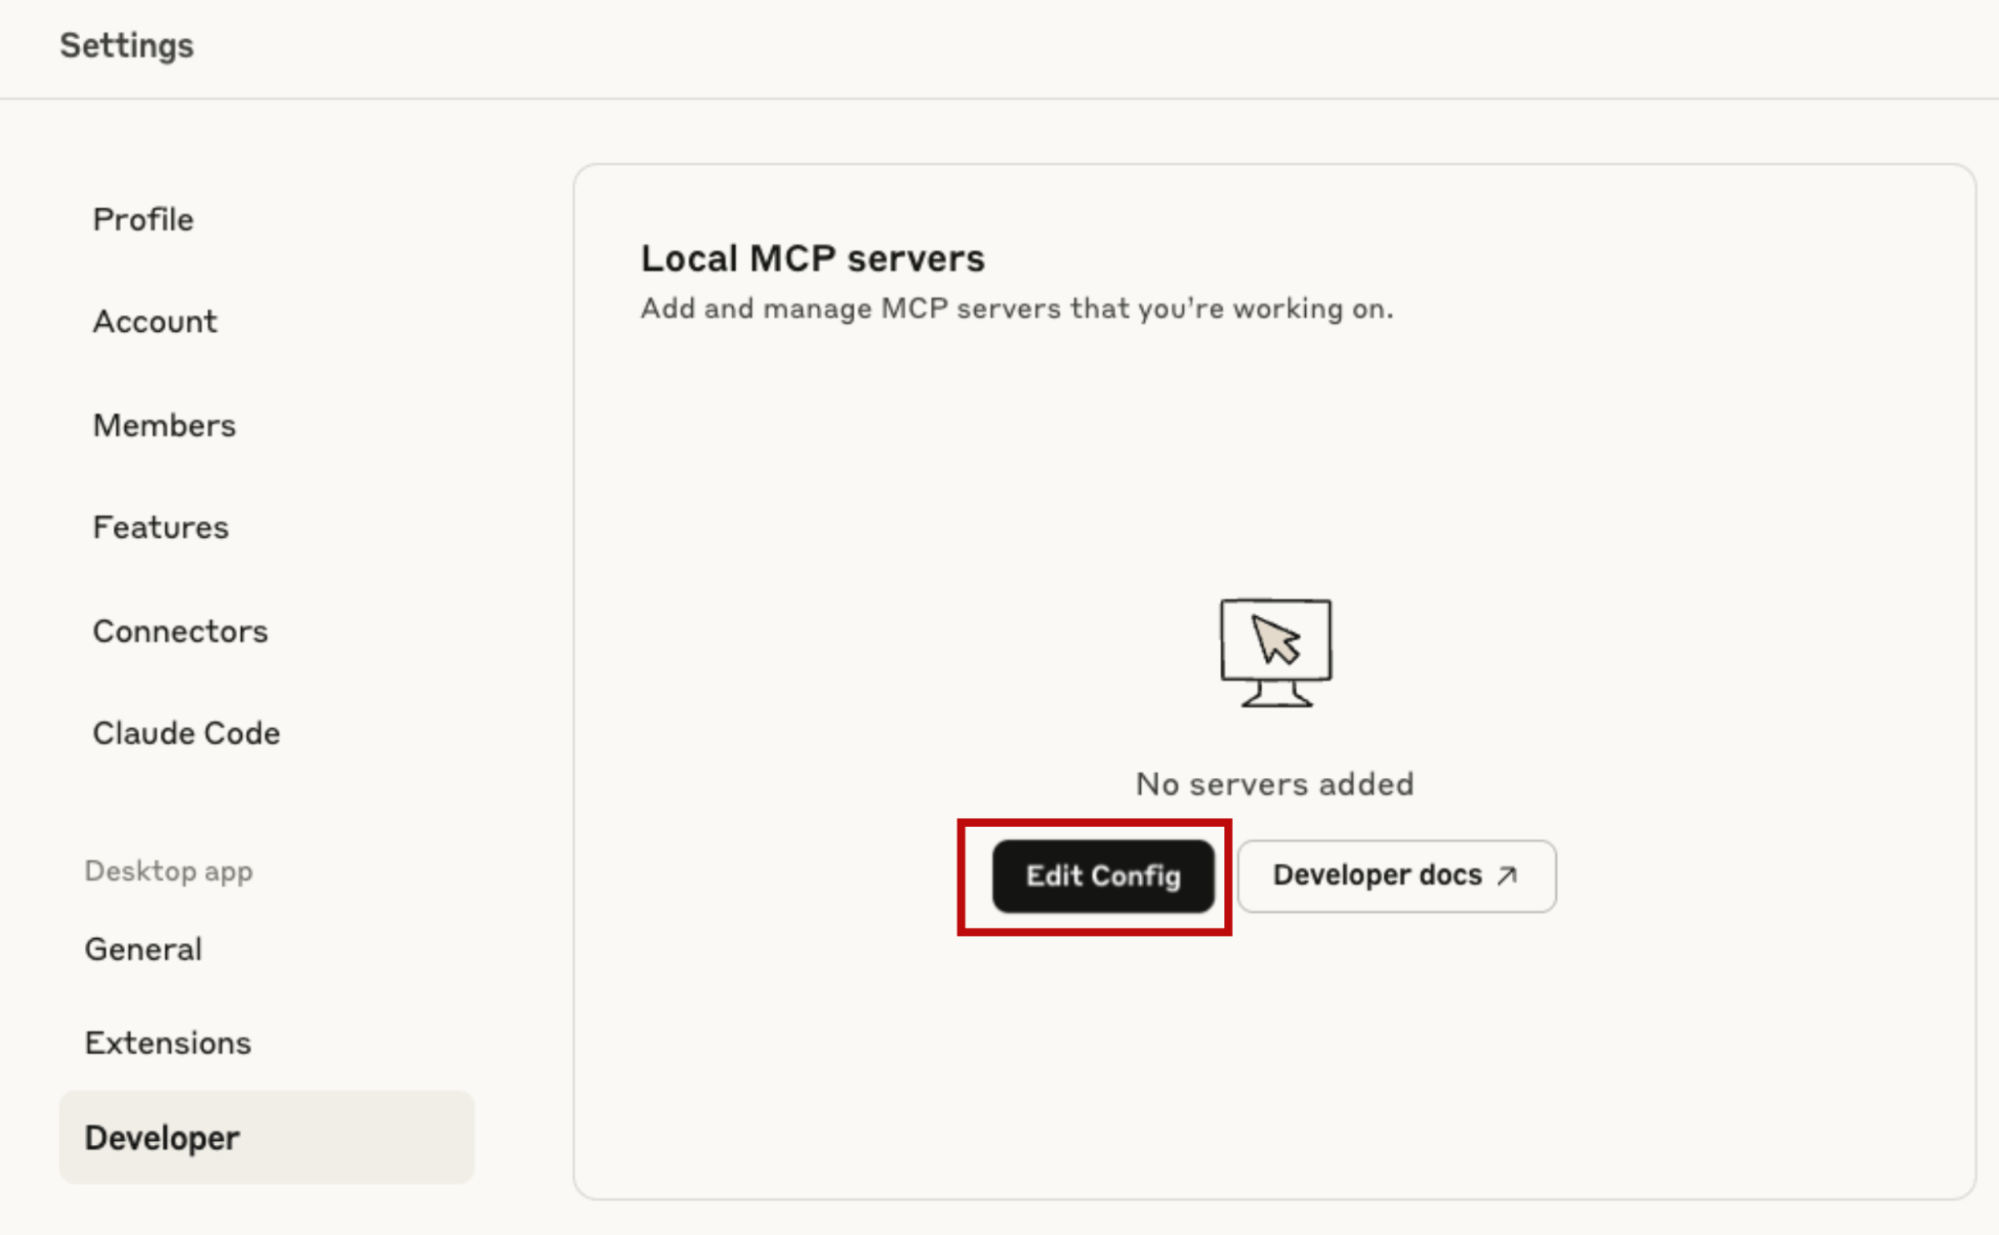
A great way to test the feature capabilities yourself is by integrating it with an AI tool like Claude Desktop. To begin, open the Claude Desktop settings and go to the Developer section. There, you will find an Edit Config option, which will open the claude_desktop_config.json file. You need to edit this file to add your Web2Agent website agent to Claude Desktop.
Add the following lines to the file, replacing the {YOUR DOMAIN} placeholder with your actual domain name. For example, if your domain is mywebsite.com, you would replace {YOUR DOMAIN} with mywebsite.com.
{
"mcpServers": {
"{YOUR DOMAIN}": {
"command": "npx",
"args": [
"mcp-remote",
"https://websites-agents.hostinger.com/{YOUR DOMAIN}/mcp/"
]
}
}
With the mywebsite.com domain, the settings file should look as follows:
{
"mcpServers": {
"mywebsite.com": {
"command": "npx",
"args": [
"mcp-remote",
"https://websites-agents.hostinger.com/mywebsite.com/mcp/"
]
}
}
Once added, you should be able to see your website in the tools list. If it is disabled, enable it.
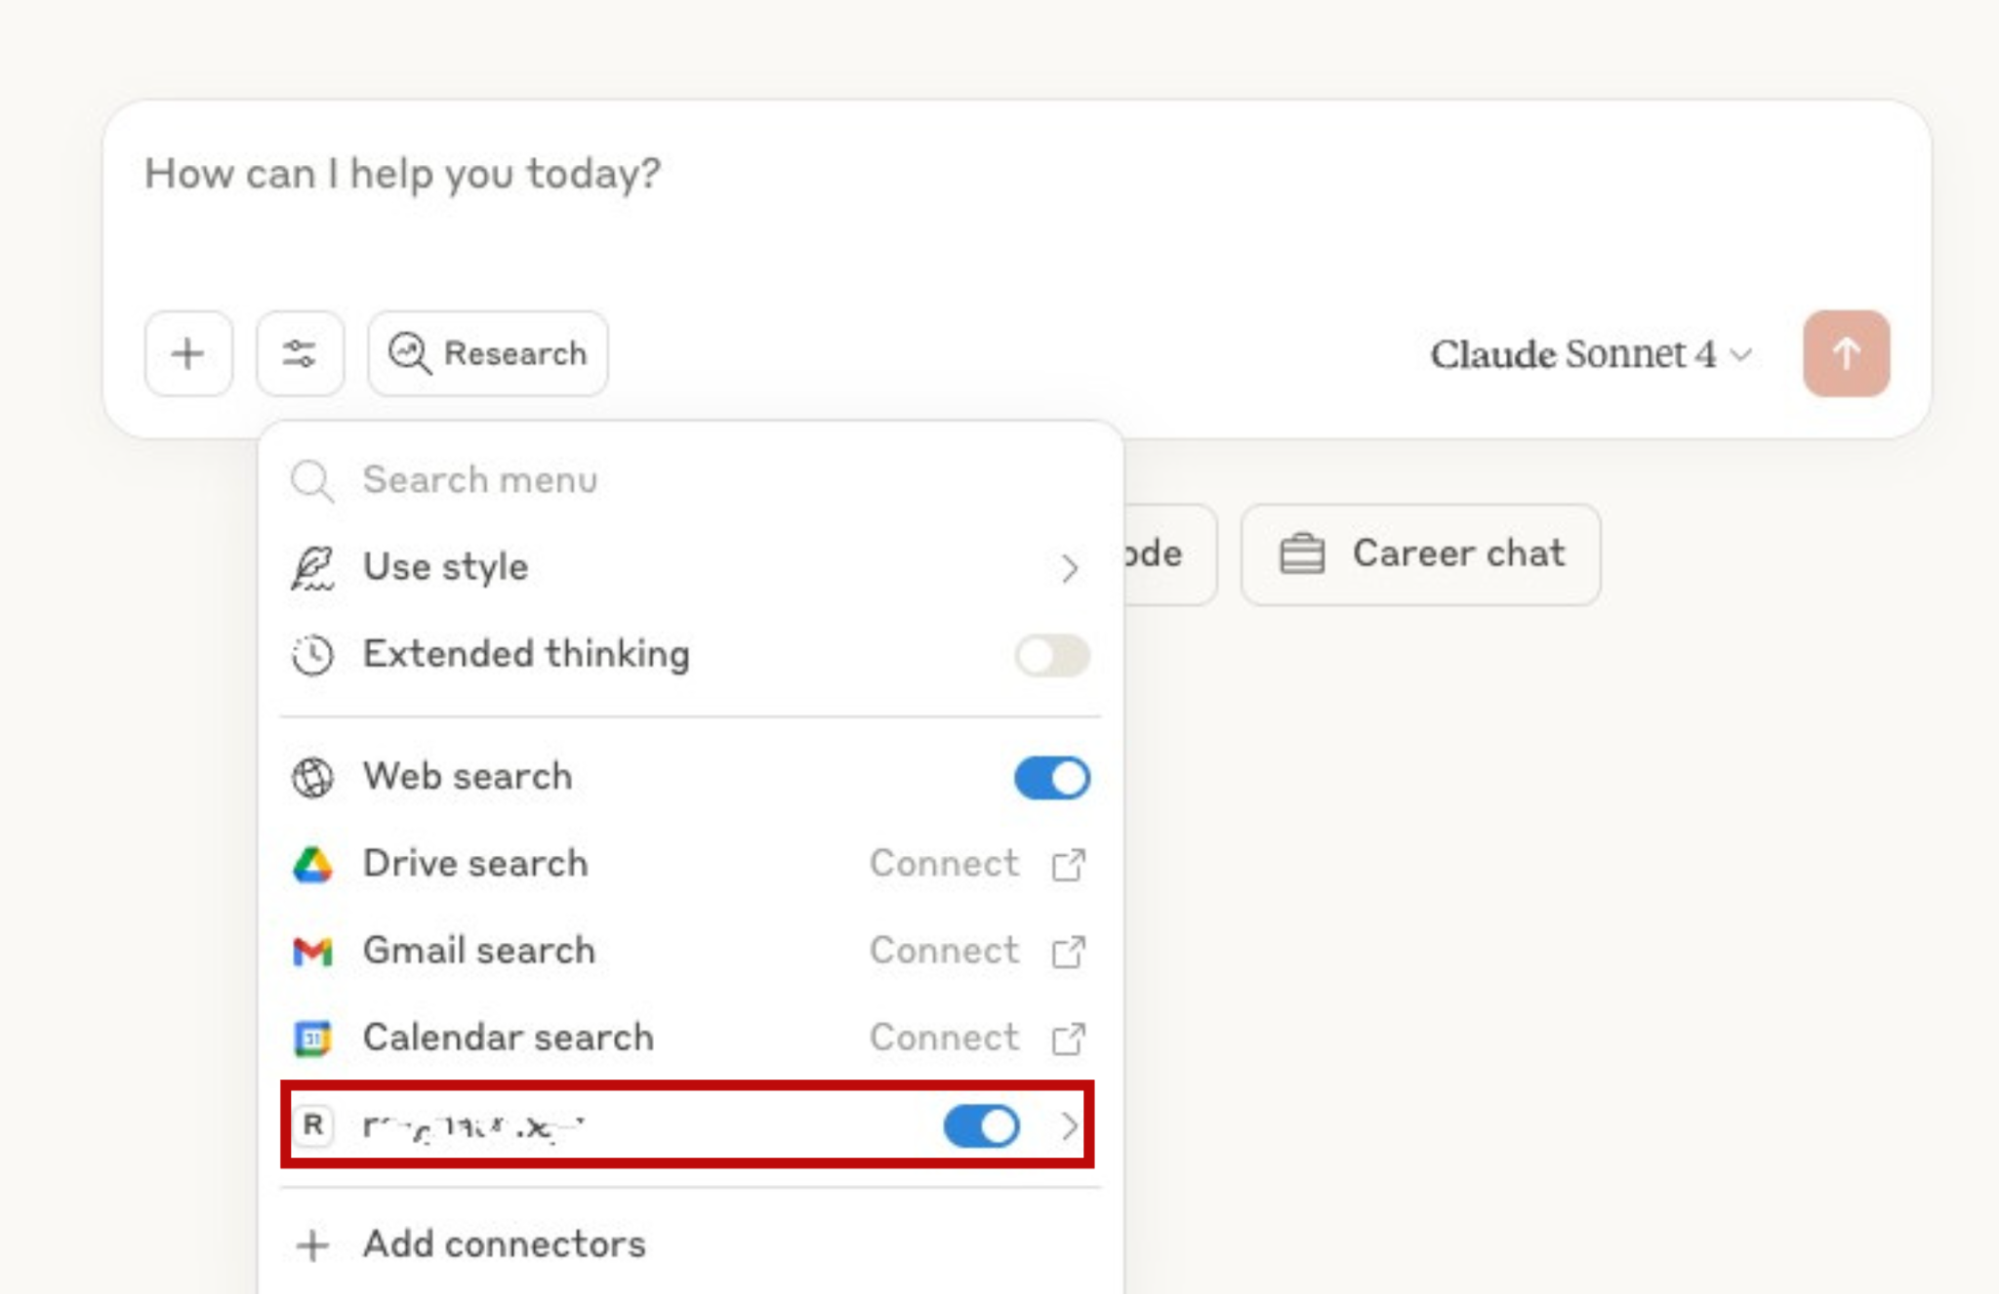
The Web2Agent feature allows you to integrate your website content with different tools that support the MCP protocol, like we did with Claude Desktop. You can also use any programming language to create a custom application that uses your own website content as well.
Transparency and data handling
When you opt in, Hostinger securely shares only relevant website update events, such as when content is published or when your site’s structure changes. This data is sent to Hostinger’s Web2Agent service. This data is used exclusively to maintain your site’s up-to-date AI representation and enhance its accessibility for agent-based tools.
No visitor activity is tracked, and no personal user data is collected. The feature follows the necessary integration standards for WordPress and Website Builder, including obtaining your consent before any data is transmitted.