How to deploy a website from VS Code
Oct 06, 2026
/
By Ariffud M.
/
8 min Read
To deploy a website from Visual Studio Code (VS Code), you push your project from your computer to a hosting provider so it goes live at a public URL.
The two main ways to deploy a website from VS Code are connecting a GitHub repository to your hosting provider for automatic deployments or using your web host’s VS Code extension, like Hostinger Connector, to deploy directly from your editor.
Both approaches have similar prerequisites, such as Git installed on your computer, a GitHub account for storing your project in a repository, and a hosting plan to host your website on a live server.
Alternatively, you can deploy your website from VS Code using file transfer protocol (FTP), GitHub Pages, or cloud platform extensions, depending on your project’s needs.
What to do before deploying a website from VS Code
Deploying a website from VS Code requires similar tools as deploying sites with other integrated development environments (IDEs). You need Git, a GitHub account, an active web hosting plan, and VS Code itself.
Each tool serves a different purpose in the deployment process:
- Visual Studio Code. Download it from the official site for Windows, macOS, or Linux.
- Your website project. You need an entry point file like index.html, app.js, or index.php. If you use a framework like React or Vue, run npm run build first to generate the files your hosting provider will serve.
- Git. Install Git on your computer so you can push code from VS Code to GitHub using commands.
- GitHub account. A free account supports both public and private repositories and connects to hosting providers, so it’s enough to store your project and set up deployments.
- Web hosting plan. Pick a web hosting plan that supports automatic deployments from a GitHub repository, so you can publish updates by pushing code instead of uploading files manually.
Note that if you only want to preview your website, you can use a VS Code extension like Live Server. It opens your site in your computer’s browser at localhost:5000, but only you can see it.
Deploying your website to a live server lets anyone with your domain access your site.
How to deploy a website from VS Code using GitHub
To deploy a website from VS Code using GitHub, prepare your project, push your code to the GitHub repository, connect the repository to your hosting provider, and verify the live site.
This method works for both static and dynamic sites. It also gives you version control, so you can track changes, compare previous versions, and undo updates when needed.
1. Create or open your project in VS Code
Open an existing project in VS Code by going to File → Open Folder and selecting the directory that contains your website files.
Your project needs at least one entry point file, such as index.html for static sites, app.js for Node.js apps, or index.php for PHP projects.
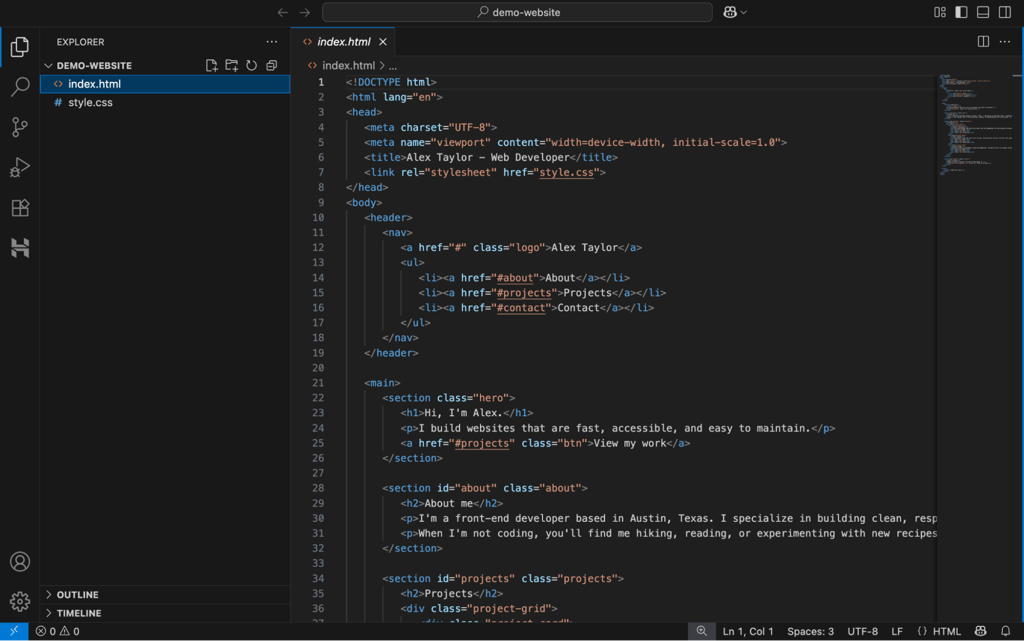
If you’ve never built a project before, try creating a simple HTML website. Create a new folder on your computer and open it in VS Code. Then, add files directly in the editor by right-clicking the Explorer sidebar → New File.
Start with your entry point, which is index.html, then add stylesheets, scripts, images, and other files as your website grows.
2. Initialize Git and push to GitHub
You can push your code to GitHub through VS Code’s built-in Source Control panel. The process takes four steps:
- Open the Source Control panel in the sidebar, or press Ctrl+Shift+G, and click Initialize Repository. This turns your project folder into a local Git repository so VS Code can track your changes.
- Stage your files by clicking the + icon next to each one, or click + next to Changes to stage everything. Staging marks the files you want to include in the next save point.
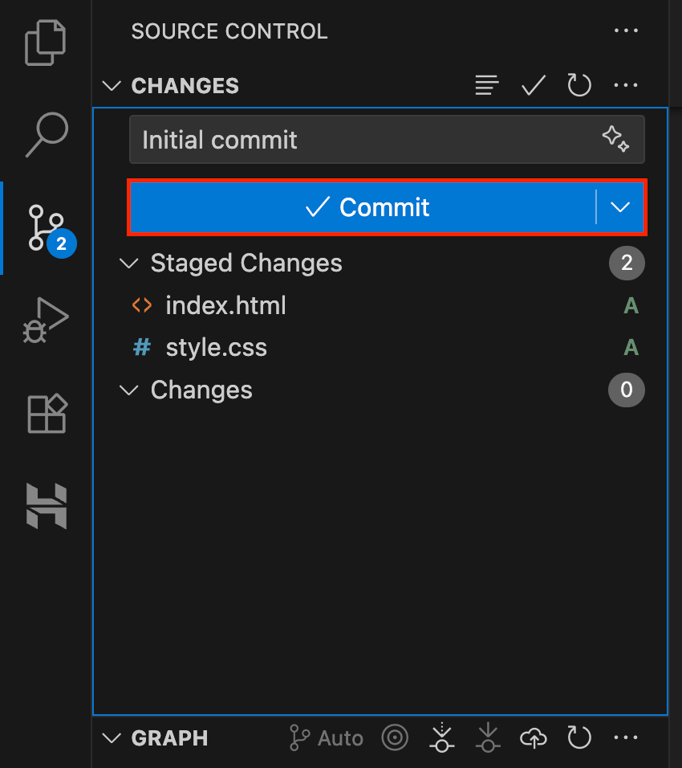
- Type a short commit message, like “Initial commit”, in the message field and click Commit. This saves a snapshot of your staged files.
- Click Publish Branch → Publish to GitHub, and choose whether you want a public or private repository. If this is your first time, VS Code opens a browser window so you can sign in to GitHub and authorize access.
VS Code creates the repository on GitHub and pushes your code automatically.
If you prefer the command line, open VS Code’s integrated terminal by selecting View → Terminal or pressing ⌃+` and run these commands one at a time:
git init
git add .
git commit -m "Initial commit"
git remote add origin https://github.com/your-username/your-repo.git
git push -u origin main
Replace your-username with your GitHub username and your-repo with your GitHub repository name.
Whichever approach you use, your project is now on GitHub and ready to connect to your hosting provider.
3. Connect your GitHub repository to a hosting provider
Connecting GitHub to your hosting provider means signing in to your hosting dashboard, finding the Git or deployment settings, authorizing GitHub access, and selecting the repository you want to deploy.
After that, your hosting provider can pull your code and publish your site. The exact steps vary across web app hosting providers and deployment platforms like Vercel and Netlify.
On Hostinger, there are two ways to connect your GitHub repository. If you have a PHP, WordPress, or static site built with HTML, CSS, and JavaScript, follow these steps:
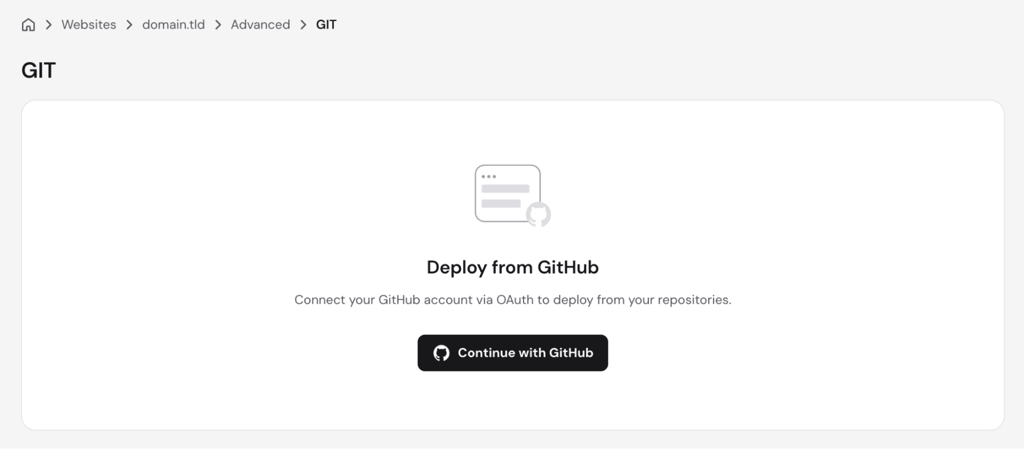
- Go to Hostinger dashboard → Websites → select the site → Dashboard → Advanced → Git.
- Click Continue with GitHub. GitHub opens an authorization page where you can install and authorize the Hostinger integration on your GitHub account.
- Select the repository and branch you want to deploy.
- Set the root directory, which is the folder your hosting provider serves files from. This defaults to public_html.
- Click Deploy.
If you’re deploying a Node.js web app, including projects built with frameworks like React, Express, or Next.js, go to Hostinger dashboard → Websites → Create website → Web App.
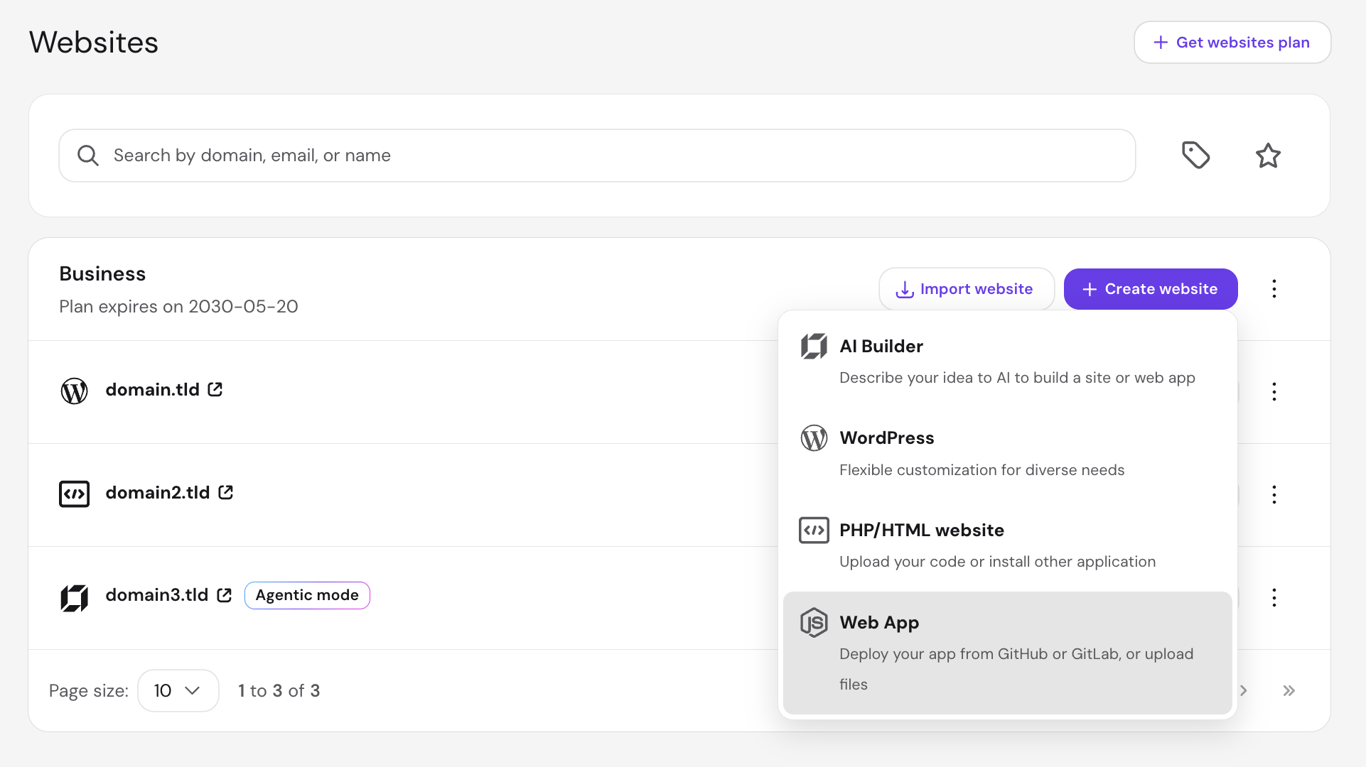
Choose whether you want to use a custom domain or a temporary one, then click Connect with GitHub. Follow the on-screen instructions to configure build settings, such as the start command and output directory, before deploying.
4. Deploy and verify your live website
Most hosting providers start the deployment from the same page where you connected your GitHub repository. Click Deploy, or follow the remaining prompts if your provider uses a multi-step wizard, and wait for the process to finish.
You should see a success message once the deployment finishes. Here’s an example from Hostinger:
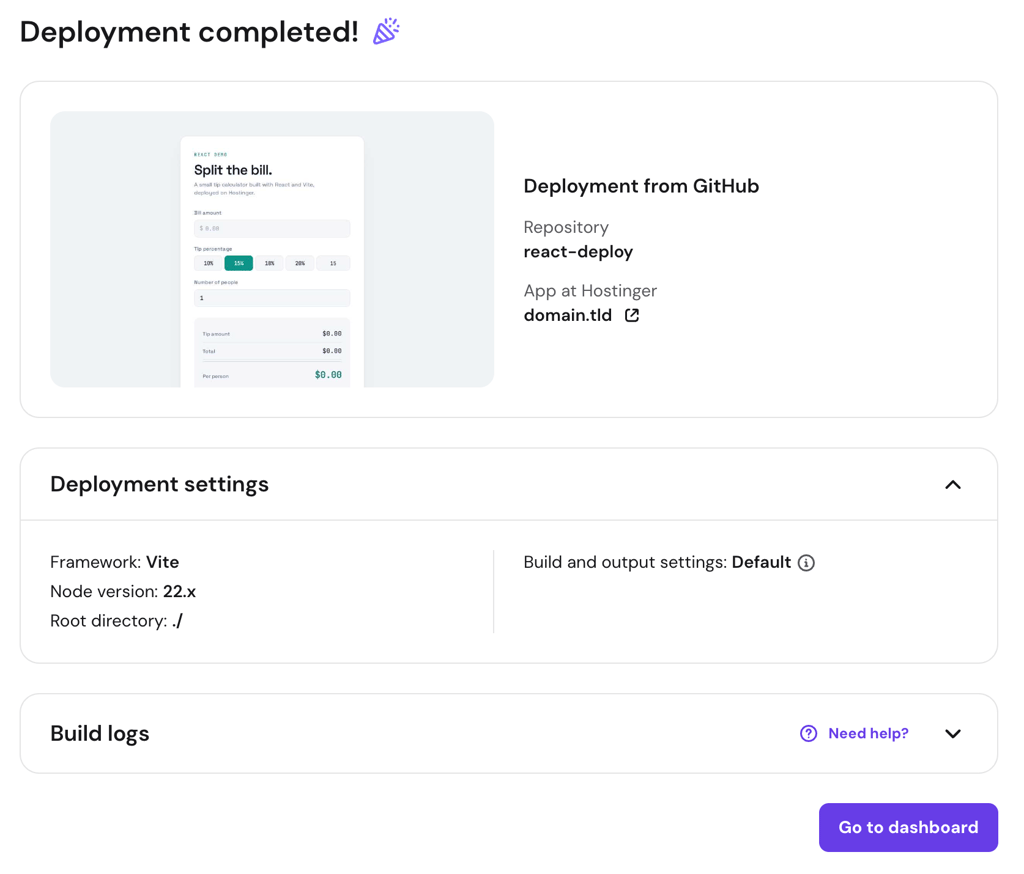
After that, verify that everything works by running through a few checks:
- Check the build status and logs in your hosting dashboard to confirm the deployment is complete.
- Visit your domain in a browser to make sure that every page loads.
- Look for the Connection is secure status in the address bar to verify that your SSL certificate is active.
From this point on, you can edit your code in VS Code as usual, then commit and push your changes to GitHub.
Some hosting providers support automatic redeployment. On Hostinger, this feature is available on the Business web hosting plan or higher. This means every push you make to GitHub triggers a new deployment without requiring you to open Hostinger dashboard.
If your provider doesn’t mention this feature, check their documentation or contact support to confirm whether automatic redeployment is available.

How to deploy a website from VS Code with Hostinger Connector
To deploy a website using Hostinger Connector, you install the extension, connect your Hostinger account, and type a deployment prompt in VS Code’s Copilot Chat.
Hostinger Connector is a free extension that gives AI coding assistants in IDEs like VS Code, Cursor, Devin, and Antigravity direct access to more than 100 Hostinger tools through Model Context Protocol (MCP).
With it, you can deploy sites, manage domains, configure DNS, and monitor servers from a single interface inside your preferred IDE. The same prompt-based workflow applies in other supported editors, so the steps are nearly identical if you’d rather deploy a website from Antigravity.
You only need an active Hostinger account to get started. However, for tasks like deployments and server configurations, you’ll also need an active hosting plan.
1. Install Hostinger Connector in VS Code
To install Hostinger Connector in VS Code, open the Extensions panel (press Ctrl+Shift+X), search for Hostinger Connector, and click Install. You’ll see the Hostinger icon in the Activity Bar on the left once it’s ready.
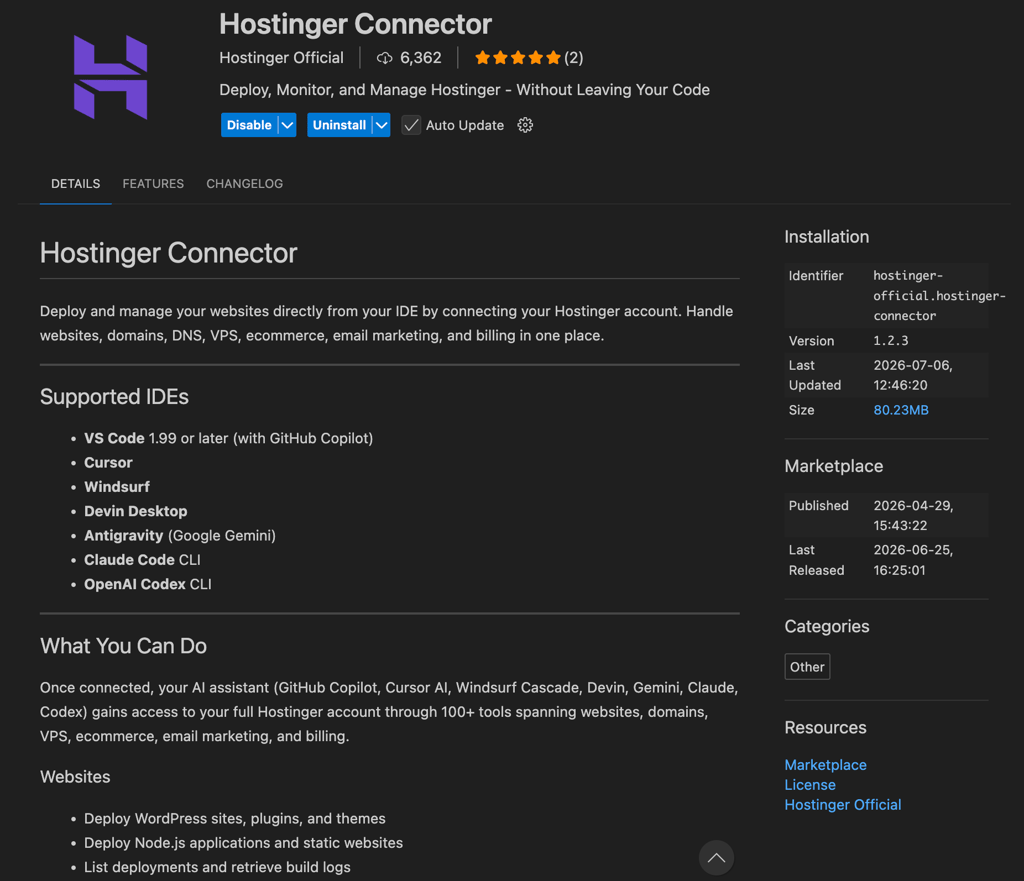
You can also start from Hostinger dashboard by going to Dev tools → API → VS Code → Install in VS Code. This opens a direct link to the extension page in your editor.
After installation, the extension checks whether Node.js is installed on your computer. If it isn’t, Hostinger Connector will prompt you to install the required Node.js version. Follow the on-screen instructions to complete the setup.
2. Connect your Hostinger account
Once you’ve installed the Hostinger Connector extension, connect it to your Hostinger account by following these steps:
- Click the Hostinger icon in the Activity Bar.
- Hit 1-Click Connect.
- Sign in to your Hostinger account in the browser window if you haven’t already, then authorize the connection.
- Return to VS Code and check that the status badge has turned green.
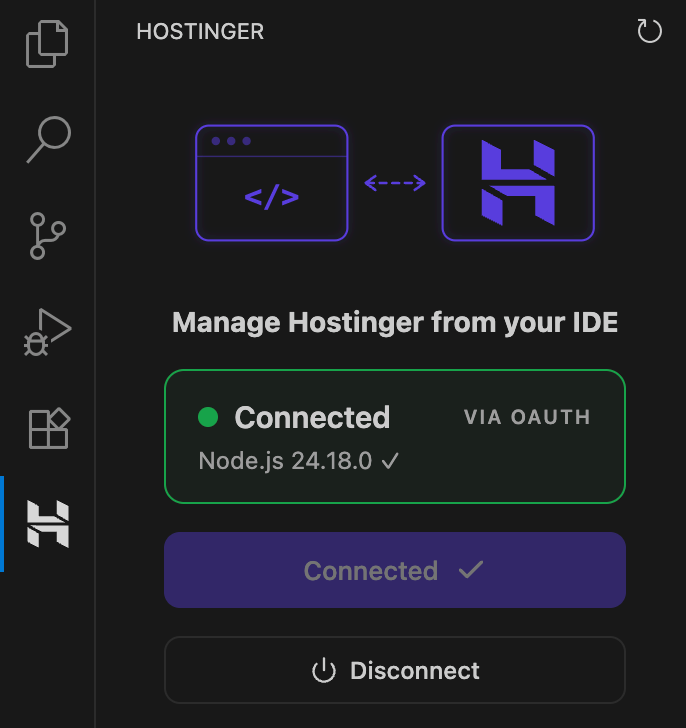
If browser authentication doesn’t work or you prefer manual setup, go to Hostinger dashboard → Dev tools → API and click Generate API token. Enter your preferred token name and expiration duration.
Then, click Generate and copy the API token. Return to VS Code → Hostinger Connector and expand Advanced: use API token instead. Paste the token you copied earlier and click Connect with API token.
3. Deploy your website to Hostinger
To deploy your website using Hostinger Connector, open Copilot Chat by going to View → Chat or pressing Ctrl+Alt+I on Windows and Linux or Ctrl+Cmd+I on macOS. Then, make sure the Hostinger tools are enabled:
- Click the Configure Tools button at the bottom of the chat input.
- Confirm that Hostinger is listed and enabled in the tools menu.
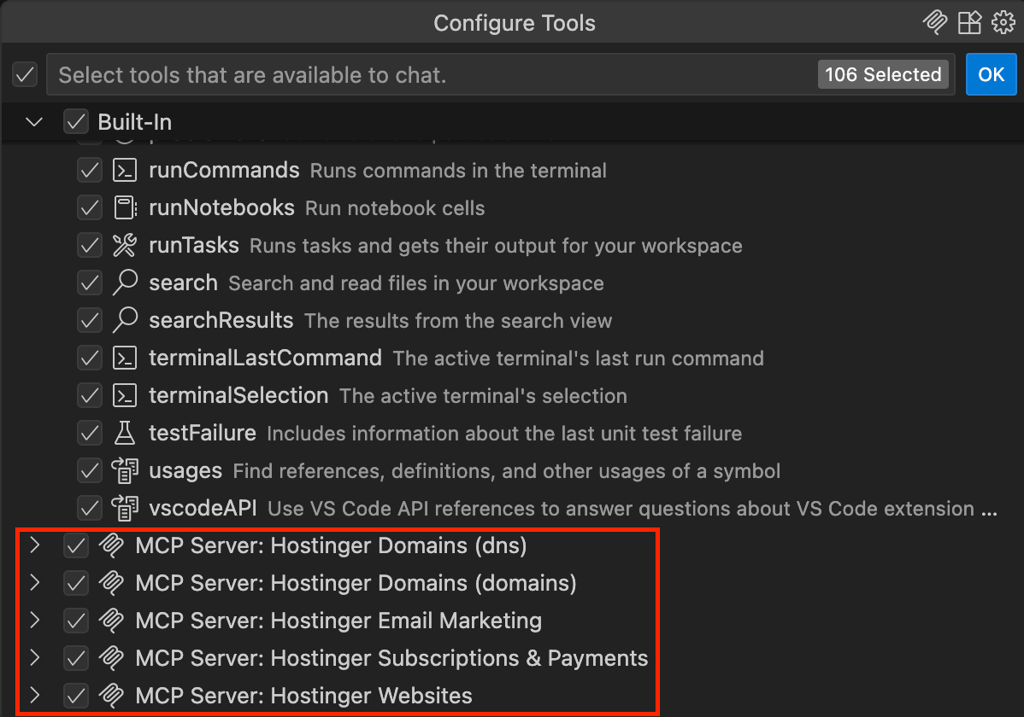
- Type a deployment prompt, such as “Deploy my Node.js app to Hostinger” or “Deploy this static site to my Hostinger account.”
The extension picks up your prompt, runs the deployment, and shows the progress directly in the chat window. Once it’s finished, you’ll see the deployment status and a link to your live site.
You can also check previous deployment statuses and build logs by asking for them in the same chat.
💡 What else can you do with Hostinger Connector?
Hostinger Connector can do much more than deploy websites. Try these prompts to manage your Hostinger account directly from VS Code:
Other ways to deploy a website from VS Code
Besides using a GitHub repository or a hosting provider extension like Hostinger Connector, you can also host a website from VS Code using FTP, GitHub Pages, or cloud platform extensions.
Each method works best for a specific scenario, so you can choose the one that fits your project best.
How to deploy a website from VS Code using FTP or SFTP
Using FTP or SFTP, you can upload your website files directly from VS Code to your hosting server. A popular extension for this deployment method is SFTP by Natizyskunk.
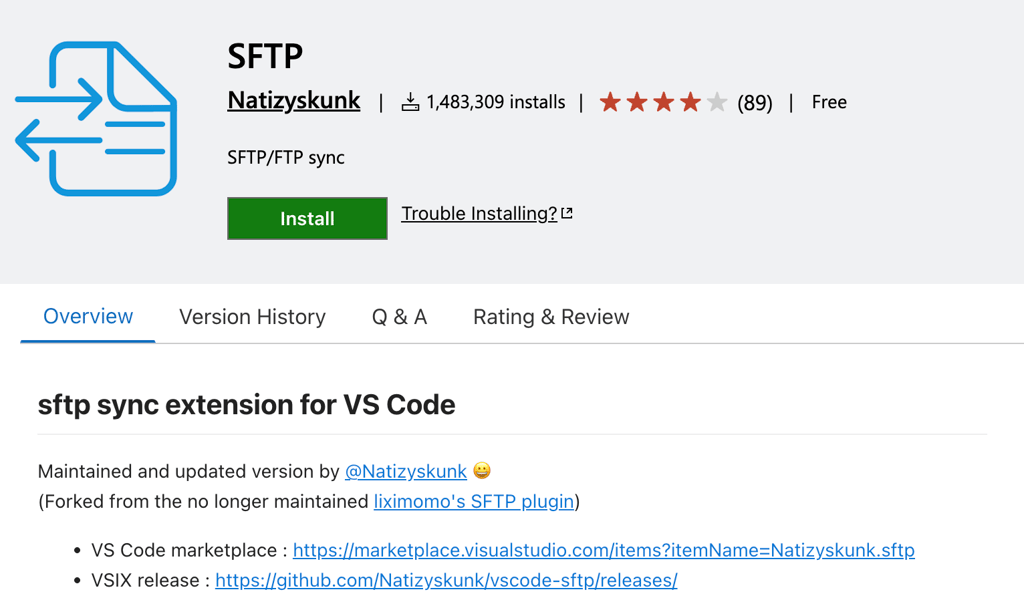
Once you add your server details, such as the hostname, username, password, and remote path (typically public_html/your-project) to the sftp.json configuration file, the extension syncs your local changes to the specified path every time you save.
The FTP method doesn’t include version control though, so you can’t track changes or revert to earlier versions of your files. That said, it works well for quick updates to traditional hosting accounts where GitHub integration isn’t available or necessary.
How to deploy a static site to GitHub Pages from VS Code
GitHub Pages is a free hosting service built into GitHub. It serves static HTML, CSS, and JavaScript sites directly from a repository.
To deploy a static site to GitHub Pages, open your repository on GitHub and go to Settings → Code and automation → Pages. Then, choose your branch and folder under Build and deployment.
After that, commit and push changes to your repository from VS Code as usual. To view the published site, go back to Pages and click Visit site.
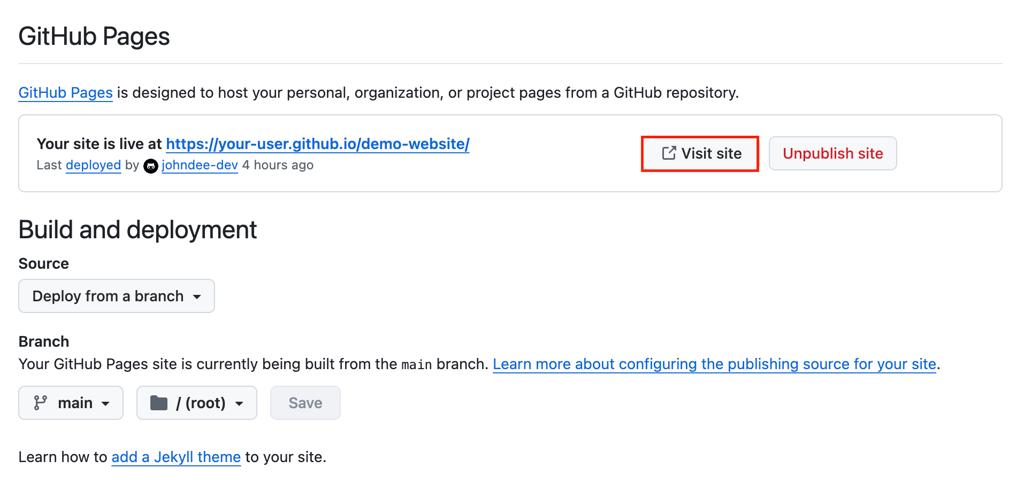
Note that GitHub Pages only supports static content with no server-side code or database access. It’s a good fit for deploying portfolios, documentation sites, simple landing pages, and anything that doesn’t need a backend.
How to deploy from VS Code using cloud platform extensions
Similar to Hostinger Connector, some cloud platforms offer VS Code extensions that let you deploy directly from the editor.
The Azure App Service extension, for example, supports full-stack app deployment for projects built with Node.js, Python, or Java on Microsoft Azure.
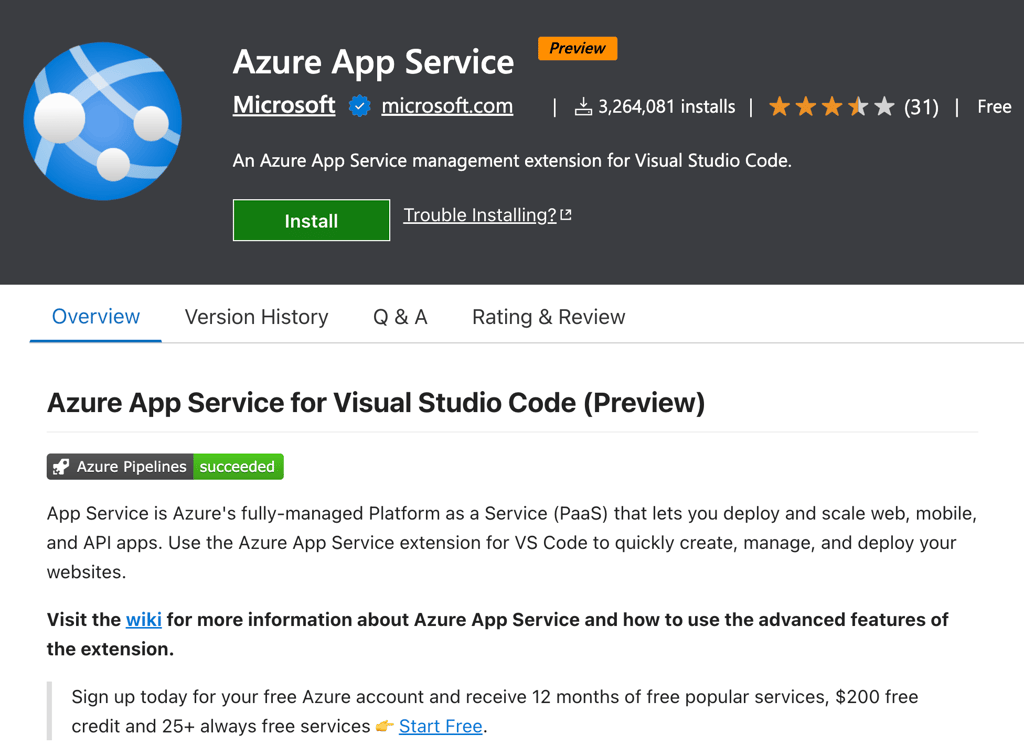
The process is similar to other extension-based deployment methods. Install the Azure App Service extension, then sign in to your Azure account through the browser prompt.
After that, follow the on-screen instructions in VS Code to select your subscription, configure your app, and deploy your project to an Azure App Service instance.
Since this extension connects Microsoft Azure, it requires a separate Azure account and billing setup. It’s better suited for complex dynamic apps that need dedicated cloud infrastructure.
What to do after deploying your website
After deploying your website from VS Code, set up a custom domain, test the site further, and configure backups as a safety net for future changes:
- Set up a custom domain. Buy a domain name, then point its DNS records to your hosting provider if your site is still on a temporary URL or default subdomain.
- Test further across devices and browsers. Open your site on a phone, tablet, and desktop to check that layouts, images, navigation, and forms work as expected in major browsers like Chrome, Firefox, and Safari.
- Set up backups and monitoring. Enable automated backups through your hosting dashboard. Consider setting up uptime monitoring as well, so you’ll know if the site goes down.
- Plan for ongoing changes. As your site grows, you’ll make updates like editing content, adding new pages, or building new features. Make sure you test every change locally before pushing it to your live site.
Ang artikulong ito ay isang lokal na bersyon ng How to deploy a website from VS Code, orihinal na inilathala sa Ingles.
All of the tutorial content on this website is subject to Hostinger's rigorous editorial standards and values.

Ariffud is a Technical Content Writer with an educational background in Informatics. He has extensive expertise in Linux and VPS, authoring over 200 articles on server management and web development. Follow him on LinkedIn.