How to use FileZilla FTP client to connect to a remote server in 2026
Mar 10, 2026
/
Ariffud M.
/
6 min Read

File Transfer Protocol (FTP) is a standard for exchanging files over the internet, enabling users to upload or download files to and from a remote server. Among various FTP clients available, FileZilla stands out for its ease of use and robust functionalities.
In this article, you’ll learn how to use FileZilla to transfer files between your local computer and a remote location. Whether you’re managing a website or sharing large files, understanding FileZilla’s interface and features will streamline your file transfer tasks.
Download glossary for web beginners
How to Use FileZilla FTP – Video Tutorial
For those who prefer a visual guide, watch our FileZilla tutorial here:

How to Use FileZilla to Connect to FTP
This section will guide you on how to connect to FTP with FileZilla and transfer files between your computer and the server.
1. Download and Install FileZilla
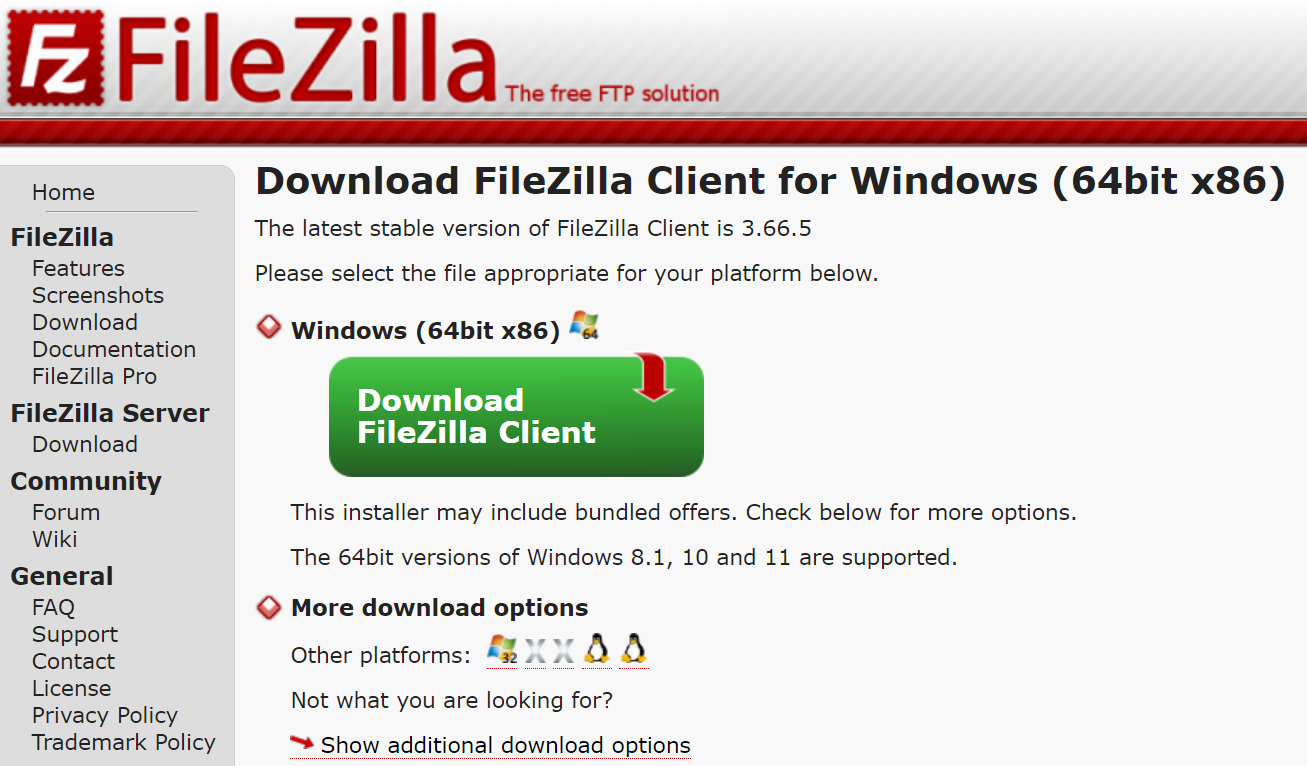
To begin using FileZilla, download this free FTP client from its official download page. There, you’ll find releases for various operating systems, including Windows, macOS, and Linux.
Once you’ve downloaded the version suitable for your OS, proceed with its easy-to-use installation wizard. Simply accept the license agreement by clicking I Agree, then continue by clicking Next on the subsequent steps.
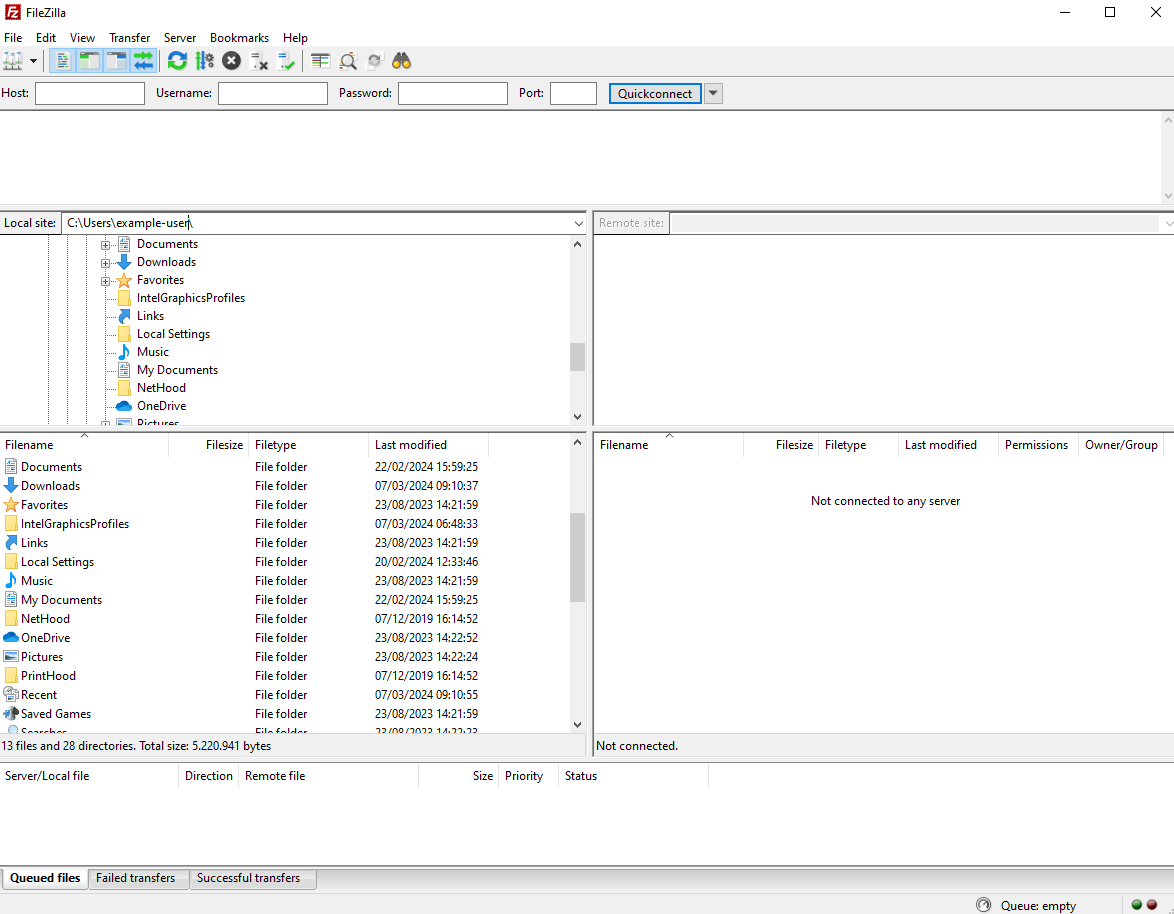
After the installation is complete, open FileZilla and start getting acquainted with its interface, which will prepare you for the initial FTP connection.
2. Gather FTP Details
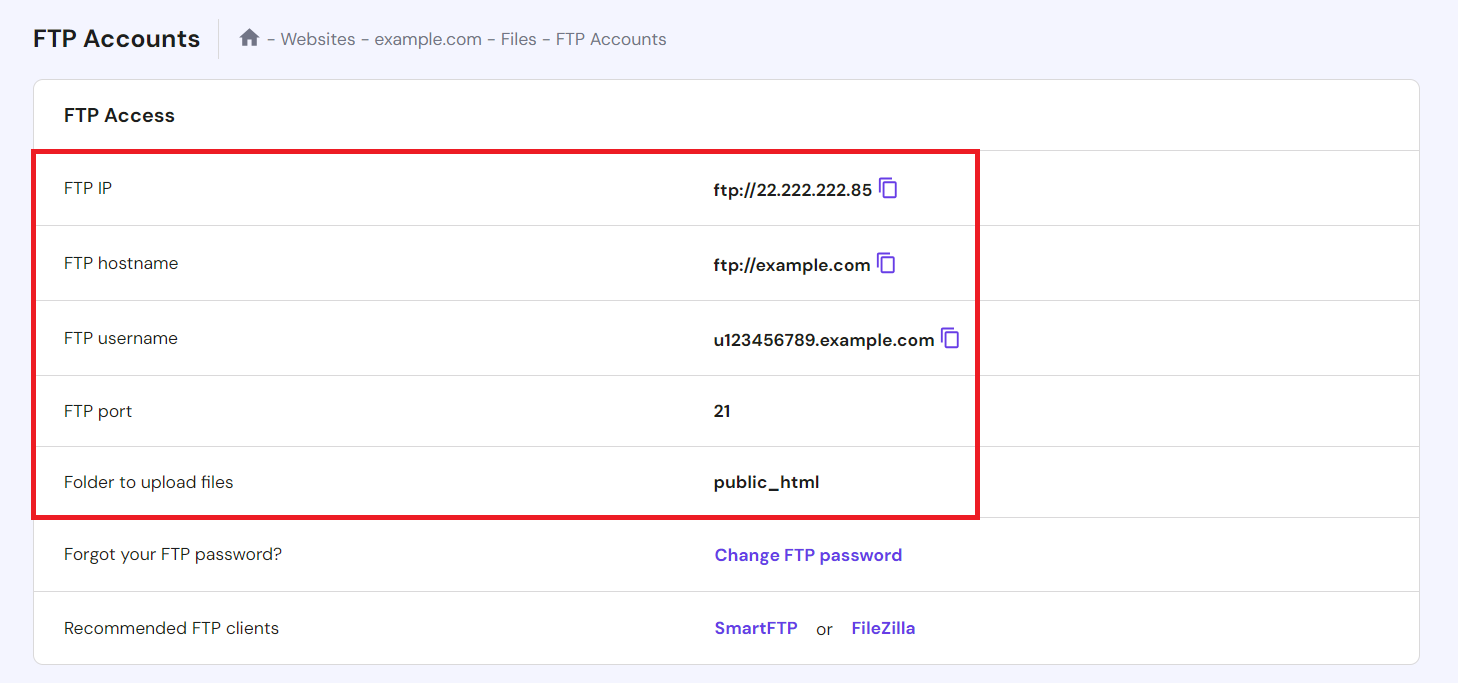
Gathering FTP details is necessary before connecting to the server via FileZilla. Look for the server’s domain or IP address, your FTP username, password, and port number.
For Hostinger’s web hosting and WordPress hosting customers, the FTP server information is accessible on hPanel. Log in to your Hostinger account and navigate to Files → FTP Accounts from your hPanel dashboard.

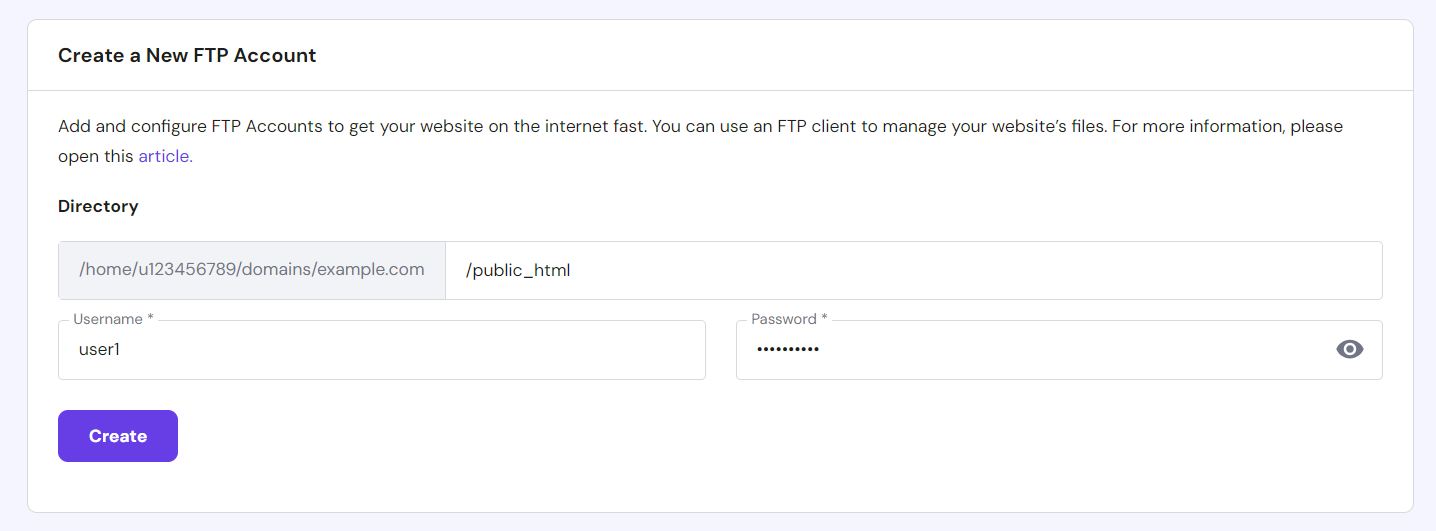
On the same FTP Accounts page, you can also create unlimited FTP accounts. This further enhances security by limiting access to essential files and allows you to assign specific directory permissions for each account.
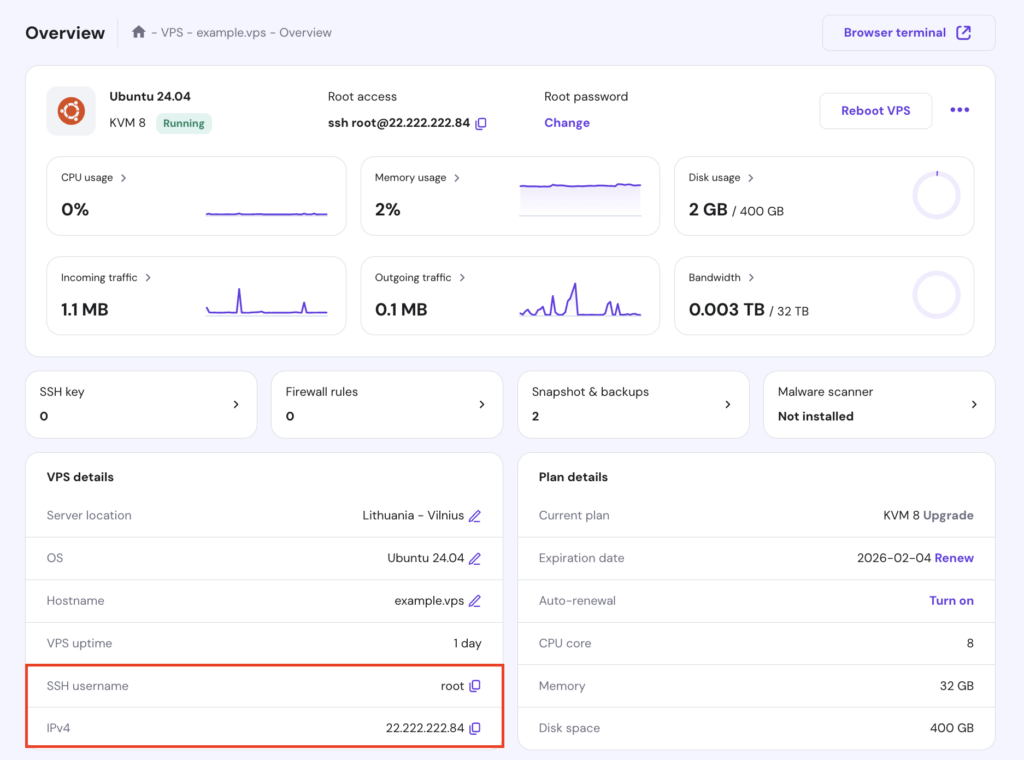
VPS hosting users can find similar information on the VPS Overview page. Use the SSH IP, username, password, and port 22 as your FTP login credentials.
3. Use the Quickconnect Feature
The FileZilla Quickconnect feature is a swift and efficient method to connect to your FTP server, ideal for one-time connections or when you need immediate access. To use this feature, find the Quickconnect bar at the top of the FileZilla interface.

Input your server’s address in the Host field, the server’s credentials in the Username and Password fields, and specify the Port as 21 for a standard connection or 22 for a more secure SFTP connection, which we’ll explain more in the subsequent step.
After inputting the necessary FTP client configuration details, click the Quickconnect button. FileZilla will then try to connect to the server. Monitor the connection status in the message log area, located just below the Quickconnect bar.

Once you’ve successfully connected, you’re ready to start transferring files between your local system and the server.
4. Set Up a Site in Site Manager
For frequent connections, the FileZilla Site Manager feature allows you to save server details for quick access. It’s handy when managing multiple servers because each login information will be readily accessible.
To utilize this feature, navigate to the File menu and select Site Manager. Alternatively, use the shortcut Ctrl + S (Windows) or command + S (macOS).
In the Site Manager’s left panel, click New Site and assign a descriptive name to your site.

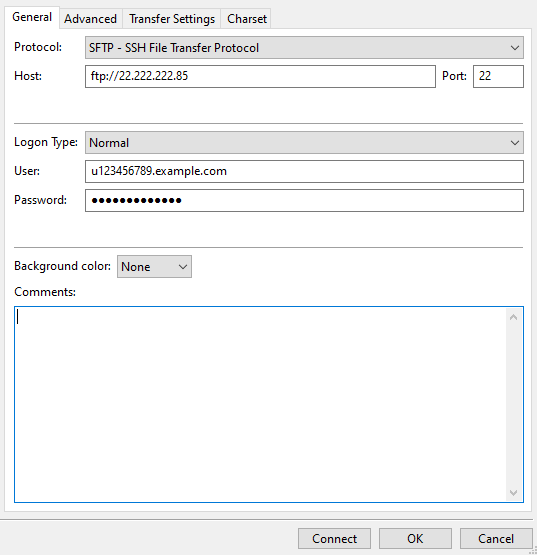
Proceed to fill in your server details on the right panel:
- Protocol. Select FTP – File Transfer Protocol for standard FTP connections or SFTP – SSH File Transfer Protocol for a secure file transfer. We recommend using the SFTP client connection, as it encrypts both your data and credentials.
- Host. Input the server’s address.
- Port. Optionally, specify the port number – 21 for FTP or 22 for SFTP.
- Encryption. When opting for a standard FTP connection, choose between two FileZilla encryption methods – Explicit for securing connections on request or Implicit for automating encryption from the start.
- Logon Type. Select the appropriate logon type. Ask for password is a secure option that asks for your password with each connection. Alternatively, Normal allows you to store your username and password.
- User. Enter your FTP username.
- Password. If Normal is your chosen logon type, input your password here.
After finishing your FileZilla server setup, click Connect to save your settings and create an immediate connection to your server.
5. Navigate Local and Remote Directories
FileZilla’s dual-panel interface allows you to navigate between directories with ease.
The left panel is the local directory tree, which shows files and folders within your computer’s file manager. Meanwhile, the right panel is your remote site, enabling you to browse through files on your server.
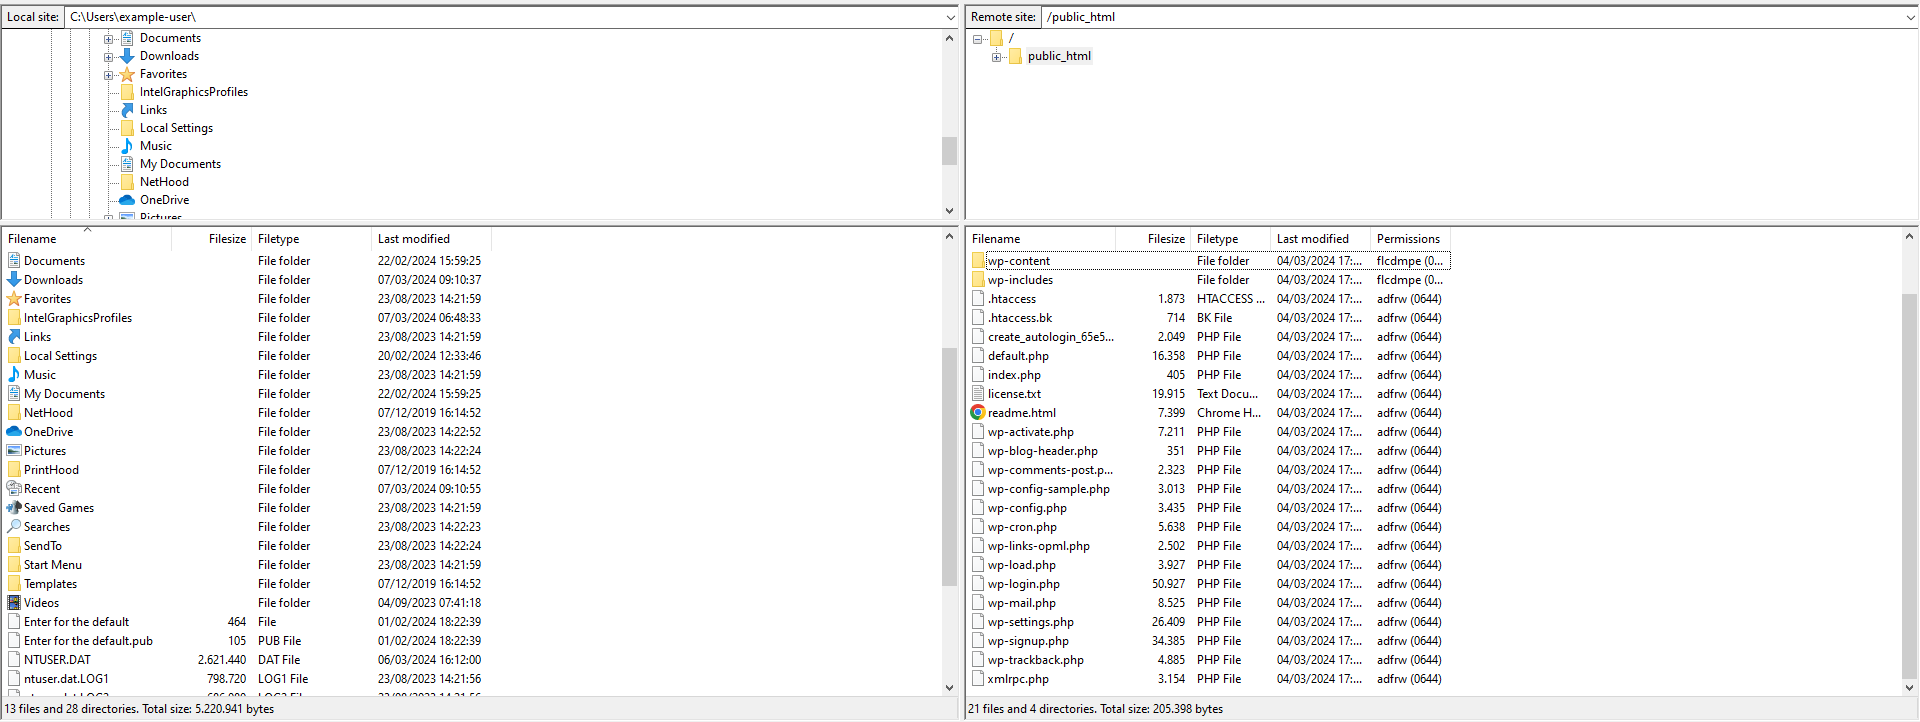
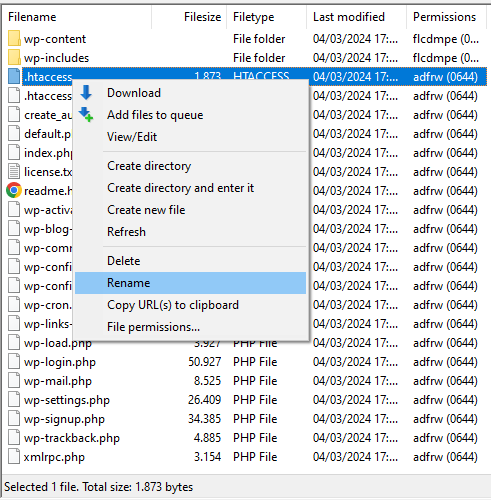
The local and remote panel’s functionality is mirrored. To explore a folder’s contents, double-click it. You can drag and drop files or folders between panels for uploading or downloading or use right-click options to rename and delete files from either location.
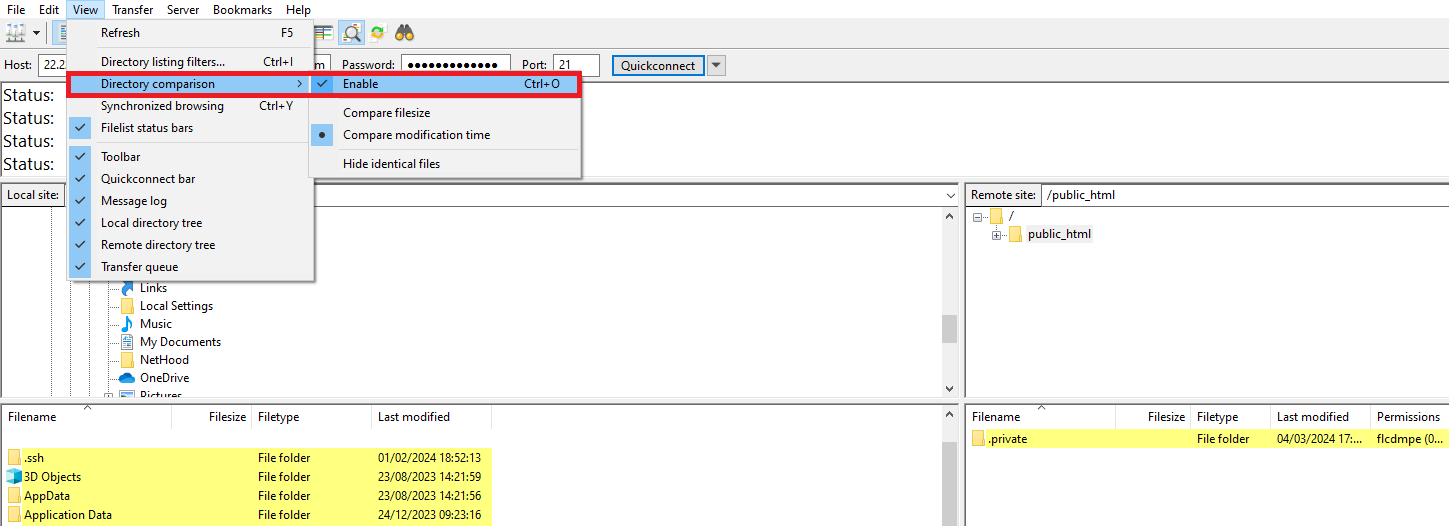
Additionally, FileZilla offers a directory comparison feature that highlights differences between local and remote folders, making it easier to synchronize content. To enable this option, navigate to View → Directory Comparison.
6. Upload Files to the Server
Uploading files to your server using FileZilla is simple. Start by locating the files you wish to upload in the left panel. Navigate through your local directories until you find the desired files.
Once you’ve identified the files, there are two main ways to upload them:
- Drag and drop. Click and hold the files, then drag them from the local panel on the left to the desired location in the remote server directory on the right panel. Release the mouse to start the upload.
- Right-click method. Alternatively, right-click on the selected files and choose Upload. This will transfer the files to the currently open folder in the remote server panel.
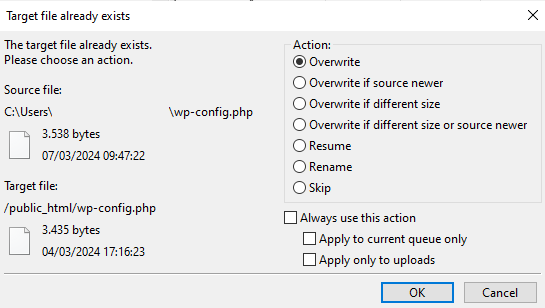
You can monitor the upload progress in FileZilla’s bottom panel. Suppose the same file name exists in the destination directory. In that case, FileZilla will prompt you with options to overwrite, rename, or skip the file, giving you full control over the uploaded files.
For website management, it’s crucial to upload files to the correct directory. For example, website files in HTML or PHP format should be placed in the public_html directory or a specific subdirectory within it.
Suggested Reading
Beyond FileZilla, there are numerous methods for uploading your website files to the server. Check out our article on how to upload website files in various ways.
7. Download Files from the Server
Downloading files from your FTP server to your local computer using FileZilla is as simple as uploading. This is particularly useful for backing up your website files or making local edits to your website content.
To do this, navigate through the directories in the right panel and click on the file you wish to download. To select multiple files, hold down the Ctrl key (Windows) or the command key (macOS) while clicking on each file.
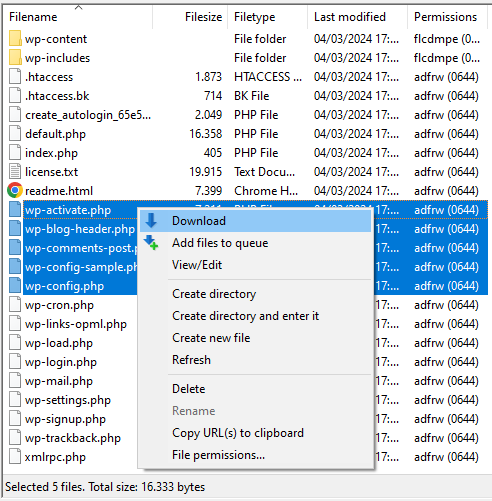
Similar to uploading, you can download your chosen files using either the drag-and-drop or right-click method.
You can monitor the download progress in the same bottom panel. When complete, the downloaded files will appear in the selected folder on your computer.
Tips for Using FileZilla FTP
Now, let’s explore some expert tips for transferring and managing files with FileZilla.
Using the Transfer Queue
The FileZilla transfer queue feature gives you an overview of and control over your ongoing file transfers. Located at the bottom of the FileZilla window, it lists all currently uploaded or downloaded files, along with their status, progress, and any pending transfers.

Here’s how to manage your transfers effectively:
- View transfer status. The queue indicates the transfer status of each file, whether it’s queued, in progress, successfully transferred, or failed.
- Pause or resume transfers. To pause an ongoing transfer, right-click on it in the queue and select Pause. To continue, right-click and choose Resume.
- Prioritize transfers. To prioritize a file’s transfer, right-click on the desired file in the queue and select Move Up or Move to Top for higher priority.
- Successful transfers tab. For an overview of all completed transfers, switch to the Successful Transfers tab. This allows you to verify successful file transfers.
Setting Transfer Limits and Concurrent Transfers
Fine-tuning FileZilla FTP settings for transfer speeds and the number of concurrent transfers can significantly enhance your file transfer performance. Here’s how:
- Navigate to Edit → Settings to access the configuration options.
- Select Transfers from the list on the left side, where you’ll find options to adjust transfer rates and concurrency.
- In the Concurrent transfers section, specify the maximum number of simultaneous file transfers.

- If necessary, activate the Enable speed limits option to prevent FileZilla from using all your bandwidth during file transfers.
- Once you’ve made your adjustments, click OK.
Troubleshooting FileZilla Connection Issues
Here are some best practices for troubleshooting FileZilla errors:
- Check if port 21 is blocked. FTP typically uses port 21. If connectivity issues arise, ensure this port is open on your router and firewall. Some ISPs may block this port for security reasons.
- Resolve the 421 too many connection error. This error message signifies exceeding the server’s maximum allowed connections. To fix this, go to Edit → Settings → Transfers and reduce the simultaneous connections.
- Fix the ECONNREFUSED – connection refused error. This indicates potential issues with login credentials, server downtime, or the server’s configuration not accepting connections on the used port. Confirm your login details, consult your hosting provider regarding server status, or make sure to use the correct port.
Conclusion
In this FileZilla tutorial, you’ve learned how to connect to servers, manage local and remote files, and troubleshoot common issues. You’re now well-prepared to enhance your web management capabilities and streamline your workflow using FileZilla.
If you have any questions or wish to share tips about this FTP client, feel free to contribute in the comments section.
How to Use FileZilla FAQ
This section will answer the most common questions about how to use FileZilla.
What Is FileZilla?
FileZilla is an FTP client that enables secure file transfers between a local computer and a remote server and supports FTP, SFTP, and FTPS protocols. Its user-friendly graphical interface makes it a popular choice for those managing website files.
Can I Adjust the Transfer Speed in FileZilla?
Yes, the FileZilla FTP client enables users to adjust transfer speeds. Navigate to Edit → Settings → Transfers, where you can establish speed limits for both uploads and downloads, ensuring efficient bandwidth management.
Is It Possible to Schedule File Transfers in FileZilla?
No, FileZilla does not natively support scheduling file transfers. Users wishing to automate transfers at specific times might need to use external task schedulers or explore other top FTP clients with built-in scheduling capabilities.
All of the tutorial content on this website is subject to Hostinger's rigorous editorial standards and values.

Ariffud is a Technical Content Writer with an educational background in Informatics. He has extensive expertise in Linux and VPS, authoring over 200 articles on server management and web development. Follow him on LinkedIn.