How to create a Mastodon server
Mar 10, 2026
/
Ariffud M. & Valentinas C.
/
15 min Read
Mastodon has become a popular alternative to traditional social media platforms. As a decentralized, open-source social network, Mastadon empowers users to operate their own servers, giving them complete control to customize their social media experience.
In this article, you’ll learn how to set up a Mastodon server on a virtual private server (VPS), from establishing an SMTP server to downloading the Mastodon installer and inviting users to join your instance.
By the end of this guide, you’ll have your own Mastodon server up and running, ready to connect with your community.
Prerequisites
To host a Mastodon server, you should prepare a couple of key components.
First and foremost, you require a Linux VPS running on Ubuntu 22.04 or Debian 11. While multiple hosting providers are available, choose a reliable one for optimal server performance.
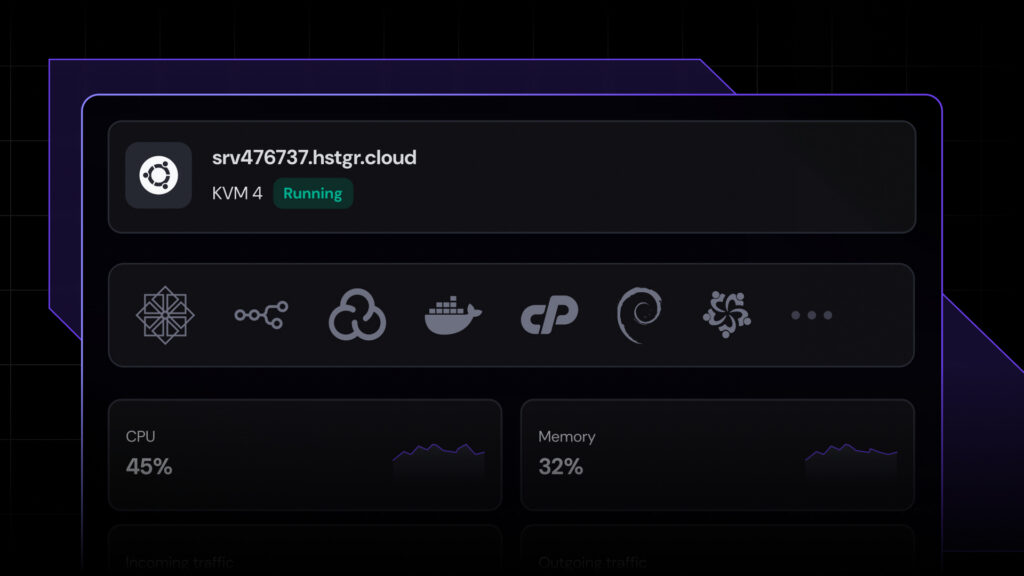
Hostinger’s Mastodon VPS service is an excellent choice for installing a Mastodon server. With up to 8 CPU cores, 32 GB of RAM, and 400 GB of disk space, it provides powerful hardware to handle Mastodon server’s demands.
Additionally, our Mastodon VPS plans grant you root access so you can customize your own server to fit your specific needs. With just a few clicks, you can install various Linux distributions, including different versions of Ubuntu and Debian.
This service implements advanced security measures to protect your server, including a Monarx-powered malware scanner to prevent malicious attacks and firewall and DDoS protection to safeguard your hosted sites against suspicious traffic.
Our Mastodon hosting is also scalable. We suggest getting the KVM 2 plan, which includes a dual-core CPU, 8 GB of RAM, and 100 GB of storage. You can then scale up as your Mastodon server grows and needs more resources.

In addition to a VPS, you’ll need a domain name so people can easily find and join your Mastodon instance. We recommend getting one from the same provider so you can manage your VPS and domain in one place.
If you purchase a domain from Hostinger, follow our tutorial on pointing it to your VPS. After that, ensure the DNS records propagate worldwide, which you can verify using an online tool like DNS Checker.
Domain Name Checker
Instantly check domain name availability.
How to host a Mastodon server
With all prerequisites in place, you can proceed with the Mastodon instance setup. For this tutorial, we’ll use a VPS running Ubuntu 22.04.
1. Set up a relay SMTP server
A relay SMTP server is an essential component for any Mastodon server. It automatically sends emails, such as confirmation links, to your users. We’ll set up an SMTP server using Brevo. It offers a free plan to send up to 300 emails daily.
Here are the steps:
- Access the Brevo homepage and sign up for a new account.
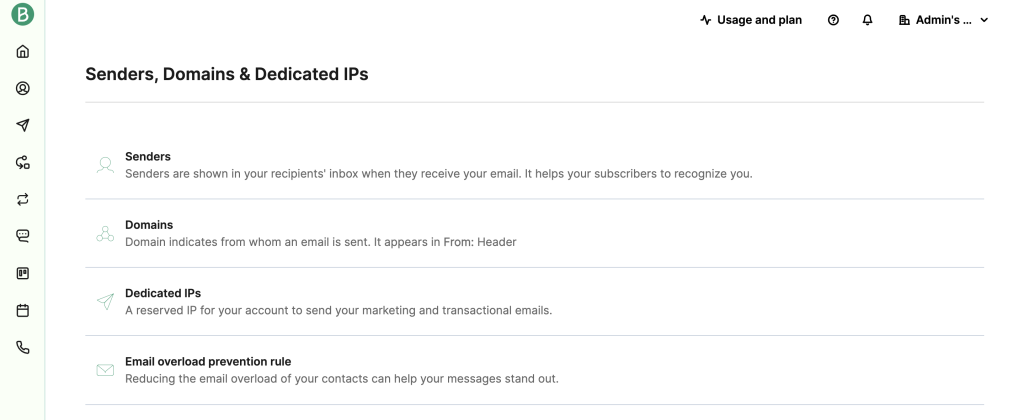
- Once registered, go to your profile in the top right corner and click Senders, Domains & Dedicated IPs.
- Select Senders and follow the on-screen instructions to enter and verify your email address. This email will be used to send emails to your users.
- Similarly, access the Domains menu to authenticate your domain name by completing the provided steps.
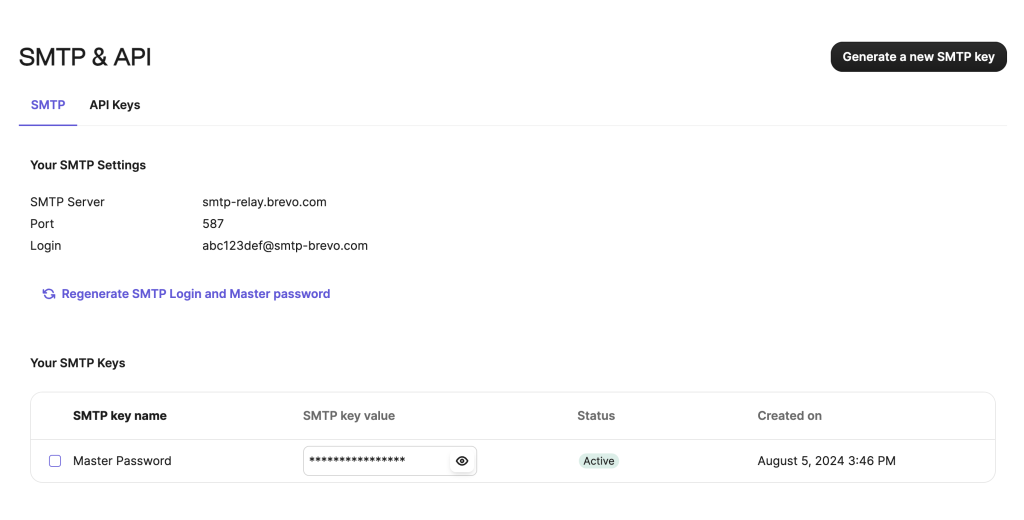
- Go to the SMTP & API menu. Note each SMTP setting, including server, port, login, and password. These are necessary to install the SMTP server on Ubuntu.
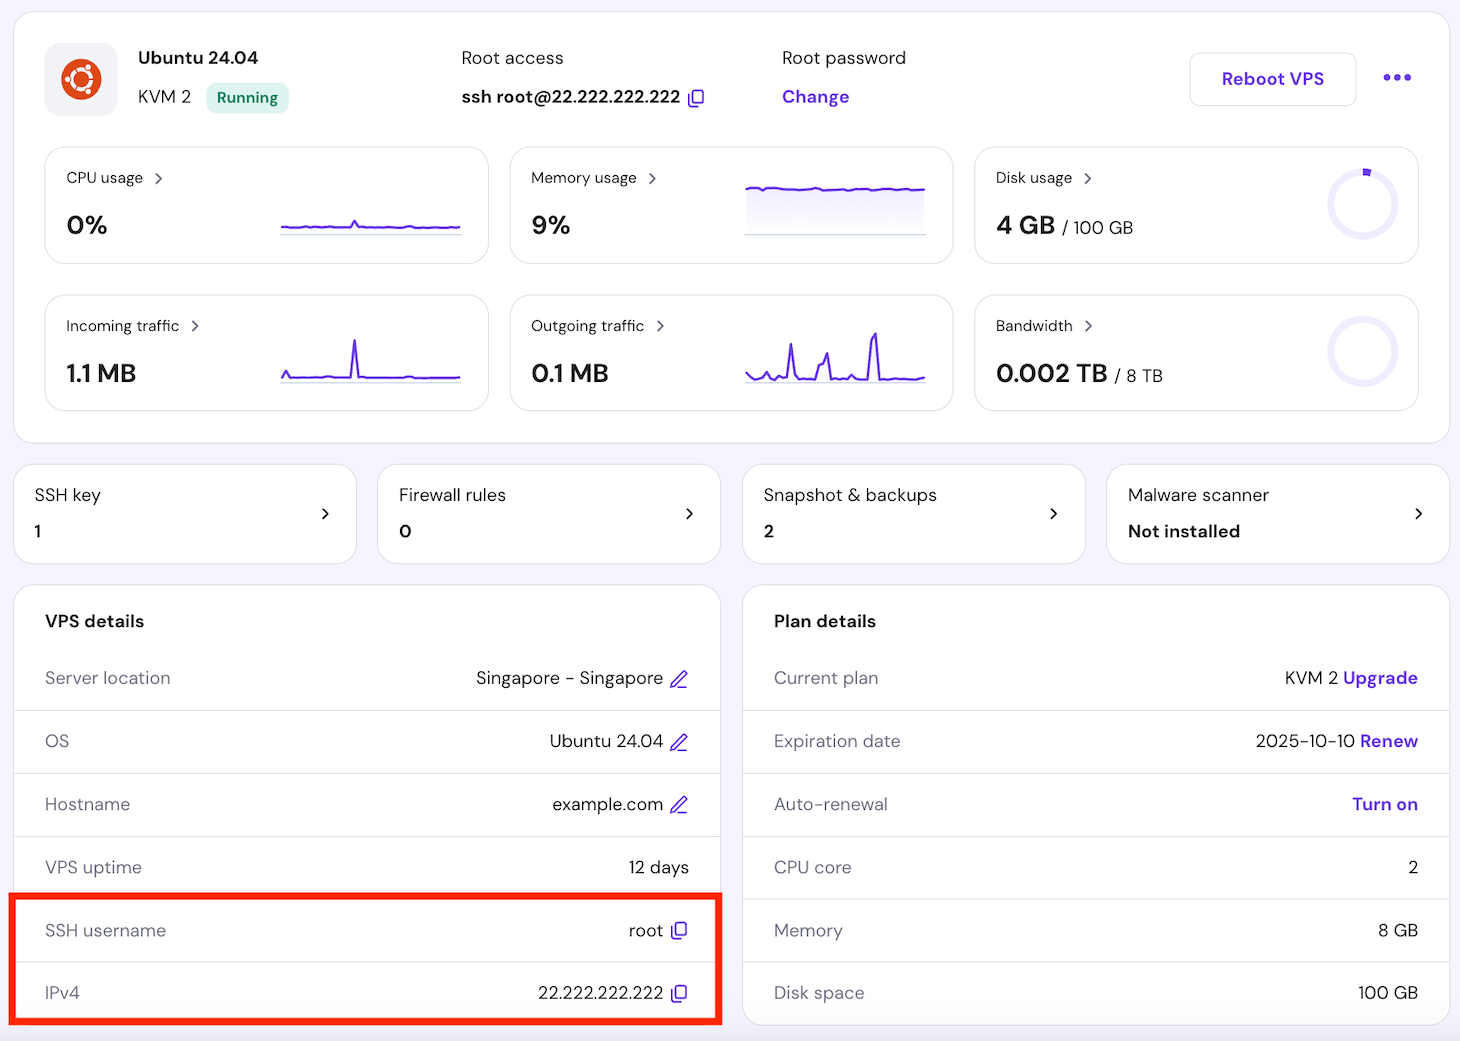
- Open your preferred terminal emulator, SSH client application like PuTTY, or Hostinger’s Browser terminal to access your server. For Hostinger VPS customers, you’ll find your login credentials by going to hPanel → VPS → Manage. Your SSH details are located in the VPS details section at the bottom of the VPS Overview page.
- Install Postfix and SASL modules by running the following command:
apt install postfix libsasl2-modules
- You’ll be prompted to choose the mail configuration. Select Internet Site by navigating with the arrow keys, pressing Space to select it, then using Tab to highlight OK and Enter to confirm.
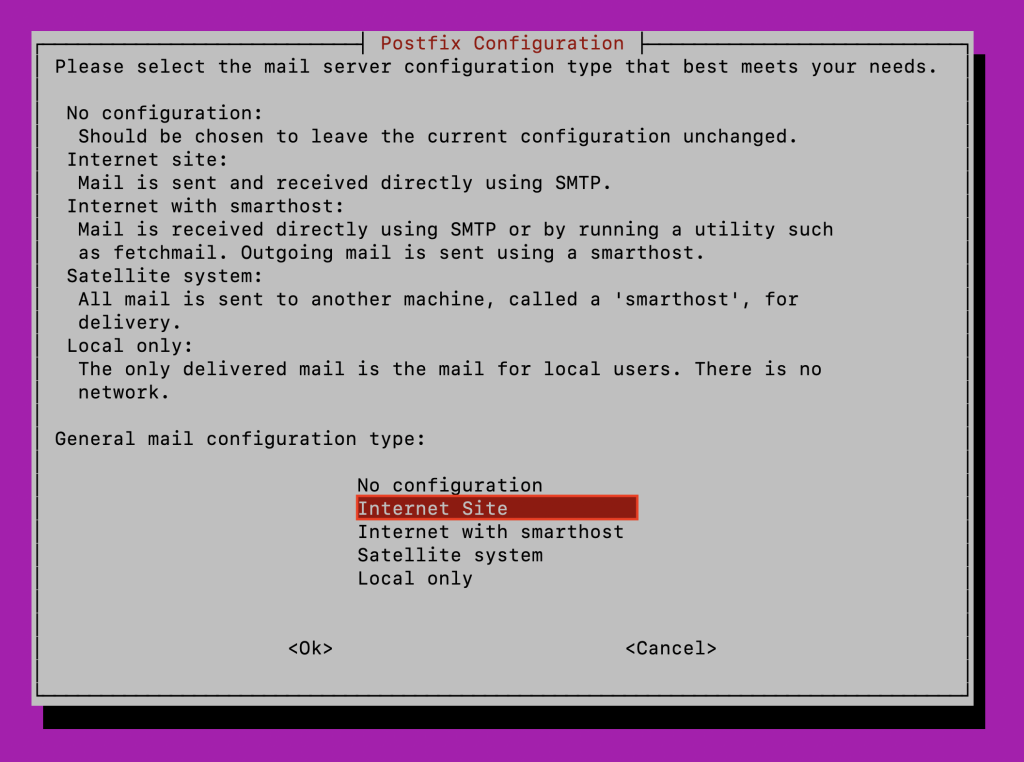
Then, enter your domain name in the dedicated field to set the system mail name.

- Open the Postfix configuration file using the nano text editor:
nano /etc/postfix/main.cf
Find the relayhost = line and replace it with the following:
# outbound relay configurations
smtp_sasl_auth_enable = yes
smtp_sasl_password_maps = hash:/etc/postfix/sasl_passwd
smtp_sasl_security_options = noanonymous
smtp_tls_security_level = may
header_size_limit = 4096000
Save the file and close nano by pressing Ctrl + X → Y → Enter.
- Create a new file named sasl_passwd:
nano /etc/postfix/sasl_passwd
Add the SMTP relay host, username, and password as below. Replace smtp_username and smtp_password with your details:
[smtp-relay.brevo.com]:587 smtp_username:smtp_password
- Once you’ve saved the changes, execute these commands to create the corresponding database file, restart Postfix, and set proper permissions:
postmap /etc/postfix/sasl_passwd
systemctl restart postfix
chmod 0600 /etc/postfix/sasl_passwd /etc/postfix/sasl_passwd.db
- Send a test email using the commands below. Replace from-address with your configured sender email in Brevo and to-address with the recipient’s email address:
apt install bsd-mailx
echo "This is a test email." | mailx -r from-address -s hello to-address
Check your recipient’s inbox to see if the email was indeed sent.
2. Secure the server
You need to set up strong security measures to safeguard your Mastodon server from unauthorized access and maintain its integrity. Here’s how:
- Configure SSH keys instead of using passwords for authentication. SSH keys provide a more secure method of accessing your VPS with a pair of cryptographic keys. Open a new terminal window without connecting to the server and type:
ssh-keygen -t rsa -b 4096
After generating the keys, copy the public key to your server. Replace username and your_server_ip with your credentials:
ssh-copy-id username@your_server_ip
💡 Pro tip
Hostinger VPS customers can use Kodee, our AI-powered assistant, to verify if public keys have been added. Simply ask, "What are my public SSH keys on my VPS?" If Kodee returns keys, you've succeeded. Moreoever, you can also ask it to add or remove SSH keys from your server via chat, all without commands.
- Switch back to the terminal window connected to your server. Update your system package list and upgrade installed packages to patch vulnerabilities and improve stability:
apt update && apt upgrade -y
- Install Fail2ban to protect your server from brute-force attacks. This software monitors log files and bans IP addresses showing malicious behavior.
apt install fail2ban
Configure it by creating a local configuration file:
nano /etc/fail2ban/jail.local
Then, add these lines inside the file:
[DEFAULT]
destemail = your@email.here
sendername = Fail2Ban
[sshd]
enabled = true
port = 22
mode = aggressive
Restart Fail2ban to apply the changes:
systemctl restart fail2ban
- Install iptables to allow only SSH, HTTP, and HTTPS ports:
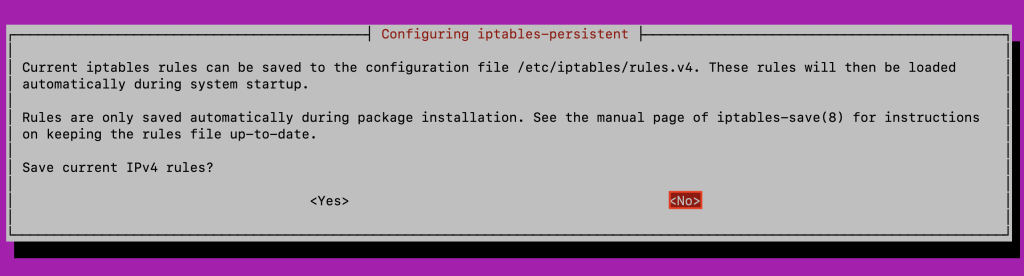
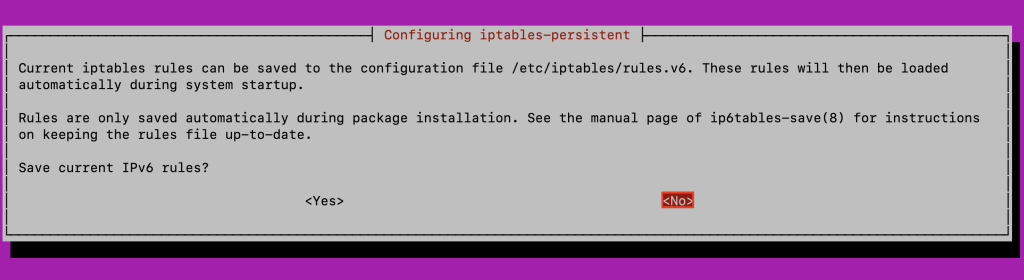
apt install -y iptables-persistent
During the installation, you’ll be asked to save the current IPv4 and IPv6 rules. Select No for both.
- Create a new file to store IPv4 configurations:
nano /etc/iptables/rules.v4
Copy these lines into the file:
*filter
#  Allow all loopback (lo0) traffic and drop all traffic to 127/8 that doesn't use lo0.
-A INPUT -i lo -j ACCEPT
-A INPUT ! -i lo -d 127.0.0.0/8 -j REJECT
#  Accept all established inbound connections.
-A INPUT -m state --state ESTABLISHED,RELATED -j ACCEPT
#  Allow all outbound traffic; you can modify this to only allow certain traffic.
-A OUTPUT -j ACCEPT
#  Allow HTTP and HTTPS connections from anywhere, including standard ports for websites and SSL.
-A INPUT -p tcp --dport 80 -j ACCEPT
-A INPUT -p tcp --dport 443 -j ACCEPT
#  Allow HTTP/3 connections from anywhere (optional).
-A INPUT -p udp --dport 443 -j ACCEPT
#  Allow SSH connections.
#  The -dport number should be the same port number you set in sshd_config.
-A INPUT -p tcp -m state --state NEW --dport 22 -j ACCEPT
#  Allow ping.
-A INPUT -p icmp -m icmp --icmp-type 8 -j ACCEPT
#  Allow destination unreachable messages, especially code 4 (fragmentation required) is required or PMTUD breaks.
-A INPUT -p icmp -m icmp --icmp-type 3 -j ACCEPT
#  Log iptables denied calls.
-A INPUT -m limit --limit 5/min -j LOG --log-prefix "iptables denied: " --log-level 7
#  Reject all other inbound; default deny unless explicitly allowed policy.
-A INPUT -j REJECT
-A FORWARD -j REJECT
COMMIT
- Create a new IPv6 configuration file as well:
nano /etc/iptables/rules.v6
Then, add the following lines:
*filter
#  Allow all loopback (lo0) traffic and drop all traffic to 127/8 that doesn't use lo0.
-A INPUT -i lo -j ACCEPT
-A INPUT ! -i lo -d ::1/128 -j REJECT
#  Accept all established inbound connections.
-A INPUT -m state --state ESTABLISHED,RELATED -j ACCEPT
#  Allow all outbound traffic; you can modify this to only allow certain traffic.
-A OUTPUT -j ACCEPT
#  Allow HTTP and HTTPS connections from anywhere, including the standard ports for websites and SSL.
-A INPUT -p tcp --dport 80 -j ACCEPT
-A INPUT -p tcp --dport 443 -j ACCEPT
#  Allow HTTP/3 connections from anywhere (optional).
-A INPUT -p udp --dport 443 -j ACCEPT
#  Allow SSH connections.
#  The -dport number should be the same port number you set in sshd_config.
-A INPUT -p tcp -m state --state NEW --dport 22 -j ACCEPT
#  Allow ping.
-A INPUT -p icmpv6 -j ACCEPT
#  Log iptables denied calls.
-A INPUT -m limit --limit 5/min -j LOG --log-prefix "iptables denied: " --log-level 7
#  Reject all other inbound; default deny unless explicitly allowed policy.
-A INPUT -j REJECT
-A FORWARD -j REJECT
COMMIT
- Manually load both configuration files during boot time:
iptables-restore < /etc/iptables/rules.v4
ip6tables-restore < /etc/iptables/rules.v6
3. Prepare the system environment
Next, set up the Mastodon server environment. This involves configuring system repositories and packages, creating a dedicated user, and installing necessary software.
Here’s the guide:
- Install essential tools and utilities:
apt install -y curl wget gnupg apt-transport-https lsb-release ca-certificates
- curl – a tool to transfer data from or to a server.
- wget – a command-line utility to download files from the web.
- gnupg – a free implementation of the OpenPGP standard to secure communication and data storage.
- apt-transport-https – allows the package manager to retrieve packages via HTTPS.
- lsb-release – provides Linux Standard Base (LSB) information about the installed distribution.
- ca-certificates – provides a set of trusted CA certificates.
- Add the Node.js repository to your VPS to ensure you have the latest version:
curl -fsSL https://deb.nodesource.com/gpgkey/nodesource-repo.gpg.key | gpg --dearmor -o /etc/apt/keyrings/nodesource.gpg
echo "deb [signed-by=/etc/apt/keyrings/nodesource.gpg] https://deb.nodesource.com/node_20.x nodistro main" | tee /etc/apt/sources.list.d/nodesource.list
- Similarly, add the PostgreSQL repository using the commands below:
wget -O /usr/share/keyrings/postgresql.asc https://www.postgresql.org/media/keys/ACCC4CF8.asc
echo "deb [signed-by=/usr/share/keyrings/postgresql.asc] http://apt.postgresql.org/pub/repos/apt $(lsb_release -cs)-pgdg main"> /etc/apt/sources.list.d/postgresql.list
- Update your package list and install the necessary packages:
apt update
apt install -y
imagemagick ffmpeg libpq-dev libxml2-dev libxslt1-dev file git-core
g++ libprotobuf-dev protobuf-compiler pkg-config gcc autoconf
bison build-essential libssl-dev libyaml-dev libreadline6-dev
zlib1g-dev libncurses5-dev libffi-dev libgdbm-dev
nginx nodejs redis-server redis-tools postgresql postgresql-contrib
certbot python3-certbot-nginx libidn11-dev libicu-dev libjemalloc-dev
- imagemagick – a software suite to create, edit, compose, or convert digital images.
- ffmpeg – a tool to record, convert, and stream audio and video.
- libpq-dev – PostgreSQL C client library and headers.
- nginx – a high-performance HTTP server and reverse proxy.
- nodejs – a JavaScript runtime built on Chrome’s V8 engine.
- redis-server – an in-memory key-value store used as a database, cache, and message broker.
- certbot – a tool to automatically use Let’s Encrypt certificates.
- Enable Corepack and set the Yarn package manager version:
corepack enable
yarn set version classic
- Create a new user named mastodon or a name of your choice to run Mastodon:
adduser --disabled-login mastodon
Switch to the mastodon user:
su - mastodon
- Set up rbenv to manage Ruby versions:
git clone https://github.com/rbenv/rbenv.git ~/.rbenv
echo 'export PATH="$HOME/.rbenv/bin:$PATH"' >> ~/.bashrc
echo 'eval "$(rbenv init -)"' >> ~/.bashrc
exec bash
git clone https://github.com/rbenv/ruby-build.git "$(rbenv root)"/plugins/ruby-build
Once done, install Ruby and set it as the global version:
RUBY_CONFIGURE_OPTS=--with-jemalloc rbenv install 3.2.3
rbenv global 3.2.3
- Install Bundler, a Ruby gem dependency manager:
gem install bundler --no-document
4. Set up the database
A crucial part of hosting a dedicated Mastodon server is creating a PostgreSQL database, which stores your instance’s essential data. Follow the instructions below:
- Return to the root user to configure the database with the necessary privileges:
exit
- Enter the PostgreSQL interactive terminal:
sudo -u postgres -i psql
- Create a database for Mastodon:
CREATE DATABASE mastodon;
- Create a dedicated PostgreSQL user for your Mastodon instance and assign a strong password. Replace your_preferred_password with a unique password of your choice:
CREATE USER mastodon;
ALTER USER mastodon WITH ENCRYPTED PASSWORD 'your_preferred_password';
- Make sure the user has the correct permissions to manage the database:
ALTER USER mastodon createdb;
ALTER DATABASE mastodon OWNER TO mastodon;
- Quit the PostgreSQL terminal by typing:
q
5. Install Mastodon
It’s time to download the installer, set up necessary Mastodon dependencies, and run the setup wizard to configure your instance. Here are the steps to complete the Mastodon installation:
- Switch back to the mastodon user to ensure all Mastodon-related files and processes are isolated from the rest of the system:
su - mastodon
- Use these Git commands to download the Mastodon installer from the official repository:
git clone https://github.com/mastodon/mastodon.git live && cd live
git checkout $(git tag -l | grep '^v[0-9.]*$' | sort -V | tail -n 1)
- Install additional Ruby and JavaScript dependencies:
bundle config deployment 'true'
bundle config without 'development test'
bundle install -j$(getconf _NPROCESSORS_ONLN)
yarn install --pure-lockfile
- Run the Mastodon setup wizard:
RAILS_ENV=production bundle exec rake mastodon:setup
The wizard will ask you a series of questions:
- Domain name – enter the domain name that is connected to your VPS.
- Do you want to enable single-user mode? – answer n to let users register on your server.
- Are you using Docker to run Mastodon? – answer n.
- PostgreSQL host – enter 127.0.0.1.
- PostgreSQL port – enter 5432.
- Name of PostgreSQL database – enter mastodon.
- Name of PostgreSQL user – enter mastodon.
- Password of PostgreSQL user – enter the database password you configured earlier.
- Do you want to store uploaded files on the cloud? – answer n to store files locally on the server.
- Do you want to send emails from localhost? – answer y since you’ve created an SMTP server before.
- E-mail address to send e-mails “from” – enter the email address you set up earlier as the sender.
- Send a test e-mail with this configuration right now? – answer y.
- Send test e-mail to – enter the recipient email address.
- Save configuration? – answer y.
- Prepare the database now? – answer y.
- Compile the assets now? – answer y.
- Would you like to create an admin user right now? – answer y.
- Username – enter the desired username for your admin account.
- E-mail – enter the email address for this admin account.
Once done, you’ll be given a generated admin password. Store this password securely to log in as the server owner later.
6. Configure the web server
After installing Mastodon on your VPS, you need to configure the NGINX web server, issue an SSL certificate for secure connections, and set up systemd services to manage the Mastodon processes. Here are the steps:
- Switch to the root user once again:
exit
- Get a free SSL certificate using Certbot, replacing example.com with your own domain name:
certbot certonly --nginx -d example.com
Follow the on-screen instructions to configure SSL automatically.
- Copy the configuration template for NGINX from the Mastodon directory:
cp /home/mastodon/live/dist/nginx.conf /etc/nginx/sites-available/mastodon
ln -s /etc/nginx/sites-available/mastodon /etc/nginx/sites-enabled/mastodon
rm /etc/nginx/sites-enabled/default
- Edit the NGINX configuration file:
nano /etc/nginx/sites-available/mastodon
Uncomment the ssl_certificate and ssl_certificate_key lines. Then, find every instance of example.com with Ctrl + W and replace them with your domain name.
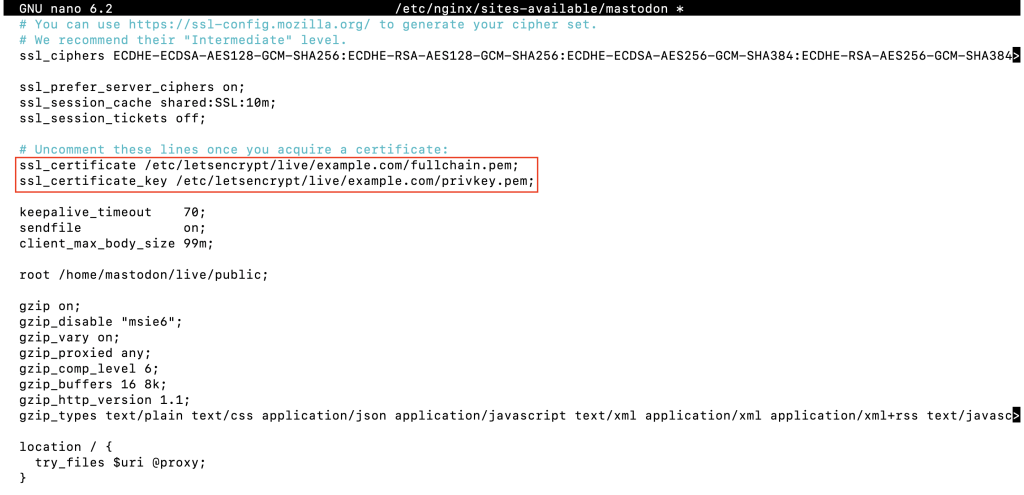
Once done, save the file and exit the text editor.
- Reload NGINX to apply the changes:
systemctl reload nginx
- Copy the systemd service files for Mastodon:
cp /home/mastodon/live/dist/mastodon-*.service /etc/systemd/system/
- Reload the systemd daemon and enable the Mastodon services:
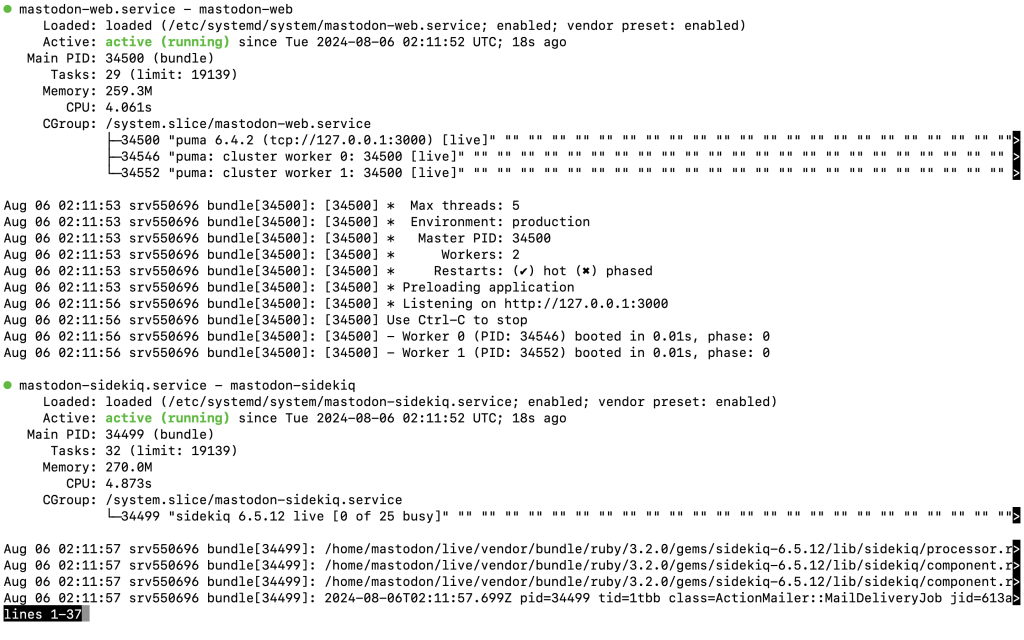
systemctl daemon-reload
systemctl enable --now mastodon-web mastodon-sidekiq mastodon-streaming
Check their statuses:
systemctl status --now mastodon-web mastodon-sidekiq mastodon-streaming
You should see an output indicating that all services are active and running without issues:
- Allow access to the core files so the CSS and JS files can load correctly:
chown mastodon:www-data /home/mastodon/
chmod 0710 -v /home/mastodon/
7. Run and customize the server
You can now open your new Mastodon server and customize it to your needs, ensuring your instance can host users and manage content. Here are the instructions:
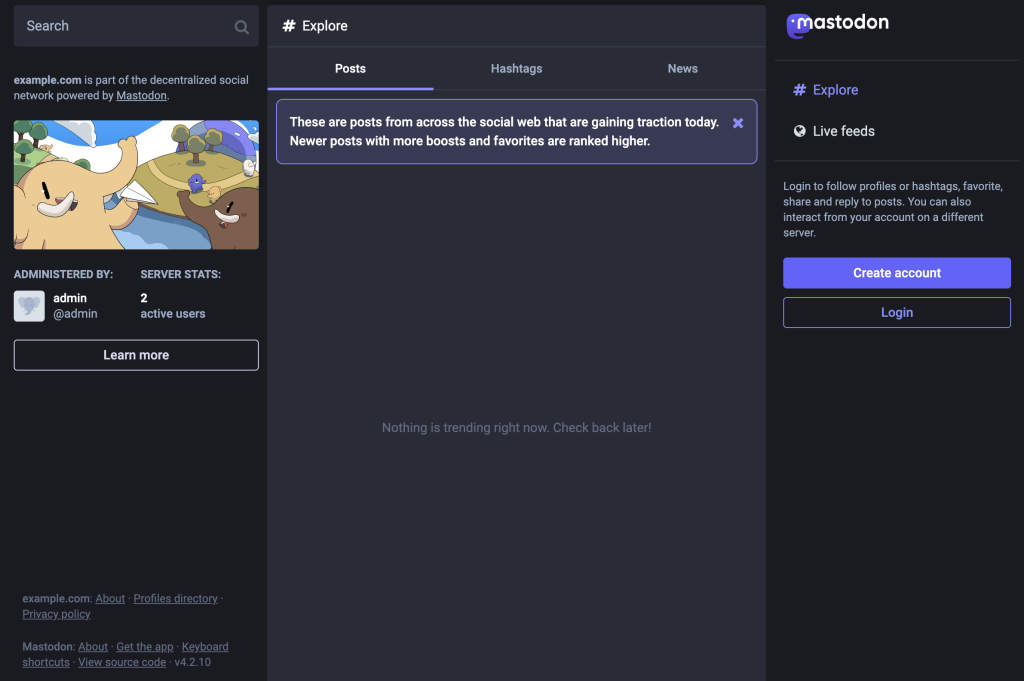
- Open your web browser and access the server via your domain. Log in using the admin account credentials you set up during the Mastodon server configuration.
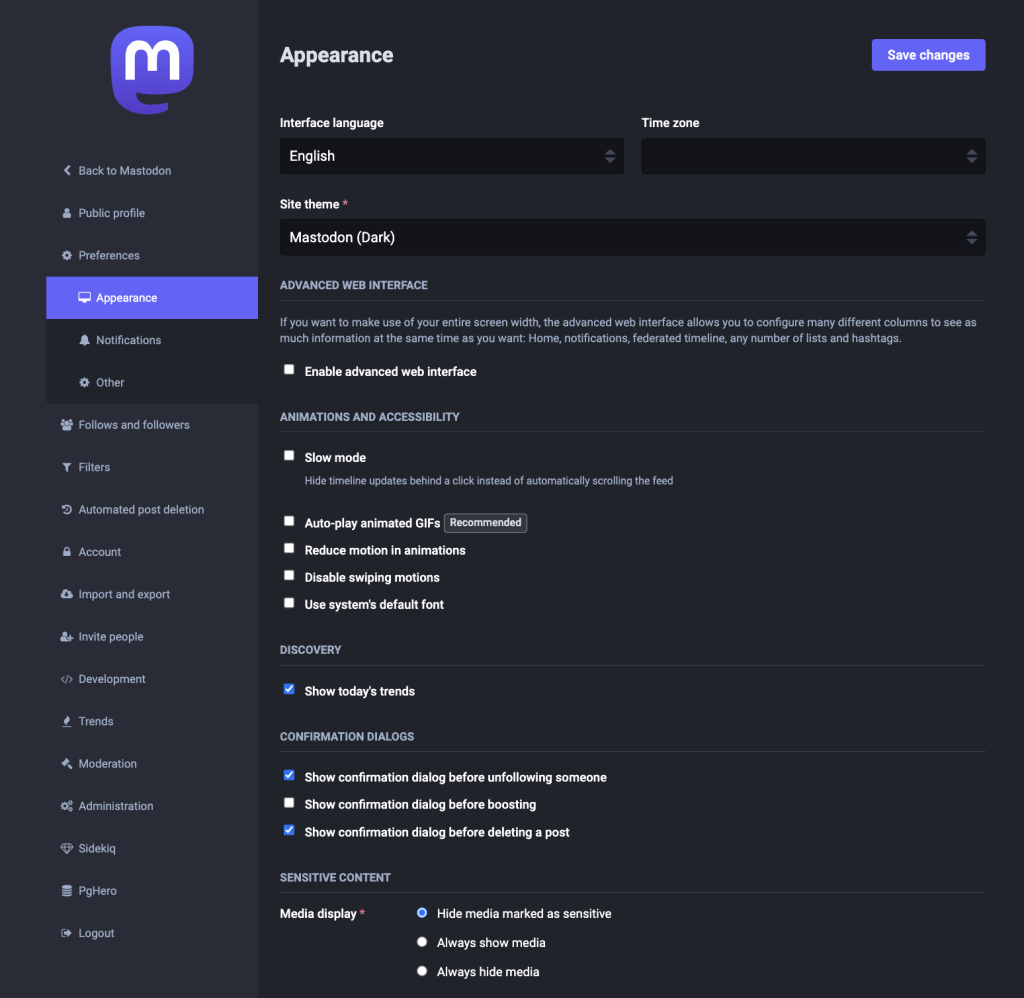
- Click Preferences to explore the admin dashboard. Here, you can manage server settings, user accounts, content moderation, configure instance-wide policies, and customize user interface options.
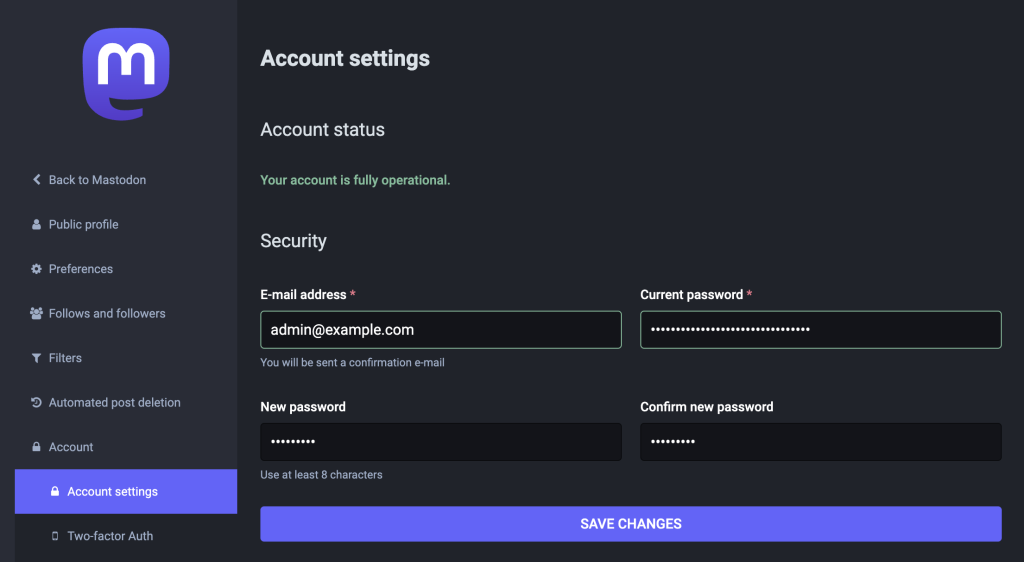
- Change the admin password periodically to ensure your account remains secure. Select Account → Account settings and fill in the current and new passwords. Then, click SAVE CHANGES.
- Optionally, administrator and moderator accounts can be created to help manage the server. Multiple administrators and moderators let you distribute responsibilities, ensure a healthy community, and foster a diverse and balanced management team.
To create these accounts, go back to your terminal and access the Mastodon root directory:
su - mastodon
cd /home/mastodon/live
Then, run the following commands to create a new Mastodon account:
RAILS_ENV=production bin/tootctl accounts create
alice
--email alice@example.com
--confirmed
--role Owner
Replace alice, alice@example.com, and Owner with the new account’s desired username, email, and role. Here are brief explanations of each role:
- Owner – has full access to all administrative functions and settings.
- Admin – can manage server settings and user accounts but can’t access certain functions reserved for the owner.
- Moderator – Responsible for content moderation and managing user interactions but can’t access functions belonging to admins and owners.
8. Invite and manage users
Once your Mastodon server is set up and running, you can invite users to join your instance. This process involves generating invite links, allowing users to sign up via said links, and moderating user activities.
Generate invite links
You can quickly generate invite links via the Mastodon admin dashboard by following these steps:
- Go to Preferences → Invite people.
- Limit the link’s number of uses or expiration time. Once done, click GENERATE INVITE LINKS.
- Copy the generated link and share it with the users you invite. You can monitor how often the link is used and deactivate it if necessary.

Register a user account
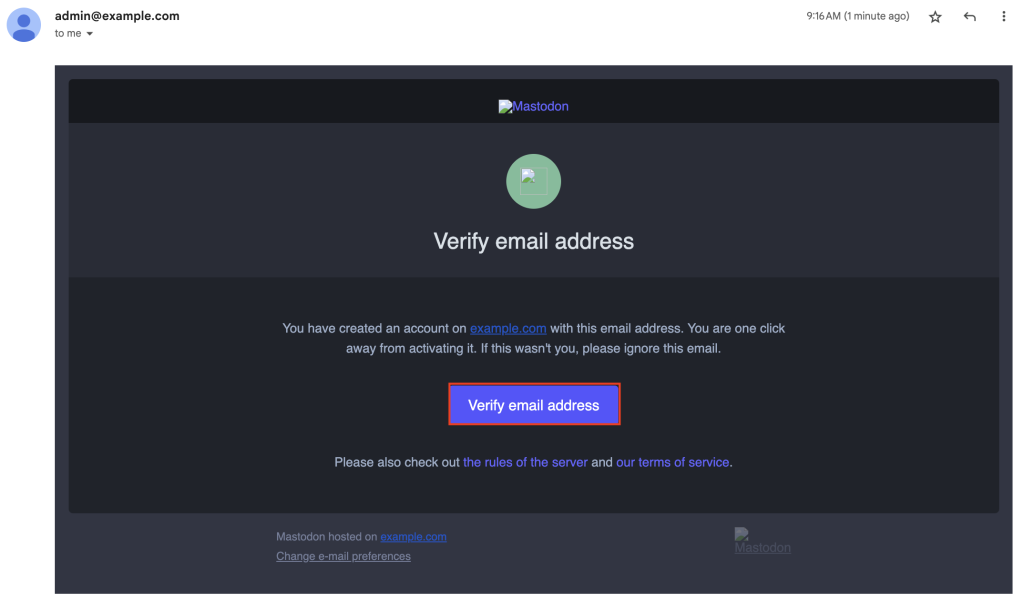
Users will be directed to the signup page when they click the invite link. After entering a username, password, and email address, your server will automatically send a verification email so users can complete their registration.
Moderate user accounts
Mastodon provides tools to manage user interactions, address inappropriate behavior, and enforce community guidelines. Here are some tips to effectively moderate your community:
- In the admin dashboard, navigate to Moderation → Reports to review any reports of inappropriate behavior.
- Use the Accounts section to view all registered users. You can suspend or silence any accounts that violate community rules.
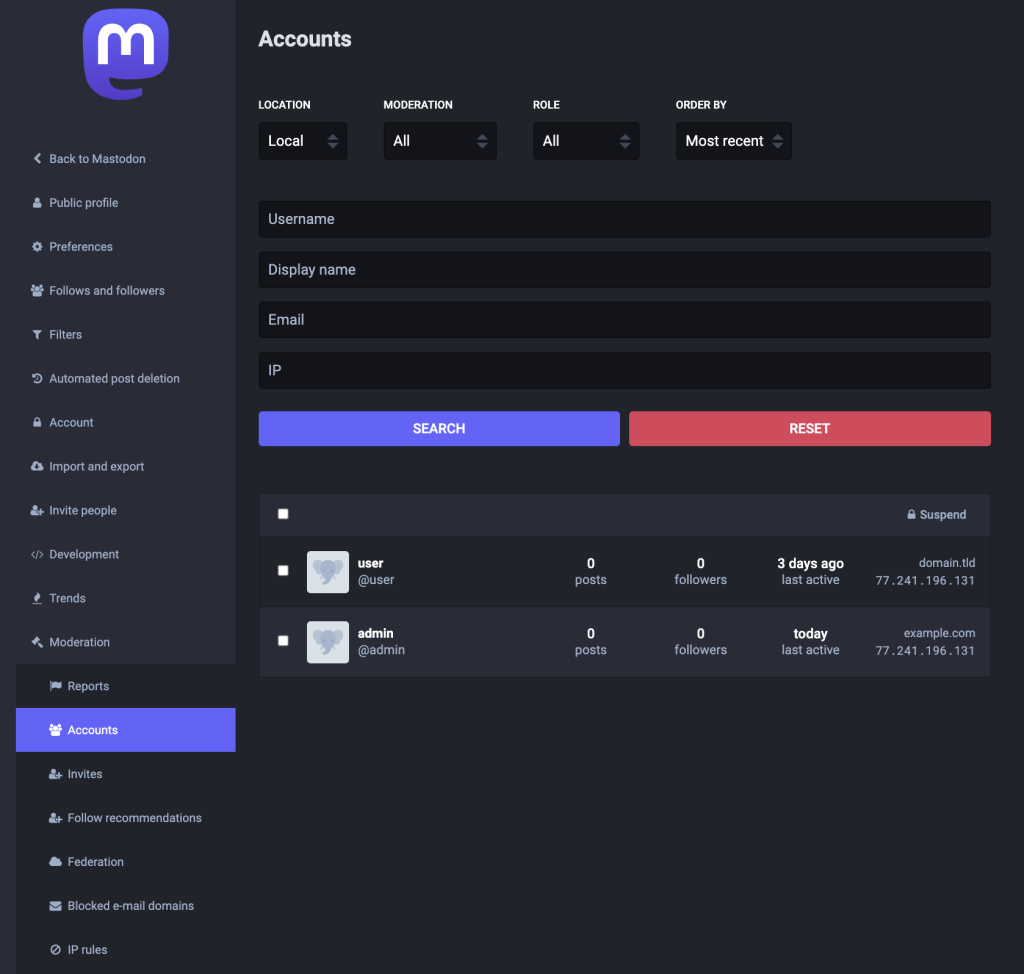
- Use other sections like Federation, Blocked e-mail domains, and IP rules to control external interactions and enhance your instance’s security.
9. Install additional features
Installing additional features like Elasticsearch and hCaptcha on your Mastodon instance can significantly improve user experience and security. Here’s how to configure these features.
Install Elasticsearch
Mastodon supports full-text search with Elasticsearch so that users can find public statuses, their posts, mentions, favorites, bookmarks, and account details.
- Elasticsearch requires a Java runtime. Install it if you haven’t done so:
apt install openjdk-17-jre-headless
- Add the Elasticsearch official repository:
wget -O /usr/share/keyrings/elasticsearch.asc https://artifacts.elastic.co/GPG-KEY-elasticsearch
echo "deb [signed-by=/usr/share/keyrings/elasticsearch.asc] https://artifacts.elastic.co/packages/7.x/apt stable main" > /etc/apt/sources.list.d/elastic-7.x.list
- Install Elasticsearch by running these commands:
apt update
apt install elasticsearch
- Start Elasticsearch with:
systemctl daemon-reload
systemctl enable --now elasticsearch
- Edit the .env.production file in the Mastodon directory:
nano /home/mastodon/live/.env.production
Include the following variables:
ES_ENABLED=true
ES_HOST=localhost
ES_PORT=9200
ES_PRESET=single_node_cluster  # Use the appropriate preset for your setup: single_node_cluster, small_cluster, or large_cluster
# ES_USER=
# ES_PASS=
- Save your edits and restart the Mastodon services:
systemctl restart mastodon-sidekiq
systemctl reload mastodon-web
- Index the search data:
su - mastodon
cd live
RAILS_ENV=production bin/tootctl search deploy
Set up hCaptcha
Mastodon can use CAPTCHA technology to help mitigate bot signups. Currently, this decentralized social media platform supports only hCaptcha.
- Sign up for a free hCaptcha account. Once registered, go to the dashboard to add a new site with your Mastodon server domain.
- Under the Account Settings, obtain your site and secret keys.
- Go back to your terminal and edit the .env.production file:
nano /home/mastodon/live/.env.production
Add the following values, replacing your_site_key and your_secret_key with your hCaptcha keys:
HCAPTCHA_SITE_KEY=your_site_key
HCAPTCHA_SECRET_KEY=your_secret_key
- After that, restart the Mastodon services:
systemctl restart mastodon-sidekiq
systemctl reload mastodon-web
- Open your Mastodon admin dashboard and go to Administration → Server settings → Registrations. Then, check the Require new users to solve a CAPTCHA to confirm their account option and save your changes.

Best practices for optimal Mastodon server performance
After finishing the Mastodon server tutorial, we suggest implementing these best practices to ensure optimal instance performance over time.
Use the Mastodon admin CLI
As the name suggests, the Mastodon admin CLI lets you manage your instance via the command line. Before you start using it, make sure to switch to the mastodon user and navigate to the correct directory:
su - mastodon
cd live
Base CLI commands
The base CLI provides general commands to interact with your Mastodon instance:
- tootctl self-destruct – permanently shuts down your Mastodon instance and deletes all associated data. Use this command with caution, as it is irreversible.
- tootctl –version – displays your Mastodon software’s installed version.
Accounts CLI commands
The following commands let you manage user accounts and their roles:
- tootctl accounts create username –email user@example.com – creates a new user account with the specified username and email address.
- tootctl accounts modify username –role Admin – changes a user’s role to Admin, Moderator, or User.
- tootctl accounts modify username –reset-password – resets a specific user account password.
- tootctl accounts delete username – permanently deletes a user account by username.
Cache CLI commands
Use the cache CLI to manage and clear various caches on your Mastodon server:
- tootctl cache clear – clears all cached data from your instance, including timelines and media files.
- tootctl cache recount – recounts the cached item numbers and updates the cache status.
Settings CLI commands
The settings CLI allows you to configure server-wide settings and preferences:
- tootctl settings registrations open – opens user registrations, allowing new users to sign up.
- tootctl settings registrations close – closes user registrations, preventing new signups.
- tootctl settings registrations approved – approves user registrations that are pending.
You can find complete commands and their explanations in the Mastodon admin CLI documentation.
Clean up and back up the server
Maintaining your Mastodon server involves regularly running cleanup tasks to free up space and resources and backing up data to protect them from accidental loss or corruption.
Run periodic cleanup tasks
Mastodon generates temporary files, such as remote media and preview cards, that can accumulate over time. Cleaning these up periodically via a cron job will help improve server performance.
- Switch to the Mastodon user:
su - mastodon
- Use the crontab -e command to edit the cron file for this user:
crontab -e
If this is your first time doing so, you’ll be prompted to select an editor. Choose your preferred one.
At the bottom of the file, add the following lines to schedule the cleanup tasks:
@weekly RAILS_ENV=production /home/mastodon/live/bin/tootctl media remove
@weekly RAILS_ENV=production /home/mastodon/live/bin/tootctl preview_cards remove
- Save the file, then verify the cron job is correctly set by listing the crontab entries:
crontab -l
This will display all scheduled tasks for the Mastodon user.
Automatically back up Mastodon data on Hostinger
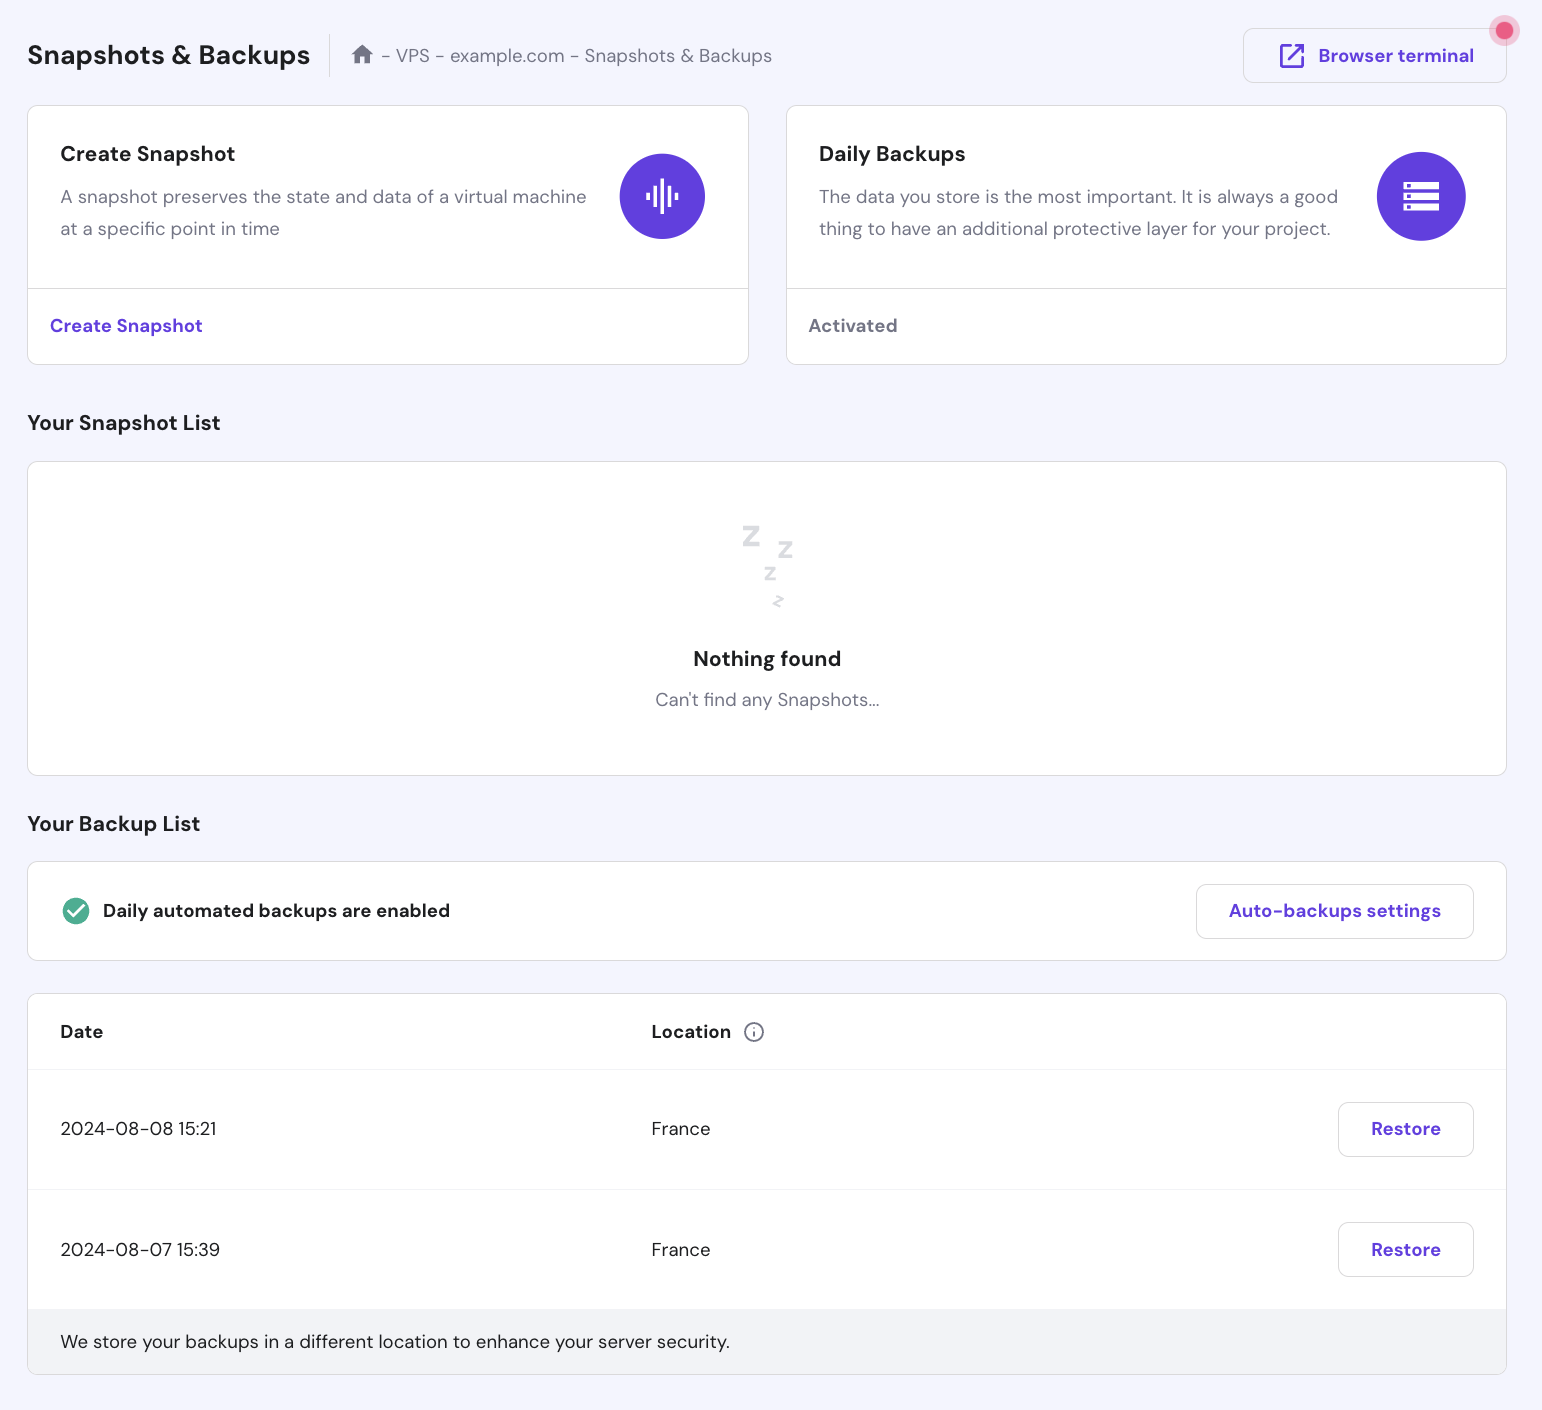
Hosting Mastodon on Hostinger’s VPS allows you to easily create backups using our built-in features.
- Log in to your Hostinger account and go to VPS → Manage.
- In the VPS dashboard’s left sidebar, select Settings → Backup & Monitoring → Snapshots & Backups.
- Click Create Snapshot to capture your VPS’s current state and data.
To set up automatic backups, activate the Daily Backups option first, and then configure your preferred backup frequency under Auto-backups settings.
Manually back up Mastodon data
Alternatively, you can manually back up important data, such as application secrets, databases, user-uploaded files, and Redis dumps.
- Store the .env.production file somewhere safe, as it contains secret configuration details:
cp /home/mastodon/live/.env.production /path/to/backup/directory
- Use pg_dump to create a backup of your PostgreSQL database. Replace the second mastodon variable with your database name:
pg_dump -U mastodon mastodon > /path/to/backup/directory/mastodon_backup.sql
- If you use local file storage, back up the public/system directory, where uploaded files are stored by default:
cp -r /home/mastodon/live/public/system /path/to/backup/directory
- Copy the Redis dump file located at /var/lib/redis/dump.rdb:
cp /var/lib/redis/dump.rdb /path/to/backup/directory
Upgrade the server version
Upgrading your Mastodon server to the latest version enables you to benefit from new features, performance enhancements, and security updates.
To view the latest version available, visit the Mastodon GitHub releases page. Review the changelog and specific upgrade instructions for the release you plan to install.
After that, check the currently installed version with these commands:
su - mastodon
cd /home/mastodon/live
git describe --tags
You should see your current Mastodon installation’s version tag:
v4.2.9
Now, you can start upgrading your server version with these steps:
- Fetch the latest tags:
git fetch --tags
- Search for Mastodon’s latest edition. Replace v4.2.10 with the actual newest release version number:
git checkout v4.2.10
Follow the specific instructions provided in the release notes when upgrading your instance.
- Return to the root user:
exit
- Restart all three Mastodon services:
systemctl restart mastodon-sidekiq
systemctl reload mastodon-web
systemctl restart mastodon-streaming
Conclusion
In this article, you’ve learned how to make a Mastodon server, from preparing the environment to installing the server and additional features. You’ve also explored several tips to optimize your instance’s performance, such as cleaning up junk files and backing up necessary data.
Establishing a dedicated server for Mastodon provides an enjoyable social media experience with complete control over your instance. Be sure to update your server whenever new versions are released to maintain a reliable and engaging platform for your community.
How to create a Mastodon server FAQ
Why should you run your own Mastodon server?
Running your own Mastodon server allows you to control content and moderation, ensure privacy, and create a customizable social media experience for your community without the limitations of centralized platforms.
How much does it cost to run a Mastodon server?
The cost to host a Mastodon server varies. For example, a VPS can cost $5 to $20/month, while a domain name can range from $1 to $10/year. There may be additional expenses for using third-party services to enhance functionalities.
What are the system requirements for setting up a Mastodon server?
A Mastodon server requires a Linux VPS or dedicated server with at least 2 CPU cores, 3 GB RAM, and 25 GB of disk storage. The server should use Ubuntu 22.04 or Debian 11 and have software like PostgreSQL, Redis, Ruby, and NGINX installed.
Can I make money by running a Mastodon server?
You can generate income from a Mastodon server through membership fees, donations, or sponsorships. Carefully plan and engage with the community to ensure sustainability without compromising user experience.

Ariffud is a Technical Content Writer with an educational background in Informatics. He has extensive expertise in Linux and VPS, authoring over 200 articles on server management and web development. Follow him on LinkedIn.

Valentinas Čirba, Hostinger's Head of VPS, is a seasoned product leader specializing in VPS products with over ten years of experience. He's an expert at setting product strategy, leading cross-functional teams, and making smart decisions to deliver innovative solutions. Valentinas is committed to creating products that not only meet business objectives but also truly serve the customer. Follow him on LinkedIn.