How to configure Fail2Ban to secure your Linux server
May 22, 2026
/
Ariffud M.
/
7 min Read
Fail2Ban is an open-source intrusion prevention tool that scans server log files and bans IP addresses after repeated failed login attempts.
It’s commonly used to protect SSH access, but it can monitor any service that writes authentication failures to a log.
Configuring Fail2Ban protects your Linux server by monitoring log files and automatically banning IP addresses after repeated failed authentication attempts.
There are six main steps to set up Fail2Ban safely:
- Install Fail2Ban on your Linux distribution using its default package manager.
- Create a local override file, such as jail.local, to store custom settings without risking overwrites during package updates.
- Configure default ban settings, including ignoreip, bantime, findtime, and maxretry, in the [DEFAULT] section.
- Enable the SSH jail to protect SSH login attempts from brute-force attacks.
- Restart and verify Fail2Ban using sudo systemctl restart fail2ban and sudo fail2ban-client status.
- Manage banned IP addresses by unbanning trusted IPs with sudo fail2ban-client set sshd unbanip your-ip-address or manually banning suspicious ones.
The safest Fail2Ban configuration approach avoids editing stock files like jail.conf or fail2ban.conf directly. Use /etc/fail2ban/jail.local for global settings and /etc/fail2ban/jail.d/custom.local for service-specific jails instead.
After applying changes, verify active jails with sudo fail2ban-client status and check SSH jail details with sudo fail2ban-client status sshd.
If Fail2Ban bans a trusted IP by mistake, remove it immediately with sudo fail2ban-client set sshd unbanip your-ip-address.
Prerequisites for configuring Fail2Ban
Before starting, make sure you have:
- A Linux server, such as Ubuntu, Debian, CentOS, AlmaLinux, Rocky Linux, or Fedora, with root or sudo access.
- SSH access to the server through a terminal client.
- An active firewall backend. Fail2Ban supports iptables, nftables, UFW, and firewalld.
- Your trusted public IP address ready for allowlisting.
- A backup access method, such as a VPS console or recovery console, in case SSH access gets blocked.
Warning! Add your own IP address to the ignoreip setting before enabling SSH bans. Skipping this step can lock you out of your server. Keep at least one active SSH session open until you confirm Fail2Ban is working correctly.
How to install Fail2Ban
Fail2Ban is available in the default repositories of most major Linux distributions. The installation commands differ slightly by distro, but the post-installation steps are the same.
Ubuntu and Debian
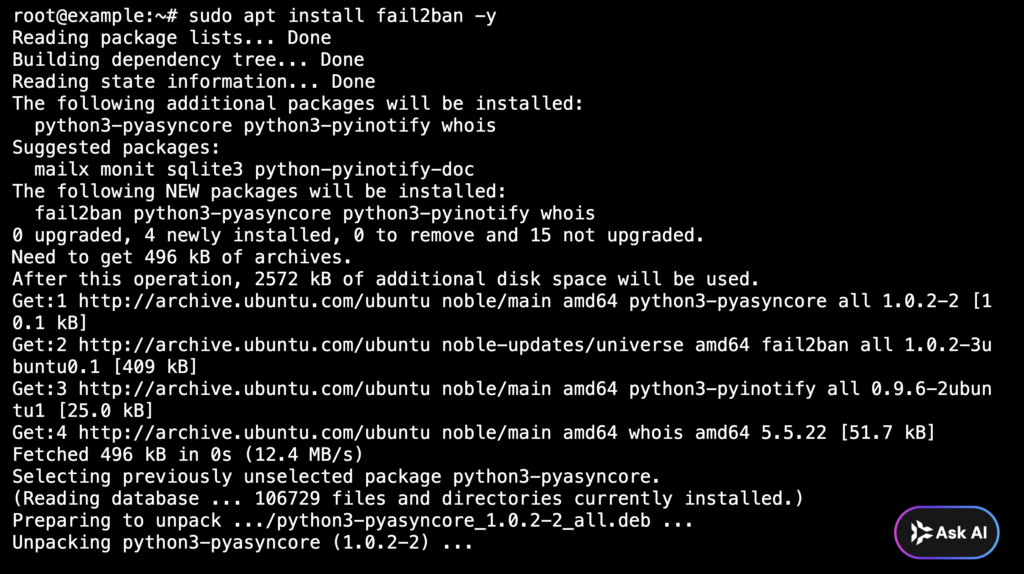
Update the package index and install Fail2Ban:
sudo apt update
sudo apt install fail2ban -y
CentOS, RHEL, AlmaLinux, and Rocky Linux
On RHEL-based systems, Fail2Ban requires the Extra Packages for Enterprise Linux (EPEL) repository. Install EPEL first, then Fail2Ban:
sudo dnf install epel-release -y
sudo dnf install fail2ban -y
Fedora
Fedora includes Fail2Ban in its default repositories:
sudo dnf install fail2ban -y
Post-installation steps (all distributions)
After installing Fail2Ban, enable the service to start automatically at boot and start it right away:
sudo systemctl enable fail2ban
sudo systemctl start fail2ban
Verify that Fail2Ban is running:
sudo systemctl status fail2ban
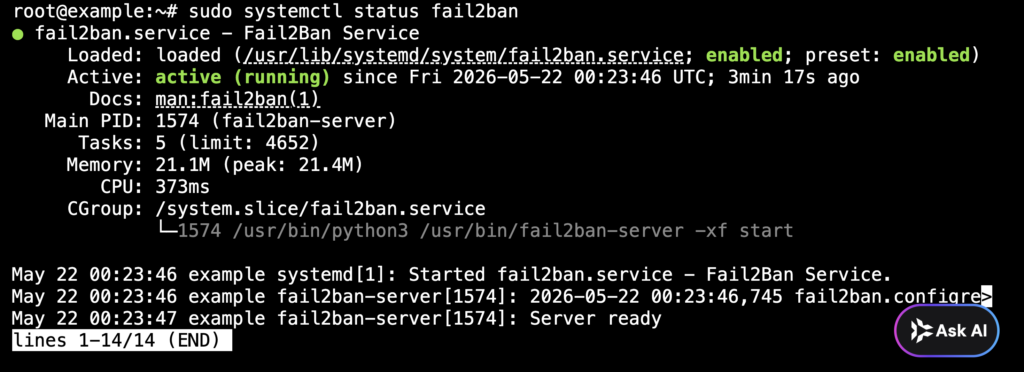
The output should show active (running). Press Ctrl + C to exit the view. If the service fails to start, check the logs with sudo journalctl -u fail2ban –no-pager for error details.
How to configure Fail2Ban safely
The Fail2Ban configuration hierarchy follows a specific order:
- /etc/fail2ban/fail2ban.conf and /etc/fail2ban/fail2ban.local control global daemon settings, such as log level, socket, and PID file.
- /etc/fail2ban/jail.conf and /etc/fail2ban/jail.local handle jail definitions and default ban behavior.
- /etc/fail2ban/jail.d/*.local holds service-specific jail overrides.
Fail2Ban reads .conf files first, then applies .local files on top. Any setting you define in a .local file overrides its .conf counterpart, and anything you don’t redefine stays at its .conf default.
Why should you use .local files instead of editing .conf files?
The package manager maintains default .conf files and may replace them during version upgrades. Settings in .local files stay untouched after updates because the package manager doesn’t overwrite them.
Use jail.local for global jail settings like bantime and maxretry, and use jail.d/sshd.local for SSH-specific overrides. This separation keeps your configuration organized and safe during upgrades.
How to create a jail.local file
Copy the default jail configuration to create your local override file:
sudo cp /etc/fail2ban/jail.conf /etc/fail2ban/jail.local
sudo nano /etc/fail2ban/jail.local
The file contains hundreds of lines, and most of them are commented out with # at the start. Commented lines are inactive and have no effect on Fail2Ban. Scroll to the [DEFAULT] section near the top to start configuring.
For a cleaner SSH-specific setup, create a dedicated file in the jail.d/ directory instead:
sudo nano /etc/fail2ban/jail.d/sshd.local
The jail.local approach is simpler when you’re just getting started because all settings live in one file. The jail.d/*.local approach works better when you’re managing multiple services, as each service gets its own configuration file.
How to configure global Fail2Ban settings
Open jail.local and add or modify the [DEFAULT] section. Some settings like bantime and maxretry may already exist as commented lines. Remove the # at the start of a line to activate it, or add new lines below the section header.
[DEFAULT]
ignoreip = 127.0.0.1/8 ::1 your-ip-address
bantime = 3600
findtime = 600
maxretry = 5
backend = auto
![The [DEFAULT] section in jail.local with ignoreip and ban settings configured](https://www.hostinger.com/tutorials/wp-content/uploads/sites/2/2022/05/nano-jail-local-default-section-ban-settings-highlighted-1024x579.png)
Each setting controls a specific part of Fail2Ban’s ban behavior:
- ignoreip lists trusted IP addresses that Fail2Ban should never ban. Replace your-ip-address with your actual public IP address, and add any management network ranges separated by spaces.
- bantime sets how long a banned IP stays blocked, in seconds. A value of 3600 equals one hour, and the IP gets a fresh set of retries after the ban expires.
- findtime sets the window for counting failed attempts. A value of 600 means Fail2Ban counts failures within a 10-minute window.
- maxretry sets how many failed attempts within the findtime window trigger a ban. With a value of 5, the sixth failure results in a ban.
- backend controls how Fail2Ban reads log files. The auto value selects the best available method for your system, typically systemd on modern distributions.
Fail2Ban versions 0.10 and later also support time-based shorthand values like bantime = 1h, findtime = 10m, or bantime = 1d instead of raw seconds.
To make repeat offenders face progressively longer bans, add bantime.increment = true to the [DEFAULT] section. Each new ban for the same IP address then doubles in duration, which is more effective against persistent attackers than a fixed ban time.
How to configure the SSH jail
Add or modify the [sshd] section in jail.local, or create a dedicated jail.d/sshd.local file:
[sshd]
enabled = true
port = ssh
logpath = %(sshd_log)s
backend = %(sshd_backend)s
![The [sshd] jail section in jail.local with enabled set to true](https://www.hostinger.com/tutorials/wp-content/uploads/sites/2/2022/05/nano-jail-local-sshd-section-enabled-1024x272.png)
The enabled = true line activates the SSH jail, which monitors SSH login attempts for repeated authentication failures. Fail2Ban doesn’t activate jails by default in most configurations, so this line is required.
The %(sshd_log)s and %(sshd_backend)s variables automatically resolve to the correct log path and backend for your distribution.
On Ubuntu and Debian, the log path resolves to /var/log/auth.log. RHEL-based systems use /var/log/secure or the systemd journal.
If you’ve changed your SSH port from the default 22, replace port = ssh with your actual port number. For example:
[sshd]
enabled = true
port = 2222
logpath = %(sshd_log)s
backend = %(sshd_backend)s
Always confirm your IP is in the ignoreip list before applying stricter SSH rules, such as lower maxretry values or longer bantime durations.
How to choose the correct firewall action
Fail2Ban bans IP addresses by adding rules to your server’s firewall. The correct banaction setting depends on which firewall your server uses.
| Firewall | banaction value |
| iptables | iptables-multiport |
| UFW | ufw |
| firewalld | firewallcmd-ipset |
| nftables | nftables-multiport |
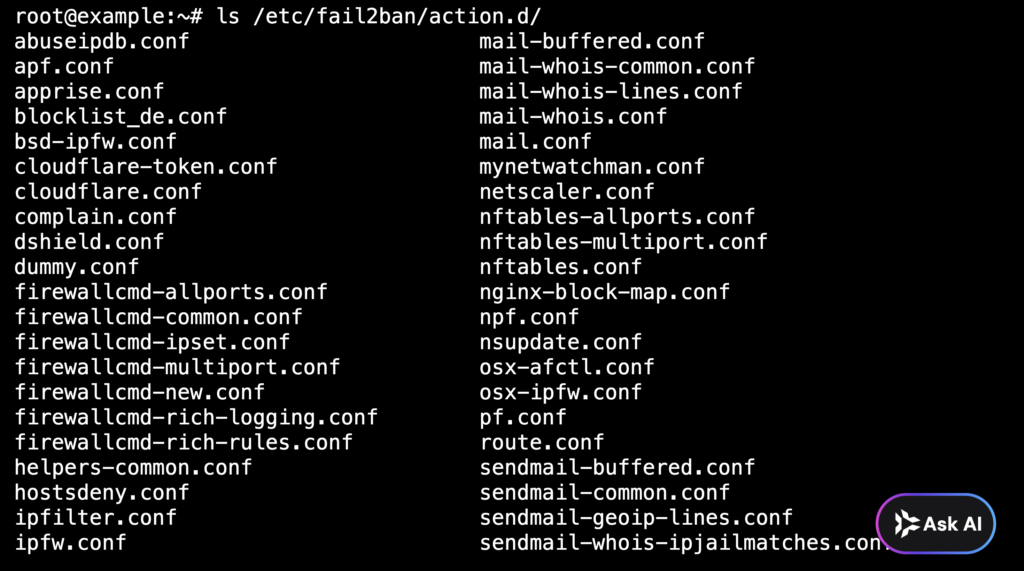
To see all available actions on your server, list the contents of the action directory using the ls command:
ls /etc/fail2ban/action.d/
If your server uses UFW, set banaction = ufw in the [DEFAULT] section of jail.local. Fail2Ban adds ban rules through UFW’s command interface, so the two tools work together without conflicts.
If your server still needs a firewall, configure UFW on Ubuntu before enabling Fail2Ban.
How to restart and verify Fail2Ban
Fail2Ban needs a restart or reload after any configuration change. Use fail2ban-client reload to apply changes without dropping existing bans, or systemctl restart for a full restart:
sudo fail2ban-client reload
If the reload doesn’t pick up your changes, do a full service restart:
sudo systemctl restart fail2ban
systemctl is the standard tool for managing Linux services on modern distributions. Check whether Fail2Ban is running:
sudo systemctl status fail2ban
View all active jails:
sudo fail2ban-client status

The output lists the number of active jails and their names. To check the SSH jail specifically:
sudo fail2ban-client status sshd
This command shows current failed attempts, total failures since the service started, and the list of banned IP addresses. A healthy configuration shows the sshd jail as active with Currently banned: 0, or more if attacks have already occurred.
How to test that bans are actually working
Confirm that Fail2Ban bans IP addresses before you rely on it. From a separate machine or IP address, deliberately fail enough SSH logins to pass the maxretry threshold, then check the jail status:
sudo fail2ban-client status sshd
You should see the test IP in the banned list. Unban it after you’ve confirmed the setup works:
sudo fail2ban-client set sshd unbanip test-ip-address
How to view Fail2Ban logs
The primary Fail2Ban log file is /var/log/fail2ban.log. Use the tail command to follow new entries in real time:
sudo tail -f /var/log/fail2ban.log

Authentication logs vary by distribution. On Ubuntu and Debian, SSH login attempts go to /var/log/auth.log:
sudo tail -f /var/log/auth.log
On RHEL-based systems, including CentOS, AlmaLinux, Rocky Linux, and Fedora, the equivalent file is /var/log/secure:
sudo tail -f /var/log/secure
On systems that use systemd journald as the primary logging backend, view Fail2Ban entries with the journalctl command:
sudo journalctl -u fail2ban
Look for INFO [sshd] Found entries, which mean Fail2Ban detected a failed attempt, and NOTICE [sshd] Ban entries, which mean Fail2Ban banned an IP address. If you see Found entries but no Ban entries, the attempts haven’t reached the maxretry threshold yet.
How to manage banned IP addresses in Fail2Ban
Fail2Ban may occasionally ban a trusted IP address by mistake, or you might want to block a suspicious IP before it reaches the retry limit. Use the fail2ban-client command for both tasks.
How to unban an IP address in Fail2Ban
Remove a banned IP address from the SSH jail:
sudo fail2ban-client set sshd unbanip 192.0.2.1
Replace 192.0.2.1 with the IP address you want to unban. This change takes effect immediately without restarting the service.
The most common reason you’ll need this is accidental self-banning after entering the wrong SSH password too many times. If that happens, use a secondary access method, such as a VPS console, to run the unban command.
How to manually ban an IP address in Fail2Ban
Add an IP address to the SSH jail’s ban list. For example:
sudo fail2ban-client set sshd banip 198.51.100.1

Manual bans are useful when you spot a suspicious IP in your logs before it reaches the maxretry threshold.
Troubleshooting common Fail2Ban configuration issues
Fail2Ban configuration mistakes are the most common cause of setup problems. Here are issues you’re likely to encounter after setting up or modifying Fail2Ban.
Fail2Ban is running but not banning IPs
Check whether the jail is active and receiving log data:
sudo fail2ban-client status
sudo fail2ban-client status sshd
If the SSH jail shows zero failed attempts despite known login failures, the most likely causes are an incorrect logpath value, the wrong backend setting, or a jail that’s missing enabled = true.
The SSH jail is not active
Confirm that the [sshd] section in jail.local or jail.d/sshd.local includes enabled = true. Fail2Ban doesn’t activate jails by default in most configurations.
After updating the jail file, restart the service and check the jail status again:
sudo systemctl restart fail2ban
sudo fail2ban-client status sshd
You are locked out of your server
If Fail2Ban bans your own IP, try one of these recovery options:
- Access the server from a different IP that’s in the ignoreip allowlist.
- Log in through your hosting provider’s VPS console or recovery console.
- Use another active SSH session, if you still have one open, to run the unban command.
Unban your IP address from the SSH jail:
sudo fail2ban-client set sshd unbanip your-ip-address
This is why adding your trusted IP to ignoreip matters. One SSH login session with too many typos can lock you out.
Fail2Ban doesn’t start after editing jail.local
Test the configuration file for syntax errors:
sudo fail2ban-client -t
If the test reports an error, check the service logs for details:
sudo journalctl -u fail2ban --no-pager
Common causes include typos in the jail file, incorrect indentation, invalid action names, misspelled jail names, and unsupported time formats. Fix the reported issue, save the file, and run the configuration test again before restarting.
Key takeaways for configuring Fail2Ban
Fail2Ban is one layer in a broader Linux VPS security strategy. It works best alongside SSH key authentication, properly configured firewall rules, regular software updates, and strong access control policies.
The safest Fail2Ban configuration workflow follows these steps:
- Install Fail2Ban using your distribution’s package manager.
- Create .local override files instead of editing default .conf files.
- Add your trusted IP to ignoreip, then set bantime, findtime, and maxretry in the [DEFAULT] section.
- Enable the SSH jail with enabled = true, then verify the correct log path and backend.
- Reload or restart the service with sudo fail2ban-client reload.
- Verify active jails with sudo fail2ban-client status and sudo fail2ban-client status sshd.
- Test that bans work from a separate IP, then monitor /var/log/fail2ban.log regularly.

Ariffud is a Technical Content Writer with an educational background in Informatics. He has extensive expertise in Linux and VPS, authoring over 200 articles on server management and web development. Follow him on LinkedIn.