How to add page to a navigation menu in WordPress: 2 effective methods
Mar 10, 2026
/
Jordana A.
/
3 min Read

To create a seamless user experience, you will likely need to add a navigation menu to your website. However, to make the most of the menu, a list of well-organized website pages is a must.
In this article, we will explore two methods for customizing WordPress menus. In the end, you’ll be able to add pages to WordPress menus effortlessly and in minimal time.
Download all-in-one WordPress cheat sheet
What Is a Navigation Menu in WordPress?
A navigation menu in WordPress is a collection of links to internal web pages within the website. It makes finding information easier and promotes pages the website owner wants to highlight.
Most navigational menus are located in accessible places across the website, such as page headers and sidebars.
How to Add Pages to WordPress Menus
There are two ways to add pages to navigation menus ‒ using the built-in navigation menu feature or the WordPress Site Editor. As the final result will be the same, check out the following sections and pick the method you prefer.
Pro Tip
Before making any changes to your menu, it’s best to back up your WordPress website first. This way, you don’t have to worry about breaking the site in case of an error.
Adding a Page to a Menu From WordPress Dashboard
WordPress lets you control how your menu appears from the admin dashboard. Here’s how to create a new page and embed it as a new menu item.
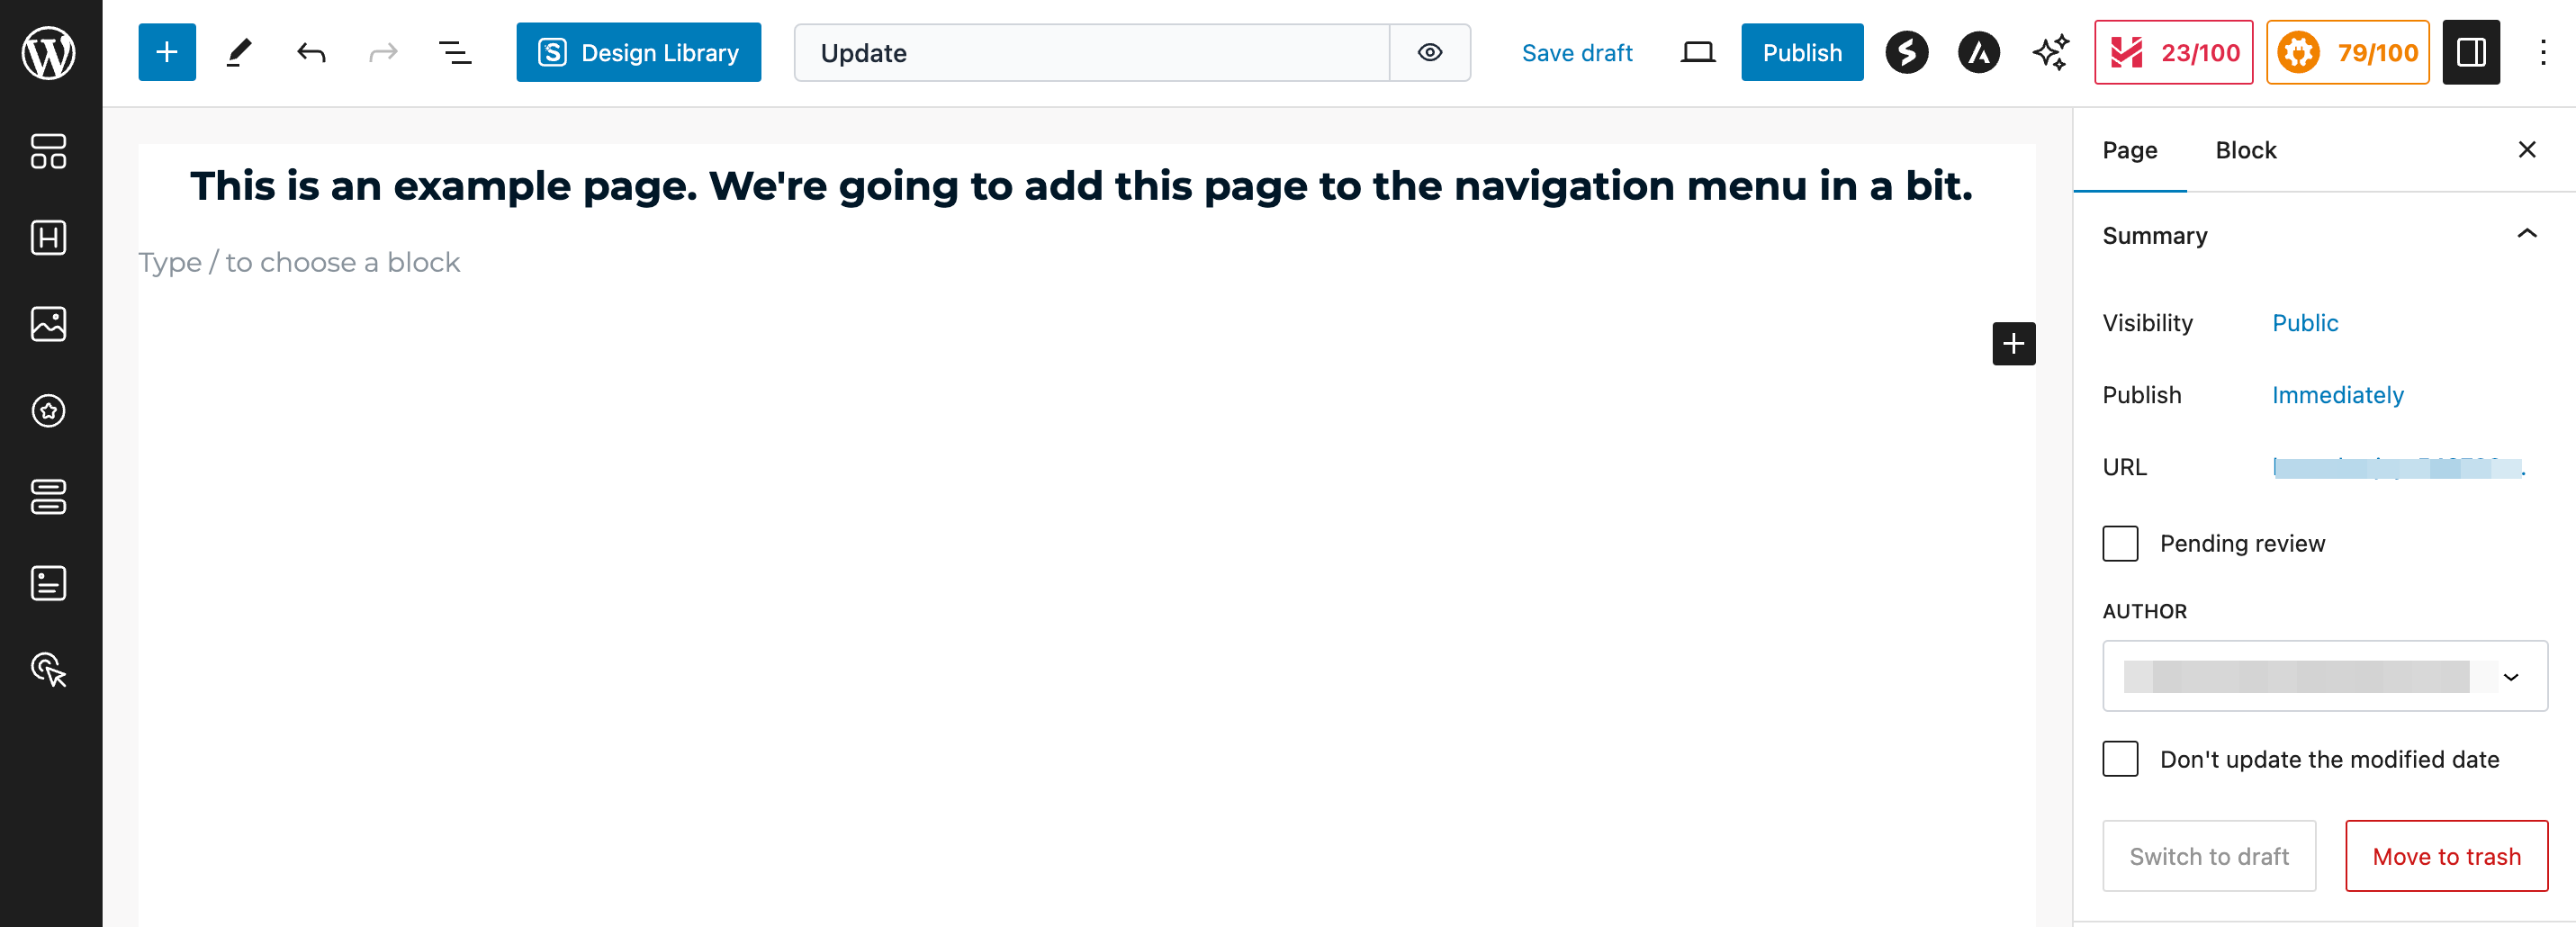
- Log in to your WordPress dashboard, head to the Pages section, and click Add New.
- Type in the page title and content you want to showcase in the menu and hit Publish.
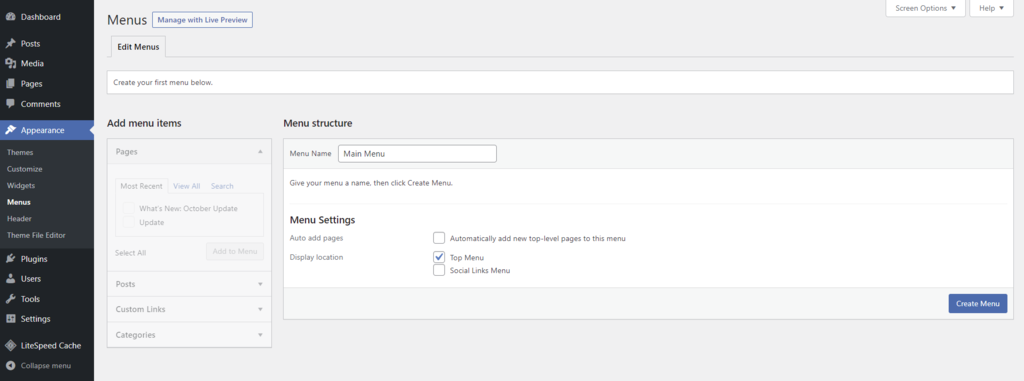
- Navigate to Appearance → Menus from the admin dashboard. Add a name to the Menu Name section and check the Top Menu box. Hit the Create Menu button. Repeat this step until you have created all of the necessary pages.
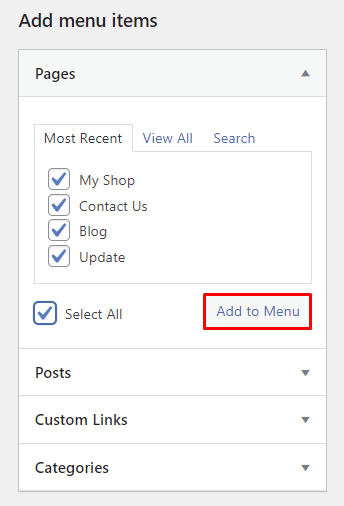
- In the Add menu items → Pages section, check the box next to the pages to include in the new menu and click the Add to Menu button.
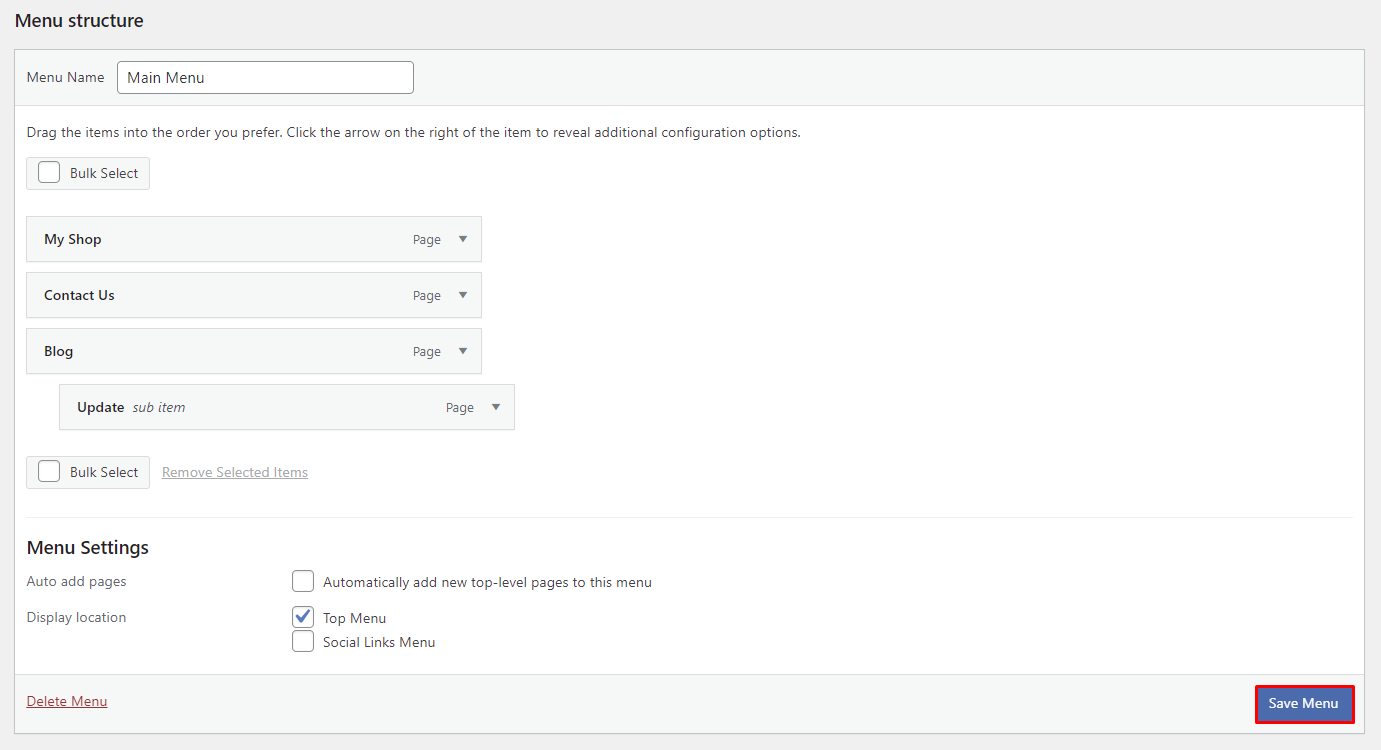
- Drag and drop the menu options to reorder them. Place a menu item on the right below the designated parent menu to create a sub-menu. Once done, click on the Save Menu button.
Now that the new menu is up and running, you can customize it by adding WordPress menu icons to enhance the readability and overall look of menu items.
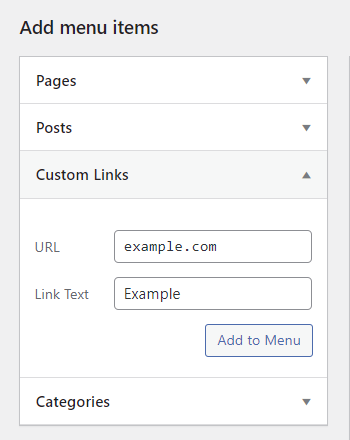
WordPress also accepts custom links, categories, and posts as menu options. For instance, expand the Custom Links dropdown menu under the Add menu items section and add the chosen URL and link text as a menu item. It’s useful for redirecting visitors to an external web page.
Adding a Page in a Menu Using the Site Editor
WordPress offers full website editing through the new Site Editor, available in version 5.9 or higher. For this method to work, make sure to choose the theme that supports this feature.

We’re going to use the Twenty Twenty-Two theme for this tutorial. Here’s how to add a menu page to a WordPress menu using the Site Editor.
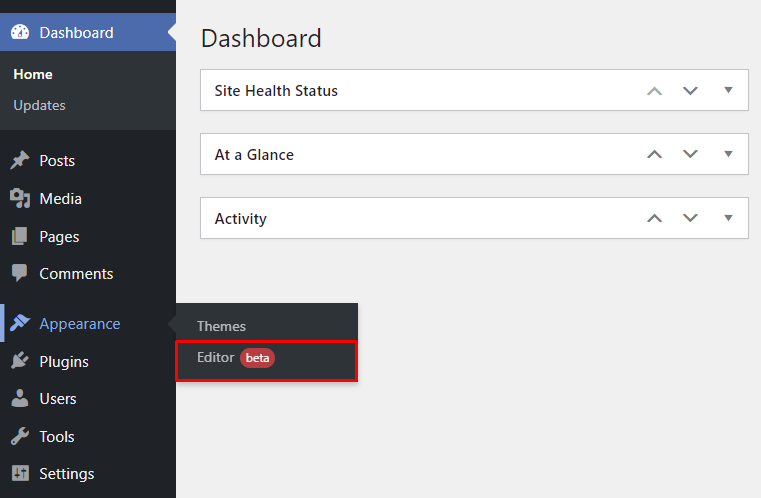
- Go to Appearance → Editor from your admin dashboard.
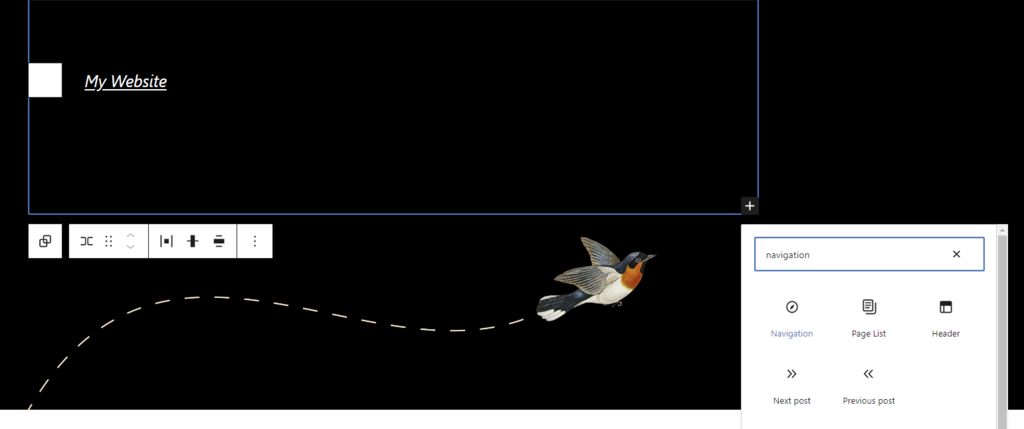
- Click the page header to activate it, then hit the (+) button on the bottom right corner. Search for the navigation block and add it to the section.
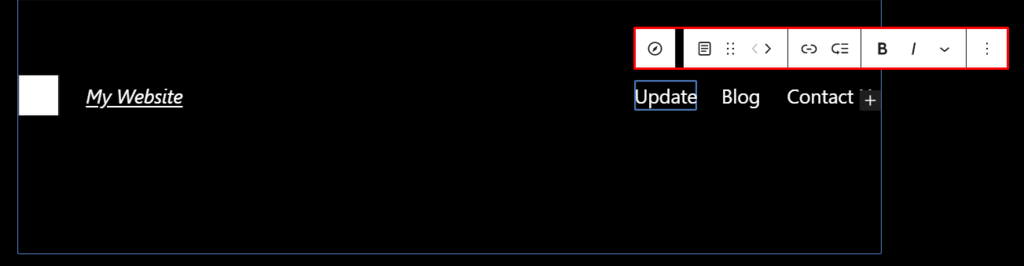
- Click on the menu bar to open the settings. Select a menu item and use the left and right arrows to reorder it.
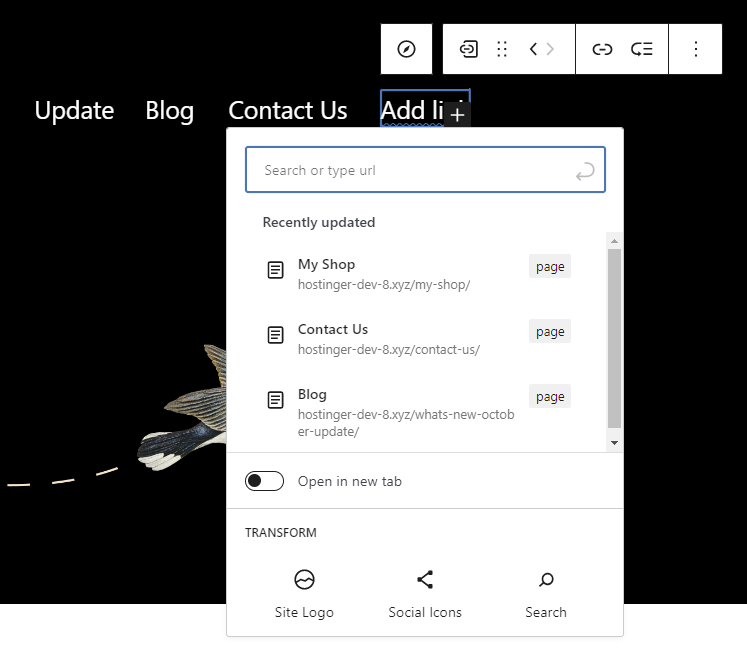
- While still on the menu bar, click the (+) button and pick a page to embed as a menu item. Select the Open in new tab slider to open the new page in a different tab.
- Hit the Save button once you’ve finished.
If your current theme doesn’t support Site Editor, add custom code to the theme’s functions.php file using the WordPress Theme File Editor. Refer to the WordPress Codex for navigation menu functions.
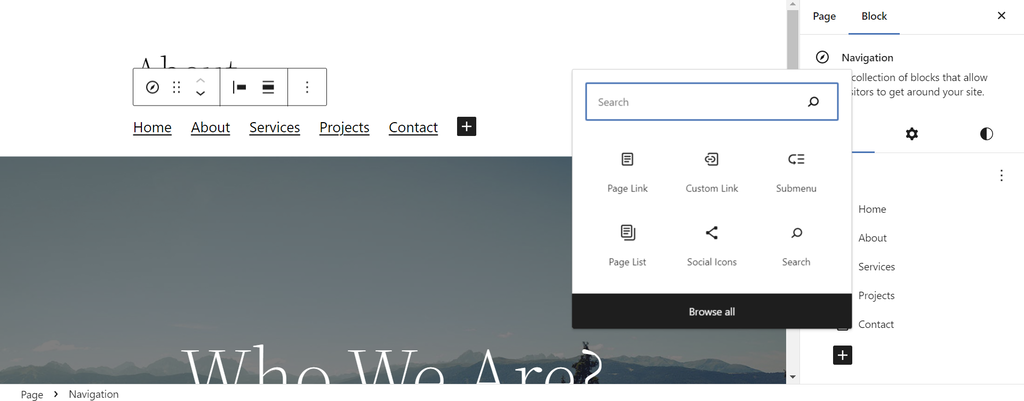
Users who are on WordPress 6.5 can use the Navigation block UI tool to add a menu section. Click on the (+) symbol in the settings sidebar to create a new item.
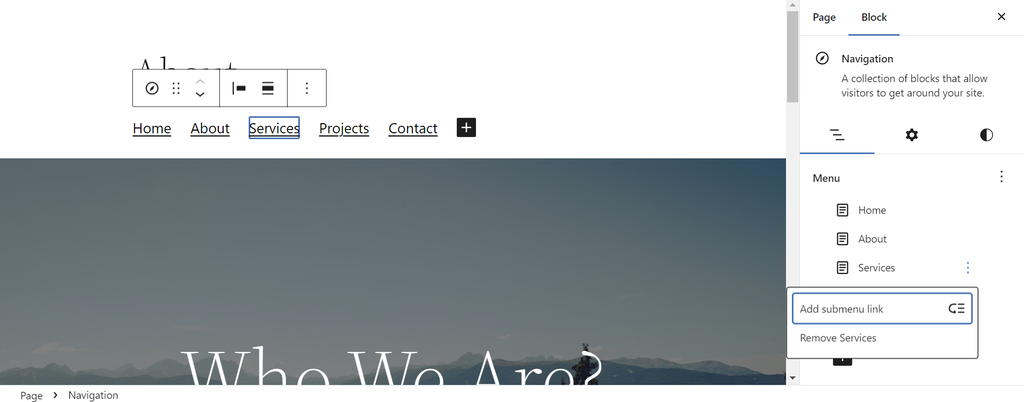
You can reorder the menu items by dragging and dropping them. To create a submenu, drag and drop the targeted menu item to a lower level or click on the Options menu next to the intended parent menu item and select Add submenu link.
Alternatively, install a WordPress menu plugin to get more customization options and eliminate the need to code. For instance, Max Mega Menu enables you to create a WordPress mega menu and easily add rich content, such as product images, search filters, and even interactive maps.

Conclusion
As a navigation menu is a crucial element of a website design, optimizing it helps ensure a smooth user experience.
In this tutorial, you have learned how to customize menus using the WordPress dashboard and the Site Editor. Pick the easiest method and start building your navigation menu. Once done, make sure to double-check whether it displays all the necessary menu items.
Should you have any questions, leave a comment below.

Jordana is a Senior Content Writer with a background in Information Systems. She has over five years of experience in WordPress and is casually dabbling with PHP and MySQL. Her passion for writing and technology drives her to create tutorials for anyone wanting to build their online presence. Follow her on LinkedIn.


Comments
2 responsesJune 03 2024
Thanks navigation menu setting tips were helpful
June 06 2024
You're welcome! I'm glad to hear that. If you have any more questions or need further assistance, feel free to reach out anytime!