How to self-host n8n on Ubuntu
Mar 10, 2026
/
Dominykas J.
/
8 min Read
Self-hosting n8n on an Ubuntu server offers enhanced data privacy, greater control, and efficiency than the managed, cloud hosting solution. Installing n8n also only takes a few steps if you already have a system with sufficient hardware resources that provides full root access to its terminal.
There are three ways to self-host n8n on Ubuntu, each with its distinct benefits and suitable for different users:
- Self-host n8n using Node Package Manager (npm). Download and install the n8n package through npm via your system’s terminal. It’s the most straightforward method, and it works for any system, but it’s the least reliable.
- Deploy n8n in a Docker container. Set up a Docker container that runs n8n. The extra steps and tools can make this method more complex, but it’s more reliable than using npm.
- Install n8n on a Hostinger VPS using a template. Set up n8n in a few clicks using Hostinger’s template. Since this method doesn’t require executing commands, it’s the safest, easiest, and most efficient.
Regardless of the installation method, self-hosting n8n requires careful management as you’ll have to handle the server administration tasks yourself. The most essential practices include keeping your n8n instance secure, updating it regularly, and setting up a robust backup system for optimal data integrity.
Explore how to self-host n8n on Ubuntu in more detail, including different methods to install it and the best practices after deployment to keep the automation platform secure.
Prerequisites for self-hosting n8n
Since n8n is a platform that requires specific hardware resources and dependencies, you’ll need to fulfill the following requirements before setting up self-hosting:
- A Linux system. For the best performance, the host system that will run n8n should run the latest version of the Linux operating system. For this tutorial, we’ll use Ubuntu, as it’s the most popular.
- Server hardware. Your n8n hosting environment should have at least 1 GB of RAM and 1 CPU core. We recommend 2 GB of RAM and 2 CPU cores for headroom and future-proofing.
- Domain for HTTPS. A domain is mandatory for issuing and installing SSL/TLS on our n8n instance. This is crucial since n8n requires a secure connection by default.
- Terminal access. Since installing and configuring n8n requires executing commands, you should be able to access the host environment’s terminal as root.
- Docker installed (recommended). While you can set up n8n outside a container, using Docker improves isolation and streamlines management. If you wish to deploy n8n inside a container, make sure you have installed Docker on your system.
The right VPS requirements are key for stable n8n hosting. Underpowered servers can slow or fail your workflows. Check our article on n8n VPS requirements to choose the best setup.
How to self-host n8n with npm
The most basic method of self-hosting n8n is manually installing it using commands through npm. This works across different systems, whether a local computer or a virtual private server, regardless of the hosting provider.
However, this installation method can be unreliable if you want n8n to run 24/7 since it lacks built-in restart policies and requires a process manager to remain consistently active. It is mainly suitable if you wish to deploy n8n for testing.
Note that depending on your Linux distribution, the commands differ. Here’s how to self-host n8n with npm on an Ubuntu server:
- Log in to your system’s terminal as root. Use SSH if you use a remote machine like a VPS.
- Run the following command to update the system package and upgrade installed software to avoid potential incompatibility issues:
sudo apt update && sudo apt upgrade -y
- Set up a terminal multiplexer that will allow n8n to run continuously in the background. In this tutorial, we’ll use Linux Screen:
sudo apt install -y screen
- Install essential dependencies – packages that n8n requires to run and function properly. Since n8n requires Node.js and npm, download their setup script using this command:
curl -fsSL https://deb.nodesource.com/setup_22.x | sudo -E bash -
- Install Node.js and npm by running:
sudo apt-get install -y nodejs
- Verify the installations with these commands. If Node.js and npm are configured properly, your terminal will return their version number:
node -v
npm -v
After installing Node.js and npm. download and configure n8n:
- Install n8n globally using npm:
npm install -g n8n
- Start a Screen session called n8n:
screen -S n8n
- Run n8n inside the screen session:
n8n
- Detach from the Screen session to return to the main terminal by hitting CTRL+A then D.
- Enter the following address in your web browser, with your-server-ip being your server’s actual address:
http://your-server-ip:5678
At this point, you might receive a secure cookie error. While you can bypass this, we highly recommend installing an SSL certificate to ensure n8n is secure. We’ll cover the steps in detail later.
How to self-host n8n with Docker
Self-hosting n8n with Docker is more reliable, as using a container offers a high level of autonomy and isolation. This simplifies the management and integration, should you want to deploy other tools to the same hosting environment.
Note that this setup process is more complicated than using npm for new Docker users, but it’s the recommended method given the benefits. To learn more about the steps in detail, check out our tutorial on self-deploying n8n with Docker.
How to self-host n8n using Hostinger’s VPS template
You can easily self-host n8n on Hostinger’s VPS with a few clicks using our OS template – a preconfigured solution that automatically installs and configures n8n along with its dependencies.
In addition to making the process easier and more efficient, using the Hostinger VPS template helps avoid errors because our system handles all the configuration tasks. Here’s how to install n8n using our template:
- Go to hPanel and log in using your preferred method.
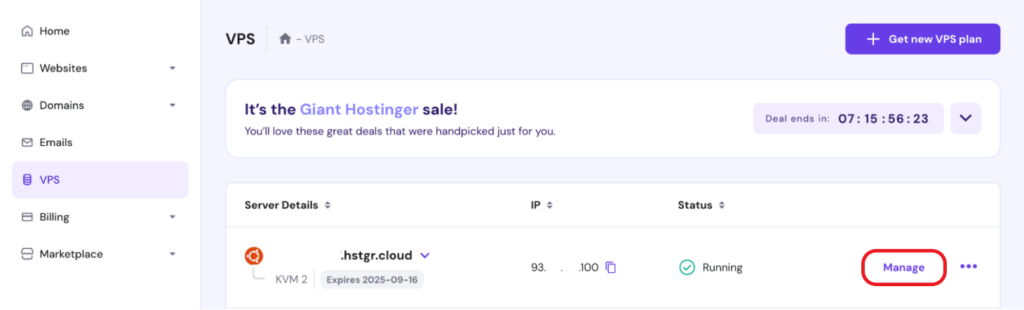
- Once you’ve logged in, navigate to the VPS section on the left-hand-side menu.
- Choose the VPS you want to apply the n8n template to and hit the Manage button next to it.
- Once in the VPS dashboard, open the OS & Panel dropdown menu on the left and select Operating System. This is where you can find hunderds of templates for installing different operating systems and applications on your Hostinger VPS.
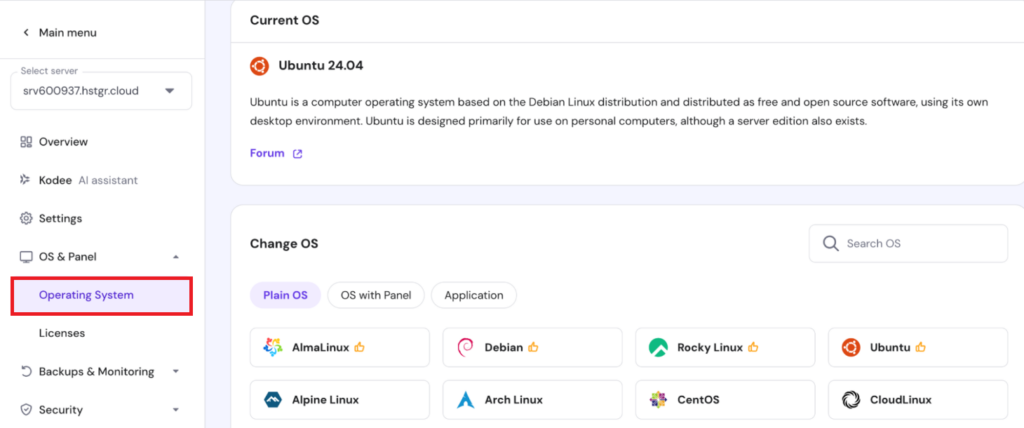
- In the Change OS panel, type n8n into the search bar and select the n8n template.
- In the dialogue window that opens, click or tap Change OS.
- You’ll see a dialog window informing you that your VPS OS will be overwritten and all files will be deleted. Check the box next to “I recognize that all my files will be deleted and cannot be restored“ and click Next.
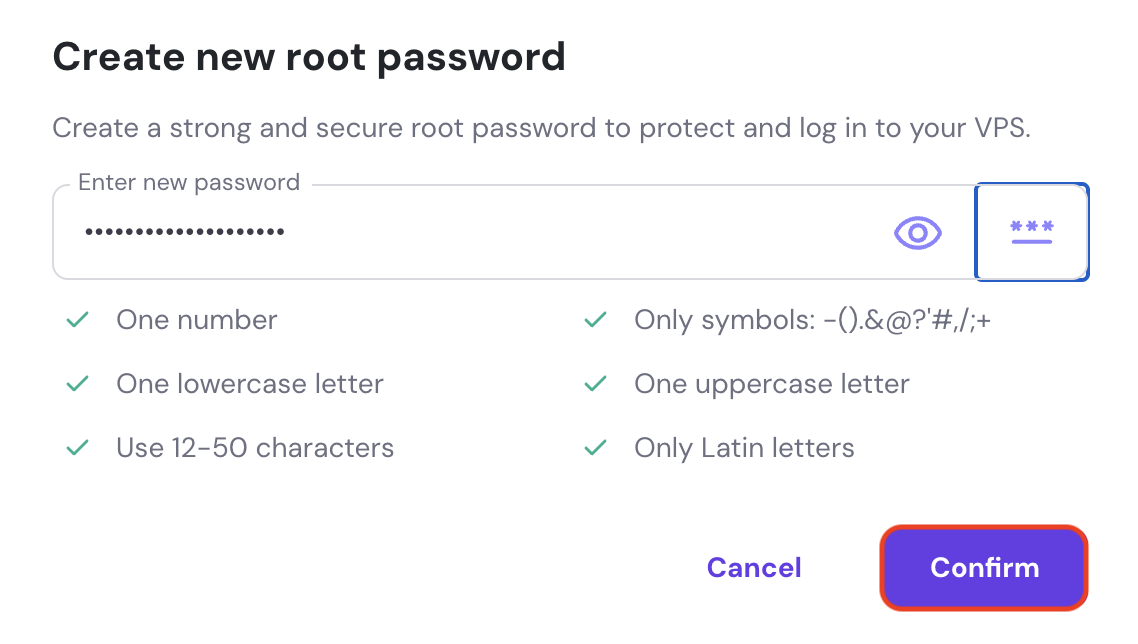
- Enter a password for the root user and click Confirm.
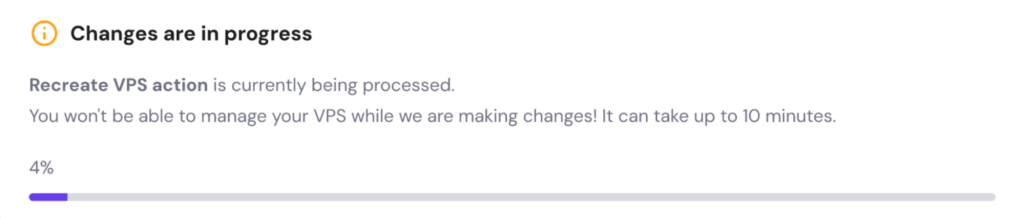
Template setup will begin. You’ll see a progress bar at the top of your dashboard, like in the example below:
💡 Pro tip
If you ever want to change your VPS password, you can do it through the Settings menu or by using Kodee, our AI-powered assistant. Kodee makes it easier – just type a prompt asking it to change your server's password and include the new one. For example: "Please change my VPS password to MyNewSecurePassword123."
Once n8n is installed, you can access it by going to hPanel’s VPS Overview page and clicking Manage App.

Installation is the first step in self-hosting n8n, regardless of the configuration methods. You must follow several more steps to ensure it works correctly and securely.
What are the best practices for self-hosted n8n?
Below are several best practice recommendations for self-hosting n8n. You should follow these instructions closely to ensure your automation platform functions optimally.
1. Secure your n8n setup
Since n8n contains a lot of sensitive data and credentials, it’s crucial to secure the platform and its hosting environment.
If you’re using a custom domain, install an SSL certificate to allow n8n to use the HTTPS connection. This is mandatory if you install n8n using npm or Docker, as this platform requires a secure cookie by default.
The easiest way to install SSL on your VPS is by using Let’s Encrypt with NGINX as a reverse proxy. Here’s how to do it:
- Install Certbot and NGINX:
sudo apt install certbot nginx python3-certbot-nginx -y
- Create/open the NGINX site file for n8n:
sudo nano /etc/nginx/sites-available/n8n
- Configure NGINX as a proxy for traffic to n8n. Add the following, replacing yourdomain.com below with your own custom domain name:
server {
   server_name yourdomain.com;
   location / {
       proxy_pass http://localhost:5678;  # Forward requests to n8n
       proxy_set_header Host $host;
       proxy_set_header X-Real-IP $remote_addr;
       proxy_set_header X-Forwarded-For $proxy_add_x_forwarded_for;
       proxy_set_header X-Forwarded-Proto $scheme;
   }
   listen 80;
}- Save and close the file with CTRL+X, then Y and ENTER.
- Enable the configuration and restart NGINX:
sudo ln -s /etc/nginx/sites-available/n8n /etc/nginx/sites-enabled/
sudo systemctl restart nginx
- Get an SSL certificate for your custom domain (replace yourdomain.com below with your custom domain name):
sudo certbot --nginx -d yourdomain.com
- Let’s Encrypt certificates expire every 90 days by default. To automatically renew it, set up a cron job on certbot:
sudo certbot renew
- Select nano if prompted to select a text editor.
- Add the following cron job:
0 2 * * * certbot renew --quiet --post-hook "systemctl restart nginx"
- Save and close the file with CTRL+X, then Y and ENTER.
For Docker-based installation, the steps are similar. The difference is that the NGINX configuration looks like the following:
server {
   server_name yourdomain.com;
   location / {
       proxy_pass http://localhost:5678;  # Forward requests to n8n
       proxy_set_header Host $host;
       proxy_set_header X-Real-IP $remote_addr;
       proxy_set_header X-Forwarded-For $proxy_add_x_forwarded_for;
       proxy_set_header X-Forwarded-Proto $scheme;
   }
   listen 80;
}
Also, you need to take these additional steps after setting up the auto-renewal cron job:
- Open the docker compose.yml file with nano:
nano ../root/docker compose.yml
- Update the following environment variables:
- WEBHOOK_URL=https://yourdomain.com/
- N8N_HOST=yourdomain.com
- N8N_PORT=5678
- N8N_PROTOCOL=https
- Save and close the file with CTRL+X, then Y and ENTER.
- Restart Docker Compose to apply the changes
docker compose down
docker compose up -d
By default, n8n doesn’t enforce authentication, so anyone who accesses your server’s IP can use it. To secure your instance, set environment variables before running the container.
With direct installation, you can use the export command to add variables. In the example below, be sure to replace username, password, and yourdomain.com with your chosen credentials:
export N8N_BASIC_AUTH_ACTIVE=true
export N8N_BASIC_AUTH_USER=username
export N8N_BASIC_AUTH_PASSWORD=password
export N8N_HOST=yourdomain.com
export N8N_PORT=5678
export WEBHOOK_URL=https://yourdomain.com/
export GENERIC_TIMEZONE=UTC
When running n8n as a Docker container (containerized installation), you can pass these variables using the -e flag (again, add your own credentials below):
docker stop n8n && docker rm n8n #stop and remove previous n8n container
docker run -d --name n8n
  -p 5678:5678
  -e N8N_BASIC_AUTH_ACTIVE=true
  -e N8N_BASIC_AUTH_USER=username
  -e N8N_BASIC_AUTH_PASSWORD=password
  -e N8N_HOST=yourdomain.com
  -e N8N_PORT=5678
  -e WEBHOOK_URL=https://yourdomain.com/
  -e GENERIC_TIMEZONE=UTC
  -v ~/.n8n:/home/node/.n8n
  n8nio/n8n
In addition to the n8n setup, you must consider other VPS security practices since a vulnerable server can put your sensitive data at risk. For example, set up a proper firewall rule to ensure only permissible IP addresses can access your automation platform.
2. Keep your instance updated
To maintain a secure n8n environment, be sure to regularly update the automation platform, its dependencies, and other underlying software. Using outdated packages can lead to broken workflows, security vulnerabilities, and a host of other problems.
The steps to update n8n depend on how you installed it. If you deploy n8n using npm, update it by running:
npm update -g n8n
If you use Docker Compose, update n8n by pulling the latest image. To do this, run these commands one by one:
# Navigate to the directory containing your docker compose file
cd </path/to/your/compose/file/directory>

# Pull latest version
docker compose pull

# Stop and remove older version
docker compose down

# Start the container
docker compose up -d
Similarly, update n8n installed with Hostinger’s VPS template using the Docker method. Our system automatically deploys n8n in a container for optimal reliability and isolation.
Meanwhile, update all other software packages on your system using the distro’s built-in package manager. On Ubuntu, simply run:
sudo apt update && sudo apt upgrade -y
3. Ensure persistence and backups
Maintaining persistence and having a solid backup strategy are critical for a self-hosted n8n instance to ensure optimal data integrity. This is especially important if you deploy it using a Docker container.
When you run n8n on Docker, all of its data is stored inside the container’s ephemeral file system. It is risky since the data of your automation platform will be wiped out if the container is deleted.
To prevent this, mount a persistent volume by running the following command:
docker run -v ~/.n8n:/home/node/.n8n ...
This command maps the ~/.n8n directory on your host machine to the /home/node/.n8n directory inside the Docker container. As a result, data n8n writes to its internal directory will be saved to your host machine’s file system.
In addition to n8n, regularly back up the entire server to maintain data safety and simplify restoration in case of critical issues. You can use different tools for this task or do it manually by copying all files to another storage.
If you use Hostinger VPS solutions, an automatic weekly backup is active by default. We also offer a manual snapshot, which captures the current state of your VPS for easy recovery if you want to perform major server customizations.
What to do after installing n8n?
After installing n8n, explore the platform in more detail to discover how it can help streamline your projects or tasks. With hundreds of pre-built nodes, extensive application integrations, and custom application programming interface (API) compatibility, the possibilities of what you can automate with n8n are incredibly vast.
For example, you can integrate Gmail with customer relationship management (CRM) software to automate a new customer onboarding process, or connect WhatsApp with the OpenAI API to create an AI-powered chatbot. For inspiration, check out our tutorial to learn about some of the most popular n8n integrations.
Instead of creating an automation system from scratch, you can also import pre-made n8n workflow templates and expand them as needed. This is especially useful for beginners who are unsure about which nodes to use for a given task.
You can explore user-shared workflow templates for different tasks from the official n8n repository. Alternatively, Hostinger users can install the n8n (100+ workflows) template, which comes pre-configured with various workflow options.
All of the tutorial content on this website is subject to Hostinger's rigorous editorial standards and values.

Dominykas is a Technical Content Writer with a background in cloud engineering and technical support. He’s operated in fields like fintech and point-of-sale and is passionate about software development, DevOps, and AI. Find him on LinkedIn.