Parent page WordPress: understanding its purpose and how to set it up
Mar 10, 2026
/
Jordana A.
/
5 min Read
WordPress has two default post types – posts and pages. However, unlike posts and other custom post types, pages don’t have to be on the same level. Users can create parent and child pages, establishing a page hierarchy on their sites.
The practice is particularly beneficial for WordPress websites with a lot of static information as it’ll help visitors easily navigate them.
This article will cover the steps to create a parent page in WordPress and display a list of child pages using three different methods. You will also learn how to manage the parent-child relationship between pages.
What Is a Parent Page?
A WordPress parent page is a top-level page in the site’s hierarchy. The group of sub-pages nestled under it are called child pages.
Differences Between a Parent Page and a Child Page
Creating a hierarchical structure requires establishing a parent-child relationship between individual pages. In this arrangement, parent pages are superior to child pages, meaning child pages cannot exist without them.
Take Hostinger Tutorials as an example. Under the main menu, you’ll find eight categories, including WordPress, VPS, and Video Tutorials. These are all child pages under the parent page /tutorials/.
Another factor that differentiates child pages from parent pages is the URL. By default, child pages carry their parent page’s slug in their URL.
For instance, the URL of the Hostinger Tutorials parent page is /tutorials/, while the WordPress child page is /tutorials/wordpress.
How to Set Parent and Child Pages in WordPress
To establish a hierarchical page structure, you’ll need to publish your first page in WordPress. Here are the steps to create parent pages:
- On your WordPress dashboard, navigate to Pages → Add New.
- Write the page’s title and content.
- Click Preview to see what it will look like and hit Publish once you’re finished.
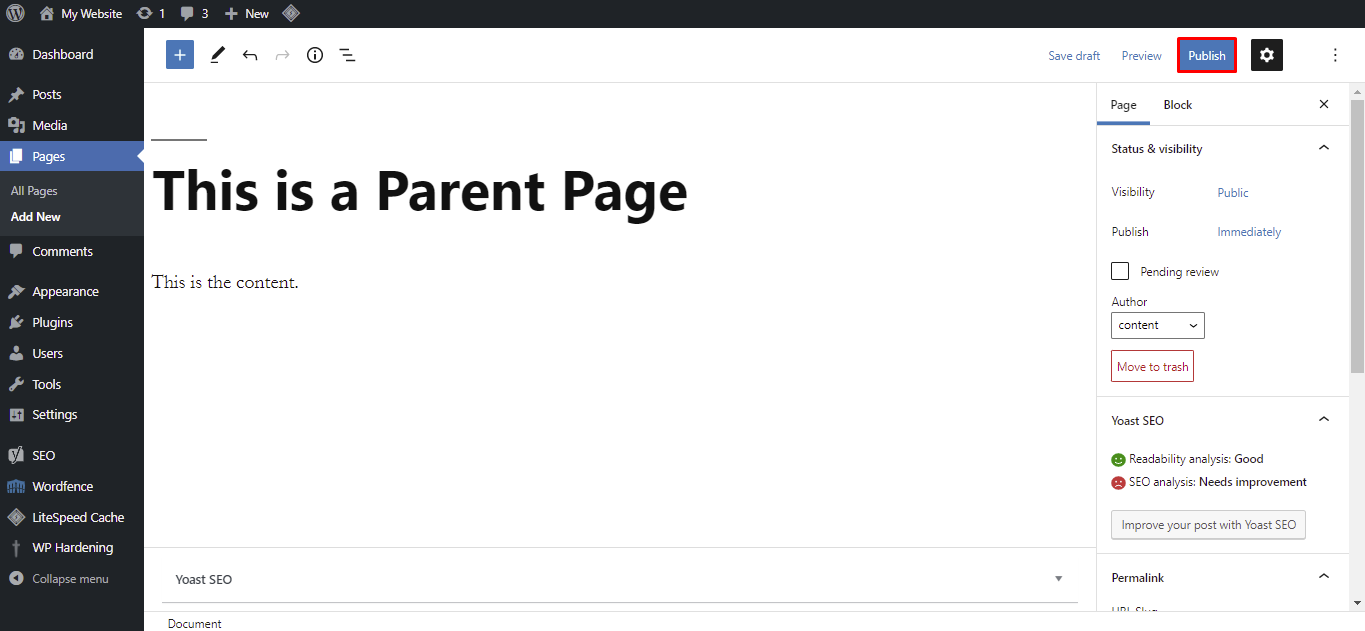
Repeat these steps to add other parent pages to your website.
Now, you can start creating child pages:
- On your WordPress dashboard, go to Pages → Add New.
- Enter the desired title and content.
- Open the Page tab and scroll down to Page Attributes. Choose a specific page to set as the parent from the drop-down menu.
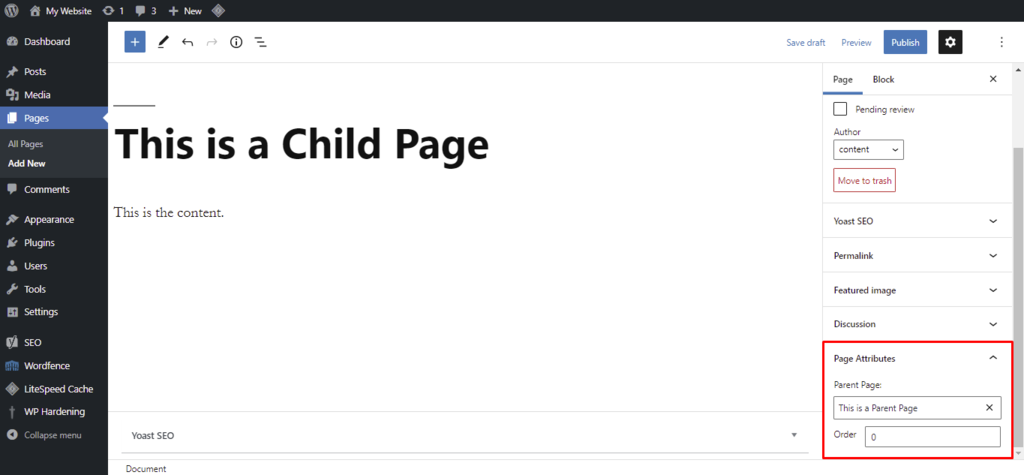
- Click Publish.
Repeat these steps as necessary to create multiple child pages. You can change their order of appearance by assigning a numeric value. To do that, use the Order textbox in the Page Attributes section.
Page Attributes Not Showing Up?
Click the Screen Options drop-down menu at the top of the page and check the box next to the Page Attributes option. Now, you’ll be able to set parent pages.
How to Display the List of Child Pages of a Parent Page
Displaying the list of child pages on their respective parent page is a great way to have a clear structure. It allows visitors to find the information they’re looking for much faster and easier, improving the user experience and the site’s navigation.
There are three ways to display a list of your child pages ‒ using a WordPress plugin, coding it manually, or editing the page template.
Use a Plugin to Show the List of Child Pages
This method is the easiest because it streamlines the configuration process. The best WordPress plugins provide shortcode parameters to add the list of child pages to a parent page and set the list style.
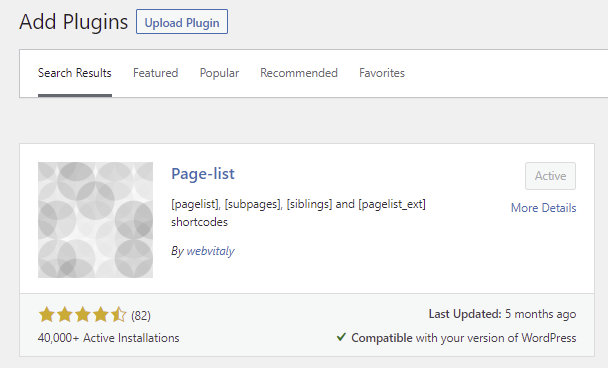
There are plenty of plugins available in the WordPress directory. In this tutorial, we’ll be using Page-list. First, install and activate the plugin.
On the plugin’s page, you’ll see a collection of shortcodes with parameters for list styling:
- [pagelist] ‒ showcase the sitemap of the site.
- [subpages] ‒ display the current page’s child pages.
- [siblings] ‒ display the current page’s sibling pages, which are pages grouped under the same parent page.
- [pagelist_ext] ‒ showcase the list of pages with their respective featured images and excerpts.
Here’s how to use the Page-list plugin to display a list of child pages in WordPress:
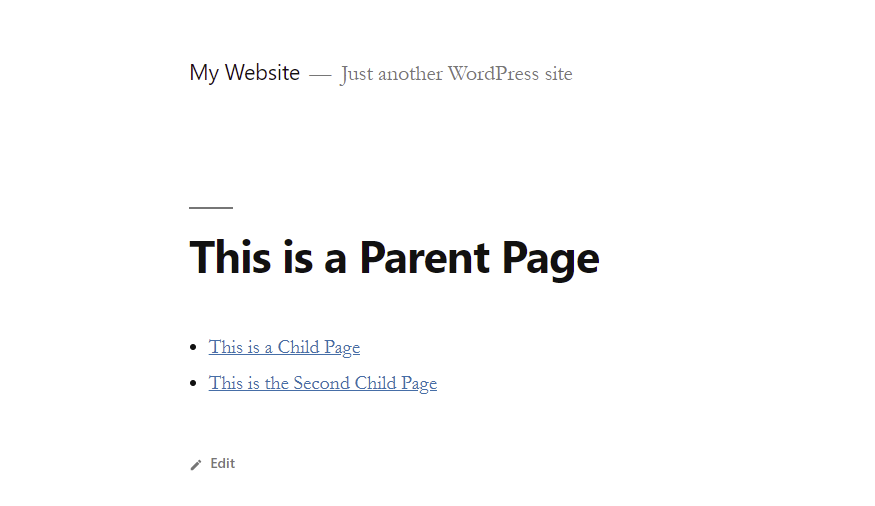
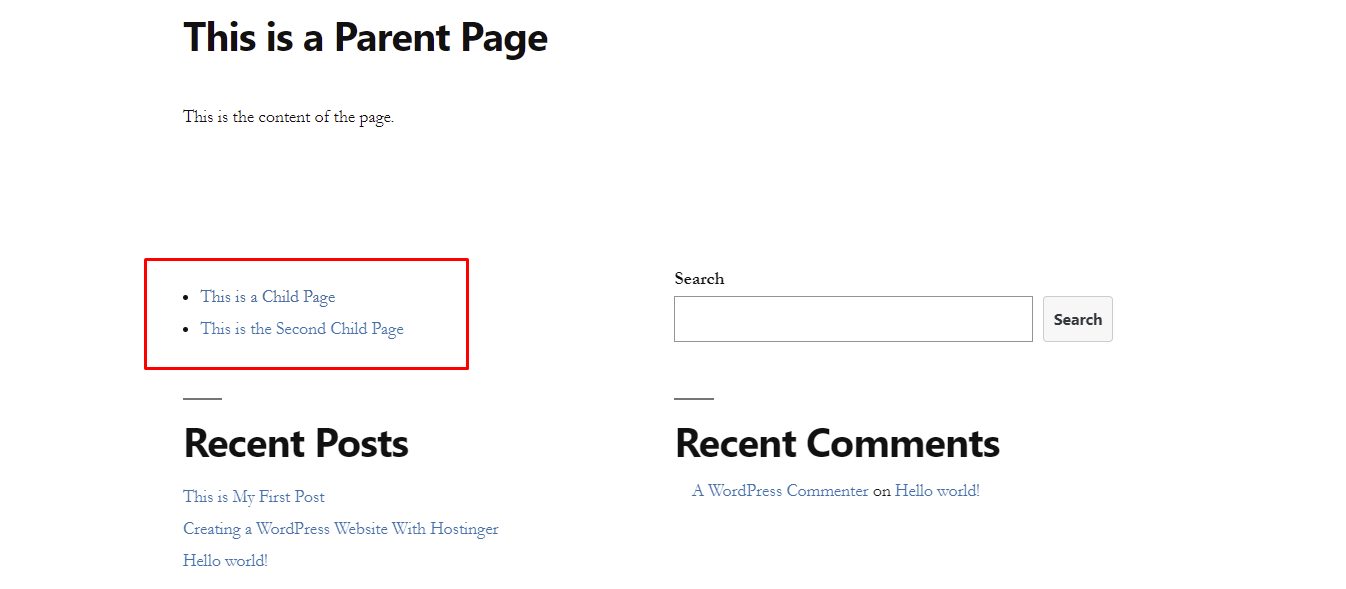
- Insert the [subpages] shortcode anywhere within the desired parent page and hit Update.
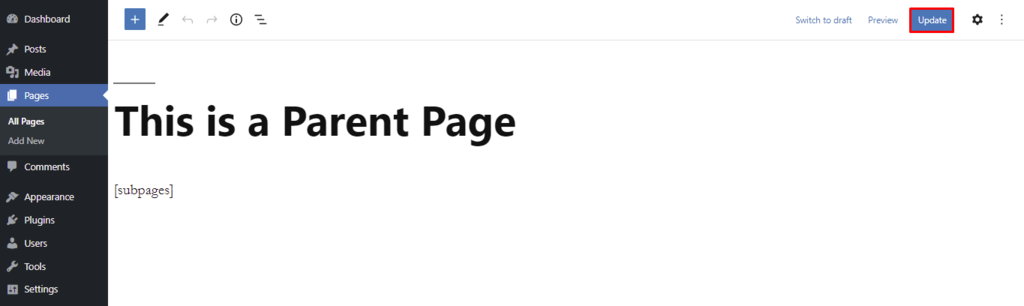
- The following image features an example of the shortcode’s application. You can add a custom CSS class or combine the main shortcode with the available parameters to style the list.
Show the List of Child Pages by Coding
Manually coding offers more flexibility in customizing the list of child pages. However, the process requires some technical knowledge, which may not suit WordPress beginners and non-technical users.
The code needs to be added to your theme’s functions.php file, accessible through an FTP client or a File Manager.
If you use our site hosting services, here are the steps to create a child page index using Hostinger File Manager:
- On hPanel, navigate to Files → File Manager.
- From your root directory (public_html), access wp-content → themes.
- Open the folder of the theme that’s currently active and locate the functions.php file.
- Double-click it and add the following code at the bottom of the file:
function wpb_list_child_pages() {
 global $post;
if ( is_page() && $post->post_parent )
    $childpages = wp_list_pages( 'sort_column=menu_order&title_li=&child_of=' . $post->post_parent . '&echo=0' );
else
    $childpages = wp_list_pages( 'sort_column=menu_order&title_li=&child_of=' . $post->ID . '&echo=0' );
if ( $childpages ) {
    $string = '<ul class="wpb_page_list">' . $childpages . '</ul>';
}
return $string;
}
add_shortcode('wpb_childpages', 'wpb_list_child_pages');- Save the changes. Now, go to your WordPress dashboard.
- Navigate to Appearance → Widgets and add the [wpb_childpages] shortcode somewhere in the widget area. Alternatively, insert it directly on the parent pages.
Important! The [wpb_childpages] shortcode won’t work on pages that aren’t part of the hierarchical structure.
Edit the Page Template to Show the List of Child Pages
Using shortcodes makes sense if you have a small number of pages. For a large-scale website, it is better to edit the page template file and automate the insertion process.
To do so, add the code mentioned above to the functions.php file. Then, insert this code snippet into the page.php file of your active theme:
<?php wpb_list_child_pages(); ?>
That’s it! The theme will automatically detect child pages and display them on the website.
Bonus: How to Manage Parent and Child Pages
As mentioned earlier, having a hierarchical structure can significantly improve the navigation and user experience of your WordPress site. What many WordPress users don’t know is that the page structure can also influence your site’s SEO.
If done correctly, page structure helps search engines like Google crawl and index a site by making its content easier to find and understand. Plus, the hierarchy tells search engines which pages are important, boosting a site’s authority and searchability.
Here are some tips to help you get the most out of your page structure:
- Group relevant content only ‒ consider the correlation between the keywords of a parent page and its child pages.
- Decide on the order ‒ in most cases, child pages are displayed according to keyword popularity to shorten visitors’ search time. However, there are instances when it’s better to organize them based on the content’s priority.
- Don’t create too many categories ‒ keep it between two and seven to avoid overwhelming users with sub-pages.
- Keep your sitemap up to date ‒ update your WordPress sitemap whenever you create a new page or change the content of the existing ones to speed up the indexing process.

Conclusion
Setting up WordPress parent pages is not an essential task, but we highly recommend it. It will create a hierarchical structure that will make your WordPress website easy to navigate.
We hope this article has helped you understand the purpose of parent and child pages in WordPress and how to set them up properly. Good luck!
Parent Page WordPress FAQs
If you want to learn more about the parent page in WordPress, the following are some frequently asked questions about the topic.
How Do I Make a Parent Page Private in WordPress?
To make a parent page private in WordPress, edit the page, locate the Visibility setting in the Publish box, click Edit, and select Private. Then, click OK to save your changes. The page, and any child pages, will now only be visible to users with the appropriate permissions.
How Can I Disable Comments on a Parent Page in WordPress?
Open the page editor and locate the Discussion settings in the Document tab. To disable comments on a parent page in WordPress, uncheck Allow Comments and save your changes. This will disable comments for the parent page and any child pages by default.

Jordana is a Senior Content Writer with a background in Information Systems. She has over five years of experience in WordPress and is casually dabbling with PHP and MySQL. Her passion for writing and technology drives her to create tutorials for anyone wanting to build their online presence. Follow her on LinkedIn.
Comments
0 responses