How to start a food blog in 8 steps
Oct 13, 2026
/
By Justina B. & Marco C.
/
10 min Read
To start a food blog, choose a niche, pick a platform, set up the site, create content, promote it, and build toward monetization.
Running a food blog is different from managing a general blog. Food content relies on clear visuals that make your recipes look worth trying. You also need to provide complete ingredient lists and step-by-step instructions readers can follow.
Your recipes should use structured data to help them show up in search with images, star ratings, and cook times. Choose a clear content angle and post consistently, especially in a competitive niche.
1. Choose your food blog niche
To choose your food blog niche, identify a specific type of food content, a target audience, and an angle that separates you from existing blogs. Starting a blog follows the same general process regardless of niche, but your food angle shapes everything from content to design.
Before you start publishing, answer three questions:
- What type of food content will you create? Recipes, restaurant reviews, cooking techniques, ingredient deep-dives, meal plans, or a mix.
- Who is it for? Busy parents, college students, home bakers, people managing dietary restrictions, or travelers looking for local food recommendations.
- What will make your blog different? Your specific expertise, a unique format, an underserved cuisine, or a perspective that existing blogs don’t cover well.
Some niche examples that combine specificity with enough room to grow:
- Quick weeknight meals for busy parents.
- Gluten-free baking with detailed substitution guides.
- Budget-friendly vegetarian recipes under $10 per serving.
- Regional cuisine from a specific country or city.
- Restaurant and street food reviews in a particular location.
- Beginner cooking techniques with step-by-step photo guides.
Passion matters, but audience demand matters too. A niche only works if enough people search for that type of content. Google Trends shows whether interest in a topic is growing, stable, or fading over time.
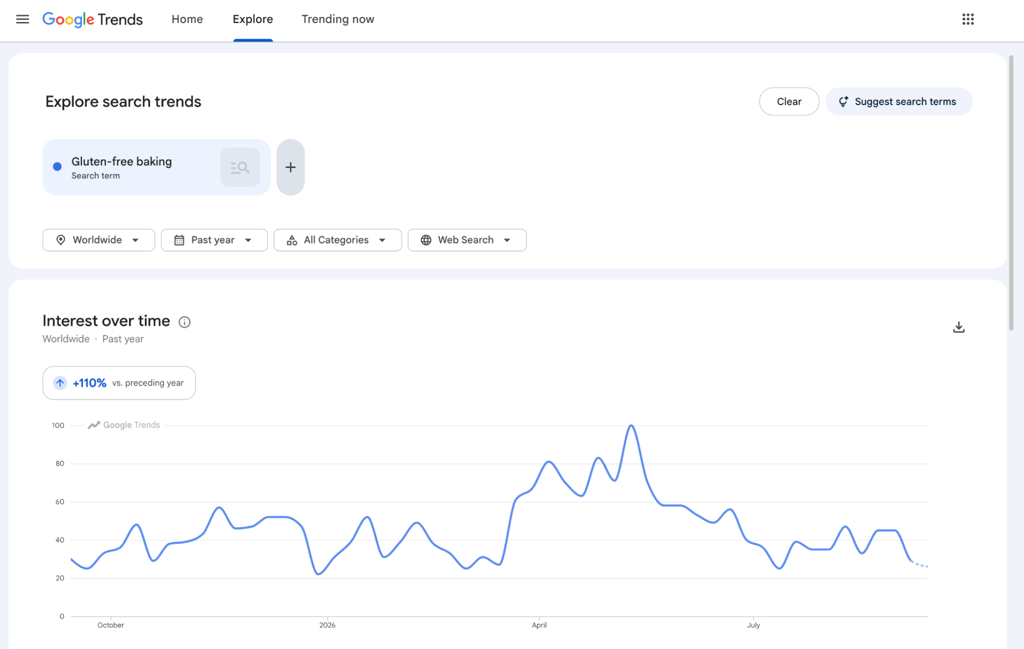
For actual search volume numbers, tools like Ahrefs, SEMrush, or the free Ubersuggest give you a clearer picture of how many people search for specific terms each month.
The more specific your angle, the easier it is for readers to remember your blog and come back. “Food blog” is a category. “30-minute Mediterranean recipes for weeknight dinners” is a niche.
Prefer building manually in WordPress over the AI builder? This video walks through the full setup, including organizing recipes into categories and subcategories.
2. Choose a blogging platform
Select a blogging platform based on simplicity versus flexibility. A website builder keeps things simple, while WordPress gives you more room to grow. Several blogging platforms work for food blogs, but two main approaches stand out.
WordPress gives you more customization options. This matters for recipe-heavy blogs. Dedicated recipe plugins like WP Recipe Maker format ingredients, cooking times, and instructions automatically. WordPress also supports SEO plugins, hundreds of food-specific themes, and full control over structured data, which helps your recipes stand out in search results.
A website builder is a simpler route than WordPress. Hosting, design tools, and a domain come bundled together.
Hostinger AI Builder offers two ways to create your site. A drag-and-drop mode where you describe your food blog and customize a generated layout, and a conversational mode where you build through back-and-forth prompts for more complex designs. Either way, you can get a working food blog online without having to manage plugins or updates.
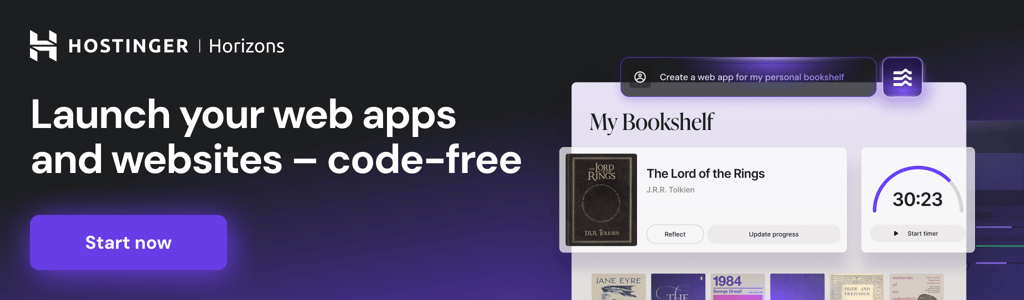
A website builder helps you publish faster when speed and simplicity come first. WordPress is the stronger foundation if you want full control over recipe formatting and SEO.
3. Set up your food blog
Set up your food blog by registering a domain, connecting to hosting, and confirming the site works before you start designing.
Pick your domain name. Choosing a domain name comes down to a few things: easy to spell, easy to remember, relevant to your niche, and free of unnecessary hyphens or numbers, for example, weeknightmeals.com, thebakingcorner.com, or eatlocaldallas.com.
Make sure the name isn’t so narrow that it limits future content, and check whether it’s available as a handle on the social platforms you plan to use.
Domain Name Checker
Instantly check domain name availability.
Set up hosting. Website builders bundle hosting into the subscription. Self-hosted WordPress requires you to purchase a hosting plan and install WordPress on it. Hostinger offers both: Hostinger AI Builder includes hosting, and managed hosting for WordPress handles smart auto-updates, malware scanning, and LiteSpeed caching to keep recipe pages fast.
Whichever host you choose, make sure it can handle the demands of image-heavy food content without slowing your site down. Choosing a web hosting provider breaks down the key factors.
Finish the technical setup. Install or connect your blogging platform, enable SSL, and confirm your site loads correctly before moving to design.
4. Design your food blog
Design your food blog around two priorities: making your content easy to find and making your food look good. Readers decide within seconds whether your site looks trustworthy and appetizing.
Focus on what a food blog actually needs:
- A clear homepage. Visitors should understand your niche within seconds of landing on the page.
- Easy navigation and content categories. Organize posts by meal type, cuisine, dietary preference, or cooking method.
- An about page. Introduce yourself, your food background, and why you started the blog.
- A contact page. Include it for reader questions, collaborations, and brand partnerships.
- Mobile-friendly layout. Food blog readers often browse on phones. Your design needs to work on small screens.
- Optimized images. High-quality food photos are essential, but compress them to avoid slowing down your site.
- Clear recipe layouts. Each recipe should follow a consistent format that readers can scan quickly.
Hostinger AI Builder includes pre-made templates filtered by blog category, so you can start with a layout built for food content and customize it from there. Adjust your homepage, navigation categories, and image placement to match your niche.
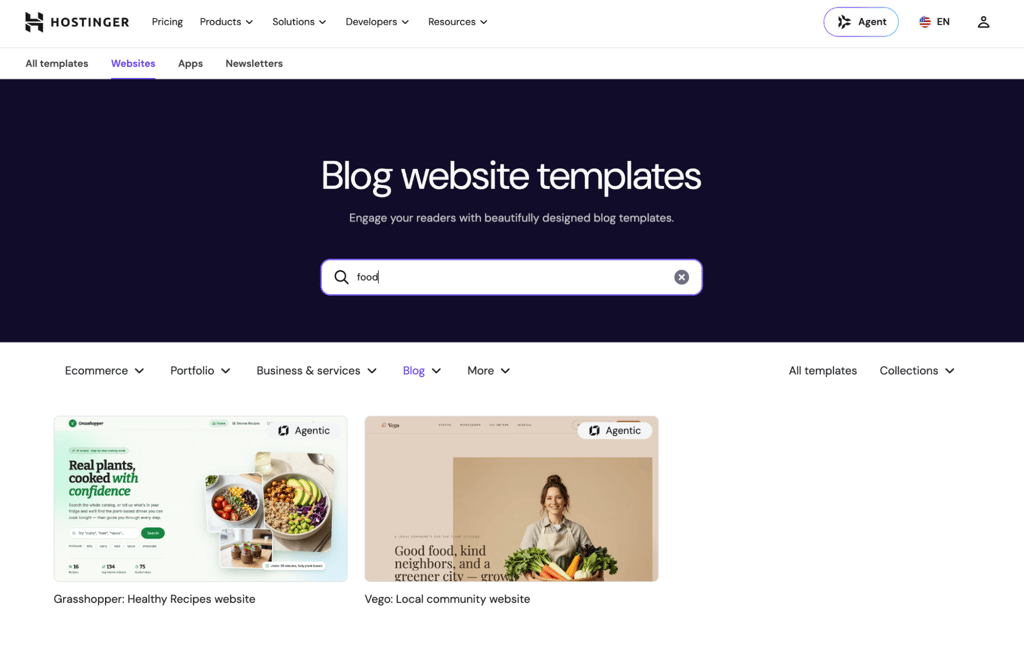
For WordPress, install a free food-specific theme from the official WordPress.org directory, or get a premium theme like Astra, which includes food and baking starter templates. Add a contact form using plugins like WPForms or Contact Form 7 so readers can reach you.
5. Plan your food blog content
Plan your food blog content by defining recurring categories, researching what your audience searches for, and building a publishing schedule before your first post goes live.
Define three to five recurring content categories. These are the core topics you’ll return to consistently. For a baking blog: bread, cakes, cookies, beginner techniques, and ingredient guides. For a healthy eating blog: meal prep, quick dinners, smoothies, and nutrition basics.
Research what your audience searches for. Use free keyword tools, Google’s autocomplete suggestions, and “People Also Ask” results to find specific questions your readers care about.
Plan an initial batch of posts before launch. Have at least five to 10 posts ready or in progress before going live. This gives visitors enough content to explore and helps search engines find and list more of your pages from the start.
Balance evergreen and seasonal content. Evergreen recipes like pasta sauce or chocolate chip cookies bring steady traffic year-round. Seasonal content like holiday cookies or summer salads drives traffic spikes at the right time. Plan for both when you map out your publishing schedule.
Choose a realistic publishing frequency. A tested recipe with original photos, written instructions, and structured data can take several hours to produce. One to two posts per week is a common starting point for food blogs, but publishing one solid post every two weeks works better than four rushed ones.
Use an editorial calendar. Create a simple spreadsheet with columns for publish date, recipe title, content category, and status. Plan at least two to four weeks ahead so you can prep ingredients, shoot photos for several recipes in one session, and avoid last-minute scrambles.
Related content categories also make it easier to connect posts through internal links. Group similar topics together, and you’ll naturally spot more chances to link one post to another. A reader who finds your sourdough bread recipe should be one click away from your guide on working with yeast.
6. Create and optimize your food blog posts
To create and optimize food blog posts, match a specific format to each topic, write headings that match what readers are searching for, and include the details readers need to cook, shop, or learn. Food blog content comes in several formats, and strong blogs mix a few:
- Recipes with everything a reader needs to cook the dish.
- Restaurant and food reviews covering taste, value, and atmosphere.
- Cooking guides and techniques for skills such as knife work, sauce-making, and grilling.
- Ingredient guides on how to select, store, and use specific ingredients.
- Meal plans and recipe collections that group recipes by theme, such as weeknight dinners or holiday baking.
Writing strong recipe posts
Recipe content is the backbone of food blogs. For each recipe you publish, include:
- A clear, descriptive title that matches what your audience searches for.
- A focused introduction explaining why the recipe works or when to serve the dish.
- Complete ingredient quantities with specific measurements.
- Preparation and cooking times.
- Servings or yield.
- Step-by-step instructions your readers can follow without having to guess.
- Substitution suggestions or troubleshooting tips were helpful.
- Original photos of the finished dish, key steps, or ingredients.
Share your own experience. Mention it if you tested the recipe three times, adjusted the sugar ratio, or found a specific flour brand that works best. That detail builds your credibility and helps your readers get better results.
Add structured data to your recipes
Recipe structured data, also called schema markup, is code that tells search engines what your recipe contains. When your recipe has structured data, search engines can display it with an image, star rating, cook time, and calorie count directly in the results. This gives searchers a preview before they click, making your recipe stand out on the page.
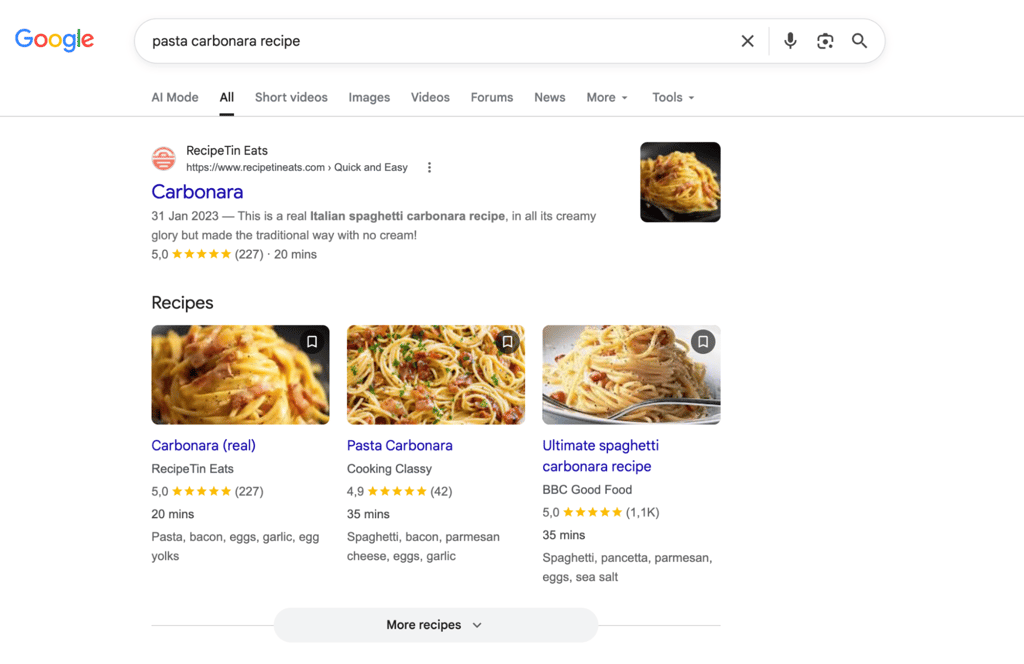
On WordPress, install a recipe plugin like WP Recipe Maker or WP Tasty. Enter your recipe details into the plugin’s recipe card, and it automatically generates structured data. Hostinger AI Builder includes built-in SEO tools, though for recipe-specific schema, you get more control with WordPress plugins.
Using AI for content creation
AI tools can help you outline posts, generate title ideas, draft meta descriptions, and tighten your writing, and increasingly, that’s built directly into website builders and WordPress plugins, so you don’t need separate software. Treat AI output as a starting point that still needs your expertise, voice, and recipe-specific details.
7. Promote your food blog
Promote your food blog through a mix of SEO, social media, email marketing, and collaborations. Your best recipes reach far more new readers when you consistently promote your blog across these channels, so build time for it into your regular routine.
SEO. Search engine optimization is how food blogs earn consistent, long-term traffic. Research keywords your audience searches for and use them naturally in titles, headings, and body text. Google also favors sites that load fast and work well on mobile, so keep both in mind as you build out your blog.
Social media. Instagram, TikTok, and Pinterest are natural fits for food content. Share finished dishes, quick recipe videos, and behind-the-scenes cooking moments. Prioritize the platforms where your audience already spends time.
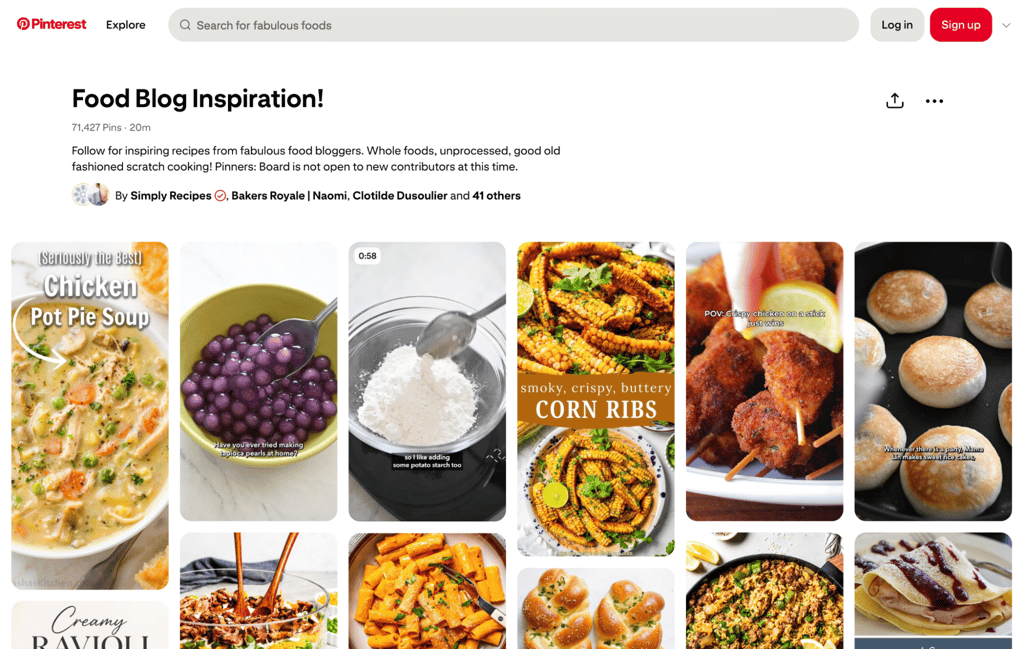
Pinterest. Pinterest works more like a search engine than a social network for food content. Create pin-worthy images for your recipes and link them back to your blog. Well-optimized pins can drive traffic for months.
Email marketing. An email list is an audience you own. Offer something valuable for signups, like a free recipe collection or printable meal plan.
Hostinger Reach lets you segment your audience and automate email sequences, from welcome emails to regular newsletters, so you can stay in touch without manually sending every campaign. The free plan covers up to 100 subscribers, with paid plans available as your list grows.
Collaborations. Partner with other food bloggers, chefs, or brands that align with your niche. Guest posts, recipe collaborations, and joint social content help you reach new readers.
Engage with your audience. Reply to comments, respond to messages, and pay attention to reader questions. Those questions often become your best future content ideas.
8. Monetize your food blog
To monetize a food blog, use display advertising, affiliate marketing, sponsored content, digital products, or memberships.
Display advertising works best with meaningful monthly traffic. Premium networks like Mediavine require sites to generate at least $5,000 in annual ad revenue. For newer blogs, Journey by Mediavine offers an entry path starting at 1,000 monthly sessions. Google AdSense accepts smaller sites than either program, but it typically pays less per visitor.
Affiliate marketing earns you a commission when readers buy through your links. Recommend cookware, kitchen tools, or ingredients you actually use and earn a commission on purchases through your links. Be transparent about affiliate relationships.
Sponsored content becomes an option once you have an established readership. Brands pay you to create a recipe featuring their product, product reviews, or integrations that align with your content. Only accept sponsorships that fit your audience.
Digital products let you monetize expertise directly. Cookbooks, meal plans, grocery lists, cooking courses, and substitution guides sell well for food bloggers.
Memberships and subscriptions work when you can offer ongoing premium value: exclusive recipes, meal plans, community access, or live cooking sessions.
Don’t expect overnight income from any of these. Focus on traffic and trust first – monetization follows once you have an audience, and there are other ways to make money blogging as you grow
Tips for running a successful food blog
Once your publishing workflow is in place, focus on improving content quality, building repeat readership, and learning which topics perform best.
- Test recipes before publishing. Cook each recipe at least twice. Note anything that could trip up a less experienced cook.
- Build recognizable content series. A weekly “5-ingredient Friday” or monthly “seasonal produce spotlight” gives readers a reason to return.
- Update your best-performing recipes. Better photos, clearer instructions, and updated tips can push a good post higher in search. Refreshing old content often drives more traffic than publishing something new.
- Use seasonality. Publish holiday recipes and seasonal guides a few weeks before people start searching for them.
- Create printable recipe cards. A simple “print recipe” button or a downloadable card gives readers something to save and makes your site easier to use while cooking.
- Create content that stays useful for years. Measurement conversion charts, ingredient substitutions, and equipment reviews continue to help readers long after you publish them.
- Look at what’s outranking you. When a competitor’s post beats yours in search, check what it covers that yours doesn’t, then fill that gap.
- Expand what’s working. If your sheet pan dinners get three times the traffic as your desserts, create more sheet pan content and related posts, like pantry-staple guides.
- Track more than pageviews. Comments, shares, and time on page reveal what resonates better than raw traffic numbers. Use that data to decide what to write next.
How much does it cost to start a food blog?
The total cost depends on your platform and which optional tools you add:
- Domain name. Typically $10-20/year. Hostinger includes a free domain with hosting plans.
- Hosting or platform subscription. Shared hosting plans start at around $2-$10/month, depending on the provider and plan tier. Hostinger AI Builder includes hosting.
- Premium theme or template. Optional. Quality free themes exist for both WordPress and website builders. Premium options run $30-$80.
- Recipe and SEO plugins. Optional. Free versions of WP Recipe Maker and Yoast SEO cover the basics on WordPress.
- Photography equipment. A smartphone and good natural lighting work well to start. Upgrade when your income justifies it.
- Email marketing tools. Free tiers like Hostinger Reach cover up to 100 subscribers. Paid plans start from $5/month as your list grows.
With a hosting plan that includes a free domain, you can start a food blog for as little as $2-$3/month. Buying a domain separately adds $10-$20/year. Everything else on this list has a free option to begin with, so upgrade only when your blog’s growth justifies it.
What to do after launching your food blog
After launching your food blog, publish consistently, watch your analytics, and pay attention to which recipes attract traffic, comments, and shares once your blog is live. This is where you start learning which topics, formats, and angles actually resonate with your readers.
Once you have published your first 15-20 posts, review which content formats perform best for your audience. You might find that step-by-step cooking guides hold readers longer than ingredient roundups, or that meal prep content earns more saves and shares than single-serve recipes.
Use reader comments, email replies, and search performance data to spot which topics deserve new content. Reader questions make strong content ideas because they show you exactly what people are already searching for, instead of guesswork.
A growing content base helps you to drive more traffic to your blog through SEO and promotion. Each well-researched recipe you publish strengthens your site’s authority and gives readers more reasons to stay.
The best time to start is before you feel fully ready. Set up your food blog, publish your first recipe, and improve from there.
This article is a localized version of How to start a food blog in 8 steps, originally published in English.

Justina is a Content Writer passionate about marketing, with a background in social media and customer success management. She also loves reading books, traveling and exploring new places as well as cooking, and trying out new recipes. Follow her on LinkedIn.

Marco Chiesi is the Head of WordPress at Hostinger, with over 20 years of experience as a software engineer in the web industry. He specializes in open-source technologies and the WordPress ecosystem, where he has contributed in different areas: Plugin Developer (with over 10 million downloads), WordCamp speaker and organizer, Meetup organizer, Translator, and Core Contributor. He is passionate about leading his team to create innovative solutions for Hostinger's web hosting product, which hosts over 5 million WordPress installations. Follow him on LinkedIn.