WordPress localhost: how to install WordPress locally in 6 steps
May 21, 2026
/
Jordana A.
/
3 min Read
WordPress localhost refers to a WordPress installation that runs on a computer’s local resources. It’s often used for development and test purposes, minimizing the need for a web hosting plan and the risk of causing issues on the production site.
This article will cover how to perform the WordPress localhost installation in six easy steps. We will use the XAMPP localhost software as it’s free and supports various operating systems.
First, let’s explore how a WordPress localhost version works and different ways to benefit from having a locally hosted WordPress website.
Why Install WordPress on Localhost
When installing the WordPress CMS locally, the entire website is placed in a localhost environment. The website establishes a connection with a local machine using the loopback address network instead of going over the internet, hence the term “local.”
A localhost WordPress website allows web developers and designers to test features before implementing them on a live website. As a result, you can fix any bug immediately without affecting the user experience.
Users who want to learn about web development can also benefit from this WordPress version. You can create a copy of a live site on your own computer and use it for various testing processes without buying a hosting plan or a domain.
Looking to install WordPress on your web host?
Check out our Complete WordPress Installation Guide
How to Install WordPress on Localhost in 6 Steps
Various local server software options are available for creating a local WordPress site. In this step-by-step tutorial, we will use XAMPP ‒ the most popular cross-platform web server for PHP development.
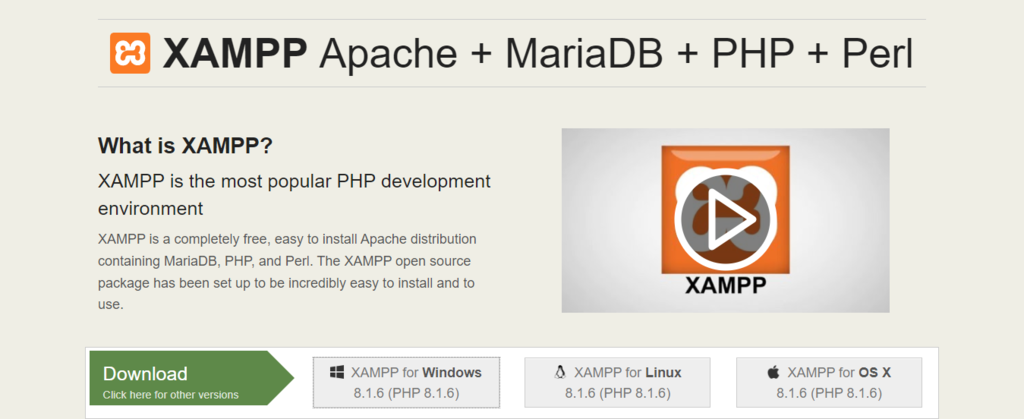
1. Download XAMPP
Go to the official Apache Friends website and download the correct XAMPP software version based on your operating system.
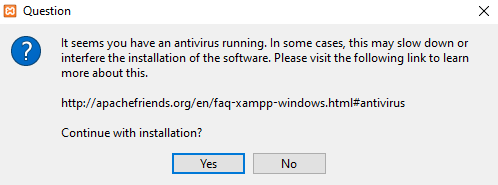
2. Install and Run XAMPP on Your Computer
Run the XAMPP installer and follow the installation instructions using the default settings. If you see a pop-up indicating that your antivirus software might affect the installation process, click Yes to continue.
After installing XAMPP, run the application and configure the environment. In the XAMPP control panel, start Apache and MySQL modules to perform the WordPress localhost installation.
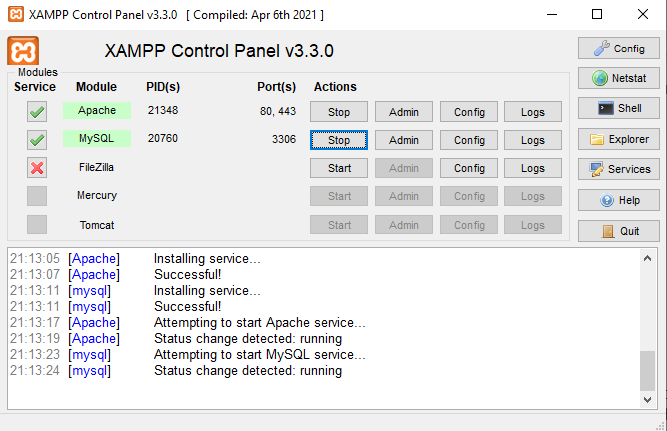
If you’re running on the Windows operating system, there’s a chance you might encounter the localhost refused to connect error. Disabling your firewall temporarily or stopping the program that uses port 80 should resolve this issue.
3. Download WordPress
Once the server is up and running, the next step is installing WordPress. Download the latest WordPress version, then extract the ZIP file.
Navigate to your XAMPP folder in the C drive (C:xampp) and locate the htdocs folder. Upload the extracted WordPress files there. We recommend renaming the new folder with your website’s name to make web development on the XAMPP server easier.
4. Create a Local Database
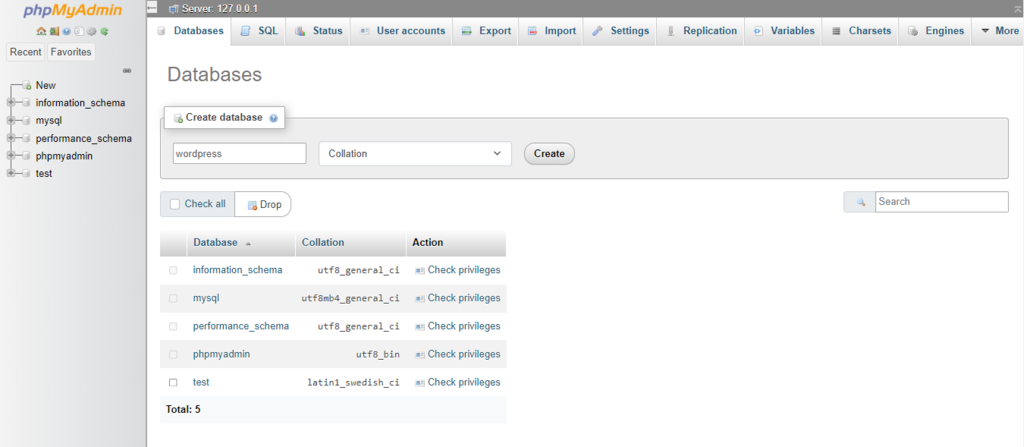
Go back to your XAMPP control panel and select the Admin button of the MySQL module to launch phpMyAdmin ‒ an administration tool for managing MySQL and MariaDB databases. It will help you create a local MySQL database for the new website.
Open the Databases tab and enter the database name into the Create database section. Set the dropdown menu’s value to Collation and hit the Create button. Your new MySQL database should appear on the left sidebar of the web page.
5. Install WordPress on Localhost
Finish installing WordPress locally by visiting http://localhost/foldername via your browser. Don’t forget to change the “foldername” placeholder with the folder name you chose in the third step.
WordPress requires a list of information to build the localhost site. Fill in the database information as follows:
- Database name ‒ the name of the database you created in phpMyAdmin.
- Username ‒ enter “root” as the default username.
- Password ‒ leave the MySQL database password field blank.
- Database host ‒ keep the default “localhost.”
- Table prefix ‒ keep the default “wp_.”
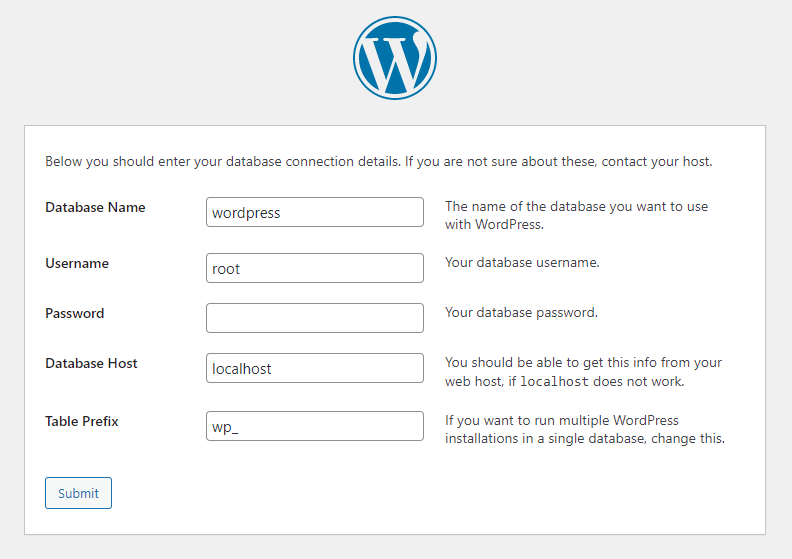
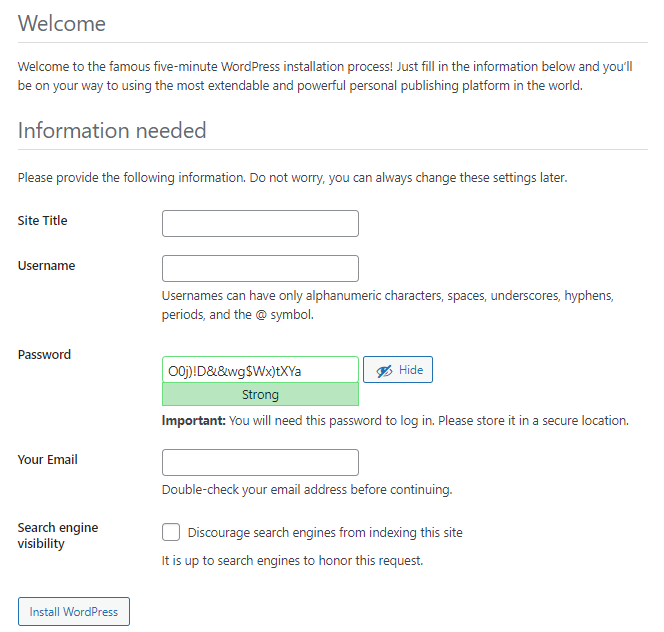
Once done, hit Submit -> Run the installation. Fill in the additional information needed, like the site name and login credentials, and click on the Install WordPress button.
Pro Tip
If you’re running on Windows or Linux, WordPress will automatically store this information in the wp-config.php file. WordPress will provide a code snippet for macOS users to replace the existing wp-config PHP file content.
6. Check the Local Site You Built
That’s it – your local test site is now ready. Go to http://localhost/foldername/wp-admin and use the login credentials you created in the previous step to access the WordPress dashboard.
Conclusion
Running a WordPress installation requires a hosting plan and a domain name. However, if you only need it for testing or learning how to use WordPress, installing the CMS on localhost and storing all the data locally should meet your needs just fine.
Here’s a recap on how to install WordPress on a localhost environment:
- Download XAMPP.
- Install XAMPP on your computer.
- Download the latest version of WordPress.
- Create a local database in phpMyAdmin.
- Install WordPress on localhost.
- Check the local test site via your browser.
Don’t hesitate to leave a comment below if you have any questions. Good luck!
Learn Other Advanced WordPress Techniques
How to Create a Shortcode in WordPress
How to Speed Up WordPress
How to Remove Sidebar in WordPress
How to Use WordPress Icon Fonts
WordPress A/B Testing Guide
How to Create a Staging Environment in WordPress

Jordana is a Senior Content Writer with a background in Information Systems. She has over five years of experience in WordPress and is casually dabbling with PHP and MySQL. Her passion for writing and technology drives her to create tutorials for anyone wanting to build their online presence. Follow her on LinkedIn.