How to change Minecraft spawn protection
Mar 10, 2026
/
Alanas M.
/
4 min Read

In Minecraft, spawn protection prevents players from placing and destroying blocks at the point where new players first enter a world – often referred to as the spawn area. This feature, exclusive to the Java edition, allows only operators (OPs) to place or destroy blocks within the spawn protection area, helping maintain a fair, welcoming, and stable environment.
Spawn protection prevents immediate griefing, preserves server landmarks like information boards, portals, and shops, and ensures a safe starting point. However, it does have limitations. For instance, it cannot prevent mob griefing, explosion damage, or activating pistons, which malicious players may exploit to bypass spawn protection.
This tutorial will guide you through setting up spawn protection on your server to keep the spawn area secure and functional.
How to change spawn protection in Minecraft
1. Accessing and modifying server properties
To enable spawn protection, locate your server properties. You can do this in multiple ways:
In Hostinger’s Game Panel UI
If you purchased one of Hostinger’s Minecraft hosting plans, you can access the server properties through your browser.
- Log in to your Hostinger account.
- In hPanel’s left-hand menu, click VPS.
- Click Manage next to your server.

- Then, click Manage panel to log in to your Game Panel using your administrator credentials.
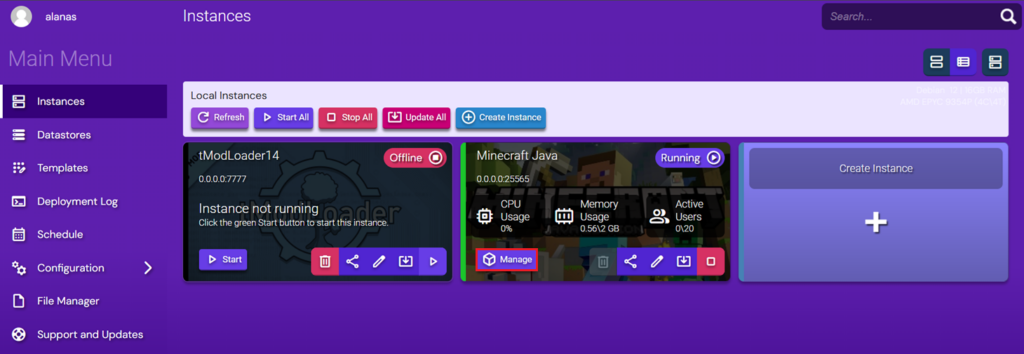
- In the Instances section, locate your Minecraft server and click Manage.
- Once you’re in the Instance Management interface, click Configuration in the left-hand menu and select Minecraft.
- At the top, click Gameplay and Difficulty. Spawn protection configuration will be under Spawn Protection Radius.
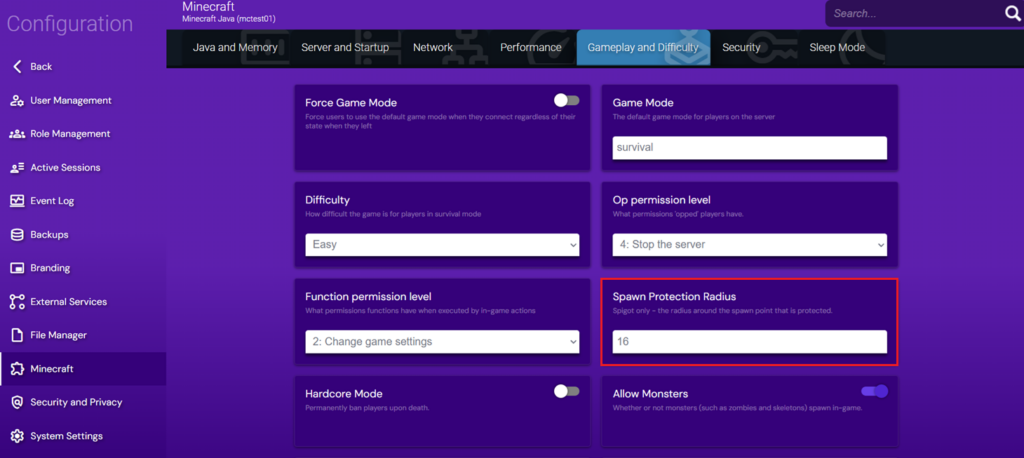
- Enter the new value. To save, press Enter.
Editing server.properties in Game Panel’s File Manager
You can also edit server properties directly through the Game Panel:
- In hPanel, Click Manage next to your server.
- Click Manage panel.
- Under your Minecraft Instance, click Manage.
- Click File Manager. This will display all server files for your instance.
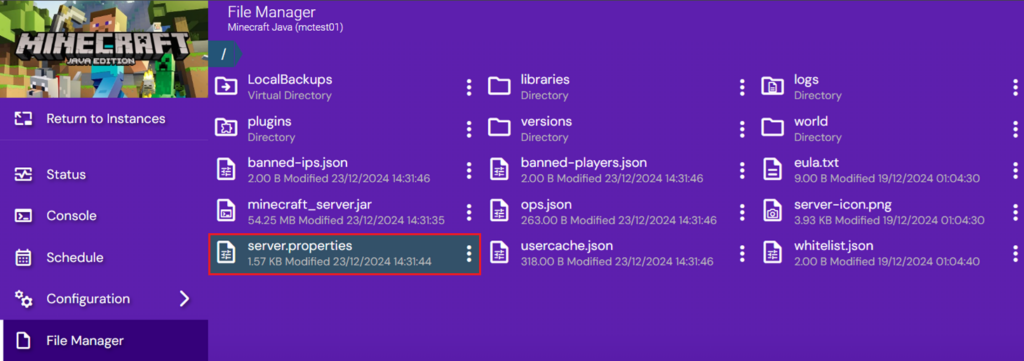
- Find the spawn-protection parameter.
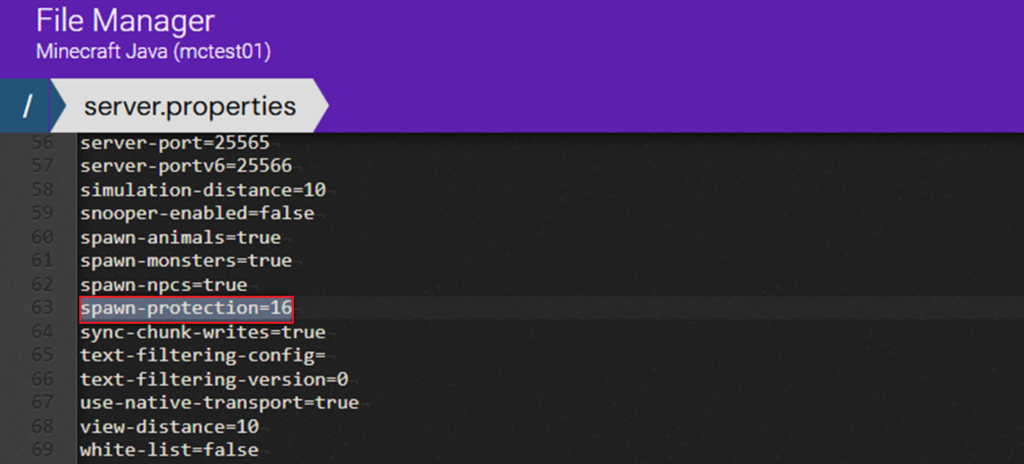
- Adjust the value, click Save, and then Close.
- Click the triple dot near server.properties and then Import Configuration.
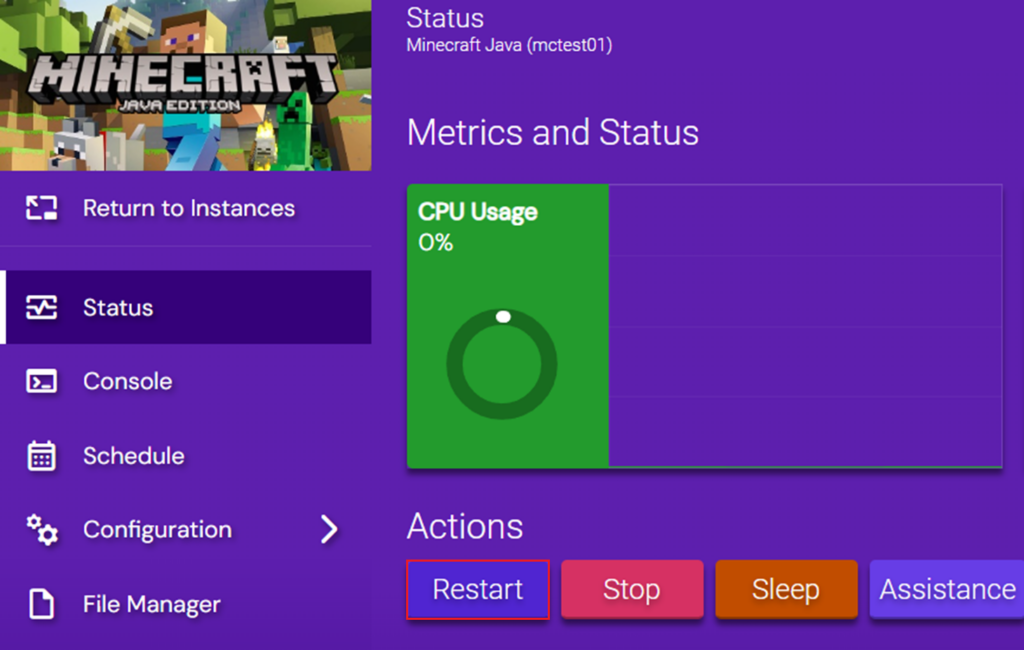
2. Saving and restarting the server
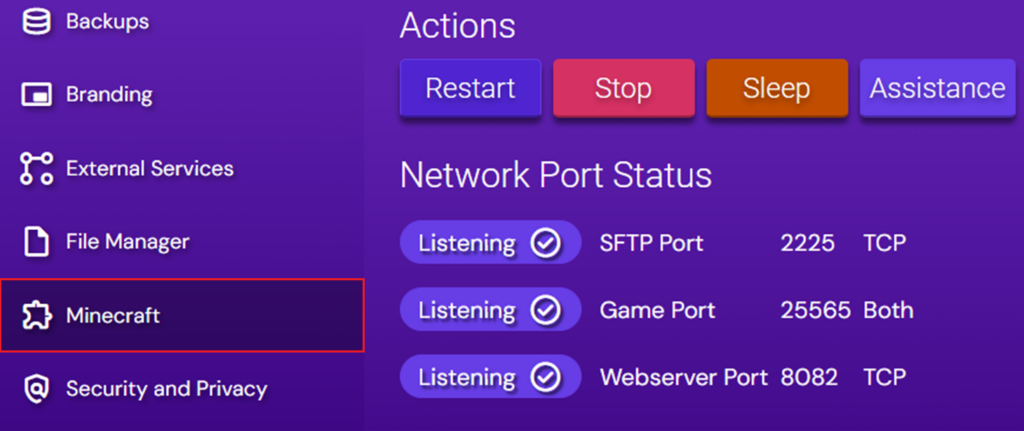
We need to restart the server to apply the changes. On Game Panel, you can restart by clicking Manage under your Instance and then Restart.
Alternatively, by connecting to the server directly, you can run the command
systemctl restart minecraft
Now that your Minecraft server is restarted, you can log in and check if it works!
Minecraft spawn tips
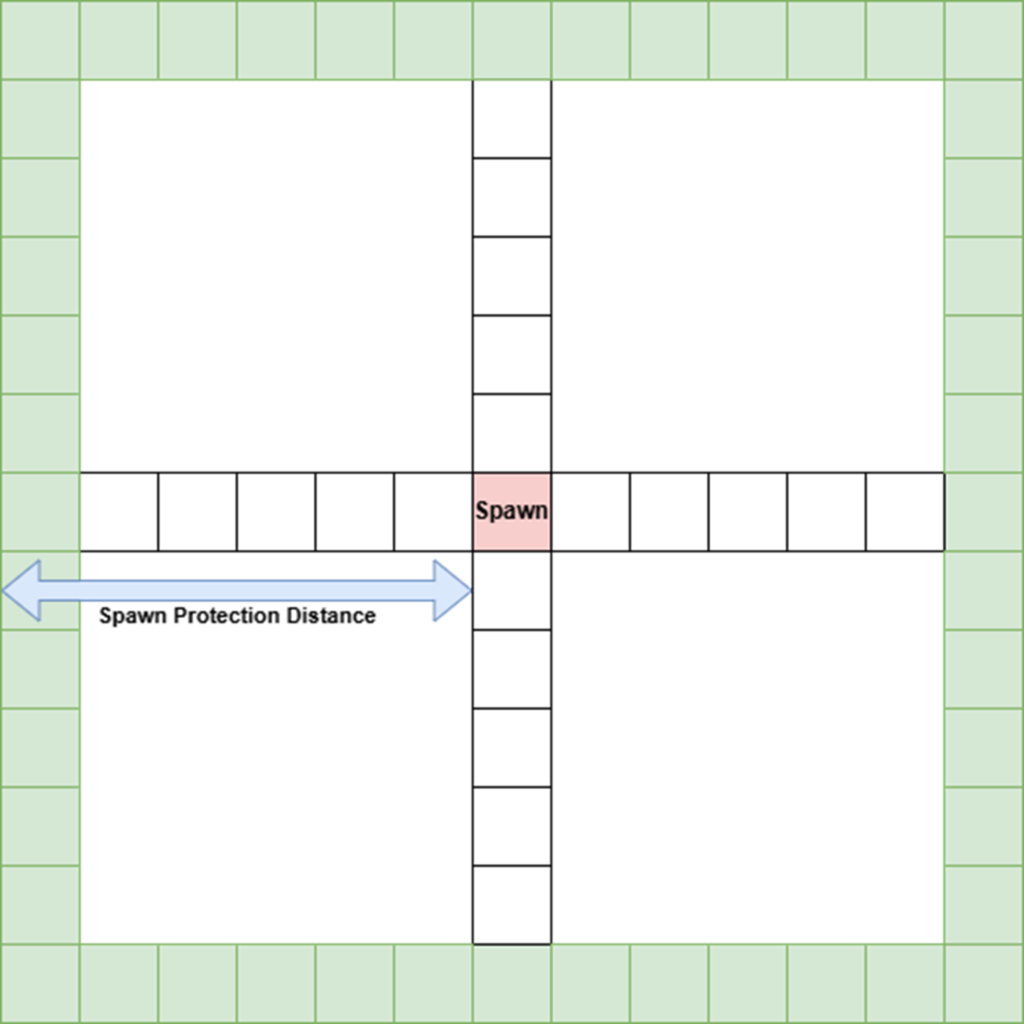
First, let’s break down how spawn protection works. The spawn-protection parameter value is used to determine the size of the area you wish to protect. It defines the length from the spawn point to the side of the spawn protection field.
If the value is 1, protection applies to a 3×3 region around the spawn, a value of 3 applies to a 7×7 region, and so on. The default value of 16 protects a 33×33 area around spawn, while a value of 0 disables spawn protection completely.
Decide on the spawn protection size
To determine the right size for spawn protection, start by measuring the distance in blocks from your spawn point to the border of the area you want to protect in all four directions. Note down these distances, and use the largest value as your spawn protection size to ensure the entire area is covered.
While this approach works well for most cases, different server types may have different needs:
- PvP servers: Players are unlikely to build around the spawn area, so it’s often beneficial to extend the spawn protection region to a larger area.
- Survival servers: Since we expect players to build and interact with the environment, it is better to limit spawn protection to a smaller area.
- Private servers: Depending on the trust level among your players, you may not need any spawn protection.
Test your changes
To begin, download your world from your server:
- Connect to your server through your preferred method, such as an FTP client.
- Navigate to the world folder.
- Download the contents of this folder to your device.
Once it’s downloaded, host your Minecraft world in a test server – separately from the live one.
After hosting the world in a test environment, prepare it for testing:
- If your Minecraft Instance is not running, navigate to Status and click Start.

- On the left-hand menu, click Console and run the following commands:
/deop [Your Username]
/op [Random Username]
These commands ensure that at least one OP exists on your server.
With your test environment ready, you can safely experiment with different spawn protection values. Follow these steps:
- Set spawn protection to your desired value.
- Restart your server.
- Connect to your test server.
- If you’re not at your spawn point, return there using one of these methods:
- Teleport manually: If you know the coordinates of your spawn point, run this command in the console:
/tp [Your Username] [X coordinate] [Y coordinate] [Z coordinate]
- Quick method: For a simpler option, run this command to return to spawn:
/kill [Your Username]
- Try breaking some blocks within your defined spawn protection area to ensure it’s working as expected.
If the results aren’t what you hoped for, simply adjust the spawn protection value and repeat these steps until you’re satisfied.
Once you find a configuration that works for you, apply it to your live server.
Conclusion
Spawn protection is a server-defined safeguard that helps ensure the initial player experience is secure, consistent, and free from destructive behavior. With the right setup, added spawn protection helps protect important areas and creates a safe, welcoming space for everyone on your server.
Minecraft spawn protection FAQ
What is spawn protection in Minecraft?
Spawn protection is a setting for your multiplayer Minecraft server that determines an area around your spawn point where regular players cannot place or destroy blocks.
How does spawn protection work?
It works by setting a radius for your spawn protection in the server.properties file, which will designate a protected area in which only OPs are able to place blocks or destroy blocks.
How can I enable spawn protection?
You can enable spawn protection by setting a value above 0 for the spawn-protection variable in server.properties and ensuring there’s at least one op in your server.

Alanas is a Content Writer with a foundation in IT and Operations. His expertise spans cloud engineering, DevOps, and process definition and optimization, gained through his experience in fintech and data-driven organizations of various sizes. Outside of work, he enjoys traveling, exploring history, gaming, and spending quality time with his family. Find him on LinkedIn.