How to self-host n8n with Coolify
May 06, 2026
/
Ariffud M. & Valentinas C.
/
8 min Read
n8n is a workflow automation tool that lets you connect apps, automate tasks, and build complex workflows without coding. While it offers cloud-hosted plans, self-hosting n8n gives you full control over data and can be cheaper than managed solutions.
Coolify simplifies self-hosting by providing a user-friendly platform for deploying apps like n8n. With its one-click deployment feature, you can quickly set up n8n and manage it alongside other apps and services from a single control panel.
This guide will show you how to install n8n with Coolify on a virtual private server (VPS). By the end, you’ll have a fully functional n8n instance running through Coolify, so you can completely control your automation workflows.
Prerequisites
Before setting up n8n using Coolify, prepare a VPS, dedicated server, or virtual machine with SSH access to install Coolify. Your system should meet Coolify’s minimum hardware requirements:
- 2 CPU cores.
- 2 GB of RAM.
- 30 GB of storage.
Hostinger’s Coolify VPS hosting is a great choice for running Coolify, offering optimized performance and seamless integration within the platform.
For most use cases, the KVM 2 plan, starting at CA$ 12.59/month with 2 CPU cores, 8 GB of RAM, and 100 GB of NVMe disk space, should be enough for hosting Coolify and n8n.
But if you plan to run resource-heavy workflows or host additional projects alongside n8n, consider a higher-tier plan. You can also easily upgrade your VPS later if needed.
Once your server is ready, set up Coolify on your system. You’ll also need to install Docker because Coolify relies on it.
If you choose Hostinger’s Coolify service, the platform and all of the required components, including Docker, come preinstalled. This saves time and reduces the risk of installation errors from manual setup via the command line.

You can also do a domain name search to assign a custom domain to your n8n instance instead of using a randomly generated one. This step is optional but makes it easier to access your n8n’s dashboard.
If you decide to use a domain, point your domain to your server’s IP address via DNS settings. Then, set up an SSL certificate to secure data transmission between your browser and n8n.
Self-hosting n8n with Coolify
In this section, we’re going to cover all the necessary steps to install n8n on the platform, from setting up Coolify to adding new users to your projects.
1. Installing and configuring Coolify
As previously explained, Coolify comes preinstalled on Hostinger’s Coolify hosting plans. But if you use our regular VPS service or have changed your operating system, you can still reinstall Coolify as a template with these steps:
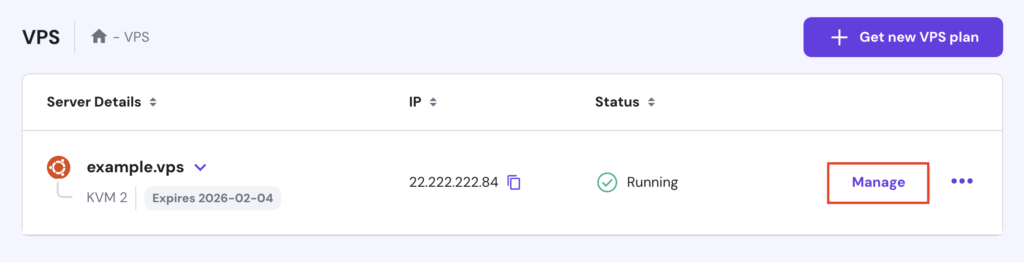
- Log in to hPanel with your Hostinger account and go to VPS → Manage.
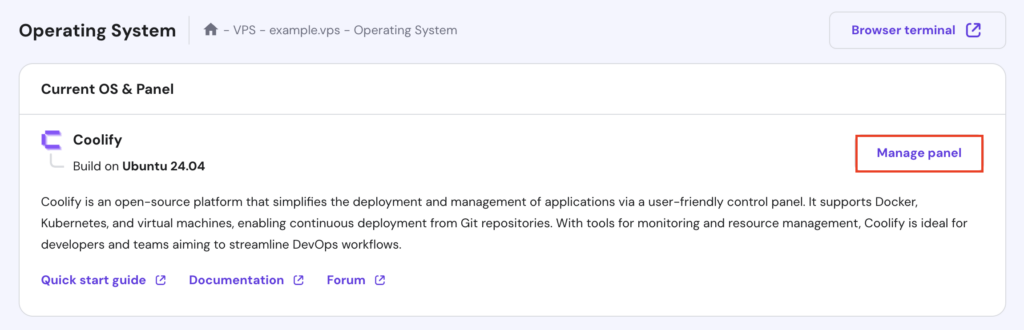
- From your VPS dashboard’s left sidebar, select OS & Panel → Operating System.
- Under the Change OS section, choose OS with Panel → Coolify.

- In the confirmation dialog, click Change OS and type your VPS root password to proceed.
Wait for the installation to complete, which takes about five minutes. Once done, scroll up and hit Manage panel to access the Coolify dashboard.
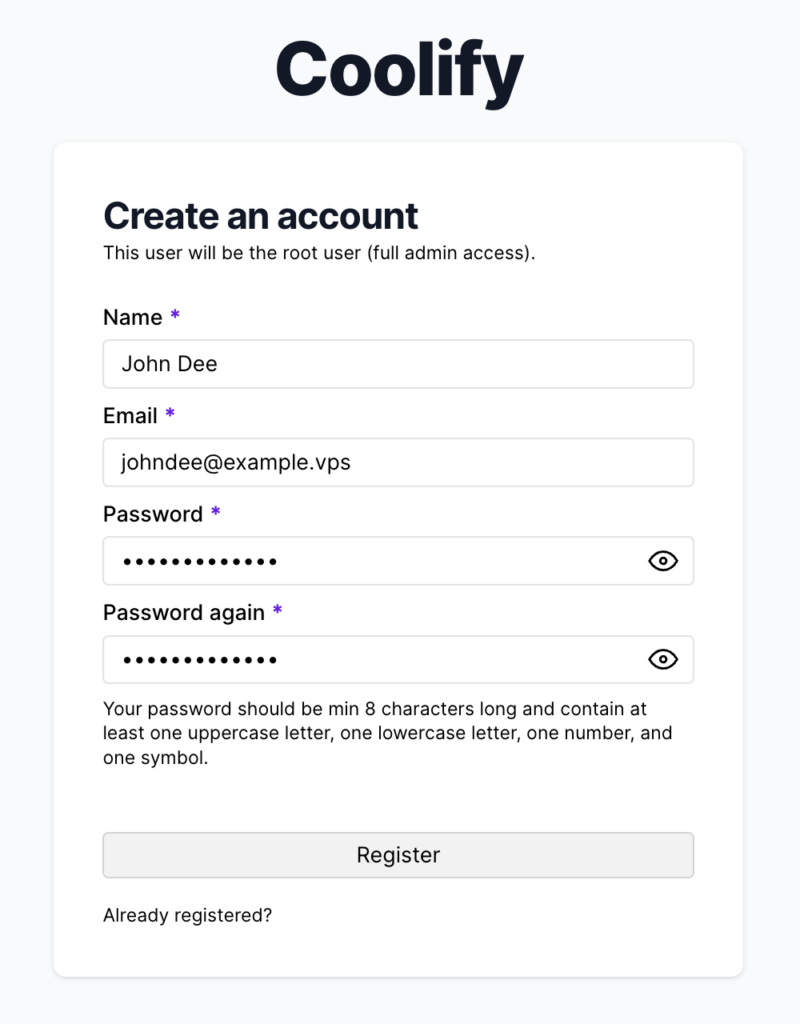
On your first visit, you’ll be prompted to create an owner account and complete the onboarding. Follow the on-screen instructions until you reach the dashboard.
Suggested reading
If you're still unsure about using Coolify to set up n8n, check out our in-depth comparison to see how it stacks up against Dokploy in terms of ease of use, supported integrations, performance, and scalability.
2. Deploying n8n on Coolify
Now it’s time to deploy n8n through the Coolify dashboard. Here’s how:
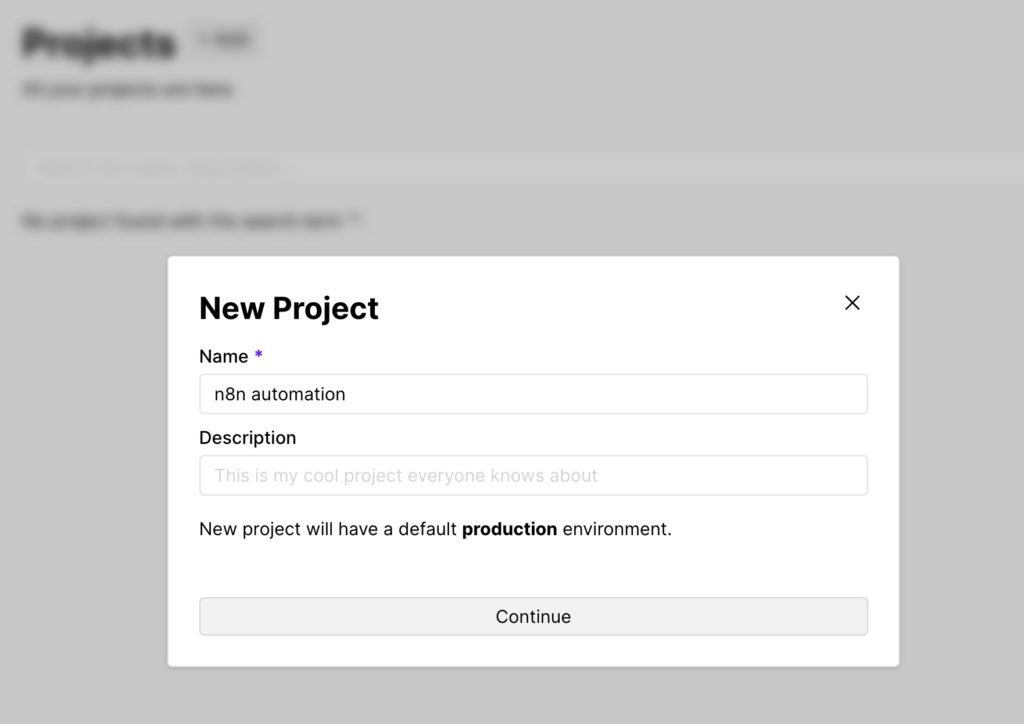
- From the left sidebar, go to Projects → Add. Name your project something like n8n automation and click Continue.
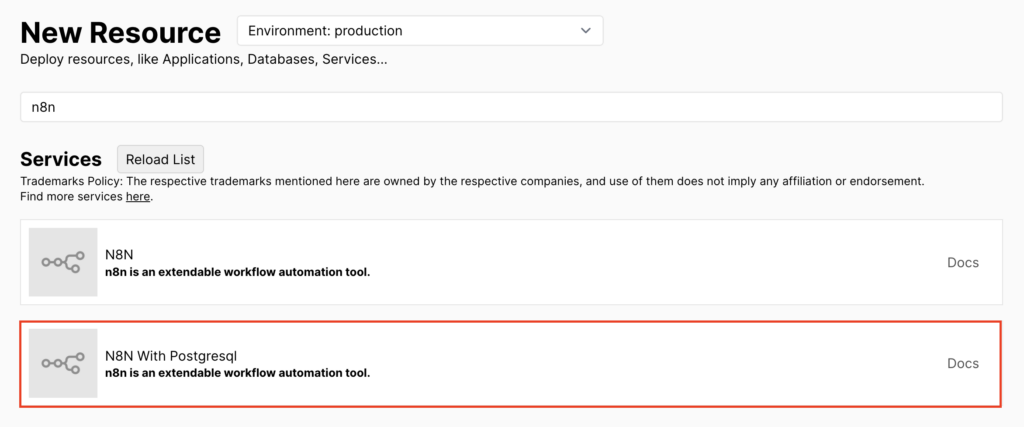
- On the Resource page, select production → Add New Resource.
- Type n8n in the search box and choose the option that includes PostgreSQL. You’ll then be directed to the Configuration page.
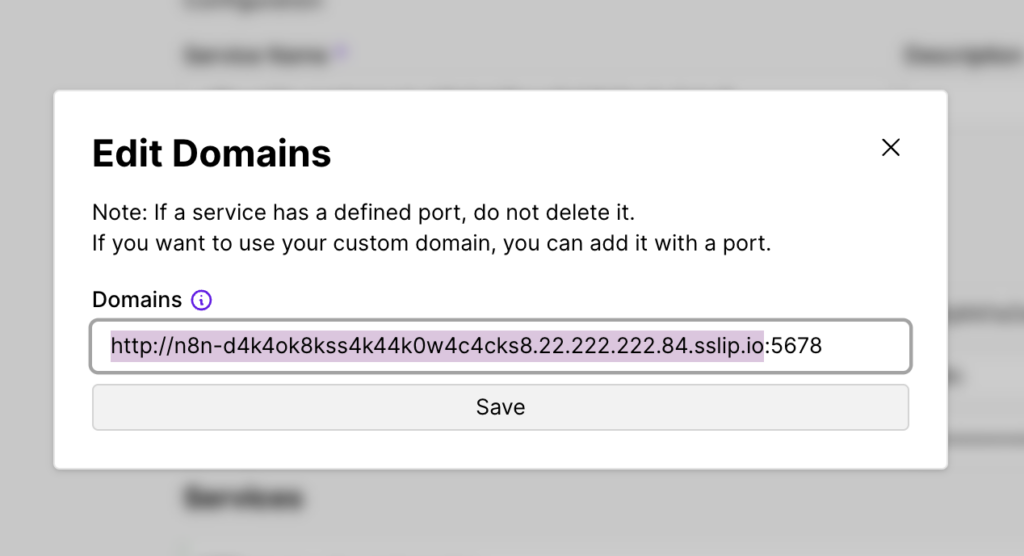
- If you’ve already set up a domain and SSL, hit the Edit button next to the generated random URL and enter your custom domain.
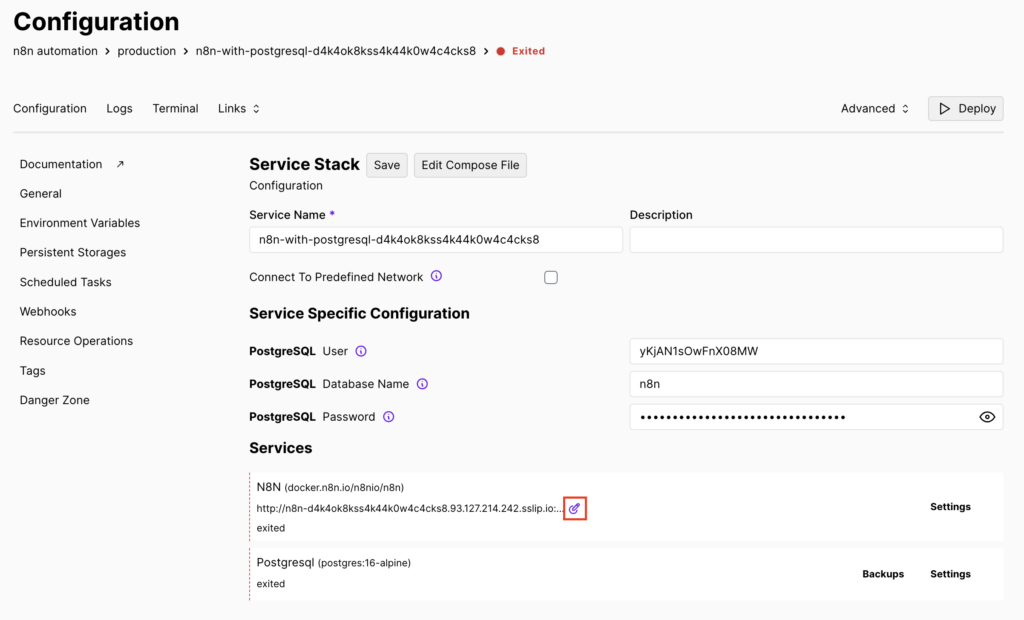
- Otherwise, you must add an environment variable to bypass the security cookie warning by clicking Edit Compose File.
- Add the following line inside the environment section:
- N8N_SECURE_COOKIE=false
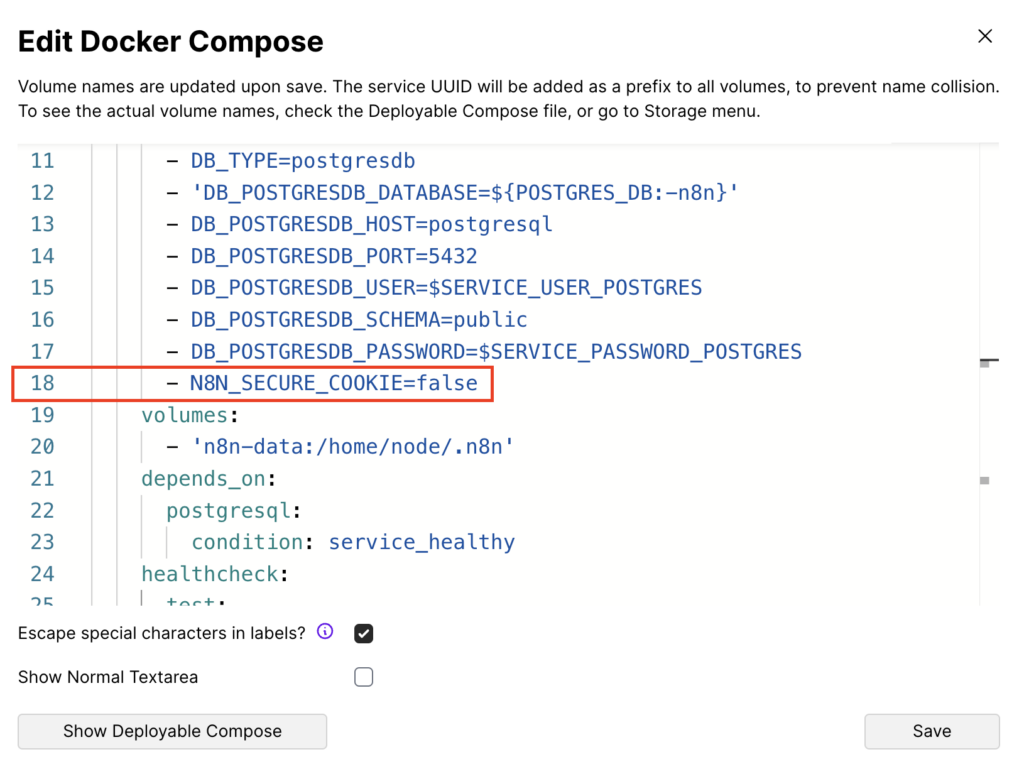
- Once done, click Save. Then, hit Deploy in the top-right corner to start the n8n deployment.
Wait for the process to complete. If you see the Container n8n-[generated name] Started line, your deployment was successful. Click Close (X) to exit the logs.
![The Container n8n-[generated name] Started line in Coolify's Service Startup logs](https://www.hostinger.com/tutorials/wp-content/uploads/sites/2/2025/03/coolify-service-startup-container-n8n-started-1024x675.png)
Suggested reading
Coolify makes hosting n8n easy, but if you prefer to run it directly on your server without Coolify, follow our guide to install n8n on a VPS.
3. Accessing your n8n project
After successfully hosting n8n on your own server via Coolify, the next step is to access your new project and start using n8n. Here are the instructions:
- Copy and paste the generated or custom domain without the :5678 port into a new browser tab. This will take you to the n8n setup page.
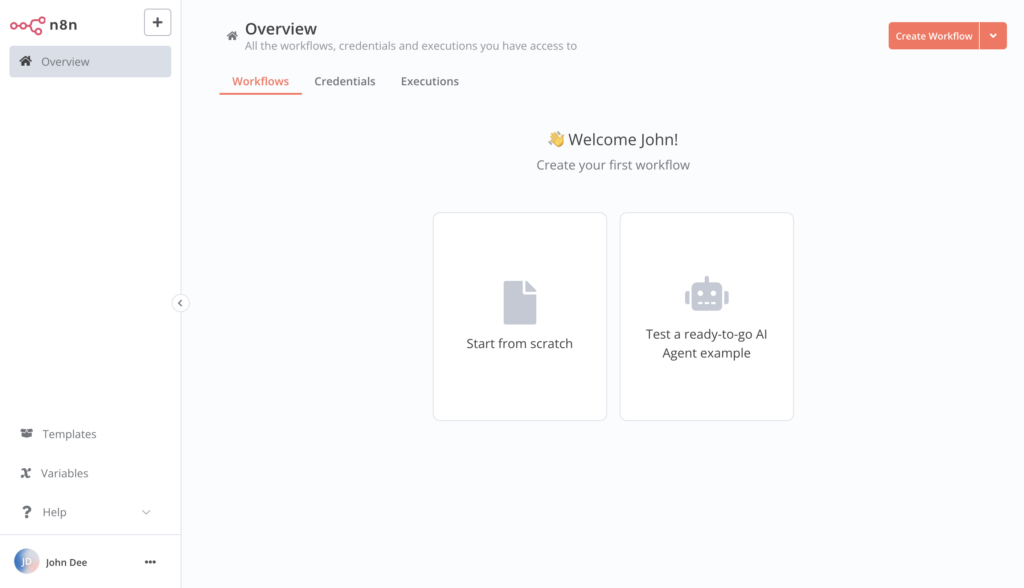
- Create an n8n owner account by following the on-screen instructions.
- Once completed, you’ll land on the n8n dashboard.
Now, you can start building workflows for various tasks, such as automating content generation with multiple AI agents.
If you need inspiration, explore what you can automate with n8n, from streamlining social media management to automating database backups.
We also suggest integrating n8n with different apps and services to expand your automation capabilities.
4. Monitoring logs and resource usage
To keep n8n running smoothly on Coolify, regularly monitor logs and track resource usage. This helps detect issues, optimize performance, and determine when to upgrade your server. Here’s how:
- In n8n’s Configuration page, navigate to the Logs tab.
- Hit Refresh for either n8n or PostgreSQL to view their logs.
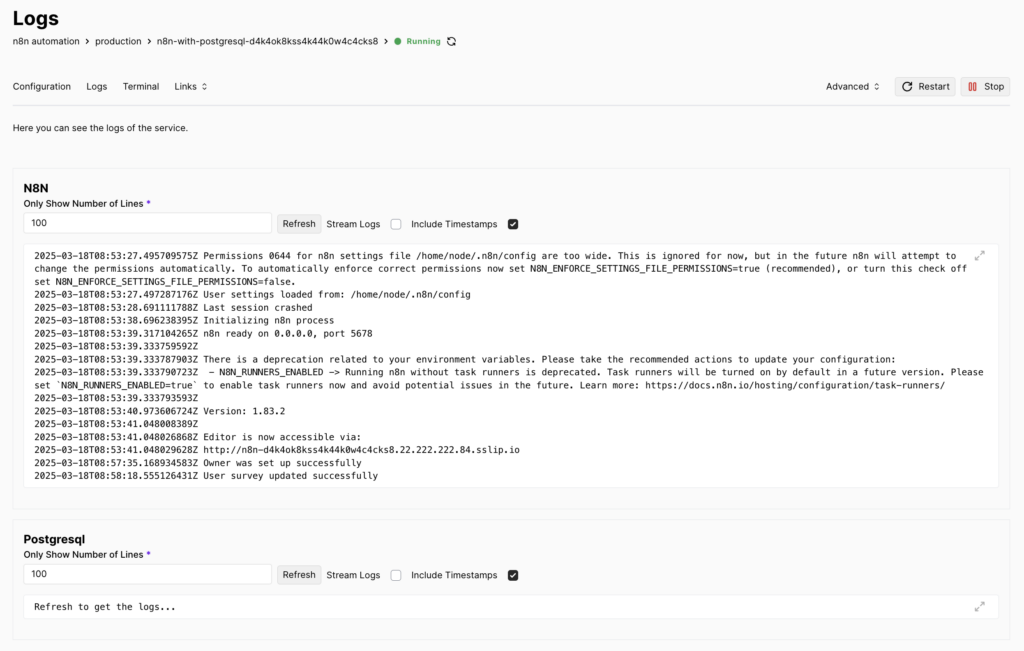
- Look for errors or warnings, such as exited containers or database connection issues.
- To free up disk space, run a Docker cleanup. From the left sidebar, navigate to Servers → localhost.
- Select Docker Cleanup and set a cron expression for the cleanup schedule. For example, use 0 0 * * * to run it every day at midnight.
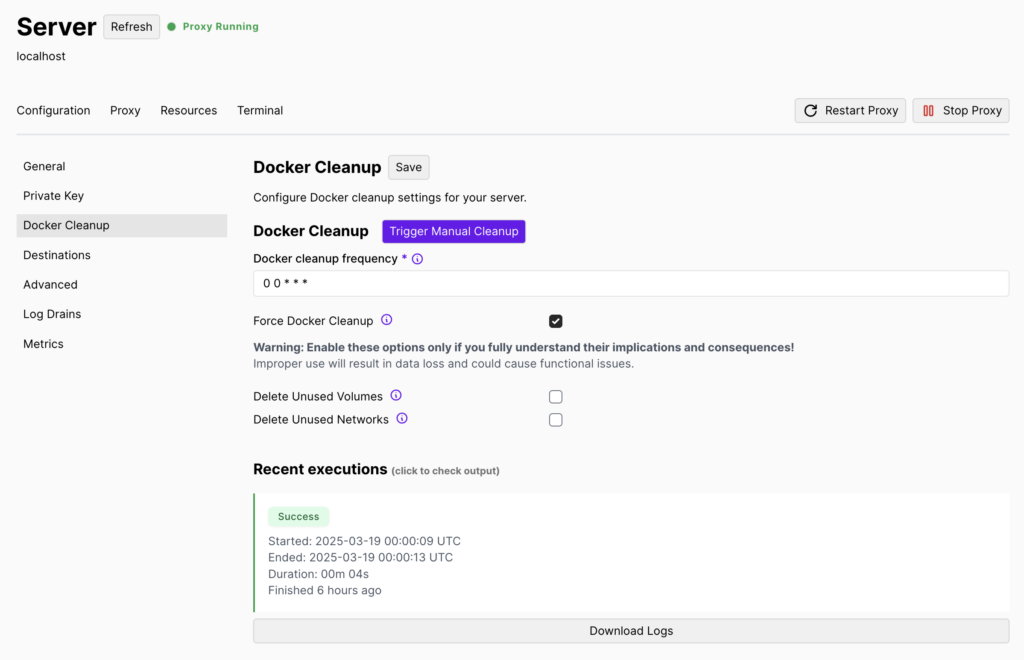
- Click Save when you’re done.
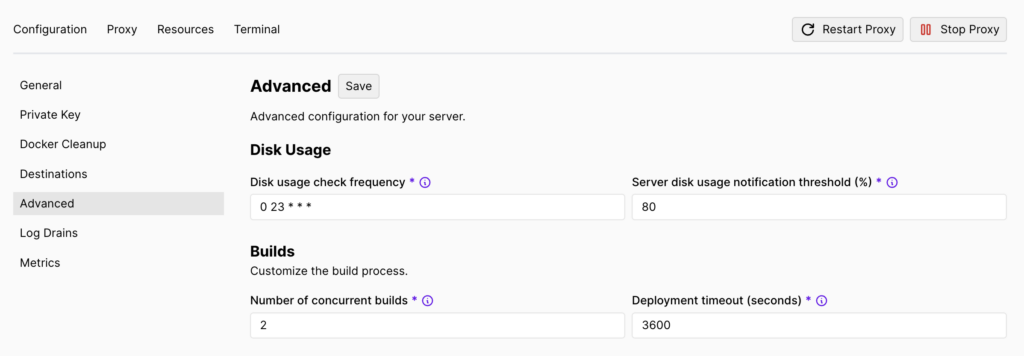
- If you want Coolify to periodically check disk usage, open the Advanced tab.
- Set a disk space check interval using a cron expression.
- Define a threshold percentage, such as 80%, to trigger notifications when usage exceeds that level.
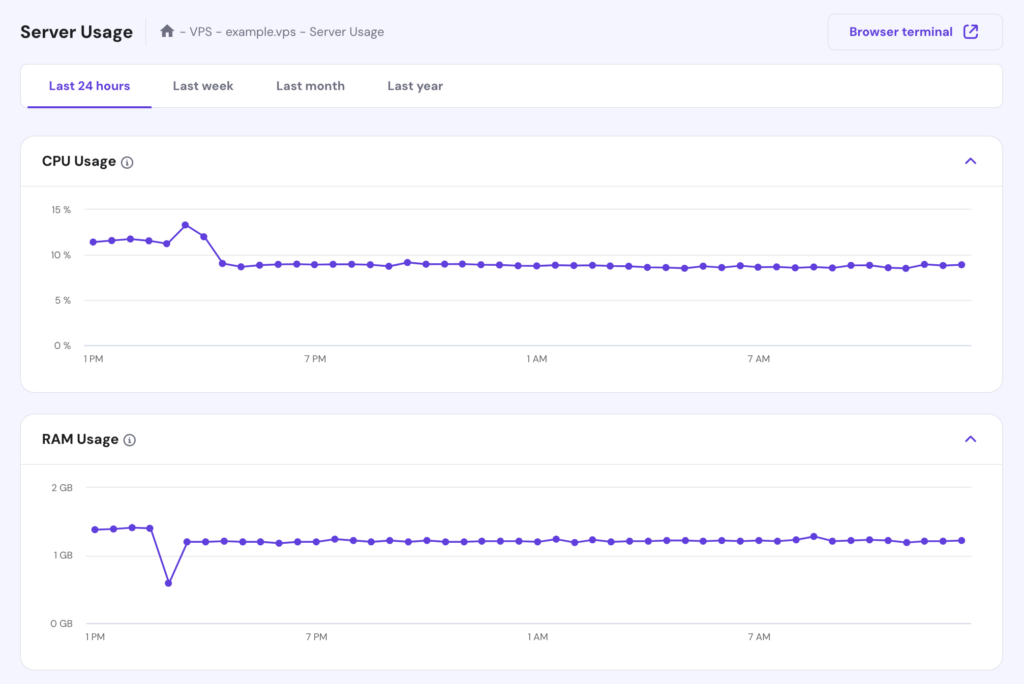
Currently, Coolify doesn’t provide detailed resource usage metrics, such as CPU load. Hostinger VPS customers can monitor their server’s resource stats via hPanel:
- Select Backups & Monitoring → Server Usage.
- Track CPU, RAM, disk space, and network traffic over different time frames.
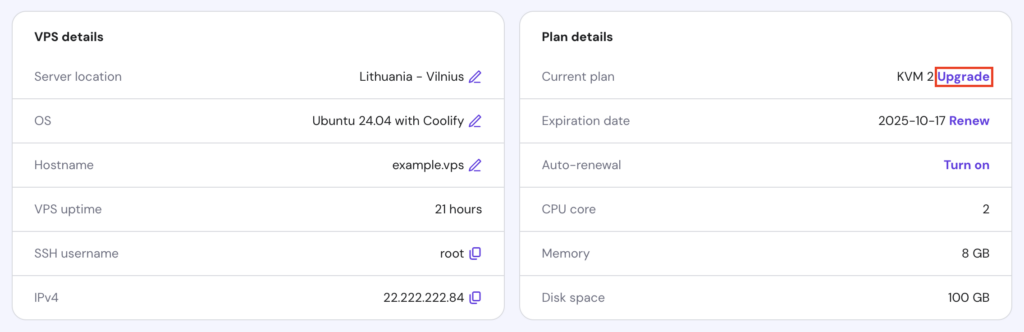
As mentioned before, you can upgrade your VPS to a higher plan if it consistently exceeds its resource limits. To do so, go to Overview → Plan details → Upgrade and follow the subsequent instructions.
5. Managing user access and permissions
If you want to collaborate on your n8n instance or scale your setup across multiple projects and teams, you can invite others to use Coolify. Follow these steps:
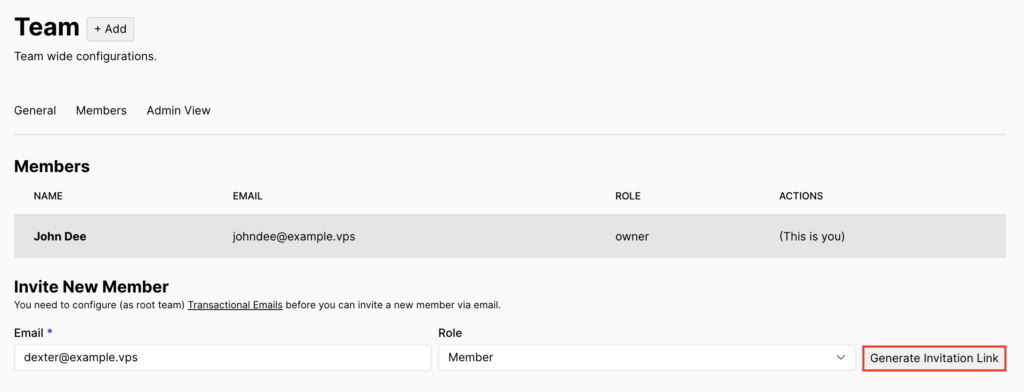
- Go to Teams → Members and locate the Invite New Member section.
- Enter their email address and assign a role.
- Hit Generate Invite Link and share the link with them so they can complete the registration process.
- To manage team members, go to the Members section in the same tab. Here, you can change roles or remove members as needed.
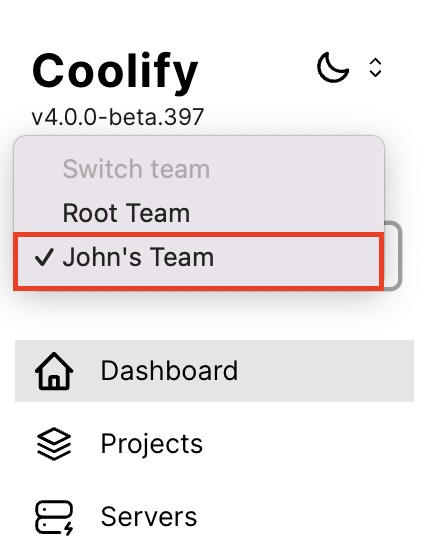
- If you need a separate team for different projects, create a new one by accessing Teams → Add, entering a team name, and clicking Continue.
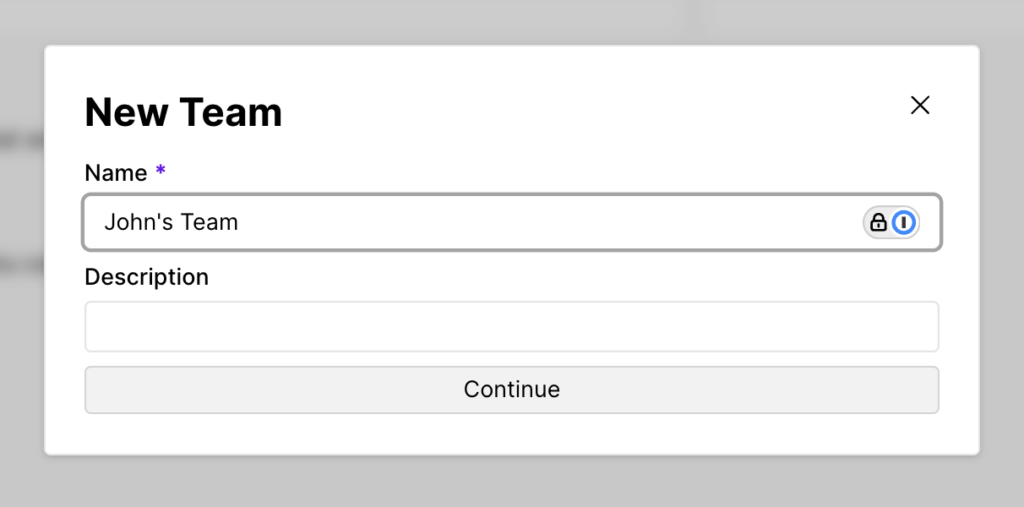
- After creating one, select it under Current Team in the left sidebar.
Troubleshooting common n8n issues
Even with a smooth setup, you may encounter issues while running n8n on Coolify. Here are some common problems and their solutions.
n8n blocks insecure connections
By default, n8n enforces secure connections via SSL. If you didn’t set up an SSL certificate for your domain or forgot to set the N8N_SECURE_COOKIE variable to false during deployment, you’ll see an error when trying to access the n8n dashboard:

To fix this, add the N8N_SECURE_COOKIE variable to the Docker Compose file, as explained in step two.
Then, save your changes and hit Restart in the top-right corner to apply them. After restarting, try opening your n8n dashboard again.
Unhealthy n8n container
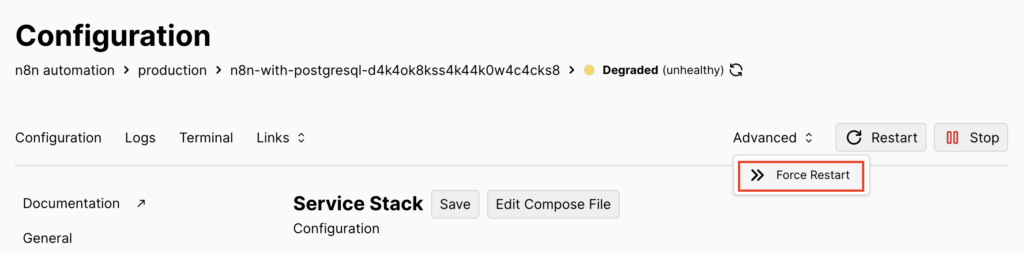
If Coolify marks your n8n container as Degraded (unhealthy), it could be due to an improper update without a restart or accidental deletion.

To diagnose the issue:
- Check the n8n logs for any errors.
- Click Restart to see if it resolves the issue.
- If a regular restart doesn’t work, go to Advanced → Force Restart to manually stop and reboot the container.
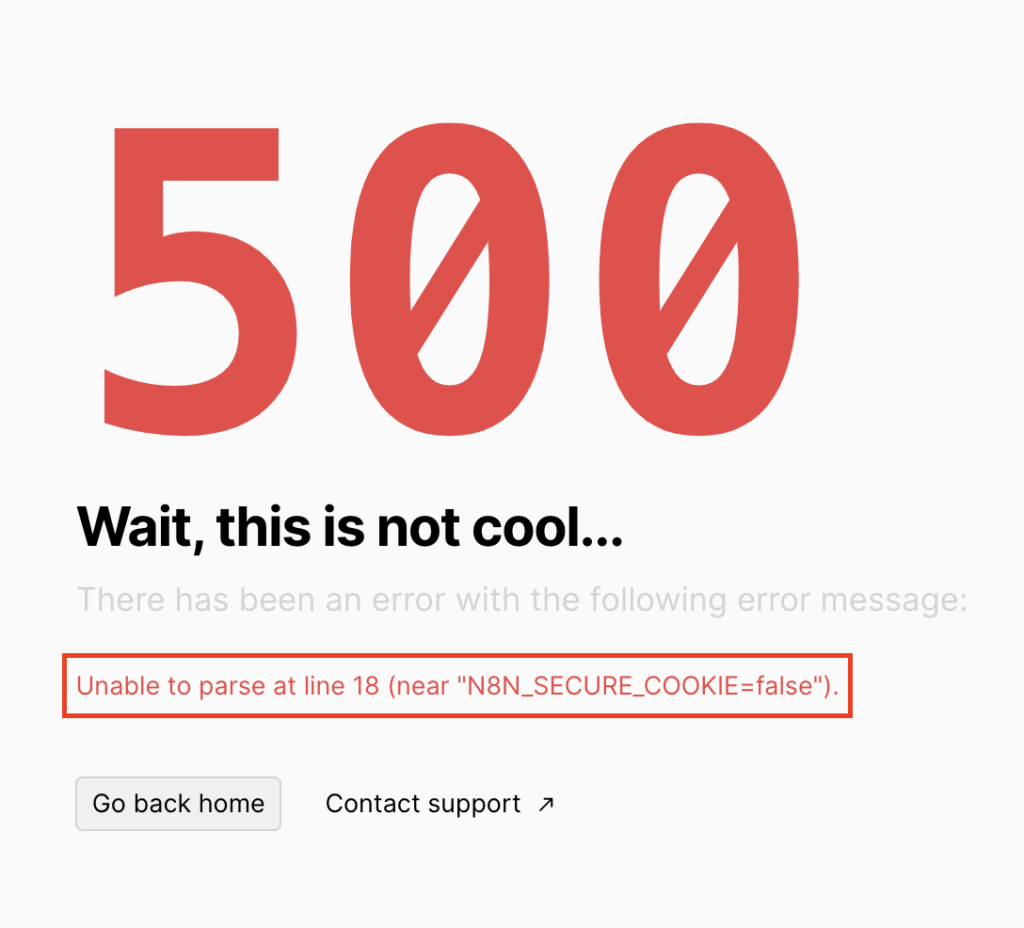
n8n deployment failures
Deployment failures usually happen due to misconfigurations in the Docker Compose file. Fortunately, Coolify highlights the exact line where the issue occurs so you can fix it accordingly.
If you still need assistance, Hostinger VPS users can ask Kodee, our AI Assistant, to analyze the issue and generate a fixed configuration.
To use Kodee:
- Copy the entire Docker Compose file content.
- Open your VPS dashboard in hPanel and go to Kodee AI Assistant from the left sidebar.
- In the text field, type a message like:
Hey Kodee, my Docker Compose file is showing an error. Can you fix it?

[Insert the file content here]
- Kodee will analyze the issue and generate a corrected version.
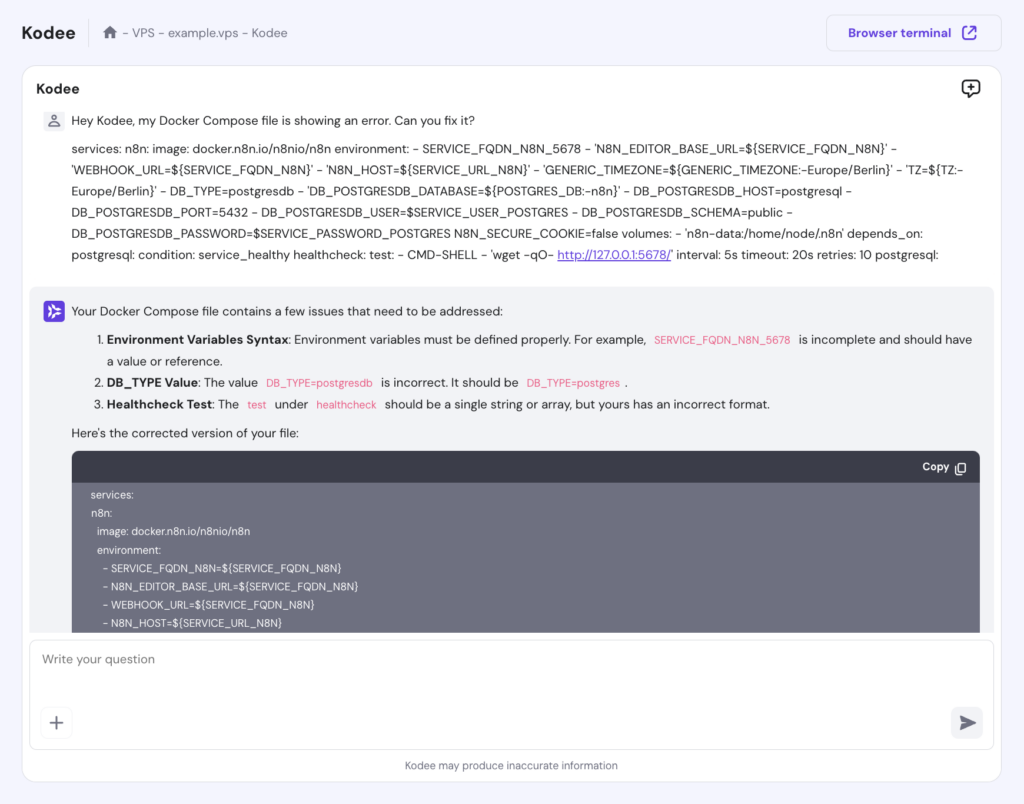
- Copy the corrected code, return to Coolify, paste the fix, and deploy n8n again to see if the issue is resolved.
Best practices for hosting n8n on Coolify
To maintain a secure and reliable n8n instance, follow these best practices when hosting it on Coolify.
Secure access with SSH keys and a firewall
Using SSH keys and a firewall helps protect your server from unauthorized access.
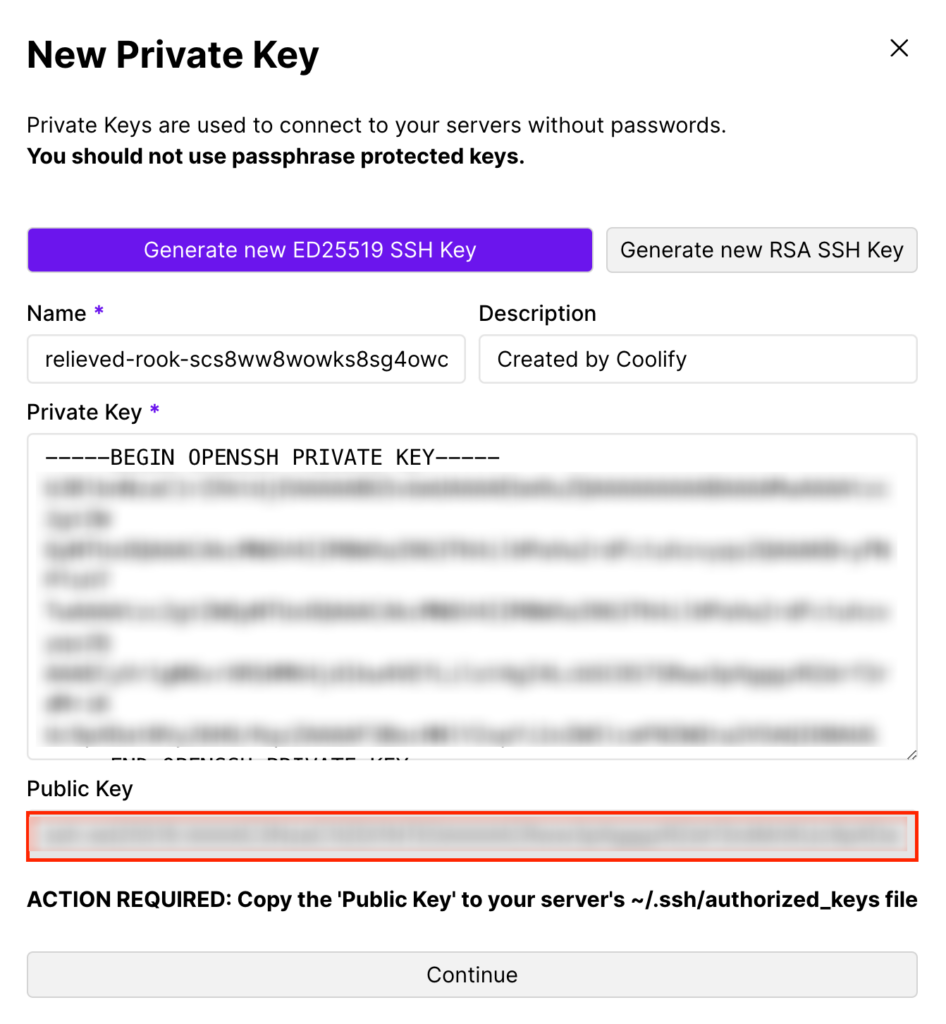
Here’s how to add an SSH key via Coolify:
- Go to Keys & Tokens → Add.
- Generate an ED25519 or RSA SSH key.
- Copy the obtained public key to your server’s ~/.ssh/authorized_keys file.
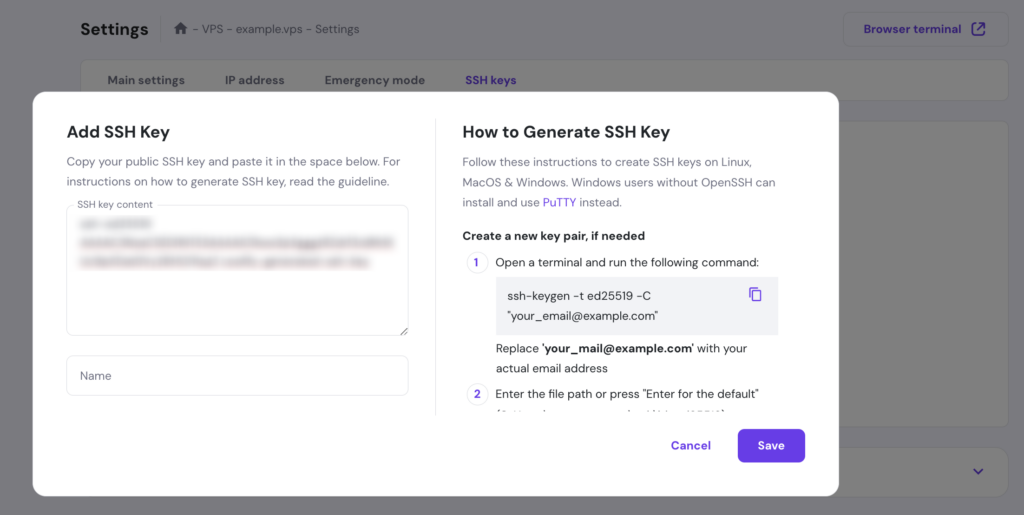
If you set up Coolify on Hostinger’s VPS, you can also add your generated public key with these steps:
- Navigate to Settings → SSH keys → Add SSH key.
- Paste your key and save it.
To further secure your server, configure a firewall using Uncomplicated Firewall (UFW):
- Check which ports are in use by running this command in the terminal:
docker ps
Note down the ports and protocols used by n8n, PostgreSQL, and other services.
- Install UFW on your server:
sudo apt update

sudo apt install ufw

sudo ufw enable
- Allow traffic only on necessary ports, for example:
sudo ufw allow 5678/tcp
- Repeat the previous step for all ports noted earlier.
Regularly back up files
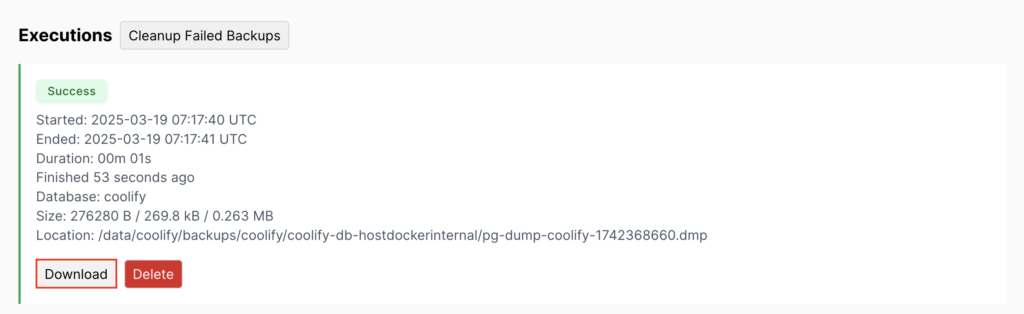
Regular backups prevent data loss and help restore your n8n instance in case of failure. To back up your Coolify database:
- Go to Settings → Backup → Configure Backup.
- Activate the Backup Enabled option.
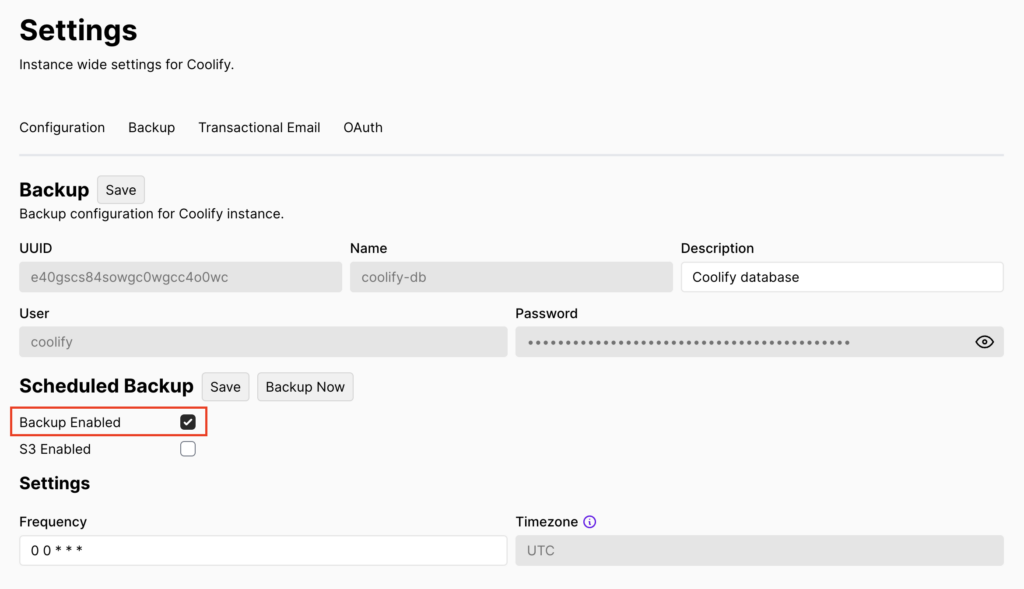
- Set the backup frequency using a cron expression, then save your changes.
- To download a previous backup, scroll down to Executions and hit Download.
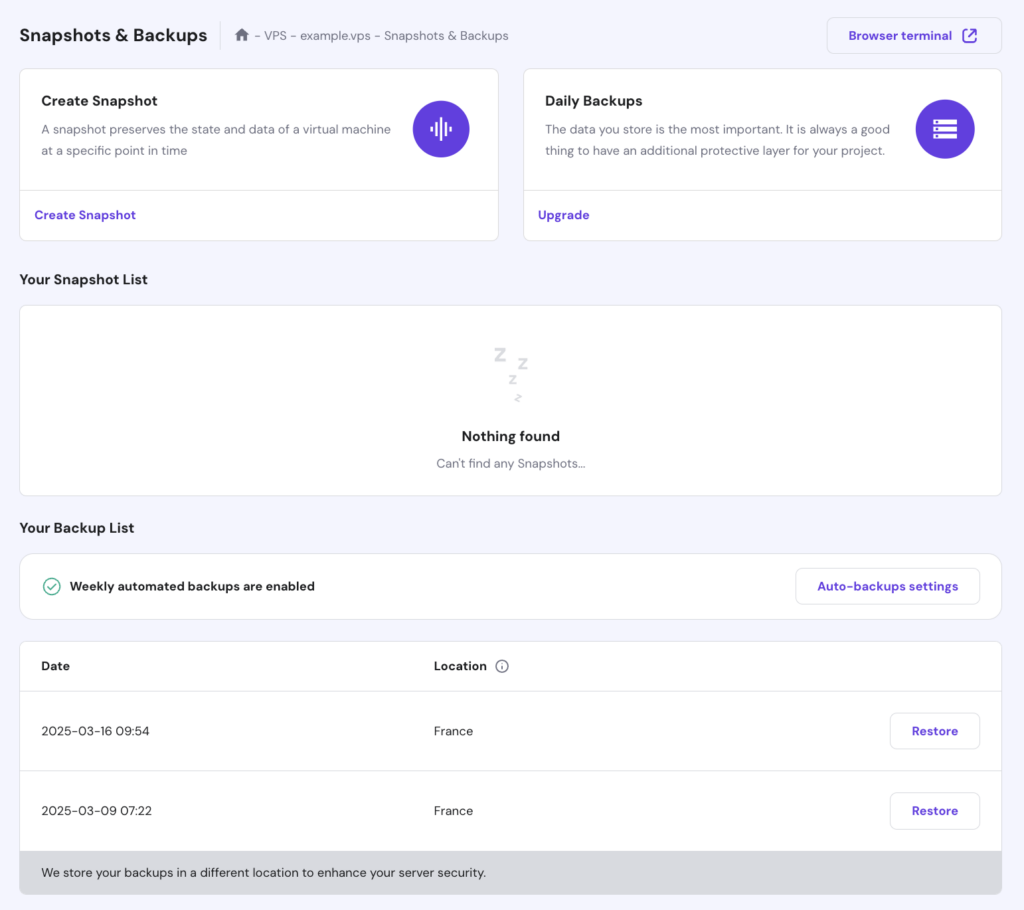
If you use Hostinger VPS, you can back up your entire server via hPanel by accessing Backups & Monitoring → Snapshots & Backups.
Managing n8n on Coolify with Kodee
When managing n8n on Coolify, Hostinger VPS hosting users can ask Kodee to do these best practices, including setting up an SSH key, adjusting a new firewall rule, and scheduling a backup, via chat to streamline the process. Simply enter your prompt and Kodee will handle the task for you.
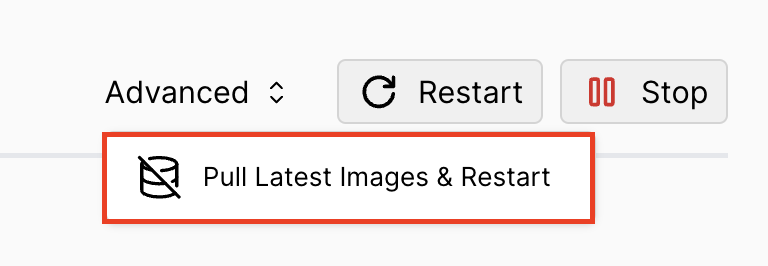
Keep n8n and Coolify updated
Running the latest versions of n8n and Coolify ensures you get security patches and performance improvements.
You can update n8n on Coolify by going to your n8n Production page, then choosing Advanced → Pull Latest Images & Restart.
Meanwhile, to update Coolify:
- Go to Settings → Configuration → Update.

- Enable Auto Update and set the update check and auto-update frequencies using cron expressions.
- To manually check for updates, hit Check Manually, then apply the update if available.
Conclusion
Using Coolify to self-host n8n lets you set up the automation tool in minutes while maintaining complete control over your workflow data and privacy.
Here’s a quick recap of the steps to deploy n8n on a VPS via Coolify:
- Install Coolify on your server.
- Create a new project in Coolify for n8n.
- Open the n8n dashboard through Coolify.
- Track logs and resource usage to avoid performance issues.
- Manage team members and permissions in Coolify.
Once everything runs smoothly, we suggest securing access with SSH keys and a firewall, regularly backing up files to prevent data loss, and keeping both n8n and Coolify updated to the latest versions for optimal performance.
If you still have questions about installing n8n on Coolify, feel free to ask in the comments section below!
How to host n8n with Coolify FAQ
How do I deploy n8n using Coolify?
To deploy n8n using Coolify, first install Coolify on your VPS. Then, create a new project, add an n8n service, and configure its environment variables. Once set up, hit Deploy to launch n8n. You can then manage your instance through Coolify’s dashboard.
Can I customize n8n settings in Coolify?
Yes, Coolify lets you customize n8n settings through environment variables. You can specify database connections, webhook settings, and authentication options. You can also assign a custom domain to n8n in Coolify for easier access.
How do I access my n8n instance after hosting it with Coolify?
After deployment, open the generated random URL in Coolify to access n8n. If you’ve pointed a custom domain to your server’s IP address, you can use that instead. Create an owner account in n8n and start building workflows from its dashboard.

Ariffud is a Technical Content Writer with an educational background in Informatics. He has extensive expertise in Linux and VPS, authoring over 200 articles on server management and web development. Follow him on LinkedIn.

Valentinas Čirba, Hostinger's Head of VPS, is a seasoned product leader specializing in VPS products with over ten years of experience. He's an expert at setting product strategy, leading cross-functional teams, and making smart decisions to deliver innovative solutions. Valentinas is committed to creating products that not only meet business objectives but also truly serve the customer. Follow him on LinkedIn.