How do I use an API with n8n on a self-hosted setup?
Mar 10, 2026
/
Aris S. & Valentinas C.
/
13 min Read
Integrating an application programming interface (API) with n8n can be complicated because every API provider has specific requirements for connecting their service. Nevertheless, n8n’s code-minimal workflow can allow you to create a highly efficient yet easy-to-maintain data pipeline that will benefit a wide range of automation scenarios.
Integrating an API into your n8n workflow consists of ten steps:
- Set up self-hosted n8n on a private server
- Enable API access
- Authenticate the API call
- Test the API functionality
- Add your API endpoint to n8n
- Add a trigger method node into your n8n canvas
- Create a workflow using other nodes
- Configure the node settings and data logic
- Test your workflow
- Secure your workflow
Note that creating an efficient workflow goes beyond these steps and involves properly maintaining its security and scalability. To improve your workflow maintainability, consider using the OneSimpleAPI node, which offers pre-configured API endpoints for basic tasks that you can manage directly in n8n, unlike other third-party APIs.
Read on to learn about n8n-API integration in detail, explore tips for securing your workflow, and dive into some common usage scenarios.
How to use an API with n8n, step-by-step
In this section, we’ll go into all the steps for integrating an API with your n8n instance.
1. Set up your self-hosted n8n instance
Before creating a workflow and integrating an API, you’ll need to set up your n8n instance. In this tutorial, we’ll focus on the self-hosted version because it offers more control and is more affordable than the official plan.
Self-hosting n8n requires a virtual private server (VPS) hosting plan. You can use one from any provider as long as it offers sufficient hardware resources to ensure your workflow runs responsively and adequately.
Since we are creating a simple workflow, a server with 1 vCPU core and 1 GB of RAM is enough, but you’ll need more hardware resources if you plan to create multiple automation scenarios.
The steps to install n8n remain the same regardless of your VPS provider. However, we recommend Hostinger’s n8n hosting plan if you want a straightforward, command-free configuration process.

After purchasing Hostinger’s n8n hosting plan, our system will automatically choose the n8n template for your server. Then all you need to do to install n8n is complete the VPS onboarding process, which involves basic tasks like setting up a hostname and root password.
If you already have a Hostinger VPS, you can install n8n anytime in one click using the OS template. Before following this procedure, back up your files because any existing data will be wiped. Here’s how to install n8n on your server:
- In hPanel, navigate the sidebar and click VPS.
- Hit Manage on the VPS you want to install n8n on.
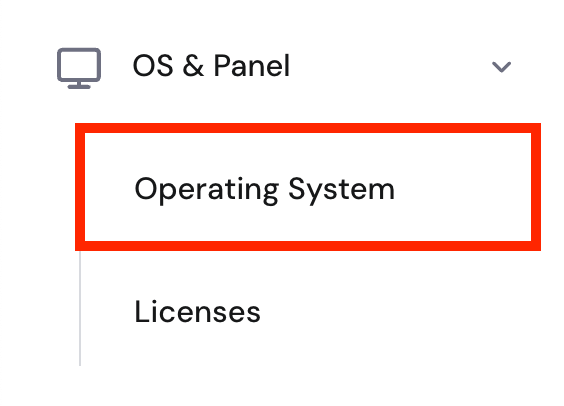
- Go to the sidebar → OS & Panel → Operating System.
- Go to the Application tab and select n8n.
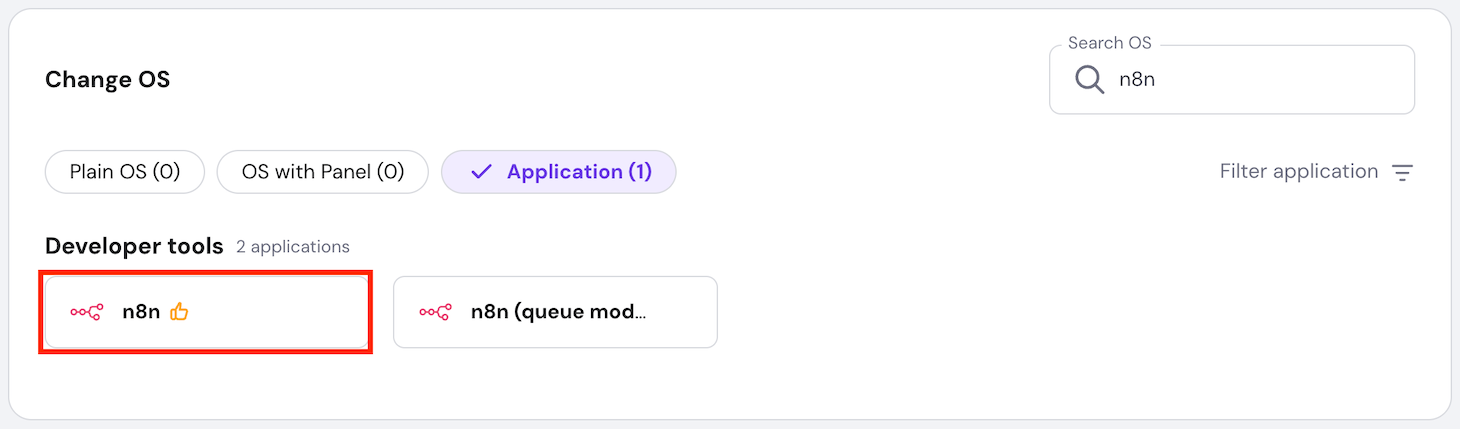
- Hit Change OS.
- Acknowledge the data deletion and hit Next.
- Enter a new root password and click Confirm.
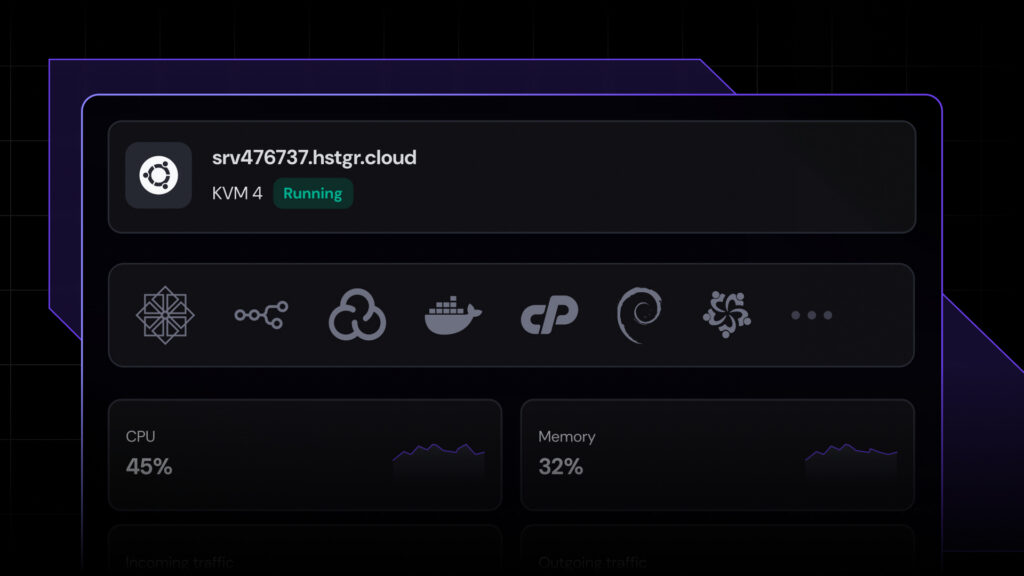
After the installation process is complete, you can access n8n by clicking the Manage App button on the same screen. Create an account to finish the configuration.
2. Find a public API
Find the API you want to integrate with n8n. You can look for one on an API marketplace like RapidAPI or a community-curated catalog like GitHub’s Public API repository.
For testing, we recommend using a public API because it is free and easy to sign up for. In this tutorial, we’ll use Hostinger’s public API as an example.
The ideal API should have comprehensive documentation covering its specification, requirements, and potential errors to help streamline the setup process. It must also come from a reputable company or developer to ensure its safety.
3. Get the API endpoint and key
After deciding on the API, access the provider’s website and obtain two essential pieces of information: its endpoint and authentication key.
An API endpoint is the URL n8n will use to interact with the API’s server and to request specific data. Meanwhile, an authentication key is a unique token that validates the n8n’s API request.
Using multiple endpoints
An endpoint is reserved for a specific function. If your workflow involves multiple actions or tasks, you may need to obtain multiple API endpoints, which can also come from several providers.
Depending on the API provider, the steps to obtain the API endpoint and authentication key differ. For example, here’s how to do so at Hostinger:
- Log in to hPanel. If you haven’t got an account, create one.
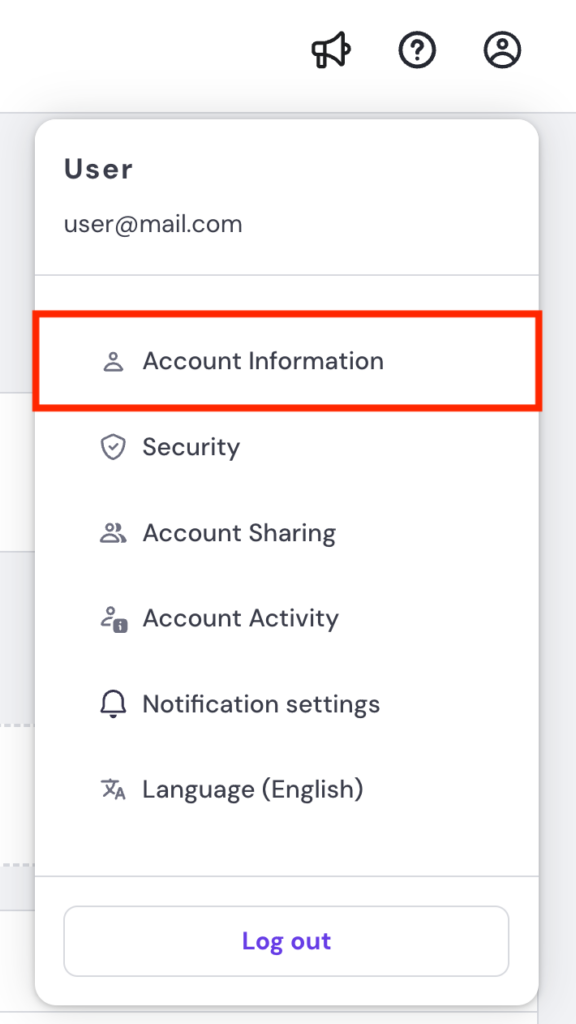
- On hPanel, click your profile icon in the top right corner and select Account Information.
- Navigate to the sidebar and click API.
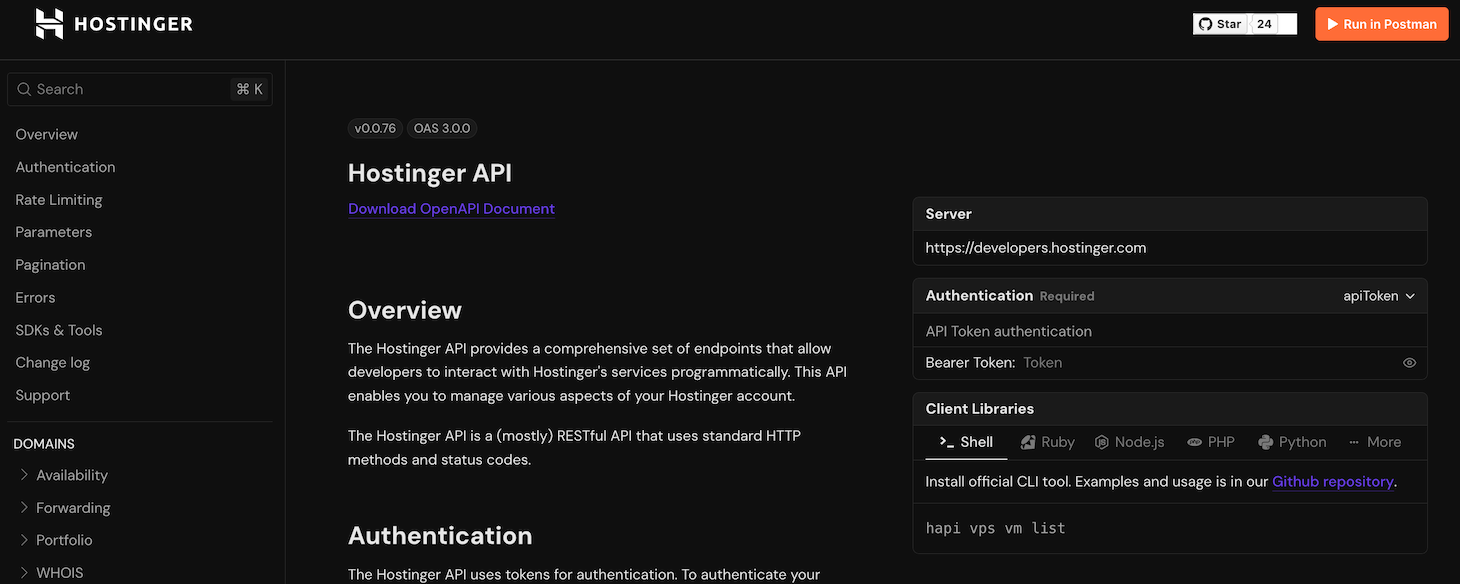
- Hit the API documentation button to open the Hostinger API reference developer page. Here, you can check all the endpoints and their specifications.
- Return to the API page and click New token to generate an API key.
- Add a name for your token and set an expiration date.
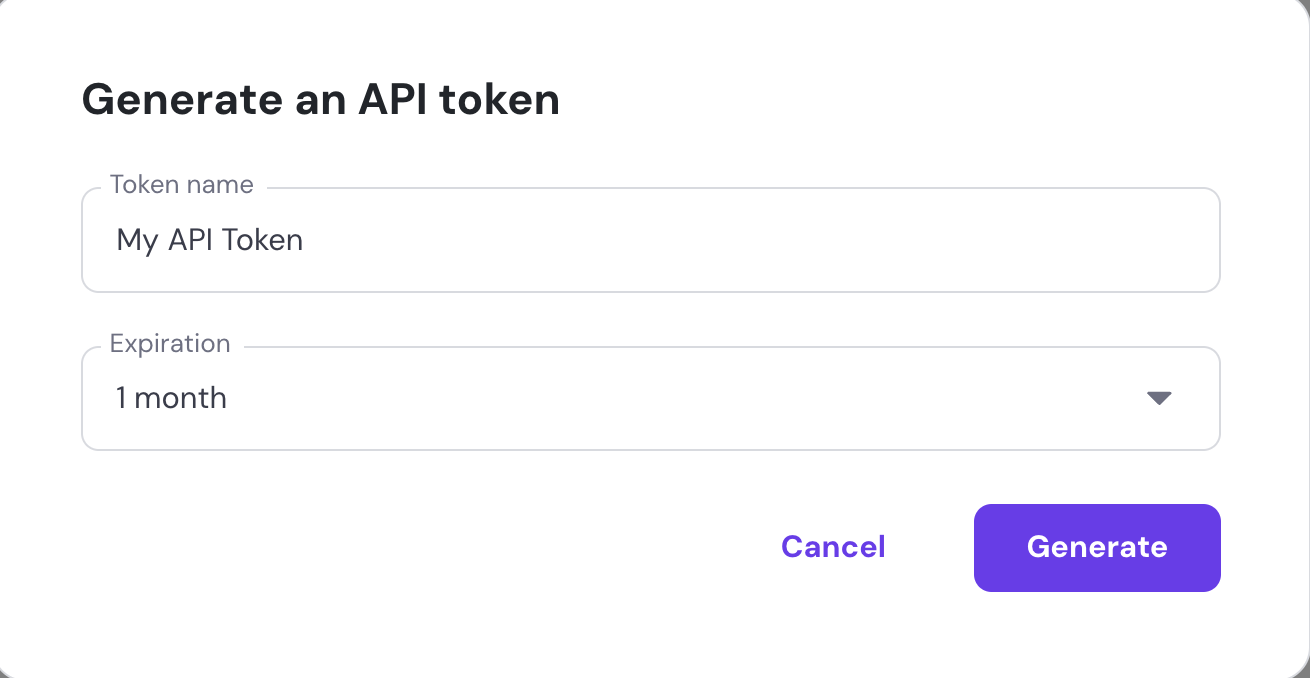
- Hit Generate.
- Scroll down to the bottom of the page to obtain the API token and the testing commands. Store them in a safe location.
For security reasons, you won’t be able to see your token again after closing the API page, so be sure to save the key and testing commands before proceeding.
4. Make your first API call
Testing your API endpoint is crucial to ensure it can take requests and send responses properly.
You can test an API using different methods, but the easiest way is to use the cURL command, which is preinstalled in your computer’s terminal.
To use cURL, simply open your system terminal and enter the following command. Replace API-endpoint and API-key with their actual values:
curl -X GET "API-endpoint" -H "Authorization: Bearer API-key"
Depending on the API, you may need to change the authorization method or add more information to the cURL request. If your API provider gives the testing commands, like Hostinger does, simply copy and paste them into your terminal. Otherwise, read its specification for more information.
If the API request is successful, your terminal will print data in JSON format. If you encounter an error, check the API documentation for a troubleshooting guide.

5. Configure your API in n8n
Adding an API in n8n is straightforward, as you only need to add the node and fill out the required information. Here’s how to do so:
- Open n8n and create a new workflow.
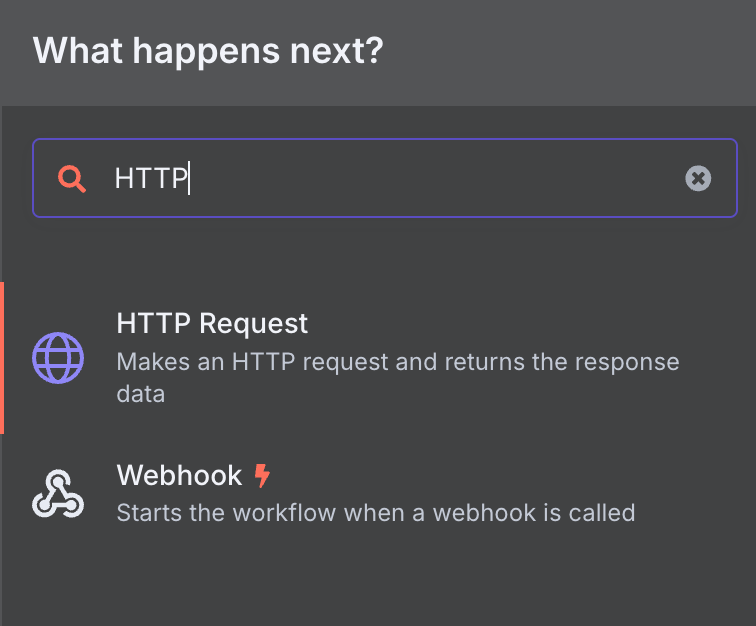
- Click the Plus icon on the top right of your n8n canvas.
- Select the HTTP Request node.
- Add the following information:
- Method. The HTTP method n8n will use on the API endpoint.
- URL. Your API endpoint address.
- Authentication. The authentication method for the API call, typically generic Bearer if you use a key.
- Query params. Restrictions or rules that modify your API request, sometimes mandatory.
- Send headers and body. Additional information to include in your API request for modifying the request.
If you have trouble filling out the fields, refer to the API and n8n documentation. Depending on your API specification, you may not need to enter all of the information above.
Although your API will be integrated with n8n after this step, it still won’t be functional because you’ll need to enable your workflow to send the API request and fetch data.
How to create workflows with API endpoints?
After integrating an API into your n8n instance, you’ll need to create a workflow that utilizes its capabilities to transform and process data.
Since the workflow and nodes differ depending on what you want to automate, check out our tutorial on n8n integration examples for inspiration. For this tutorial, we’ll create a simple alerting system that gives users notifications when their VPS resource usage exceeds certain thresholds.
1. Choose a trigger method
Starting an n8n workflow requires a trigger node. There are various options for different workflow scenarios, which are classified into eight categories:
- Trigger manually. Starts the workflow when a user deliberately clicks the trigger node on the n8n canvas.
- On app event. Runs the workflow when an event takes place in an application, like Telegram, Notion, or Airtable.
- On a schedule. Triggers the workflow at a specific interval, ideal for automating API calls.
- On a webhook call. Initiates the workflow when the trigger node receives an HTTP request through the webhook URL.
- On a form submission. Begins the workflow on a form submission, passing the input data into the workflow.
- When executed by another workflow. Activates the workflow when another workflow calls for it.
- On chat message. Commences the workflow when a user sends a message to n8n.
- Others. Starts the workflow when a specific event happens, but not on a specific application, such as an error or a new email.
In this tutorial, we’ll use n8n’s Webhook node, one of the most flexible and easiest to configure. Because it uses a URL, you can start the node by simply opening the address in your web browser. You can also integrate the webhook into custom-coded applications without being restricted to specific platforms.
The webhook node works as is, but you can configure many settings to improve its security and usability. For example, you can set an authentication method to ensure only legitimate users can trigger it. We’ll explain more about this in the next section.
Important! n8n’s Webhook trigger node has two fields for URLs: test and production. Use them correctly based on their purposes to avoid security and functionality issues.
2. Create a workflow
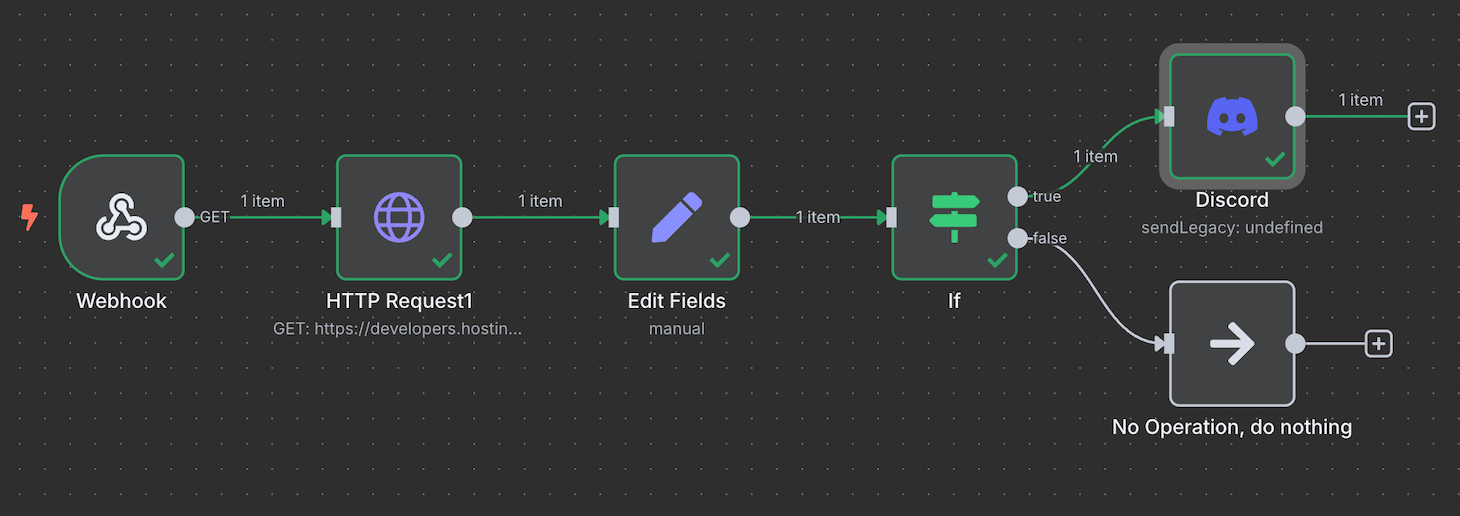
Creating a workflow in n8n involves connecting nodes to determine data flow and handling. In our case, the workflow plan is as follows:
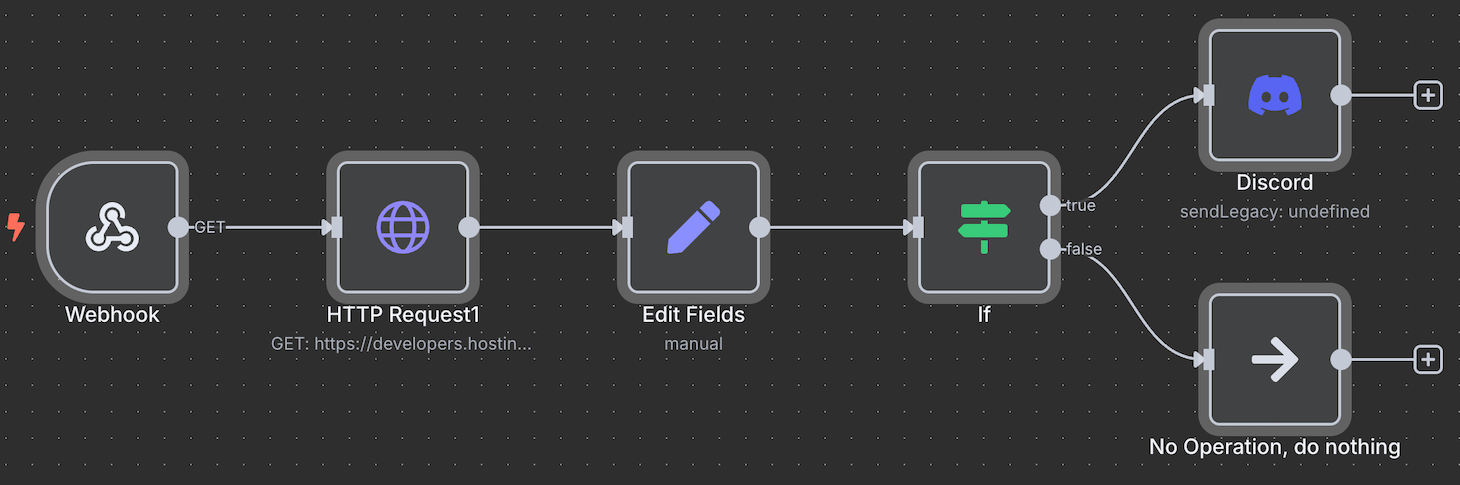
- When called, the webhook triggers the workflow, sending a request to the API in the HTTP request node.
- The API fetches the data, which will be stored in the HTTP request node.
- The HTTP request node then passes it to the Edit Fields node for processing.
- The Edit Fields node manipulates the raw data. In this case, it finds the average of each resource usage metric.
- The If node defines a logic that triggers a specific event based on the processed data. If the resource usage exceeds a particular threshold, it triggers the next node. Otherwise, it does nothing.
- The Discord node starts when the average resource usage exceeds the threshold, automatically notifying users.
The workflow diagram looks like the following on the n8n canvas:
You can expand this workflow further by connecting more nodes or workflows – it depends on the complexity of your automation goal.
For instance, you can integrate a workflow that automatically asks AI tools for performance optimization solutions, which is possible by combining MCP with n8n. Another example is that you can connect the spreadsheet node to log the history of hardware usage spikes.
3. Configure the workflow logic
Configuring logic in n8n defines how your workflow will select, manipulate, and use data to yield your desired results.
By default, raw API data contains information that might not be relevant or compatible with the subsequent node’s processing capability. Reformatting and sorting this data ensures that each node can manipulate and forward it properly.
Reading API raw data
APIs typically send responses in the JSON format, which structures data in a key-value pair like so:
[
   {
      "cpu_usage":
      {
         "unit": "%",
         "usage": {
            "1751494508": 1.5 }
      }
   }
]
If we break it down, each data point is structured in a key-value pair called object like so:
{"key": value}A key has to be a string written inside quotation marks. Meanwhile, a value can be a string, a number, or an object.
In addition to the JSON format, n8n provides a schema and table view of your API data. This helps you read and process the data more easily, as you can drag and drop it into other nodes.
Manipulating API data using JavaScript
n8n lets you pass data to nodes using two methods: Fixed or Expression. Fixed means the previous node forwards a value as is, while Expression enables you to manipulate it beforehand.
Because Expression passes data dynamically, it is typically used when working with a large amount of data or frequently changing values, such as hardware usage history.
Using n8n Expression
In addition to manipulating fetched data, Expression is also useful for sending a dynamic API request. For example, in the HTTP Request node, you can set a query parameter that automatically changes, like a date.
Expression in n8n is written inside a pair of double curly brackets, mostly based on the Luxon and JMESPath libraries. Here’s what it looks like:
{{ $json.object }}In our workflow, we want to set a dynamic value that takes the average of the VPS resource usage data. To do so, we add the Edit FIelds node and use the following expression:
{{ $json.cpu_usage.usage.values().average() }}Here’s a breakdown of the expression:
- $json. Takes the JSON value, which is the API’s raw data.
- cpu_usage.usage. Reads the usage object inside the cpu_usage field, which contains a list of timestamped CPU resource usage.
- values(). Returns the values of the previous object as an array, in this case, the value of “1751494508”: 1.5 and so on.
- average(). Takes the average value of the array.
If we want to perform the same operation for other hardware usage metrics, simply adjust the object accordingly. For example, here’s an expression that takes the mean of RAM usage:
{{ $json.ram_usage.usage.values().average() }}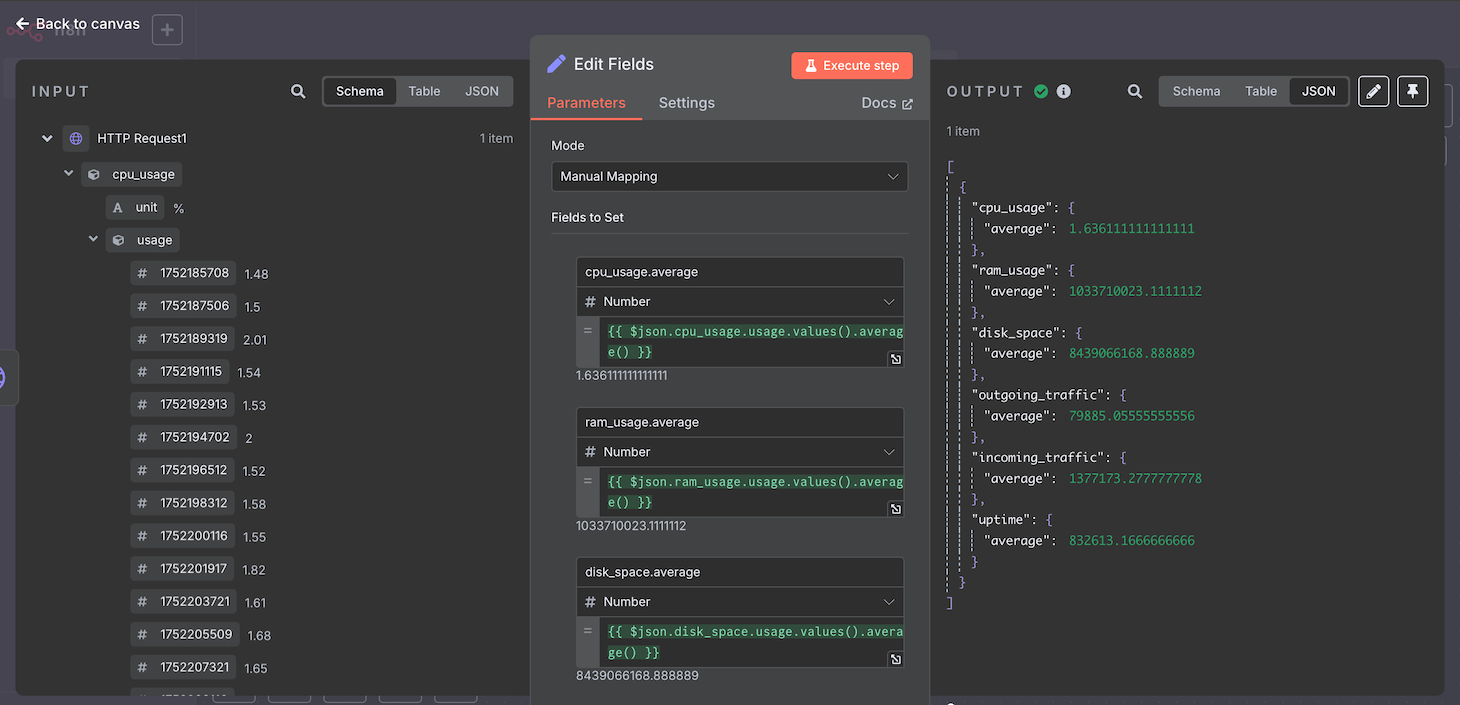
4. Test your workflow
Testing your workflow is not only helpful for verifying your automation’s functionality, but also lets you check the output from each node when developing the logic. Because your data may change after passing through a node and expression, testing helps you identify which data to work on next.
To test your n8n workflow, simply hit the Save button and click Execute Workflow. Then, start your workflow based on your chosen trigger node, which in our case is calling the webhook.
If your workflow runs, you should see checkmarks on nodes and green lines between them. Double-click a node to see its input and output values, which helps you determine how to set up the next node.
Using mock data
Checking the functionality of nodes in the middle of your workflow might be tricky because they commonly use altered data from the previous node. This means you must configure all the previous nodes before determining the data you are working with.
To simplify the testing process, n8n lets you use mock data to simulate the input a node will take and process. You can create it by simply clicking Set mock data on a node’s output field.
5. Secure your workflow
Securing your n8n workflow is crucial, especially but not only if it contains private data or sensitive information. For example, if unauthorized parties know your webhook URL, they can overload it with requests, potentially causing downtime in your automation system.
Enabling authentication on the trigger node is the most essential way to secure your workflow. This ensures that only sources with valid credentials, like a key or login information, can start the workflow.
The steps to configure authentication are similar regardless of your trigger node. For instance, here’s how to do so in the Webhook node:
- Double-click your Webhook node to open the configuration window.
- Click the Authentication drop-down menu and select a method. We’ll choose Basic Auth.
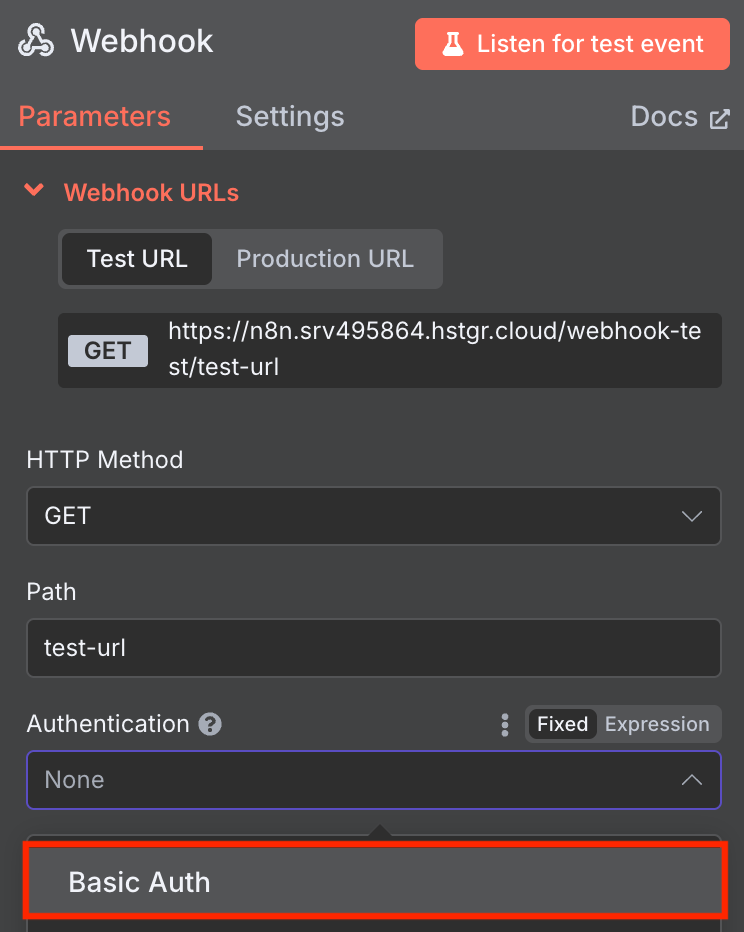
- Expand the Credential for Basic Auth drop-down menu and click Create new credential.
- Enter a new username and password.
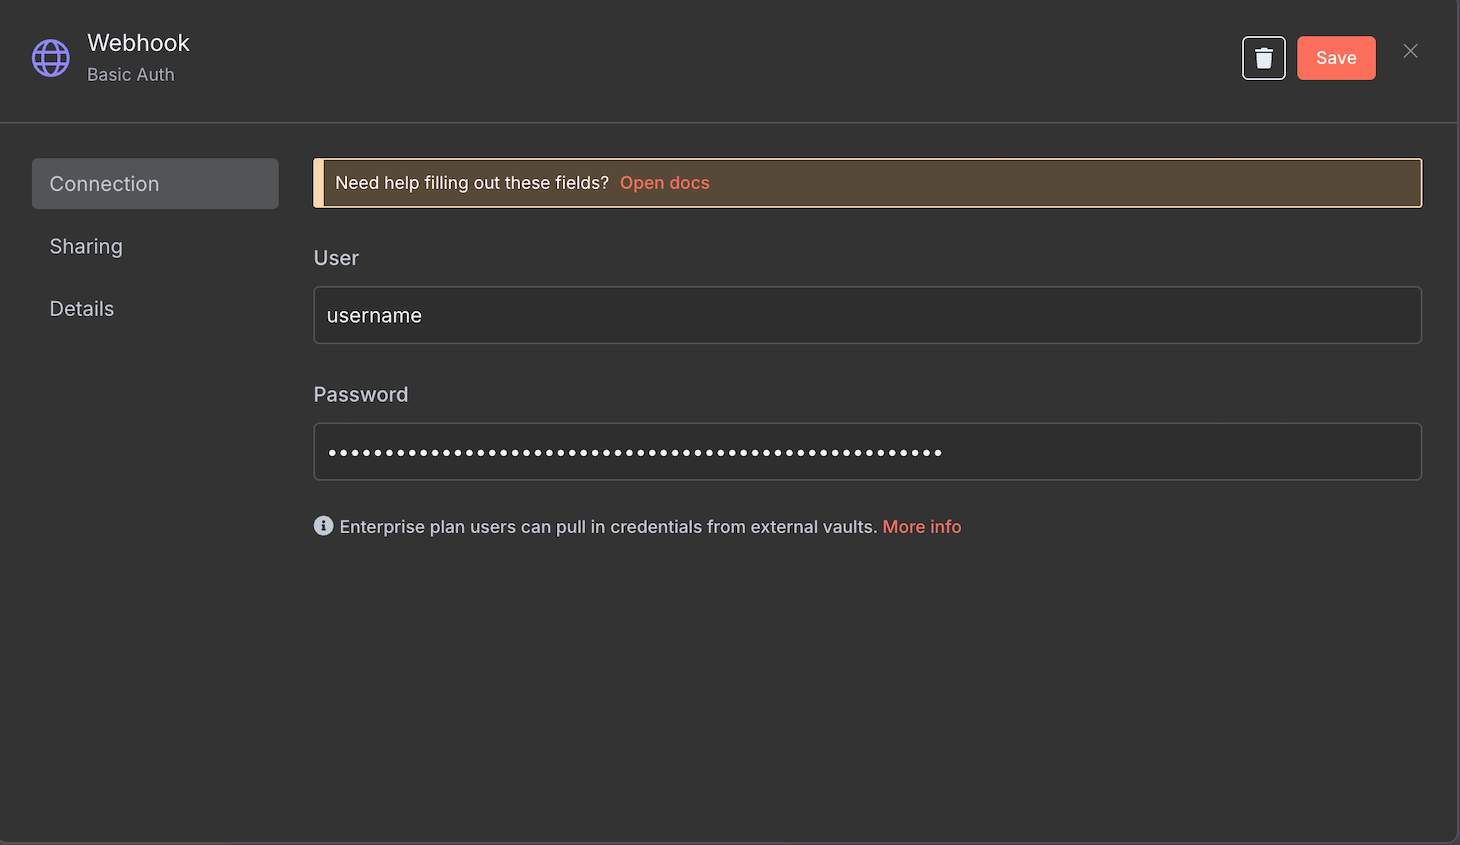
- Hit Save.
Now, you can only call the webhook with the correct username and password. To check whether the authentication works, open the URL in your web browser, and a pop-up asking for the login credentials should appear.
If you use another node and want to enable Bearer authentication, you must generate a token that meets n8n’s security requirements using a separate tool. There are different methods and settings to create it. For example, here’s how to make one in the Base64 format:
- Open an online encoder tool. In this tutorial, we’ll use Base64Encode.
- Enter a username and password pair in the following format, which will be the authentication credentials:
username:password
- Click Encode.
- Copy the encoded token and store it in a safe location.
In addition to securing the trigger node, there are other essential security practices to safeguard your n8n-API workflow. We’ll discuss them in the following section.
What are the best tips for securing and scaling an API in n8n?
Securing your API integration in n8n involves various tasks beyond enabling authentication. In addition to maintaining its safety, the performance of your self-hosted n8n instance must remain optimal to ensure the responsiveness and smooth functionality of your automation.
Here are several best practices for securing and scaling your API-integrated n8n workflow.
- Follow VPS security best practices. Secure your VPS by implementing strategies like setting up the correct firewall rule and installing a malware scanner. If your server is compromised, cyber criminals can gain access to your n8n instance easily.
- Limit URL usage. Reserve the production webhook URL for the live environment and avoid exposing it to the front end. Keeping this address safe prevents unauthorized parties from exploiting or controlling your workflow.
- Update API keys regularly. Set a short expiration date for your API. The more frequently you update your authentication key, the less likely it is to be compromised.
- Validate inputs and outputs. Validate data, especially that coming from and sent to external services like an API, to ensure its safety. Sometimes, cyber criminals inject malicious code into your data during transfer, which can present serious risks if unnoticed.
- Use HTTPS. Only use HTTPS to exchange data with APIs and other external services. By default, most APIs already use the encrypted protocol, but you can also proxy the communication using an API gateway like NGINX.
- Implement a monitoring system. Set up a monitoring system using tools like Prometheus and Grafana to track the performance of your n8n instance, including CPU, memory, and workflow execution times. This can help identify bottlenecks, areas for performance improvement, and the occurrence of cyber attacks like DDoS.
- Consider the API rate limit. Public APIs commonly limit the number of requests within a specific time span to avoid overloading, downtime, and misuse. Set appropriate delays between requests in your n8n workflow to prevent exceeding the limit, which can result in service disruptions or blocked access.
- Enable the n8n queue mode. Activate n8n’s queue mode to offload tasks to multiple workers for asynchronous and distributed processing. This allows your workflows to handle large volumes of tasks without blocking and improves performance by processing tasks in the background.
How to create a workflow with OneSimpleAPI
Creating a workflow with OneSimpleAPI makes it easy to integrate APIs with various types of functionality, like generating QR codes or taking screenshots, into your automation system. With n8n’s pre-configured OneSimpleAPI node, you can quickly connect different API features without configuring their endpoints individually.
To use OneSimpleAPI, you need to create an account and a token. Here’s how to do so:
- Open the OneSimpleAPI user registration page and create an account.
- Open the inbox of the email address you use for the registration.
- Check for an email from OneSimpleAPI and follow the instructions to validate your account.
- You should land on the API token creation page. From this menu, enter a name and select the permission to grant for your token.
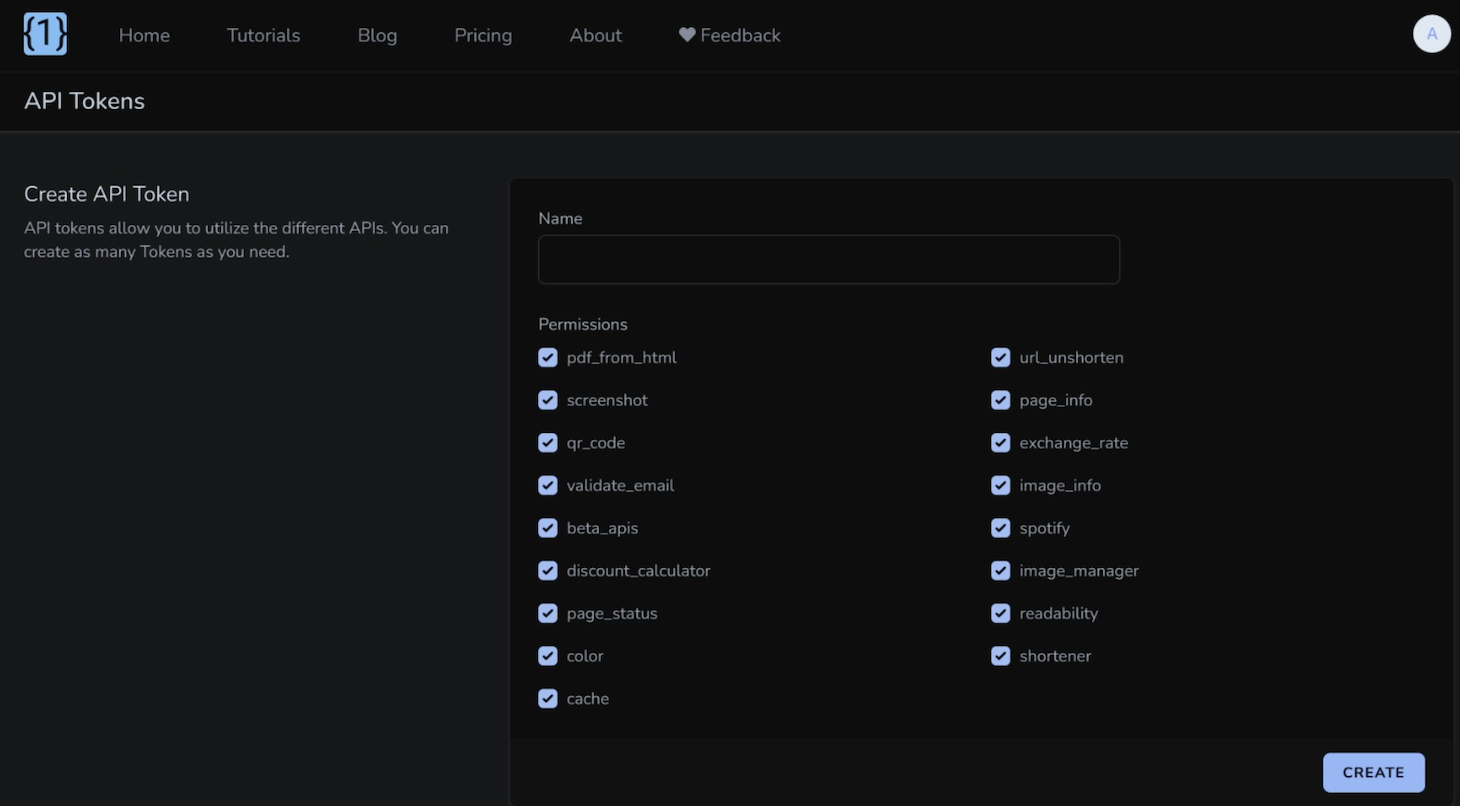
- Hit Create.
- A pop-up window will appear. Copy the API token and store it in a safe location.
Next, let’s add the OneSimpleAPI node to your workflow:
- Click the plus icon on your n8n canvas and select OneSimpleAPI.
- Select the action that OneSimpleAPI will do. We’ll choose Get details about a Spotify artist, but note that configuration steps will slightly differ depending on the action.
- Expand the Credential to connect with drop-down menu and choose Create new credential.
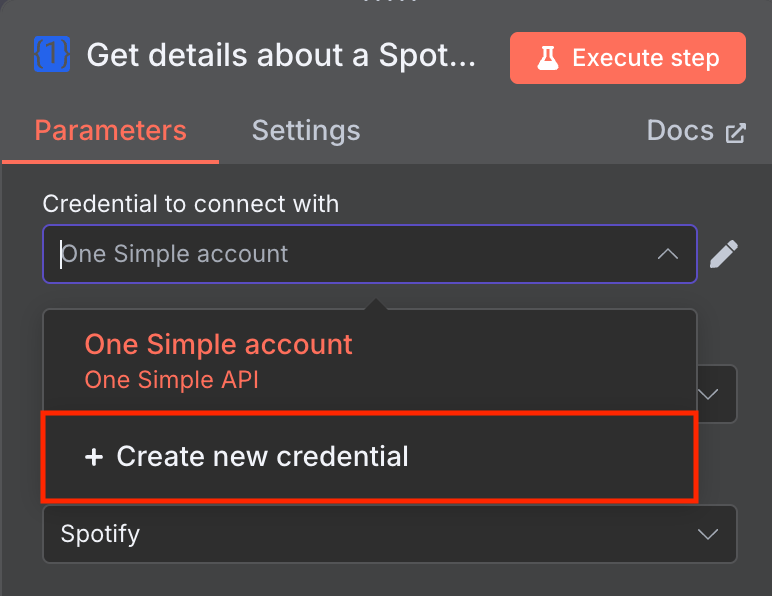
- Enter the API token you created previously. Hit Save.
That’s it. Next, test your workflow to ensure the OneSimpleAPI node can receive and process data.

Alternatives and common API use
Integrating an API into n8n enables you to create an automation workflow for various use cases. Here are some of the most common ones:
- Connecting proprietary or niche applications. When working with internal tools or custom services, the HTTP Request node allows you to make API calls to these services. For example, you can integrate your in-house CRM system to fetch or update customer data.
- Implementing custom API operations. Some APIs offer functionalities not available through n8n’s built-in nodes. For example, complex queries on a database might not be possible using n8n’s default node and expression library, meaning you’ll have to do this using an API.
- Integrating multiple API endpoints. You can create a workflow with several API endpoints that can be triggered from a single URL, streamlining the integration of multiple service providers. For instance, you can connect Hostinger and Jira APIs to create a system that automatically creates a Jira ticket when your VPS experiences downtime.
- Handling complex data transformations. Since APIs typically return nested or complex data structures, n8n’s data transformation nodes help process and format this data as needed. n8n’s pre-configured tools and libraries make the process more efficient.
- Creating microservices with n8n. By combining multiple webhooks and workflows, you can build microservices within n8n, enabling modular and scalable automation solutions. For instance, you can integrate the WooCommerce API to handle the inventory of your online store, the Stripe API for its payment, and the Shippo API for its shipping mechanism.
Key takeaways: using an API with n8n
Integrating an API into your n8n workflow enables the automation of a wide range of tasks involving data exchange with various services, including proprietary tools or software.
With API-based functionality, you can utilize complex features or data processing capabilities beyond what n8n supports. You can also combine multiple APIs in a workflow, allowing other services to use them through a single endpoint.
In addition to public APIs from external providers, you can also easily integrate various API capabilities with n8n’s built-in OneSimpleAPI node.
Given the extensive API capabilities and n8n nodes, combining these tools makes it possible to automate various tasks. We recommend checking our n8n workflow examples to learn more about what you can automate using this tool.

Aris is a Content Writer specializing in Linux and WordPress development. He has a passion for networking, front-end web development, and server administration. By combining his IT and writing experience, Aris creates content that helps people easily understand complex technical topics to start their online journey. Follow him on LinkedIn.

Valentinas Čirba, Hostinger's Head of VPS, is a seasoned product leader specializing in VPS products with over ten years of experience. He's an expert at setting product strategy, leading cross-functional teams, and making smart decisions to deliver innovative solutions. Valentinas is committed to creating products that not only meet business objectives but also truly serve the customer. Follow him on LinkedIn.