How to change Minecraft version from Java to Bedrock on a dedicated server
Dec 02, 2025
/
Alanas M.
/
8 min Read
Whether you’re aiming to support crossplay, reach more players, or just prefer Bedrock’s performance on certain devices, moving a Minecraft server from Java to Bedrock is possible – but it takes a few steps.
In this guide, we’ll show you how to move your Minecraft server while keeping as much of your original setup as possible. If you decide that a complete Minecraft version switch doesn’t fit your needs, we’ll also cover how to configure cross-play on a Java edition server.
Understanding Minecraft versions
Minecraft Java Edition is written in Java and runs on the Java Virtual Machine (JVM), which is how Minecraft was initially programmed. It’s very customizable and with tons of plugins and mods available. However, it uses more RAM and CPU, especially with many players or heavy modding, and is limited to PC players.
Minecraft Bedrock Edition is written in C++ and was initially developed for systems that don’t support Java, starting with Minecraft Pocket Edition for mobile players.
C++ is a more efficient game coding language – it runs faster, uses fewer resources, and performs significantly better on lower-end hardware. Bedrock is widely available and supports cross-platform play on devices like Windows, Xbox, PlayStation, and mobile devices.
Outside of the technical details, some core game mechanics also differ. The two best examples of this are:
- Redstone behaves differently. In Bedrock, pistons react faster to redstone pulses, and some circuits, like quasi-connectivity, don’t work the same or are entirely absent.
- Combat is drastically different. Bedrock has the old combat system, where you can spam-click efficiently, while Java has implemented attack cooldowns, which encourage proper timing.
There are two main reasons why you might consider switching a server from Java edition to Bedrock edition:
- Accessing a broader player base – the Bedrock edition has a much larger player count across multiple platforms.
- More optimized server resources – a Bedrock edition server is roughly twice as efficient in handling server load as Java.
Prerequisites and limitations
The first thing to understand is that while both are Minecraft, Java and Bedrock are technically two separate games running on different engines. Since these are separate games, there are limitations as to what you can move over:
- You cannot migrate player data, as Java and Bedrock players differ.
- Bedrock does not support server plugins.
- Java mods will not work.
- You need to convert your world data to move it over.
- You will need to reconfigure permissions.
When moving a server from Java to Bedrock, you typically do not need to consider resources. For example, with 20 players, Java will run well with 4GB RAM and 2 vCPUs, while with Bedrock, you can run the same load with 2GB RAM and 1 vCPU. However, if you expect more players, ensure your server can handle the extra pressure.
Important!
Make sure to back up both your server and world files, as making this change can result in losing your data.
How to change a Minecraft server from Java to Bedrock
To switch your server from Java to Bedrock, you’ll need to stop your current Java Edition instance and create a fresh Bedrock Edition instance. Here’s a step-by-step on how to do this in Hostinger’s Game Panel:
- In hPanel, navigate to VPS and press Manage on your Game Panel VPS.

- Click the Manage panel button and log in with your credentials.

- Find your Minecraft Java instance and click Manage.
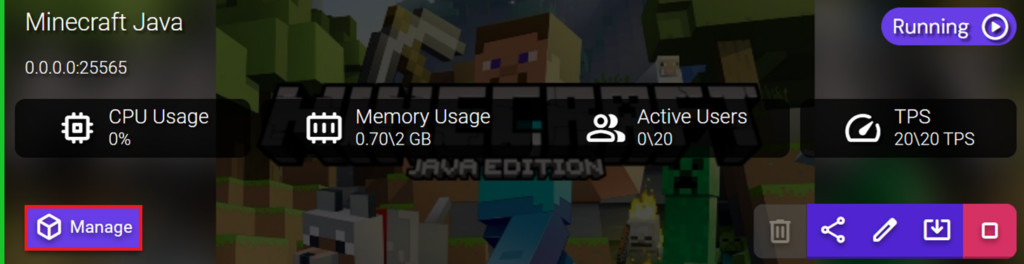
- Click Stop to stop your Java server.
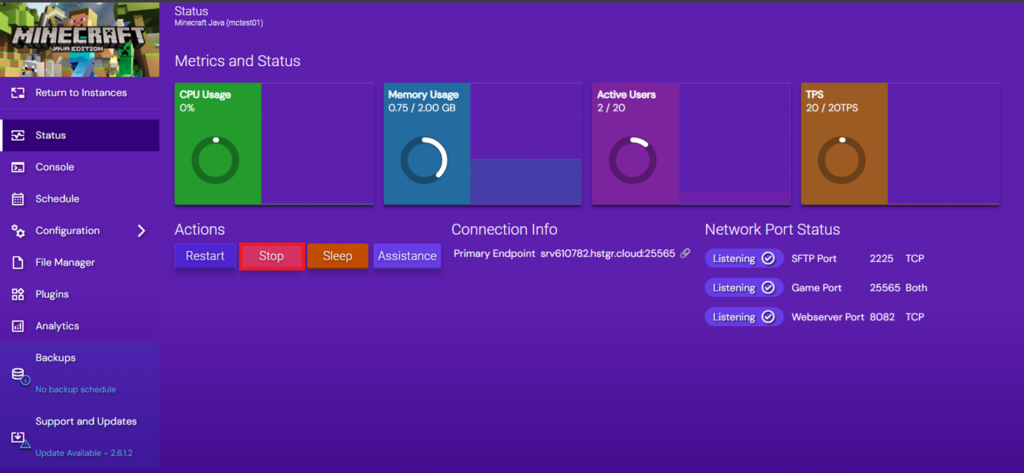
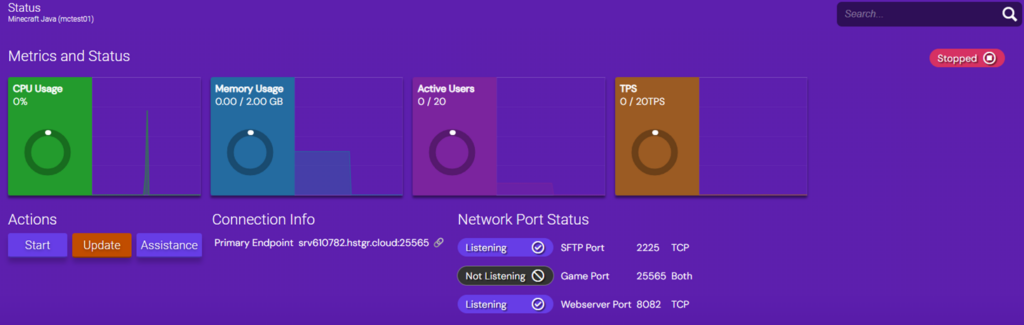
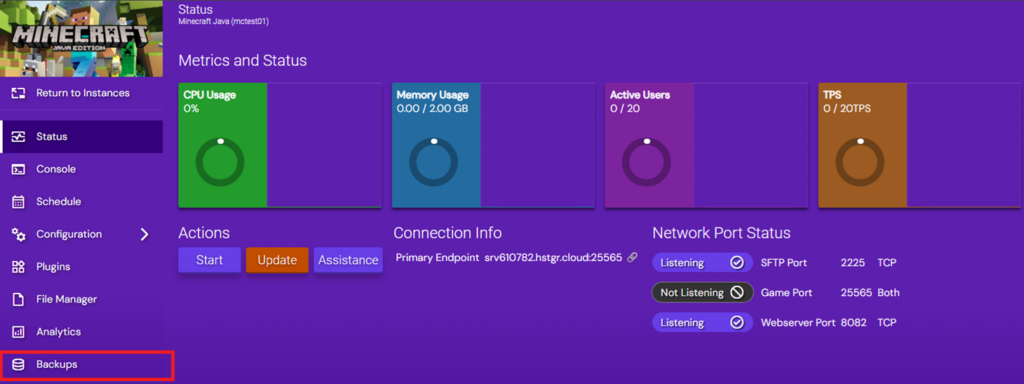
Now, you need to wait for the server to stop. A stopped server will:
- Have the Stopped status in the top-right corner of the screen.
- Have the Game Port as Not Listening under Network Port Status.
- CPU, Memory, Active Users, and TPS metrics will be at 0.
At this point, you should make a full server backup. Here’s how to do it:
- Click Backups in the left-hand menu.
- Under Create a Backup, fill in the manual backup details. Make sure that you enable Mark as sticky so that any automatic backups you have won’t overwrite it.
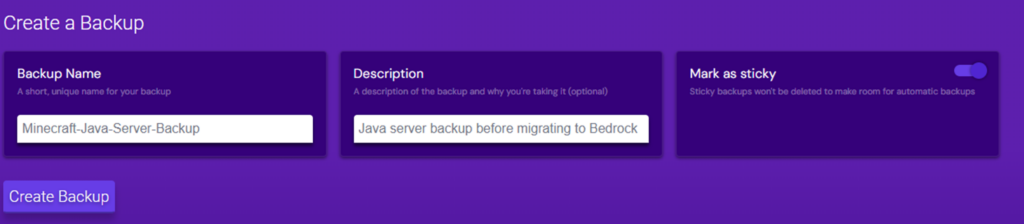
- Press Create Backup. Depending on your server file size, the backup process should take up to 2 minutes. Once it’s completed, you should see it under Stored Backups.

Now that you have backed up your files, you can create a new Bedrock instance. At the left-hand menu, click Return to Instances and click Create Instance.

In the pop-up screen, select the Minecraft Bedrock application and click Create Instance.
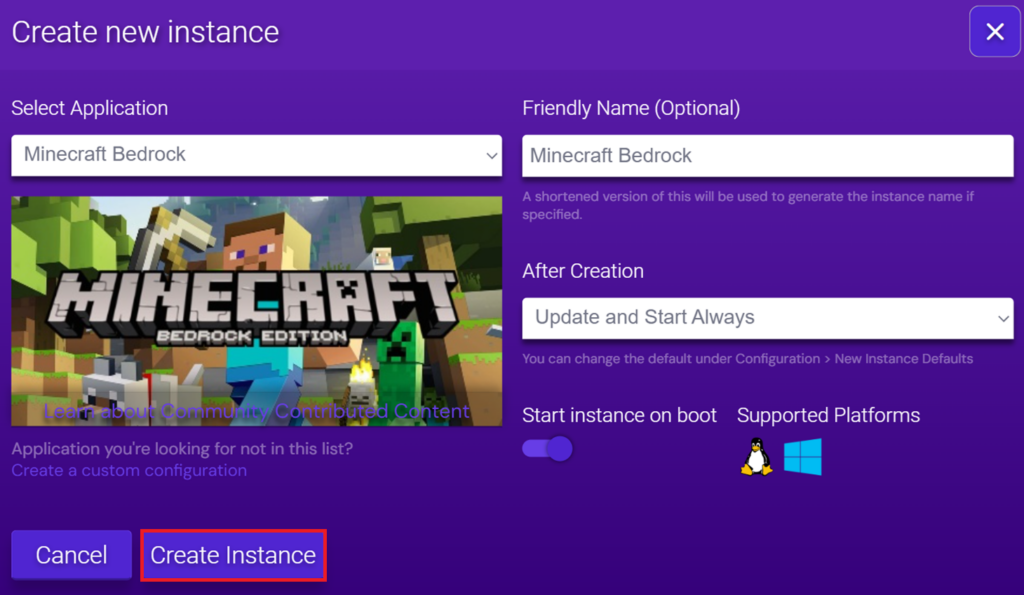
Your Bedrock instance is now ready, and you can start the migration process.

How to configure your Bedrock edition server
Even with a fresh Bedrock edition server set up, you can still carry over a few configuration settings from your previous Java setup.
The server.properties file defines the basic configuration for your Minecraft server. The Java edition file differs quite a bit from the Bedrock edition. However, there are some shared or similar values. Here’s a side-by-side comparison of gameplay-impacting server.properties values that can be re-applied:
| Property name | Description |
| difficulty | Toggles difficulty level. |
| gamemode | Sets the default gamemode for players. |
| force-gamemode | Sets player gamemode to default on fresh login. |
| white-list (Java) / allow-list (Bedrock) | Restricts login access to players defined in a list. |
| view-distance | Defines the view distance for players, overriding client settings. |
| simulation-distance (Java) / tick-distance (Bedrock) | Defines the distance where random ticks are sent. |
| player-idle-timeout | Sets the amount of time in minutes before inactive players are kicked. |
| level-seed | Sets the seed for the fresh world generation. |
Additionally, the two Minecraft versions share quite a few game rules. While you cannot transfer them over directly, you can reapply some common game rules. Here are some examples:
| Game rule | Description |
| doDaylightCycle | Defines whether the in-game day-night cycle progresses. |
| doEntityDrops | Toggles if non-mob entities (such as Minecarts) drop items. |
| doMobLoot | Controls if mobs drop items and experience when killed. |
| doWeatherCycle | Toggles if the weather can change automatically. |
| doFireTick | Manages if fire spreads and extinguishes naturally. |
| mobGriefing | Defines if mobs can change blocks, such as creepers or endermen. |
| naturalRegeneration | Toggles natural health regeneration when hunger is full. |
| playersSleepingPercentage | Sets the percentage of sleeping players needed to skip the night. |
You can also switch over your game ports to match what Java had previously. Java edition uses port 25565 by default, while Bedrock edition uses 19132. However, these values are not static and can be changed. Here’s how to do it:
- Edit your Minecraft Java instance.
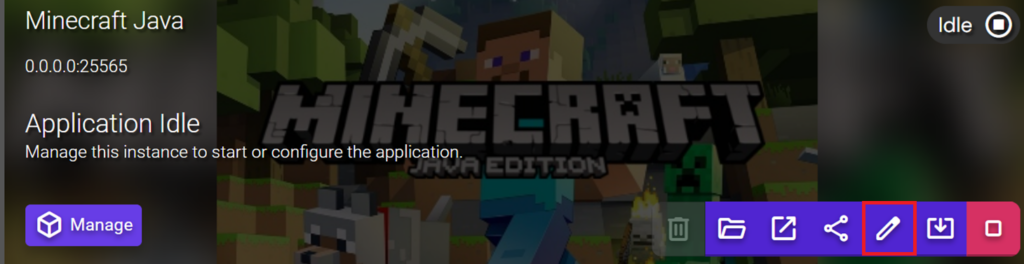
- Under Network and Ports, note down and modify the Game Port to any other number. This change is needed to free up the port for your Bedrock instance. Then, click Save changes.

- Edit your Minecraft Bedrock instance next.
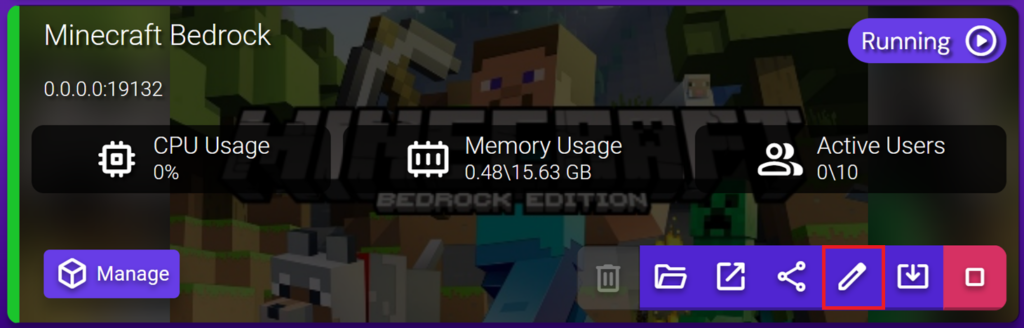
- Under Network and Ports, modify the Server IPv4 port value to match your Java instance’s port and press Save Changes.

Pro tip
You can also modify this setting in server.properties.
How to convert a Minecraft world from Java to Bedrock
Once you have switched over your server, the next step is moving your Java world to Bedrock. There are two main options for doing this.
A quick and practical way to do this is simply using the same seed. Java and Bedrock use the same world generation algorithms, so if you don’t care about keeping your builds, it’s the easy way of doing it.
However, you must convert your world to move over player-made objects, such as buildings and chests. Multiple tools can help you do this, such as:
- Universal Minecraft Converter (part of Universal Minecraft Tool) – a paid tool that includes Java-to-Bedrock world conversion and other editing features.
- Chunker – an open-source Minecraft world conversion tool. Microsoft also recommends this tool for world conversions and offers documentation for it.
Pro tip
While Minecraft world converters do not transfer player data, they transfer items in chests. To retain your progress, store your items in chests that will carry over before starting this process.
To start the conversion process, you need to download your Minecraft Java world:
- Click Manage on your Minecraft instance.
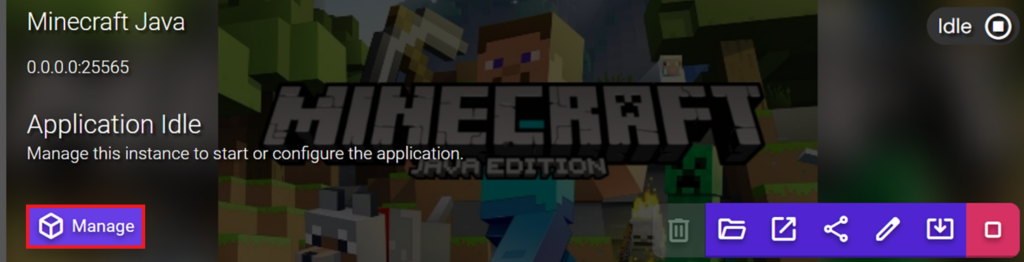
- In the left-hand menu, click File Manager.

- Click the three-dot menu next to your world folder and select Create archive.
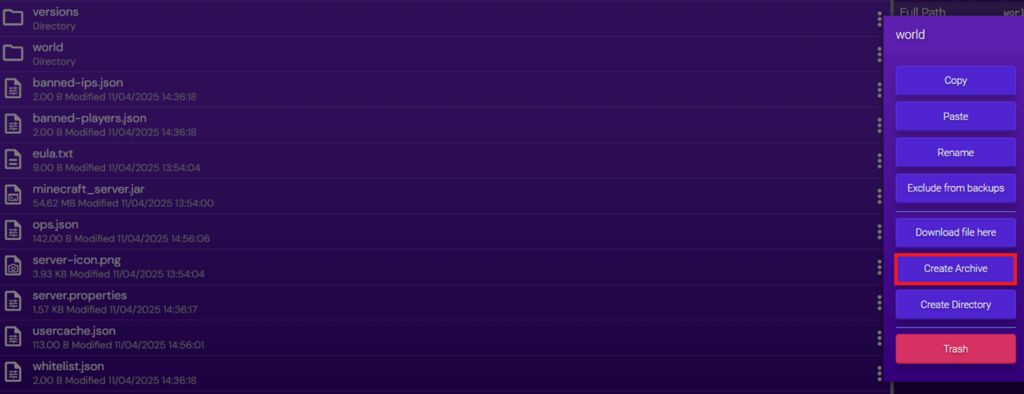
- Find your newly created world.zip file, click the three-dot menu, and click Download.
Now, you must convert the world file to be compatible with Bedrock. In this tutorial, we will use Chunker.
- Open the Chunker application and press Select archive.
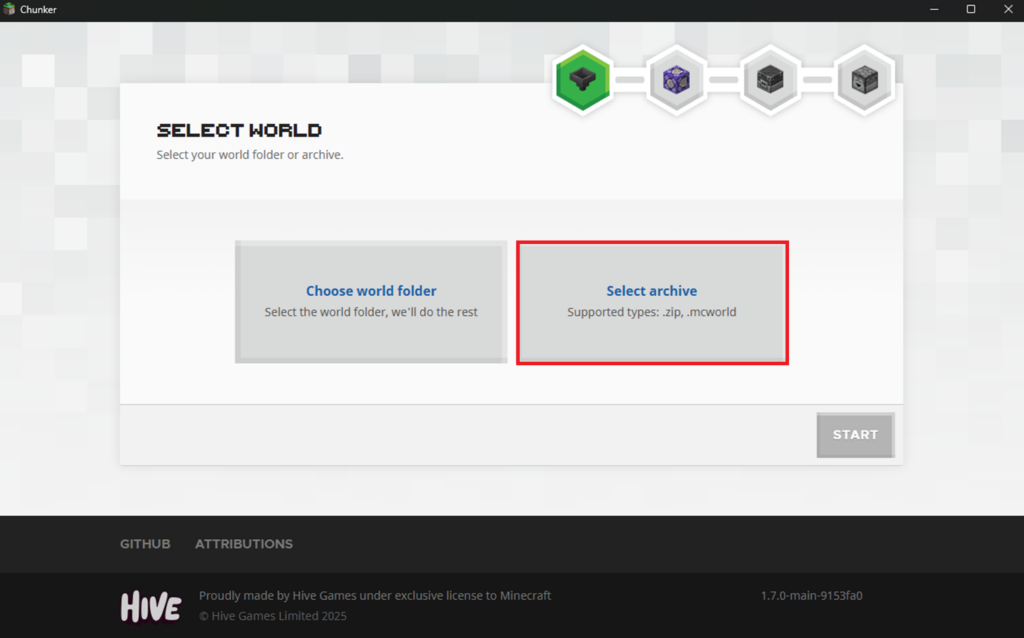
- Select the downloaded world.zip file on your computer.
- Click Start.

- Select your Bedrock edition server’s version. You can check the server version easily in the console by checking the startup logs.
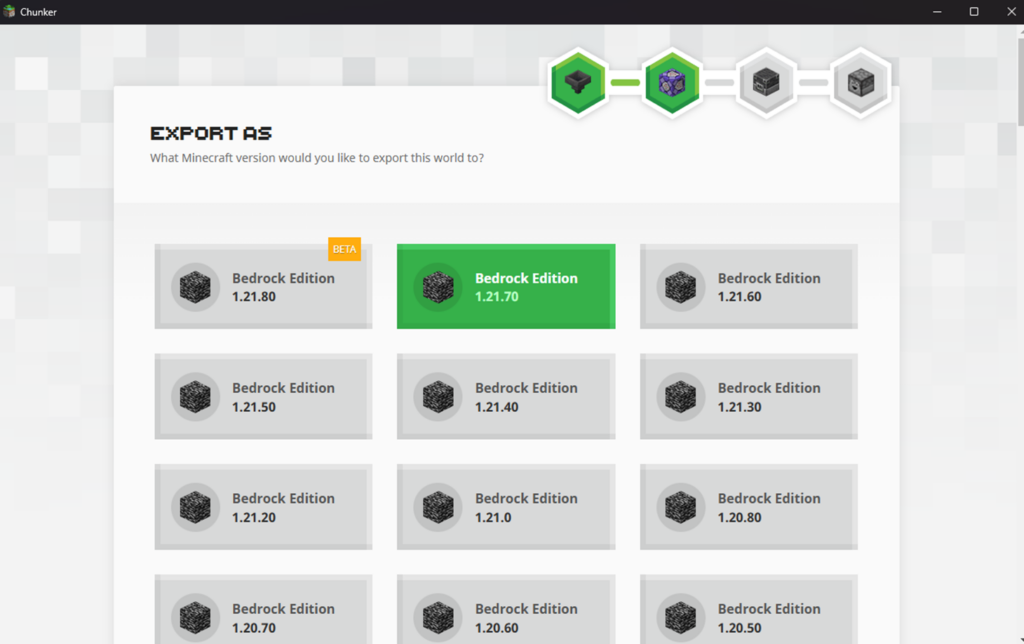
- Scroll down to the bottom and click Convert.
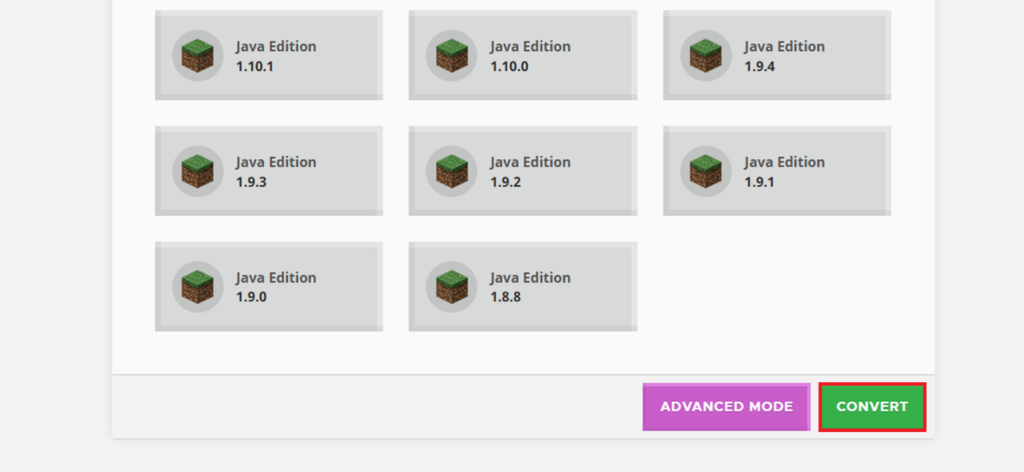
- Once Chunker converts your world, you can optionally check the Output log for any data it couldn’t convert.
- Press Save and save the world file to your computer.

- Chunker exports worlds as .mcworld files, but you need the raw server files. To get them, change the file extension of your world file to .zip. When opened, this will display the db folder and level.dat file.
Next, upload your converted world file to the Bedrock instance:
- Click Return to Instances to return to the Game Panel’s homepage.

- Click Manage on your Bedrock instance.

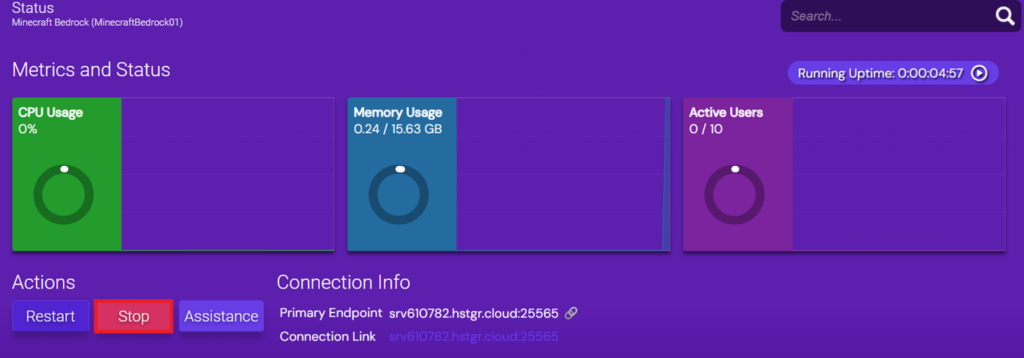
- Click Stop to stop your Bedrock server.
- In File Manager, navigate to worlds. You will see the Bedrock Level folder, which contains your current Bedrock world.
- Since it’s a fresh world, we will simply delete the Bedrock level folder. Click the three-dot menu and select Trash.
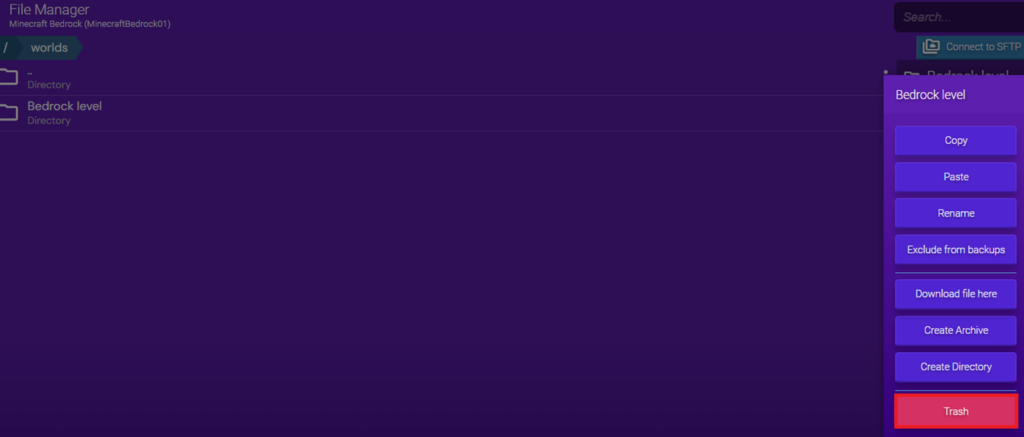
- Click the three-dot menu and re-create the directory, naming it Bedrock level. You will now have a clean directory.
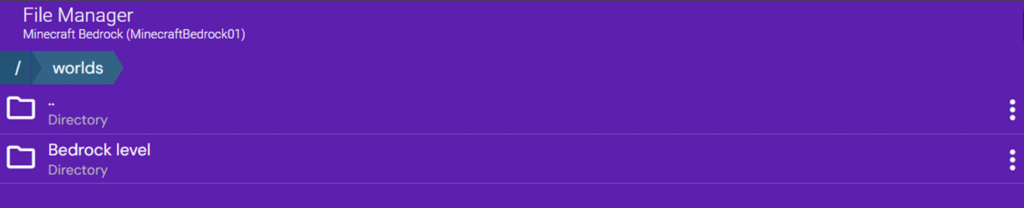
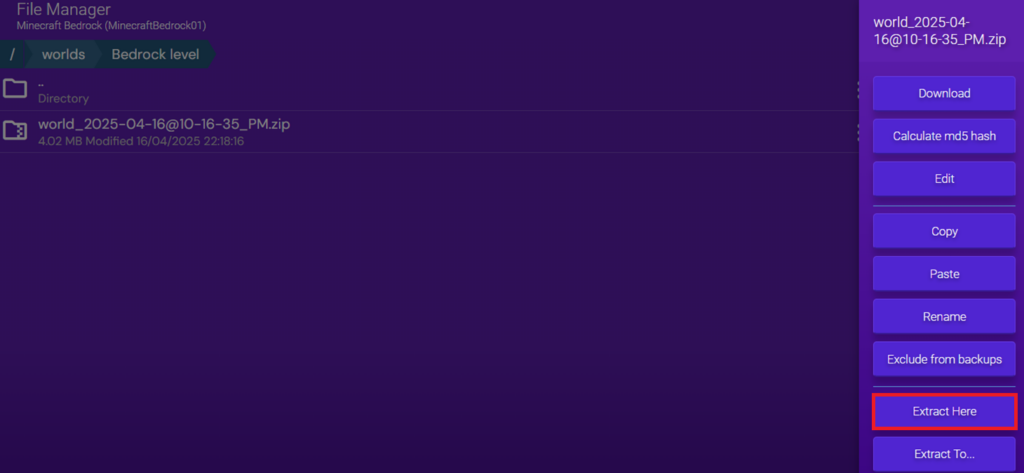
- Open the Bedrock level folder and upload the .zip version of your converted world.

- Click the three-dot menu next to your world.zip file and press Extract here.
- Go back to Status and start your server.
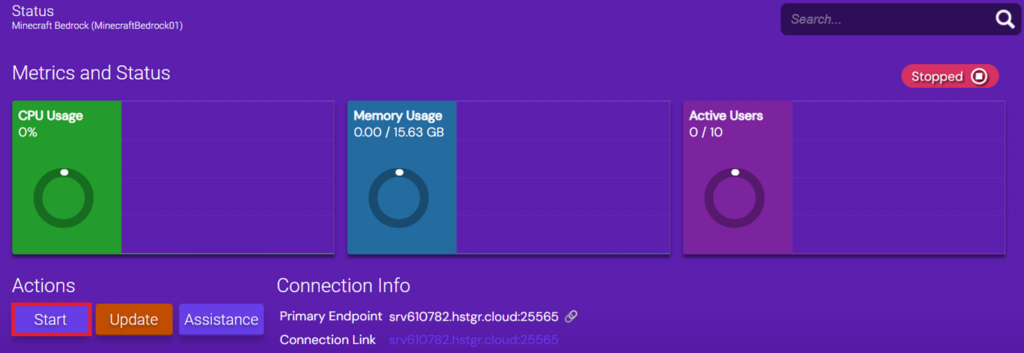
At this point, you can log in and explore your world to check if everything is working correctly and if there are any issues with your world.
Setting up Java-Bedrock crossplay
Want to invite Bedrock players to join your Java Edition server without giving up Java’s powerful customization options? The good news is that you don’t need to choose between them.
With the help of the GeyserMC plugin, you can make your Java server accessible to Bedrock players without converting the world or losing Java-specific features.
It works by opening a separate port for your server that allows Bedrock players to access it. It acts as a proxy between a Bedrock player and your Java edition server. It takes their Bedrock packets and converts them to Java packets for the server to understand, and any packets sent back get converted back to a Bedrock packet.
To implement it, you need a Java edition server running on Paper or Spigot. Let’s see how you can do it!
Important!
Before doing this, we recommend backing up your server files to restore a vanilla Minecraft server configuration.
- In your Game Panel instance, open your Minecraft instance.

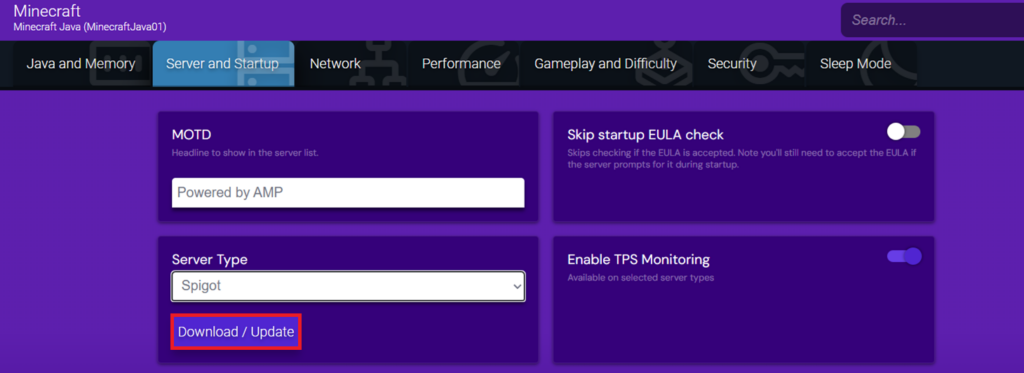
- In the left-hand menu, click Configuration → Minecraft → Server and Startup.
- Under Server Type, select either Spigot or Paper. In this tutorial, we will use Spigot. Be sure to choose a Spigot version that is compatible with GeyserMC.
- Click Download/Update.
- While Spigot is downloading, let’s download the GeyserMC plugin jar file. You can do it from their official site.
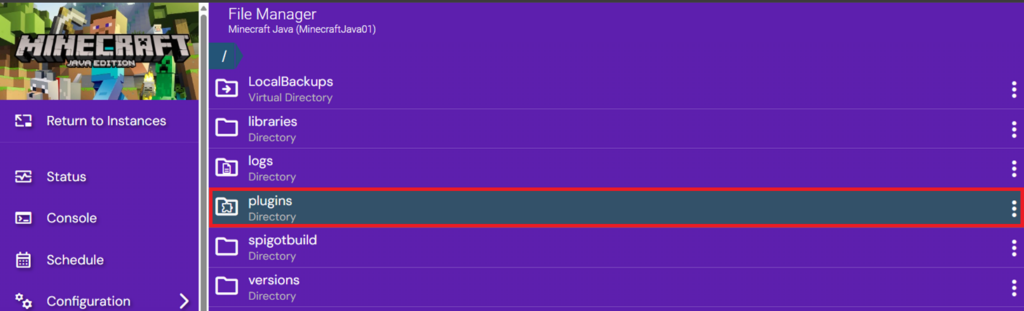
- Once Spigot is successfully downloaded and compiled, navigate to File Manager and open the Plugins folder.
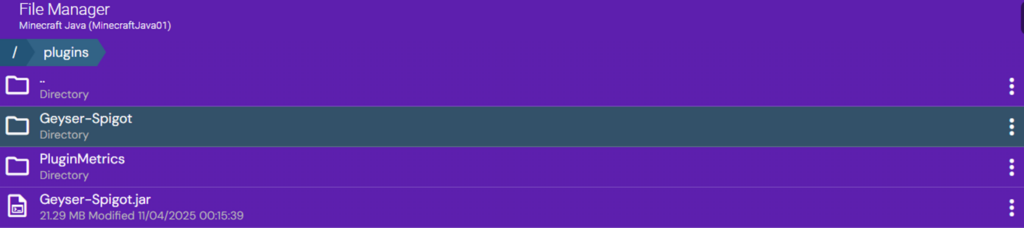
- Upload the Geyser-Spigot.jar file.

- Navigate back to Status and press Start. The server start will initialize the GeyserMC plugin and generate its configuration files.
- Go back to the File Manager and return to the plugins folder. You will now see a new folder named Geyser-Spigot.
- Open the Geyser-Spigot folder and double-click config.yml. Take note of the server port – this is the port that Bedrock players will use to connect to your server. By default, the port is set to 19132.
- To test the connection, you can run this command in your server console:
geyser connectiontest <servername> <port>
Important!
Bedrock players will be greeted with a message saying, “You need to log in with a Java Edition account to play on this server.” To remove this message, install the Floodgate plugin and adjust GeyserMC’s auth-type value to floodgate in config.yml.
With GeyserMC set up, your server can now support both Java and Bedrock players. If anything goes wrong, check the server console – GeyserMC logs are quite detailed and often point directly to the issue, especially for connections.
Conclusion
Switching your Minecraft server from Java to Bedrock isn’t as complicated as it might seem. While the two editions are built differently, there’s enough flexibility to rebuild your setup, move your world, or even enable cross-platform play to keep both sides connected.
If Bedrock edition is better for your server or players, you have everything you need to make that transition. Whether you’re starting fresh or carrying over your existing world, you have the tools – now it’s just a matter of making the switch.
How to switch from Java to Bedrock FAQ
Can I switch from Java to Bedrock version on my server?
Yes, but it’s not a direct toggle. Switching between these servers means stopping your Java edition server and spinning up Bedrock. However, you can transfer your world and a few of your server settings with some extra work.
Do I need to reinstall Minecraft to change the version?
Not quite. While you don’t need to remove your Java edition server, you must stop it and start a fresh Bedrock edition server. You can remove Java afterward, but nothing’s stopping you from keeping it, especially if you want to roll back quickly.
Will my world work after switching from Java to Bedrock?
Not automatically. Java and Bedrock use different world formats, so you’ll need a conversion tool like Chunker to transfer your world. Some structures and entities may not carry over perfectly, so testing the converted world before going live is essential.

Alanas is a Content Writer with a foundation in IT and Operations. His expertise spans cloud engineering, DevOps, and process definition and optimization, gained through his experience in fintech and data-driven organizations of various sizes. Outside of work, he enjoys traveling, exploring history, gaming, and spending quality time with his family. Find him on LinkedIn.