How to create and use a phpinfo file to check your PHP information
Mar 10, 2026
/
Tomas A.
/
2 min Read
If you need to check your website’s PHP configuration, also known as phpinfo, to ensure it meets software requirements, you’re in the right place. This tutorial will guide you on creating a phpinfo file and accessing its detailed information through your hosting control panel. Let’s get started!

Checking PHP Information Using Hosting Control Panel
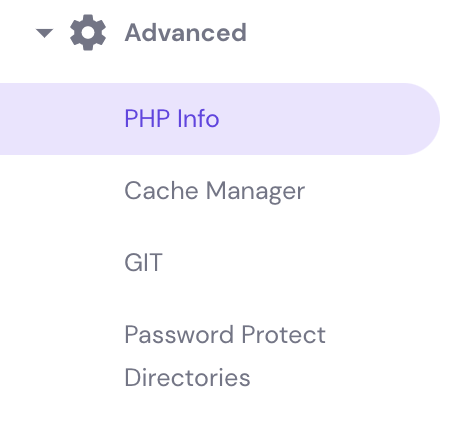
In this guide, we’ll be using Hostinger’s hPanel, where you can easily check your PHP information using the PHP Info tool. Once you’re logged in, scroll down and go to Advanced -> PHP Info.
You’ll then be forwarded to a page with detailed information about your current PHP version, modules, and values, etc. Scroll down to browse for more.
If you wish to find data about a specific module or function, you can use the CTRL + F (CMD + F for macOS) shortcut to open the search feature within your browser.
Checking PHP Information by Creating a phpinfo File
In case your hosting platform doesn’t offer the mentioned built-in PHP Info feature, there is no need to worry! You can reach the same goal by creating a phpinfo file in your public_html directory.
The file will be accessible via a browser and will show you the same detailed information.
You will need a way to access your public_html files. Here we’re using Hostinger’s File Manager as an example.
- Navigate to File Manager under the Files section in your hPanel.
- Once you’re in public_html directory, click the New File button.
- Name your file phpinfo.php and press Create.
- Scroll down and locate the new phpinfo file within the directory, then right-click to Edit.
- Now, copy and paste the following code into the text editor and press Save.
<?php
phpinfo();
?>
The same result can be achieved by using any text editor on your computer. Create the phpinfo.php file by following the same steps from before, then uploading the file to your server’s public_html folder through an FTP client.
If you don’t know how to configure or never worked with an FTP client, such as FileZilla, refer to our FTP guide for more information.
Checking PHP Information Using a Browser
You should have a phpinfo.php file in your public_html directory by now. So, all that’s left is to access the file by adding /phpinfo.php at the end of your domain name.
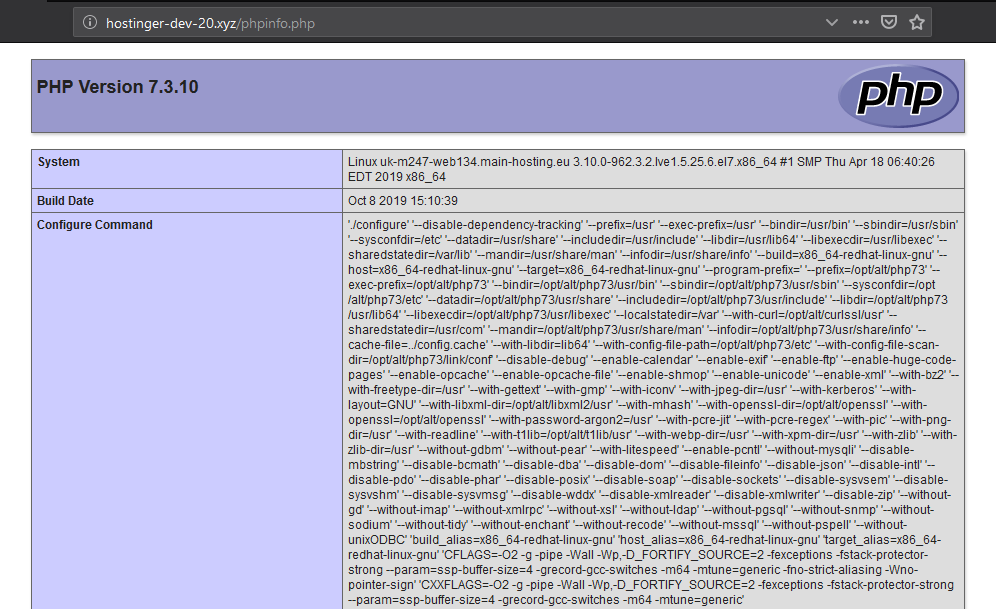
You should see a similar view when the file is accessed via any browser:
Pro Tip
If you don't want your phpinfo page to be displayed all the time, you can easily disable the file by giving it a different name. phpinfo.php_disabled, for instance.

Conclusion
There you have it! By finishing this tutorial, you’ve learned how to create a phpinfo.php file and how to check PHP information via your hosting control panel or your default browser. That was pretty easy, right?

Tomas provides top-notch technical advice on a daily basis to our valued customers. He also likes to create websites and do various coding side projects.

Comments
February 06 2018
Pleasant paragraph and amazing content. I am actually enjoying these a lot!
February 15 2018
Thank you, Nonton! I am glad to hear that our tutorials are helpful! :)
February 15 2018
First of all I would like to say terrific blog! I had a quick question that I'd like to ask if you don't mind. I was curious to know how you center yourself and clear your thoughts prior to writing. I've had difficulty clearing my mind in getting my ideas out there. I truly do take pleasure in writing however it just seems like the first 10 to 15 minutes tend to be wasted simply just trying to figure out how to begin. Any ideas or hints? Thank you!
February 15 2018
Hello. Thank you for your question! :) The most important thing is to have proper preparation. Here's a quick list of things that I do before starting an article: - Primary and secondary keyword research; - Check what the most popular articles for your keyword and think what you could do to make it even better; - Writing plan (how many sections, their names, and similar). If you at least do these three things, you'll have a much easier time writing your posts and articles!
May 19 2018
Very good information. Lucky me, I discovered your site by chance and bookmarked it for later!
May 22 2018
The information shared in this tutorial was very useful. Exactly what I needed. Keep on writing!
August 27 2020
Thank you, very simple steps (slight modifications for Windows 10 more recent versions of PHP) but most helpful guide that I have come across thus far.
December 23 2024
This is confusing, from the standpoint that the phpinfo.php is read within hpanel and that file can output different information, as in the variables, than the one you show how to create. Why are there two of these files? And which one has precedent? But also, why doesn't the one shown in hpanel update, like the one that was created? The other part that's confusing and not entirely clear is this file's security. You say we can rename it, but if we do that, won't the GEOIP information we've enabled in our .htaccess file then get ignored?
January 15 2025
Thank you for your questions! To clarify, the
phpinfo()function is designed to display PHP configuration details, and for security reasons, it’s only accessible through your hosting account. That’s why there’s nophpinfo.phpfile in Hostinger’s website files. If you want to view the output in your browser, you’ll need to create a separatephpinfo.phpfile with the function and any selected parameters you need. Regarding precedence, neither option takes precedence—it depends on whether you prefer accessing the information via the hosting panel or through the browser ;)