How to use n8n to generate content
Mar 31, 2025
/
Ariffud M.
/
9 min Read
As a workflow automation tool, n8n lets you connect different apps and services to streamline tasks. One powerful use case is AI-powered content creation, which lets you automate the entire process of writing high-quality blog posts with minimal manual effort.
When using n8n, you can build a workflow that fetches trending topics, writes full-length articles, and publishes them automatically. This saves time and boosts productivity – perfect for bloggers, marketers, and businesses looking to scale their content output efficiently.
However, AI-generated content may still require manual fact-checking and quality control to meet high standards.
This article will guide you through setting up a content generation workflow in n8n. By the end, you’ll have a fully functional system that uses multiple AI agents to automate content creation, reducing the need for constant human input.
Understanding the multi-agent content generation approach
A multi-agent content engine is a system where multiple AI-powered agents handle different stages of content creation, each with a specific role.
Instead of relying on a single AI model, which often leads to inconsistencies, this structured workflow optimizes every stage, resulting in more engaging, well-researched, and SEO-friendly content.
Here’s how the process works:
- Fetching a relevant topic – the first AI agent retrieves trending and engaging topics based on predefined criteria. This ensures your content aligns with current search trends and audience interests.
- Generating an article outline – once a topic is selected, the next agent creates a well-structured outline, preparing a logical flow before drafting begins.
- Writing the full draft – the third agent expands the outline into a complete article, focusing on readability, clear structure, and SEO best practices.
- Refining the content – before publishing, another AI agent polishes the draft by improving readability, fixing grammar, and enhancing clarity for a natural, human-like tone.
- Formatting and converting to HTML – function-based nodes fix formatting issues and convert Markdown-formatted text into HTML, making the content compatible with most content management systems (CMSs).
- Publishing to CMS – the final workflow step uploads the content to your CMS. You can configure it to publish immediately, as drafts, or even schedule posts based on your needs.
Prerequisites
Before setting up an automated content generation workflow in n8n, make sure you have the following:
A virtual private server (VPS) plan
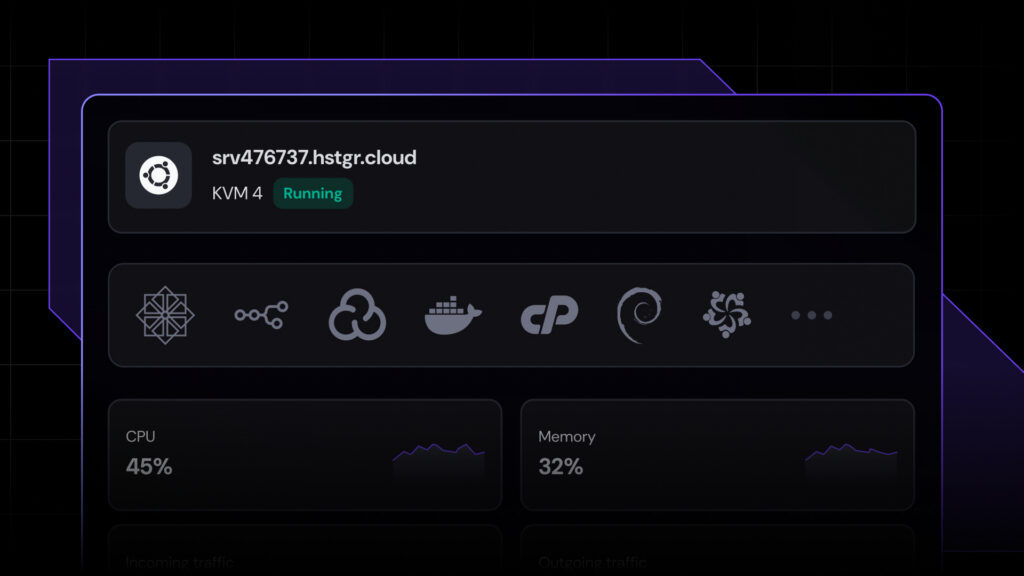
You’ll need a VPS to run n8n. A VPS provides dedicated CPU, RAM, and storage to run multiple workflows without performance issues.
Hostinger’s n8n VPS service is a great option, offering a balance of performance and budget. Since n8n isn’t resource-intensive, the KVM 1 plan, starting at £4.99/month, should be enough for most workflows.
But if your workflow involves heavy data processing, consider getting a more advanced VPS plan. You can monitor resource usage in hPanel and easily upgrade your plan if needed.

A running n8n instance
After preparing the VPS, set up n8n on your server. With Hostinger’s n8n plans, installation takes just a few clicks as they come with a preconfigured template. This eliminates the need for manual installation via the command line, which can be time-consuming and prone to errors.


A CMS with API-based publishing
To automate content publishing, you need a CMS that supports API-based publishing, such as Ghost or WordPress. We’ll use Ghost in this tutorial, which we’ve already set up on a VPS.
Once your Ghost site is ready, open the admin dashboard and go to Settings → Integrations → Add custom integration.

Name your new integration and save the admin API key to integrate Ghost with n8n later.

An AI model for generating content
You’ll also need a large language model (LLM) to generate content. Here, we’ll use DeepSeek AI within n8n.
Make sure to obtain an API key by accessing the DeepSeek platform site and navigating to API keys → Create new API key. Copy and store the generated key securely, as it will only be shown once.

How to build a content generation workflow in n8n
Here’s how to set up an automated content generation workflow in n8n from scratch, using DeepSeek as the AI agent and Ghost as the publishing platform.
While n8n offers workflow templates to speed up the process, we’ll take a hands-on approach for better customization and control over each step.
1. Create a new workflow in n8n
Start by opening your n8n dashboard. For Hostinger VPS customers, you can do so by clicking the Manage App button on your VPS Overview page.

Once inside the dashboard, hit Create Workflow in the top-right corner.

Give your new workflow a name, such as Multi-Agent Content Generation, then click Save to store your workflow settings.

Next, click Add first step… and choose Trigger manually from the available trigger options.

2. Set up DeepSeek to fetch a relevant topic
After defining the first step, add a new node by clicking the plus (+) icon next to When clicking ‘Test Workflow’. Type DeepSeek in the search bar and select the one with the cube icon.

Next, choose Create chat completion from the available chat actions. This will open the configuration dialog.

In the Credentials to connect with field, click the arrow-down icon to open the drop-down menu, then select Create a new credential.

Paste your DeepSeek API key into the designated field and hit Save.

Now, rename the node to something like SEO specialist. Then, choose your preferred chat model – we’ll use deepseek-chat for this guide.
In the Prompt section, click Add Message and set the role to User. Type the following prompt into the Content field:
You're an SEO specialist. Generate one blog keyword about AI, automation, or productivity. Ensure it's engaging, trending, and relevant for 2025.

Once done, hit Test Step to run the node. If successful, you’ll see the result in the right output pane like this:

Click Back to canvas to continue building your workflow.
3. Generate an outline based on the topic
Repeat the process by adding another DeepSeek node for the content specialist role, choosing the chat action, and renaming the node accordingly.
Then, select your preferred chat model and add a prompt similar to:
You're a content specialist. Create a structured outline for an article with the keyword: {{ $json.message.content }}. Include 5-7 main sections.The {{ $json.message.content }} variable comes from the left input pane’s content section. You can drag and drop this variable into the prompt field to dynamically insert the keyword from the previous step.

Pro tip
Every time you add a new node, test it immediately to confirm it works correctly and to catch potential issues early.
4. Draft the article
You’ll need another AI agent to generate the full-length blog post. Connect a new node, rename it to Content writer, adjust its settings as needed, and use the prompt below:
You're a content writer. Based on this outline: {{ $json.message.content }}, generate a well-written blog post. Keep it engaging, well-structured, and SEO-friendly.At this stage, the workflow will produce a complete article based on the structured outline from the previous step.

Suggested reading
Learn effective AI prompting techniques to generate high-quality content in our guide.
5. Refine the content
While the previous node generates engaging content, the article may still sound stiff, robotic, or too AI-generated.
To enhance readability and set a more natural tone, include another AI agent to act as a content editor. This step improves phrasing, structure, and flow to ensure a human-like writing style.
Add a DeepSeek node as usual, then paste the following prompt – or adjust it if needed:
You're a content editor. Improve the {{ $json.message.content }} blog post by enhancing readability. Refine the tone and phrasing to make it sound more natural, engaging, and human-written – avoiding overly generic or robotic language.
6. Fix the formatting
If you check the previous node’s output, you’ll notice that the content is still unstructured and includes unwanted formatting.
To fix this, include a Code node to separate the title and body content into two variables, clean up unnecessary tags, and ensure proper formatting.
After adding the node, set the running mode to Run Once for All Items and the language to JavaScript. Then, paste the script below into the designated field, replacing $input.first().json.message.content with your variable from the left pane:
const text = $input.first().json.message.content; // Ensure this matches your AI output field

// Split into lines and remove empty ones

const lines = text.split("\n").filter(line => line.trim() !== "");

// Extract the title (first Markdown header)

let title = "";

if (lines[0].startsWith("# ")) {

title = lines.shift().replace("# ", "").trim(); // Remove `# ` from title

}

// Remove title duplication in content

let content = lines.join("\n").trim();

if (content.startsWith(`**${title}**`)) {

content = content.replace(`**${title}**`, "").trim();

}

// ** 1️⃣ Fix Headings (No Extra `<p>`, Remove `**`) **

content = content

.replace(/^##\s+\*\*(.+?)\*\*/gm, "<h2>$1</h2>") // Convert `## **Heading**` to `<h2>`

.replace(/^##\s+(.+)/gm, "<h2>$1</h2>")  // Convert `## Heading` to `<h2>`

.replace(/^###\s+\*\*(.+?)\*\*/gm, "<h3>$1</h3>") // Convert `### **Heading**` to `<h3>`

.replace(/^###\s+(.+)/gm, "<h3>$1</h3>")  // Convert `### Heading` to `<h3>`

.replace(/<p>\s*(<h[23]>)/g, "$1")  // Remove `<p>` before `<h2>` and `<h3>`

.replace(/(<\/h[23]>)\s*<\/p>/g, "$1");  // Remove `</p>` right after headings

// ** 2️⃣ Fix Paragraphs (No `<p>` Before Headings or Lists) **

content = content

.replace(/\n{2,}/g, "\n")  // Prevent excess new lines

.replace(/(?<!<\/h2>|<\/h3>|<\/ul>|<\/li>)\n(?!<h2>|<h3>|<ul>|<li>)/g, "\n<p>")  // Add `<p>` for text sections

.replace(/<\/p>\s*<p>/g, "</p>\n<p>")  // Ensure correct spacing between paragraphs

.replace(/<p>\s*<\/p>/g, "")  // Remove empty `<p>` tags

.replace(/<\/h2>\s*<p>/g, "</h2>\n")  // Remove `<p>` after `<h2>`

.replace(/<\/h3>\s*<p>/g, "</h3>\n")  // Remove `<p>` after `<h3>`

// ** 3️⃣ Fix Lists (Ensure No `<p>` Inside `<ul>`) **

content = content

.replace(/\n- (.+)/g, "\n<ul>\n<li>$1</li>")  // Convert `- item` to `<ul><li>item</li>`

.replace(/<\/li>\n<li>/g, "</li>\n<li>")  // Ensure `<li>` items are properly closed

.replace(/<\/li>\n\n<ul>/g, "</li>\n</ul>\n\n<ul>")  // Fix nested list structure

.replace(/<\/li>\n(?!<\/ul>)/g, "</li>\n</ul>")  // Close lists properly

.replace(/<\/ul>\n<p>/g, "</ul>\n")  // Remove `<p>` right after `<ul>`

.replace(/<p>\s*<ul>/g, "<ul>")  // Remove `<p>` before `<ul>`

.replace(/<\/ul>\s*<\/p>/g, "</ul>");  // Remove `</p>` after `<ul>`

// ** 4️⃣ Remove Unnecessary `<br />` and Extra Formatting Issues **

content = content

.replace(/<br\s*\/?>/g, "")  // Remove all `<br />` tags

.replace(/\n?---+\n?/g, "")  // Remove `---` section dividers completely

.replace(/\n{3,}/g, "\n\n"); // Prevent excessive line breaks

return [

{

json: {

title: title,

content: content.trim()

}

}

]
After executing the node, the output is still in Markdown format. You need to convert it to HTML to ensure compatibility with Ghost.
To do this, connect a Markdown node, select Markdown to HTML as the conversion mode, and then drag the content variable into the Markdown field.

7. Publish to Ghost
Add a Ghost node to your workflow and select Get a post from the Actions list.

From the Credentials to connect with field, create new Ghost credentials by entering your site’s URL and the admin API key you previously generated.

Change the Operation value to Create, drag {{ $json.title }} and {{ $json.content }} into their respective fields, then set the content format to HTML.
In Additional Fields, you can customize the blog post settings, such as changing the publishing status to Draft so you can review it later in the Ghost admin dashboard.

After testing the node, the new post should appear as a draft in the Ghost dashboard’s Posts section, just as configured earlier.

8. Test and monitor your workflow
Once the workflow is set up, test it manually to verify if everything runs as expected. Go back to the workflow editor canvas and hit Test Workflow. Each process should be completed successfully, indicated by a green checkmark icon.

If the workflow runs smoothly, you can schedule it to execute automatically at specific intervals, such as every few hours or days.
To do this, delete the “When clicking ‘Test Workflow'” node by clicking the trash bin icon above it. Then, select Add first step… → On a schedule.

In the Trigger Rules section, set the interval to hours, days, weeks, or a custom interval and specify the exact time you want the workflow to run.

Don’t forget to connect the trigger to the SEO specialist node and re-test the entire workflow afterward. Then, activate the workflow by toggling the activation switch in the top bar of your editor canvas.

Here’s what your final automated content generation workflow should look like:

Best practices for scaling workflow as content grows
As your content production grows, you need to optimize your workflow for efficiency and high-quality output. Below are key best practices to ensure your automation scales with increasing content demands.
Add advanced nodes for enhanced functionality
Include additional nodes to improve content quality and automation:
- Sentiment analysis node – ensures the generated article aligns with your brand’s voice.
- OpenAI’s DALL·E – auto-generates relevant images for each article.
- Another AI agent to create SEO metadata – writes meta titles and descriptions for better search visibility.
Distribute workload across multiple workflows
Instead of running everything in a single workflow, break it into specialized, interconnected workflows:
- Content generation workflow – handles keyword research, outline creation, drafting, and refinement.
- Publishing workflow – manages formatting, metadata generation, and content publishing.
Then, use a Webhook node to trigger workflows asynchronously and efficiently handle high-volume content requests.
Automate review and approval processes
As the volume of generated content increases, you may need a manual review step to maintain quality control before publishing:
- Store drafts in Google Sheets or Airtable for quick approval.
- Send Slack or Telegram notifications to team members for content review.
- Add a manual approval step in the workflow to ensure quality control before content goes live.
Suggested Reading
Want to learn more about integrating AI agents with n8n? Check out our article on how set up an AI agent on n8n with Hostinger VPS.
Conclusion
The multi-agent content generation approach lets each AI agent handle a specific task, creating a structured and efficient content workflow while minimizing manual effort.
Using n8n, you can build an automated content generation workflow that streamlines the entire process. Here’s a quick recap of the steps:
- Set up n8n and create a new workflow.
- Add the first DeepSeek node to generate a keyword.
- Structure the outline based on the chosen keyword.
- Write a full-length, engaging article.
- Edit the article to improve readability.
- Fix formatting and convert it to HTML.
- Publish the content to Ghost.
- Test and automate the workflow.
You can also refine your workflow by adding more nodes for advanced functionality or including a manual review step to maintain content quality.
If you’re ready to take automation even further, explore n8n’s integrations with analytics tools, email marketing platforms, and other services to enhance your content strategy.
How to use n8n to generate content FAQ
Do I need programming skills to use n8n for content generation?
No, you don’t need programming skills to use n8n, as it’s a no-code workflow automation tool. However, having basic scripting knowledge can help fix formatting issues, extract titles and content, and clean unwanted characters, because AI content tends to have extra spacing or markdown elements that need adjustment.
How does the multi-agent approach improve content creation?
A multi-agent content engine distributes tasks across specialized AI agents, improving efficiency and content quality. Each agent focuses on a specific role, such as topic research, outline generation, drafting, editing, and formatting, which reduces inconsistencies and enhances readability.
Can I integrate n8n with a CMS?
Yes, you can integrate n8n with CMS platforms that support API-based publishing, like Ghost, WordPress, and Strapi. API-based publishing means the content is sent directly from n8n to the CMS, enabling automated post creation, scheduling, and updates without manually accessing the CMS dashboard.
All of the tutorial content on this website is subject to Hostinger's rigorous editorial standards and values.

Ariffud is a Technical Content Writer with an educational background in Informatics. He has extensive expertise in Linux and VPS, authoring over 200 articles on server management and web development. Follow him on LinkedIn.