How to add plugins to a Minecraft server: Using Game Panel and FTP
Nov 29, 2024
/
Ritoban M.
/
5 min Read

Whether you’re looking to add basic commands, implement an economy system, or create custom game modes, plugins provide the foundation for building engaging multiplayer experiences in Minecraft. The best part is that players can join your enhanced server using their vanilla Minecraft client – no additional downloads are required.
There are more than 40,000 plugins to choose from. The process of adding them is also easy enough to learn – it can be done through either the Game Panel interface or FTP (File Transfer Protocol).
While new users might prefer the simplicity of a Game Panel installation, FTP users benefit from advanced customizability and a bigger plugin selection. Let’s unpack each method of adding plugins to a Minecraft server, so that you know everything you need to kick-start a unique player experience on your server.
Prerequisites for adding Minecraft plugins
Before installing plugins to your Minecraft server, you need to make sure you have a few things ready. Let’s look at them now:
- A dedicated Minecraft server: You’ll need a running Minecraft server, preferably version 1.20.2 or later, for optimal compatibility with modern plugins. While older versions can still support plugins, the latest versions provide access to the newest features and security updates.
- Server access with admin privileges: You’ll need administrative access to your hosting server through either a secure shell or a hosting control panel. For example, Hostinger’s Minecraft VPS Hosting offers a Game Panel, which provides a user-friendly interface for managing your server settings and files.
- FTP access: File Transfer Protocol (FTP) access is essential for uploading plugin files to your server. A reliable FTP client like FileZilla will allow you to transfer files securely between your local computer and the server. Make sure you have your FTP credentials ready, including the hostname, port, username, and password.
- Compatible server software: Your dedicated Minecraft server must run on plugin-compatible software such as Bukkit, Spigot, or Paper. Among these, Paper is the most recommended as it offers superior performance and compatibility with the widest range of plugins while maintaining great security and optimization.

How to add Minecraft plugins using the Game Panel
Hostinger’s Game Panel offers the most straightforward approach for Minecraft plugin management. Here’s how to enhance your server with plugins:
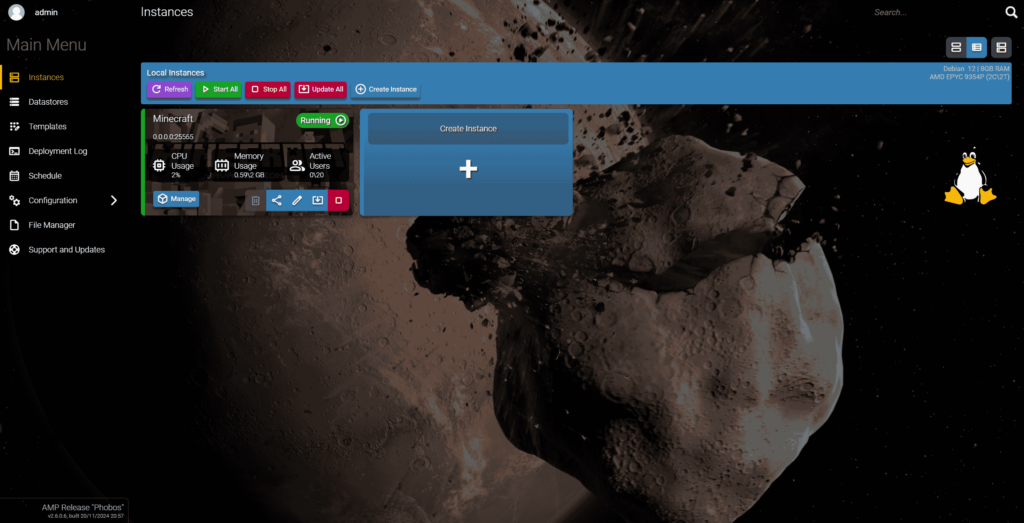
- Access your Game Panel dashboard and click the Manage button for your Minecraft server instance. This opens your server’s control interface where all management functions are located.
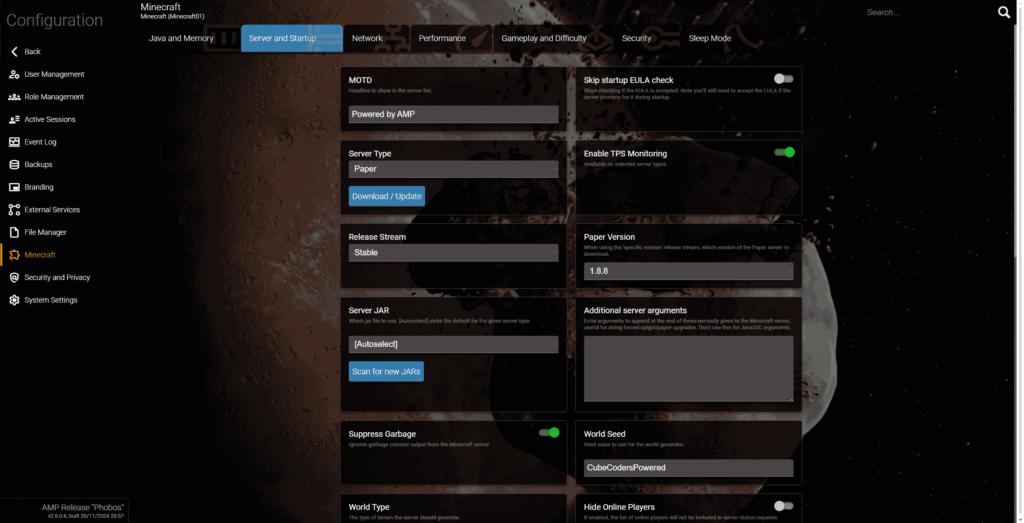
- Navigate to the Configuration → Minecraft. From there, visit the Server and Startup tab. Here, ensure your server is running on either CraftBukkit, Spigot, or Paper, as these server types are required for plugin compatibility.
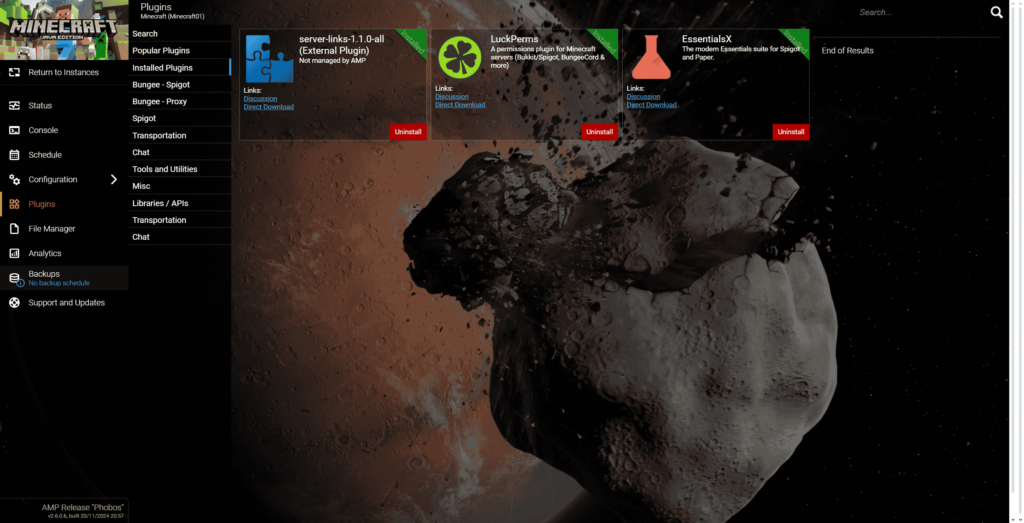
- Click on the Plugins section. You’ll see a curated list of popular and verified plugins that you can install with a single click.
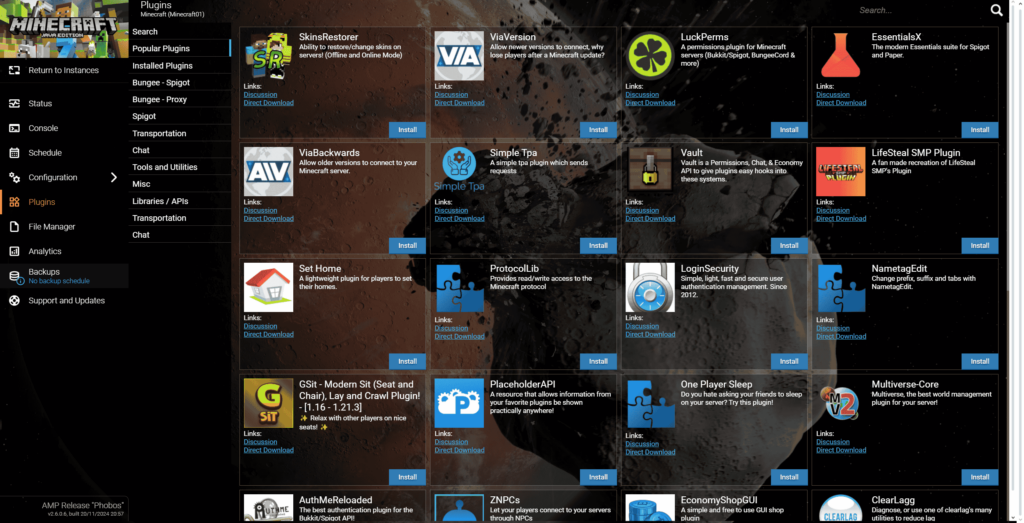
- Click the Install button next to your chosen plugin. Before installing, you can click the Discussion button to read more details about the plugin’s features and requirements.
- After installing your desired plugins, return to the main dashboard and restart your server to activate them. This step is crucial as plugins only load when the server initializes.
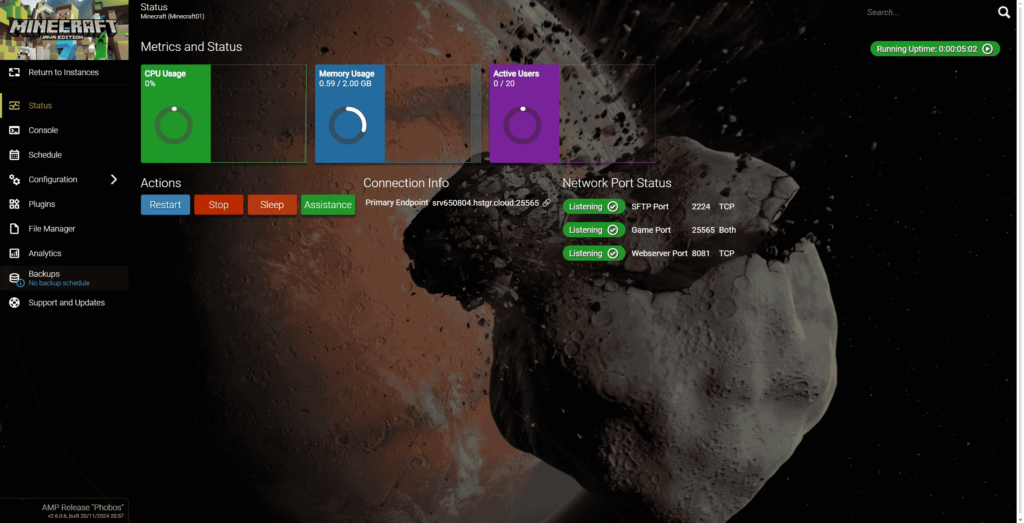
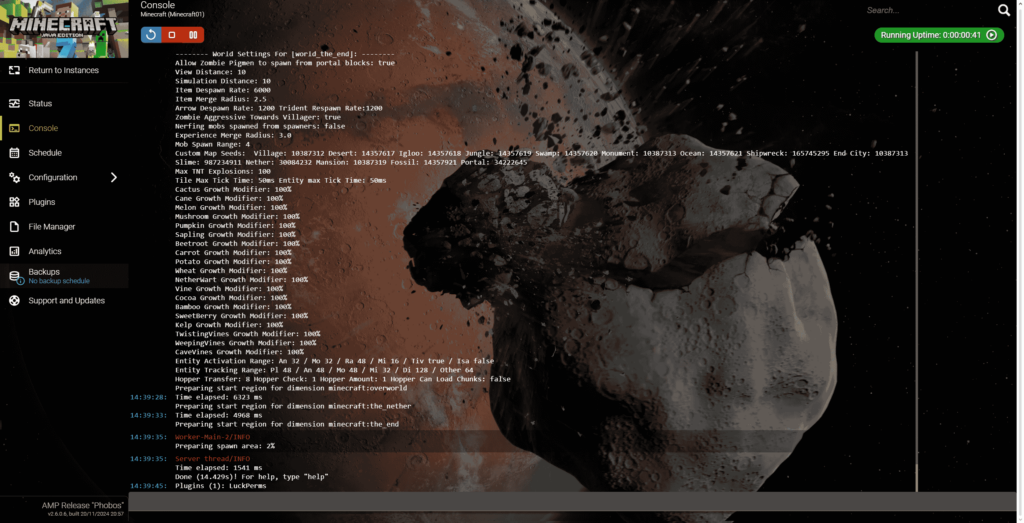
- To verify your plugins are working correctly, open the server console and type the command /plugins. This will display a list of all active plugins on your server.
Pro Tip
Game Panel offers many popular plugins, but you might want to explore additional options from trusted sources. In such cases, you can use the manual installation method through FTP, which we'll cover in the next section.
How to install Minecraft plugins using FTP
While the Game Panel method offers convenience, FTP provides more flexibility and control over plugin installation. Here’s a detailed guide to installing plugins using FTP:
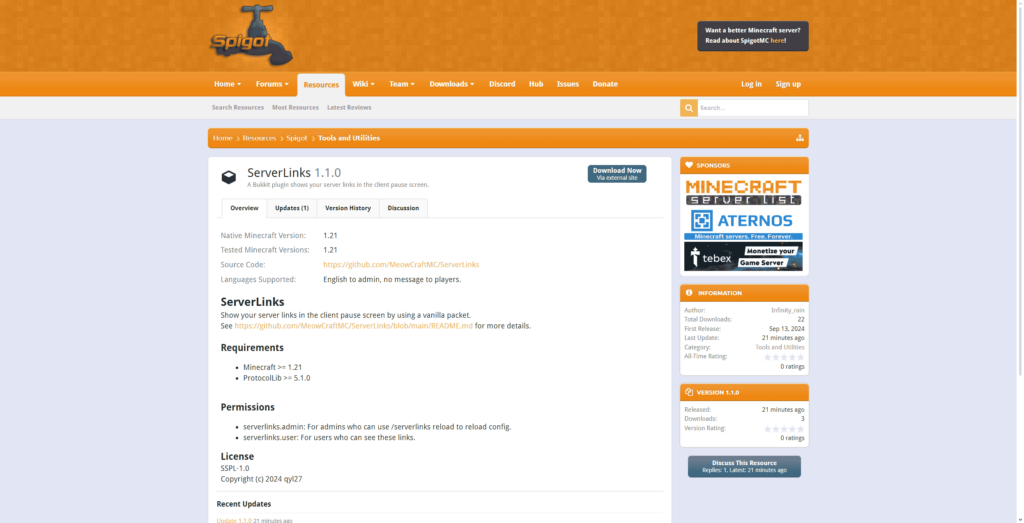
- Download your desired plugins from trusted sources like Spigot or Bukkit. Ensure the plugin files have a .jar extension and are compatible with your server version.
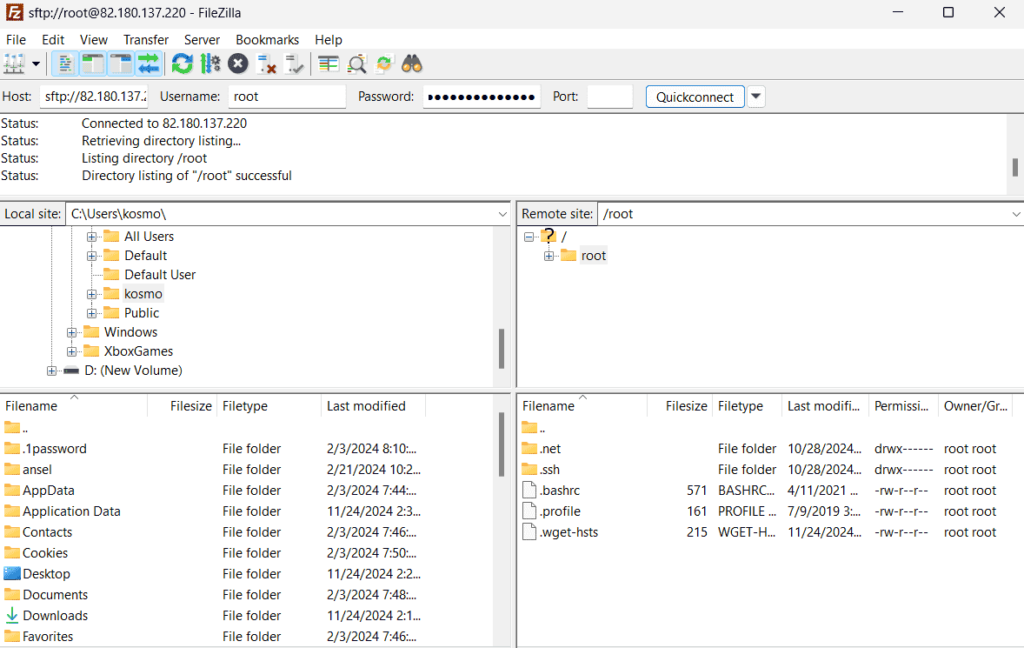
- Launch your FTP client (such as FileZilla) and connect to your server using the credentials provided by Hostinger:
- Host: Your server’s IP address
- Username: Your FTP username
- Password: Your FTP password
- Port: 22 (default FTP port)
- Navigate to the /plugins folder in your server directory. If this folder doesn’t exist, start your server at least once to generate it automatically. (Mine is located in /home/amp/.ampdata/instances/Minecraft01/Minecraft)
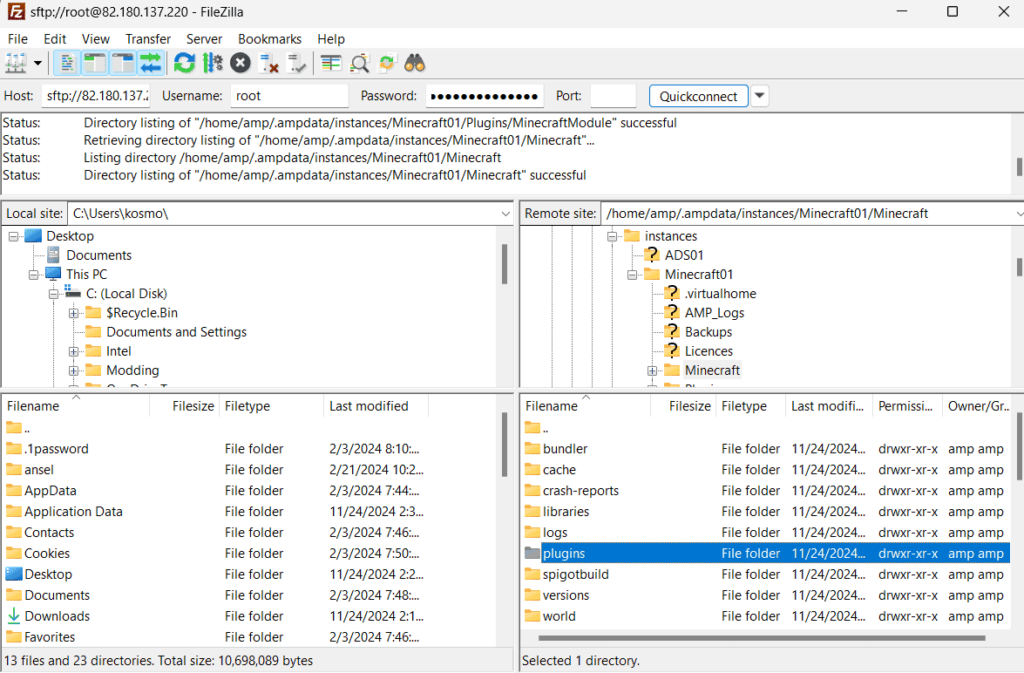
- Upload the plugin .jar files to the /plugins folder. You can do this by dragging and dropping the files from your local computer to the server directory. If you have a plugin pack in a .zip format, upload it directly to the plugins folder and use the control panel to extract it.
- Return to your server control panel and restart the server to activate the new plugins. This step is essential as plugins only load during server startup.
Important! Always back up your server before installing new plugins to prevent any potential data loss during the installation process.
Managing and configuring Minecraft plugins
Once your plugins are installed, you’ll need to configure them to suit your server’s needs. Most plugins create their own configuration files in the /plugins/[plugin_name] folder upon first launch.
Editing configuration files
Access your plugin’s configuration files through FTP or Game Panel’s file manager. The main configuration file is typically named config.yml and uses YAML format.
This file controls various aspects of the plugin’s functionality, from basic settings to complex features. It’s different for every plugin, but it usually allows you to customize behavior without modifying the plugin code itself.
Remember to restart your server or use the plugin’s reload command to apply changes.
Plugin commands
Each plugin typically comes with its own set of commands to enable real-time management while in-game. The most fundamental command is /plugins, which displays all active plugins on your server. For individual plugin control, you can use:
/plugin reload [plugin_name]: Reloads a specific plugin’s configuration/plugin enable [plugin_name]: Enables a disabled plugin/plugin disable [plugin_name]: Temporarily disables a plugin/[plugin_name] help: Shows all available commands for that plugin
Maintaining plugin health
Keep your plugins updated to ensure optimal performance and security. Check the plugin’s documentation regularly for updates and compatibility information.
If you notice conflicts between plugins or performance issues, try disabling plugins one by one to identify the source of the problem.
Pro Tip
Create a test server environment to experiment with plugin configurations before implementing changes on your live server.
Choosing the right plugins for your Minecraft server
Selecting the right plugins is key to creating an enjoyable server experience. Trusted platforms like SpigotMC and Bukkit are excellent sources, offering thousands of verified plugins with regular updates and strong community support.
When evaluating plugins, keep these factors in mind:
- Active development: Look for plugins with recent updates to ensure ongoing support.
- Server performance: Consider how the plugin will affect your server’s performance.
- Community feedback: Check reviews and ratings for reliability and quality.
- Version compatibility: Ensure the plugin works with your specific server version.
- Integration: Check for API compatibility, such as support for Vault, to ensure smooth integration with other plugins.
Remember, adding more plugins doesn’t necessarily improve gameplay. Focus on quality over quantity to maintain a smooth and enjoyable server experience.
Conclusion
Adding plugins to your Minecraft server can significantly enhance your gaming experience. Whether you choose to use our Game Panel’s user-friendly interface or opt for manual FTP installation, both methods provide reliable ways to customize your server with powerful features.
Remember to start small with essential plugins and gradually expand based on your needs and your server’s performance capabilities. Regular maintenance, including keeping plugins updated and properly configured, will ensure a smooth gaming experience for your community.
How to add plugins to a Minecraft server FAQ
What are Minecraft plugins?
Plugins are server-side modifications that add features and functionality without requiring players to modify their game clients. Unlike mods, plugins only need to be installed on the server, making them easier to manage.
Can I install plugins on any Minecraft server?
No, you need a compatible server software like CraftBukkit, Spigot, or PaperMC to run plugins. Vanilla Minecraft servers don’t support plugins. PaperMC is recommended for optimal performance and the widest plugin compatibility.
How do I upload plugins to my Minecraft server?
You can install plugins either using the Game Panel’s automatic installation feature or manually via FTP. For manual installation, simply upload the plugin’s .jar file to your server’s /plugins folder and restart the server to activate it.
All of the tutorial content on this website is subject to Hostinger's rigorous editorial standards and values.

Ritoban Mukherjee is a freelance tech and innovations journalist from West Bengal, India. His work focuses on reviews, guides, and features about consumer and business software, such as website builders, hosting services, and cloud storage — among other things. He has been published on Tom's Guide, TechRadar, Creative Bloq, IT Pro Portal, Gizmodo, Medium, Quartz, and Mental Floss. Follow him on LinkedIn.