Conan Exiles dedicated server setup guide
Mar 10, 2026
/
Dominykas J. & Valentinas C.
/
8 min Read

Conan Exiles is an open-world survival game that can be played in single-player or multiplayer, on private and official servers, or on a server you decide to host yourself.
Many players prefer to host or join dedicated servers for a more immersive and controlled experience. Running your own server gives you the freedom to set custom rules, manage player communities, and install mods – something that the official servers don’t support.
A Gaming VPS (Virtual Private Server) lets you do all of that and more – you’ll get access to scalable resources, near-constant uptime, and tons of customization options.
In this guide, we’ll walk you through two setup methods for Conan Exiles server hosting: our easy Hostinger Game Panel setup and manual configuration for more advanced users.
By the end of this guide, you’ll be ready to set up and manage your own Conan Exiles server.
Requirements for setting up a Conan Exiles server
To host a dedicated Conan Exiles server, you’ll need a reliable environment that offers both performance and stability. A Gaming VPS is an ideal choice for this purpose.
Why Choose a Gaming VPS?
- Performance: VPS environments use powerful, dedicated hardware, ensuring your server can handle large player counts, complex game worlds, and mods, all without any lag.
- Uptime: VPS hosting guarantees constant uptime, so your server is always online, even when your personal devices are not.
- Scalability: As your player base grows, VPS resources like RAM and storage can be scaled to meet demand, preventing the need for server migration.
- Full Control: A VPS gives you full root access, which allows you to manage every aspect of your server and customize the environment as needed.
Resources Needed for Optimal Performance
The server’s resource needs depend on its player count, mod usage, and game complexity. Here are the general guidelines:
- RAM:
- Small Server (up to 10 players): 8 GB
- Medium Server (10-30 players): 16 GB
- Large Server (30+ players or mod-heavy setups): 32 GB or more
- CPU: A quad-core processor (3.0 GHz or higher) is sufficient for smaller servers. For larger servers, consider using an 8-core processor or higher to ensure better performance.
- Storage: SSD storage is recommended for fast data access and load times. For small servers, start with at least 50 GB. For larger servers with mods or additional content, consider 100 GB or more to ensure enough space for backups and expansions.
- Bandwidth: A minimum of 5 Mbps upload speed is required for a small server, but for a larger player base or more active gameplay, opt for at least 10-20 Mbps to avoid latency issues.
With these guidelines in mind, you’ll be prepared to choose the right environment for your own server. Next, we’ll guide you through the step-by-step process of setting up your server using both easy and advanced methods.
Setting up a Conan Exiles server using Hostinger Game Panel
For those looking for a simple, user-friendly solution, Hostinger Game Panel is a great way to get your Conan Exiles server up and running with minimal effort. In the following section, we’ll walk you through the steps to set up your server using this platform.
1. Access the Game Panel
Before you can set up the Game Panel, you’ll need to select and purchase a plan. Navigate to our game server hosting page and select a plan that best suits your needs and server.

Once you’ve purchased a plan, follow through with these steps to set it up:
1. Start Game Panel setup: Log in to hPanel. On the Home page, you’ll see a pending Game Panel setup similar to this:

Press Setup and Start Now in the next window.
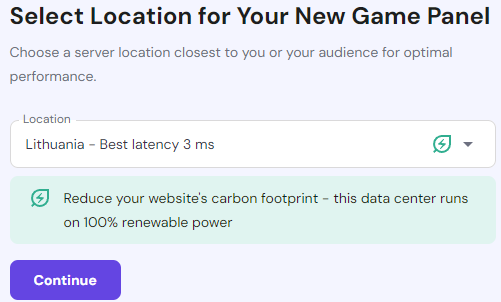
2. Select a location for your Game Panel: Consider which region you’re expecting traffic from – where your player base will be located.
3. Set your Game Panel password: Set the password you will use to log in to the Game Panel. Your username will be set to admin.

4. Finish setup: Double-check your Game Panel information and complete the setup.
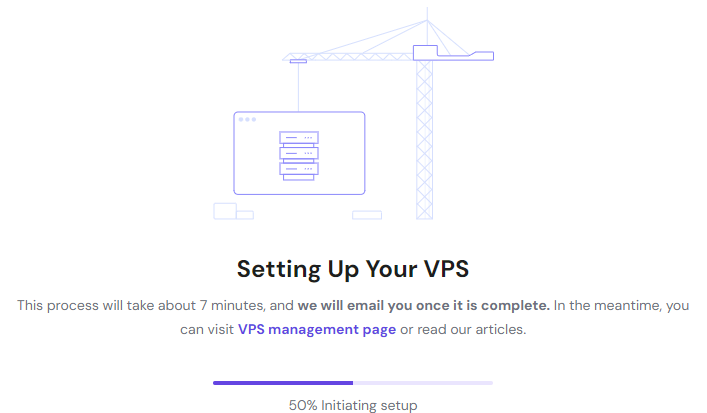
5. Wait for Hostinger to set up your VPS: All you need to do now is wait for Hostinger to finish setting your VPS for Game Panel, after which you can continue setting up your game server.
2. Install Conan Exiles server via Game Panel
With your Game Panel VPS set up and ready, the next step is to install the Conan Exiles server software. This process is straightforward and can be completed directly through the Game Panel interface. Let’s go over the steps:
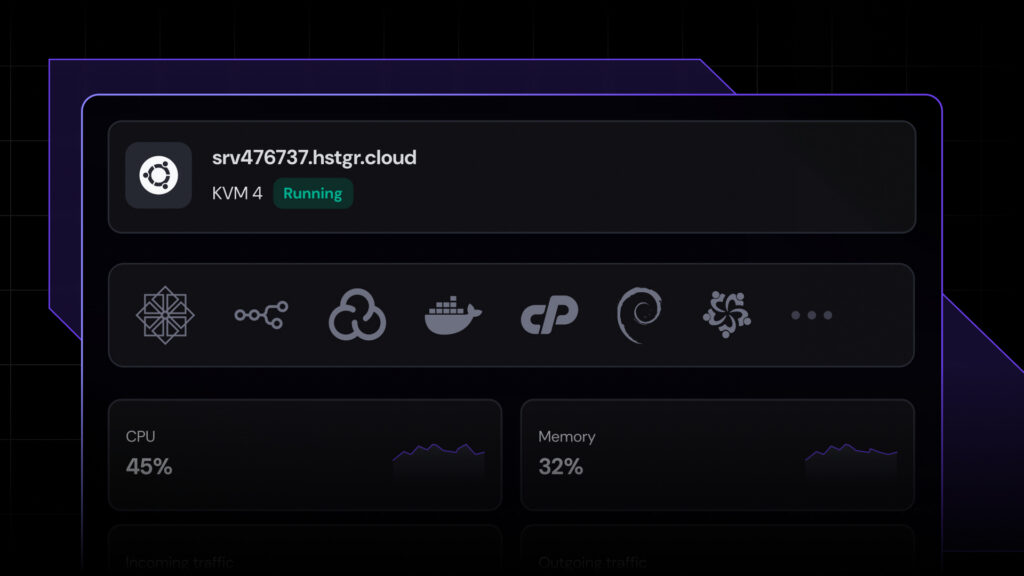
1. Navigate to your Game Panel: Log in to hPanel. On the VPS page, you’ll see a running Game Panel VPS:

Press Manage and Manage Panel in the next window, which will take you to your Game Panel login page. Log in with the credentials you’ve set in the previous section.
2. Start game instance creation: Select Create Instance in the Instances section:
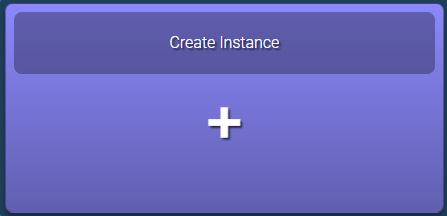
A Create new instance window will open where you can specify further details for your game.
3. Create your Conan Exiles game instance: In the Select Application section, select Conan Exiles:
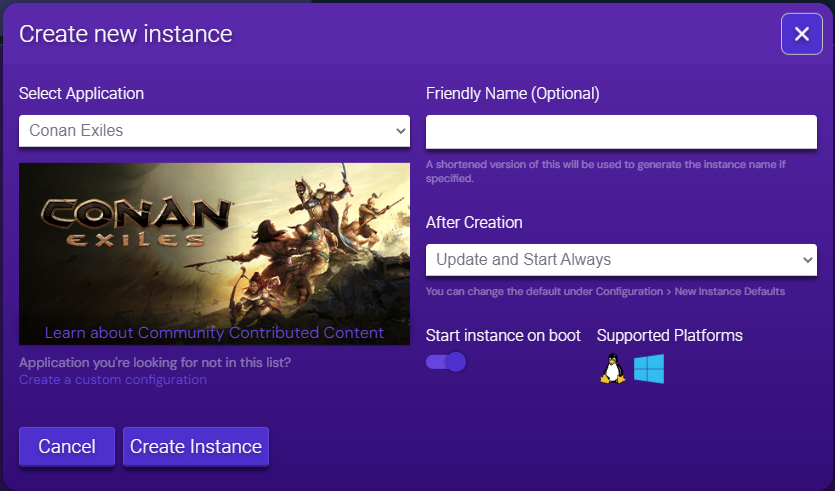
- In the Friendly Name section, enter the name of your server.
- In the After Creation section, select what your instance should do with the dedicated server at the start.
- Toggle Start instance on boot if you want your game server to be started every time you start your Game Panel VPS.
After configuring all of the relevant options, press Create Instance and wait for it to be created.
Once Hostinger finishes setting up your game instance, you’ll see it in the Instances section of your Game Panel:

3. Manage and customize the server
Once the server is up and running, you can now adjust the game server settings if needed:
- Press Manage on the ConanExiles instance card.
- Select Configuration on the left side menu.
- Select Conan Exiles on the left side menu.
Here are the settings you can configure:
- Server Name: You can set a custom server name to make it easier to find.
- Map: You can select which map to use or even use your Custom map.
- Server Password: You can set a password to prevent unwanted players from entering.
- Server Region: In addition to the Game Panel region, you can select a Server Region, which affects how the server is filtered in the server list in the game.
- Anti-cheat: There are two options of Anti-cheat available – BattlEye and Valve Anti-cheat (Steam VAC)
- Mods: You can specify which mods to use in the Mods List from the ones you have loaded. You can load mods in the File Manager, found on the left side menu on the main game instance page. Conan Exiles mods should be uploaded to the ConanSandbox→Mods directory – you’ll have to create one if it’s not already present.
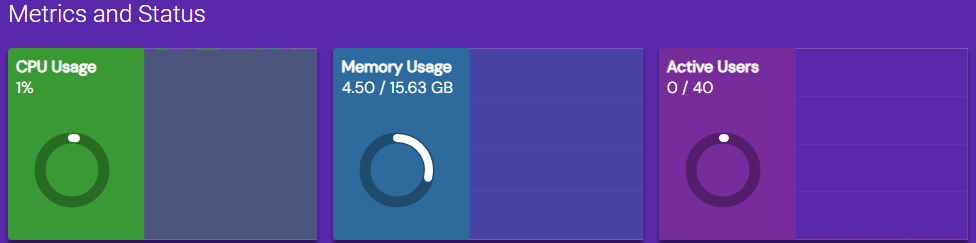
You can also monitor performance and game server actions on the Manage page of your game instance. Here’s what you’ll find on the Status page:
- You can see the CPU, Memory Usage, and Active Users in the Metrics and Status section:
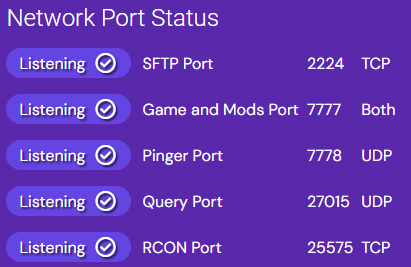
- You can see the Port statuses in the Network Port Status section:
- You can Restart, Stop, Sleep, or get Assistance in the Actions section if you’re having issues with your server performance:

- You can get the Connection Link or the server’s address (Primary Endpoint) in the Connection Info section:

There is also an Analytics page on the left side of the menu. It allows you to see statistics of your users and where most connections come from.
By following these steps, you’ll have your Conan Exiles server successfully set up and running through the Hostinger Game Panel, allowing you to easily manage, customize, and optimize your game server performance.
Setting up a dedicated Conan Exiles server manually
If you’re familiar with Linux commands and prefer more control and customization over their server, you can set up a Conan Exiles server manually, as well.
In this section, we’ll guide you through the process of configuring your server from scratch, giving you full access to advanced settings and greater flexibility.
1. Prepare your VPS
Before starting the setup process, ensure your VPS is updated and ready. You’ll need administrative (root) access to perform the installation.
Use SSH as the root user to connect to your VPS and run the following commands to update your system:
sudo apt update
sudo apt upgrade
You’ll also need some basic utilities for the server setup. Install the necessary dependencies:
sudo apt install lib32gcc-s1 wget screen
2. Install Wine
Since Conan Exiles requires Wine to run its Windows-based server files, you’ll need to follow these steps to install Wine on Ubuntu:
- Enable 32-bit architecture:
sudo dpkg --add-architecture i386
- Add the Wine repository:
sudo mkdir -pm755 /etc/apt/keyrings
sudo wget -O /etc/apt/keyrings/winehq-archive.key https://dl.winehq.org/wine-builds/winehq.key
sudo wget -NP /etc/apt/sources.list.d/ https://dl.winehq.org/wine-builds/ubuntu/dists/$(lsb_release -cs)/winehq-$(lsb_release -cs).sources
- Update your repositories:
sudo apt update
- Install Wine:
sudo apt install --install-recommends winehq-stable
- Verify Wine installation: Check the installed version of Wine to make sure it’s set up correctly:
wine --version
3. Download and install SteamCMD
SteamCMD is the tool used to download and manage the Conan Exiles server files. Follow these steps to set up SteamCMD on your VPS:
- Create a directory for SteamCMD:
mkdir ~/steamcmd
cd ~/steamcmd
- Download SteamCMD:
wget https://steamcdn-a.akamaihd.net/client/installer/steamcmd_linux.tar.gz
- Extract the SteamCMD archive:
tar -xvzf steamcmd_linux.tar.gz
- Run SteamCMD:
./steamcmd.sh
4. Download Conan Exiles server files
With the SteamCMD installation complete, the next step is to download the Conan Exiles server files. Here’s how:
- Log in to SteamCMD anonymously:
login anonymous
- Set the installation directory:
force_install_dir ~/conanexiles_server/
In this example, the directory we set is conanexiles_server.
- Download the server files:
Currently, the Conan Exiles server files have a Steam App ID 440900. That being said, you should always make sure the correct ID is used when you’re setting up your server. You can find a Steam App ID on SteamDB or directly on the Steam Store by locating the app.
Download the server files using the following command:
app_update 440900 validate
This command will download the necessary files for the Conan Exiles server into the specified directory. The process may take a while depending on your connection speed.
5. Set server configurations
Once the server files are downloaded, you’ll need to adjust the configuration to suit your server preferences. The key configuration files can be found in:
~→conanexiles_server→ConanSandbox→Saved→Config→WindowsServer
- Edit the main server settings: Open the Engine.ini configuration file using a text editor like nano:
nano ~/conanexiles_server/ConanSandbox/Saved/Config/WindowsServer/Engine.ini
- Adjust the following settings:
Server name:
ServerName=YourServerName
Server Password:
ServerPassword=YourPassword
Max Players:
MaxPlayers=20
Other detailed configurations like resource respawn rates and PVP settings can be modified in the ServerSettings.ini file, located in the same directory.
- Save the file: After making your changes, save the file and exit the editor (Ctrl + X, then Y to confirm in Nano).
6. Start the Conan Exiles server
Once the server is configured, you can start it using the following commands:
- Navigate to the server directory:
cd ~/conanexiles_server
- Launch the server using Wine:
wine ConanSandboxServer.exe -log
- Run the server in the background: To ensure your server remains running even after you log out of your terminal, you can use a screen session to run it in the background:
screen -S conanserver
wine ConanSandboxServer.exe -log
You can detach from the screen session with Ctrl + A, then D and reconnect to the session later with:
screen -r conanserver
- Verify the server is running:
ps aux | grep ConanSandboxServer
If you use Hostinger VPS, you can check if the Conan Exiles server is running by asking the Kodee AI assistant. Simply ask it, “Check whether the ConanSandboxServer process in my VPS is active,” and Kodee will return the process status.
7. Set up firewall rules
For players to connect to your server, certain network ports need to be open. Conan Exiles uses the following ports:
- Game Port: 7777/UDP
- Query Port: 27015/UDP
- RCON Port: 27016/TCP (optional for remote console access)
Hostinger VPS lets you configure your firewall settings directly through hPanel. Alternatively, you can also configure UFW (Uncomplicated Firewall) for any other Ubuntu setups.
Open the necessary ports with these commands:
sudo ufw allow 7777/udp
sudo ufw allow 27015/udp
sudo ufw allow 27016/tcp
sudo ufw reload
These commands allow traffic through the required ports, enabling players to connect to your server.
If you use the Hostinger game server, you can also open the port by asking Kodee. Simply enter the following prompt into the chat interface, with mygameserver.hostname.com being your actual VPS hostname:
Open port 7777/udp, 27015/udp, and 27016/tcp on mygameserver.hostname.com to all IP addresses.
8. Connect to the server
Players can now connect to your server in two ways:
- Via the in-game server browser: Once your server is running, players can find it by searching for the server name you set up in the Conan Exiles in-game server browser.
- Direct IP connection: You can also share your VPS’s public IP address with players for a direct connection. To connect, they can use the format:
IP:Port (e.g., 123.45.67.89:7777)
Ensure that your players have the correct server name and IP address so they can easily find and connect to your Conan Exiles server.
Conclusion
In this guide, we’ve covered two different methods for setting up a Conan Exiles private server. The Hostinger Game Panel offers a quick and user-friendly solution for those who prefer simplicity, while the manual setup method provides more control and customization for advanced users.
For the best performance and seamless management experience, we recommend trying out Hostinger Game Panel plans. These plans offer the power, speed, and reliability needed to run a smooth and stable Conan Exiles server.
Conan Exiles dedicated server FAQ
Why use a dedicated server for Conan Exiles?
Dedicated servers offer better performance, stability, and control compared to hosting locally or using shared servers. They ensure consistent uptime, allow for custom settings, and support more players without lag.
Do I need a powerful VPS to run a Conan Exiles server?
Yes, a VPS with adequate CPU, RAM (at least 6-8GB), and storage (around 50GB) is necessary to handle the game’s requirements and maintain smooth performance, especially with multiple players online.
What ports need to be opened for the server?
To run a Conan Exiles server, you must open the following ports:
Game Port: 7777/UDP
Query Port: 27015/UDP
RCON Port: 27016/TCP (optional for remote management)

Dominykas is a Technical Content Writer with a background in cloud engineering and technical support. He’s operated in fields like fintech and point-of-sale and is passionate about software development, DevOps, and AI. Find him on LinkedIn.

Valentinas Čirba, Hostinger's Head of VPS, is a seasoned product leader specializing in VPS products with over ten years of experience. He's an expert at setting product strategy, leading cross-functional teams, and making smart decisions to deliver innovative solutions. Valentinas is committed to creating products that not only meet business objectives but also truly serve the customer. Follow him on LinkedIn.