How to create Apache virtual hosts on CentOS 9 Stream
Dec 02, 2025
/
Edgaras G.
/
2 min Read
If you want to host more than one domain on your server, you need to create corresponding hosts on the webserver. That way, your server can deliver different content for different requests. In this tutorial, you will learn how to create Apache virtual hosts on CentOS 9 Stream.

1. Installing Apache
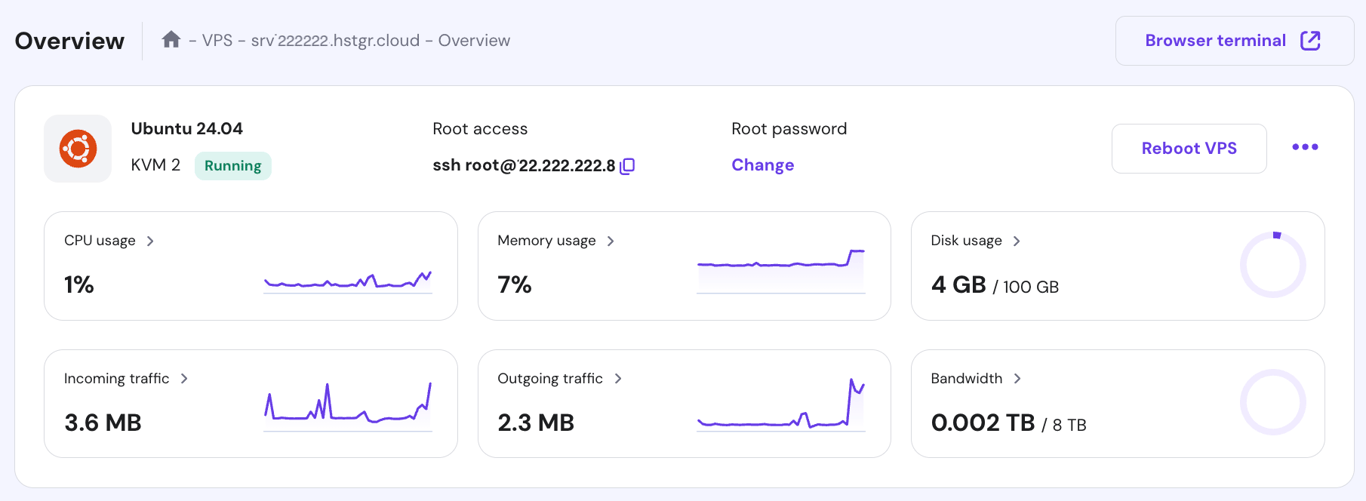
Before we begin, make sure that you have root access to your VPS or server using an SSH connection. If you’re using Hostinger’s hPanel, you will find your login credentials near the top of the Overview page.
- Install Apache on your CentOS 9 machine by typing the following command:
sudo yum -y install httpd
- Once the installation is completed, enable Apache as a CentOS service:
sudo systemctl enable httpd.service
- Visit your server’s IP address to check whether Apache is already running or not. The page should look like this:

2. Creating a directory tree
- A directory tree is used to hold website data. First, set the working directory to /var/www by running this command:
cd /var/www/
- You should use a unique document root for each virtual host:
mkdir -p yourdomain.com/public_html
Remember to replace yourdomain.com with your actual domain name.
- Make the directory accessible to Apache. Run the chown command to change the ownership and chmod to set correct permissions for the whole web directory.
chown -R apache:apache /var/www/yourdomain.com/public_html chmod -R 755 /var/www
Apache now has the required access to create additional directories and serve content for incoming queries.
3. Creating a demo page
It is recommended that you make a demo page for your Apache virtual hosts. This way, you can check whether the host is working before you actually move your website files. Here’s how you do it:
- Use the nano editor to create an index.html file in yourdomain.com/public_html directory:
nano yourdomain.com/public_html/index.html
- Paste the following content to the file:
<html>
  <head>
    <title>This is a test page</title>
  </head>
  <body>
    <h1>It works!</h1>
  </body>
</html>
- Save the file by pressing CTRL + X and then Y.
4. Creating the virtual host
- Create a new virtual host .conf file in the Apache configuration directory:
nano /etc/httpd/conf.d/yourdomain.com.conf
- Insert the following content into the .conf file:
<VirtualHost *:80>
    ServerName www.yourdomain.com
    ServerAlias yourdomain.com
    DocumentRoot /var/www/yourdomain.com/public_html
    ErrorLog /var/www/yourdomain.com/error.log
    CustomLog /var/www/yourdomain.com/requests.log combined
</VirtualHost>
In the example above, we tell Apache that we will be using port 80 for the communication and that yourdomain.com is the name of the virtual host. Additionally, we also specify directories for the website files (document root) and error logs.
- Restart Apache for the changes to take effect:
systemctl restart httpd.service
And that’s it – you have just created an Apache virtual host for your domain! Now try to access the host, and you should see the “It works!” text on the demo page we made earlier.
Conclusion
You have learned how to create an Apache virtual host in four easy steps. To summarize, let’s take a look at them once again:
- Install Apache from CentOS 9 Stream.
- Create a directory tree that will be used to hold all your website files.
- Make a demo page to see if the Apache virtual host is working properly.
- Create the virtual host by making configuration files in the Apache directory.
We hope you’ve found this tutorial useful. Feel free to comment below if you have any questions!


Edgaras is a veteran server administrator at Hostinger. He makes sure that every server runs at full throttle and has all the latest technological advancements. When he's not working, Edgaras enjoys skiing and exploring the world.


Comments
0 responses