How to use Node.js with Docker: Build and containerize your applications
Feb 24, 2025
/
Dominykas J.
/
11 min Read
Node.js is a powerful runtime environment that enables developers to build fast, scalable, and efficient server-side applications using JavaScript. Its event-driven, non-blocking architecture has made it a popular choice for real-time applications and microservices.
Docker, on the other hand, revolutionizes application deployment by providing lightweight, portable containers that bundle an application and its dependencies, ensuring consistent performance across environments.
In this guide, you will learn how to effectively use Docker with Node.js. We’ll cover the basics of setting up a simple application, creating Dockerfiles, optimizing your containers for production, and implementing best practices.
Download free docker cheat sheet
Prerequisites
Before diving into the details, ensure you meet the following prerequisites:
Virtual Private Server (VPS)
While optional to follow this guide, you will want your application hosted for production. Hostinger’s KVM2 is a solid VPS hosting plan to work with for small-to-medium-sized projects – it comes with 2 vCPU cores, 8GB of RAM, 8TB of bandwidth, and 100GB of NVMe disk space for £6.99/month.
Node.js installed on your system
You can download it from the official website, or if you’re using Hostinger’s VPS, you can install Node.js automatically using a Node.js template.
Docker installed and configured
We also have a Docker VPS template that you can install with only a few clicks.
Some basic knowledge of JavaScript and Docker commands, such as docker build and docker run, will simplify the process as well.
Having these prerequisites in place will help you follow along with the examples and maximize the value of this guide.

Getting started with Docker for Node.js
Choosing the right Node.js Docker image
The Node.js Docker Official Image provides prebuilt Docker images optimized for different use cases. These images save time and effort by bundling Node.js with necessary libraries, and they are maintained by the Node.js and Docker teams to ensure security and compatibility.
Here are the main types of Node.js Docker images:
- Slim images: These lightweight images include only the essential components required to run Node.js. They are smaller in size, however, they may lack some libraries that are useful during development.
- Alpine images: Based on Alpine Linux, these images are ultra-lightweight and ideal for production environments.
- Full images: These images are larger in size and include additional tools and libraries. They are particularly useful for development and debugging.
Due to their efficiency and smaller size, the Slim or Alpine-based images are recommended for most production environments. The Full image can be useful for development purposes, especially when debugging or using tools not included in lightweight variants.
Setting up a simple Node.js application
To get started, let’s create a basic Node.js application:
- Open your terminal and create a directory for your project:
mkdir node-docker-app
cd node-docker-app
The mkdir command creates a new directory named node-docker-app to house your application files.
The cd command moves into this directory, making it the current working directory for subsequent commands.

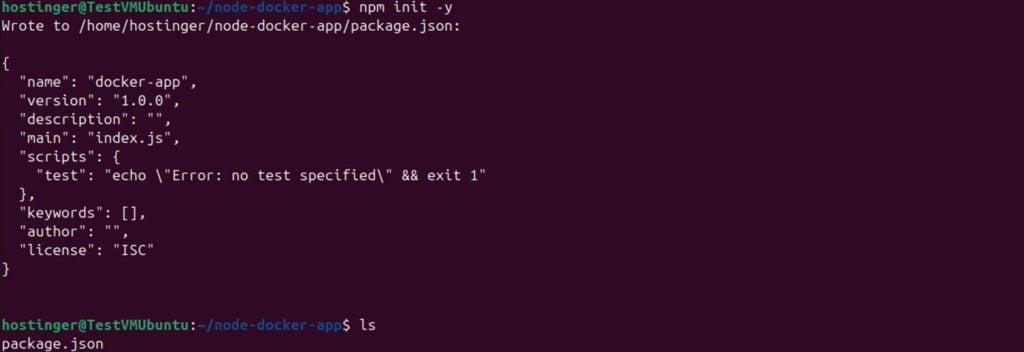
- Run the following command to generate a package.json file:
npm init -y
This command initializes the project and creates a default package.json file, a json file that manages the application’s metadata and dependencies.
- Create the application file named app.js and add the following code:
const http = require("http");

const port = 3000;

const server = http.createServer((req, res) => {
  res.writeHead(200, { "Content-Type": "text/plain" });
  res.end("Hello, Docker!");
});

server.listen(port, () => {
  console.log(`Server running at http://localhost:${port}`);
});
This script creates a basic HTTP server using Node.js’s built-in http module. When accessed, it responds with the message “Hello, Docker!” and logs the server’s URL to the console.
- If your application requires additional dependencies, you can install them using npm install. For example, to use the popular express framework:
npm install express
The above command adds express to your project and updates the package.json file to include it as a dependency.
Building a Node.js application with Docker
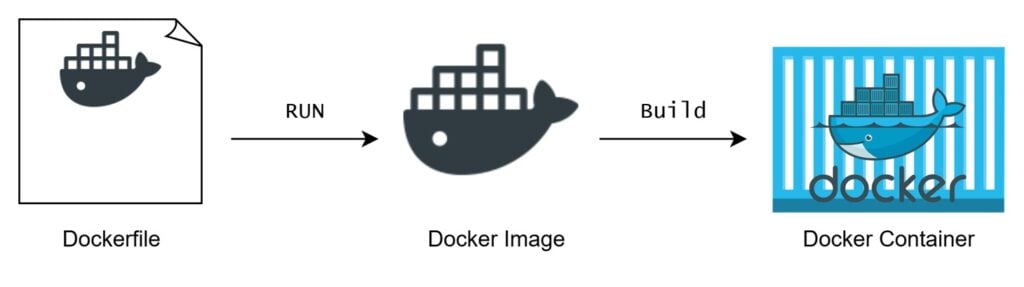
At a very basic level, building any Node.js application with Docker takes 3 steps:
- Create a Dockerfile.
- Build the Docker image.
- Run the Docker container.
Let’s go through each of them.
Step 1: Create a Dockerfile
Create a file named Dockerfile in your project root directory and add the following:
# Use alpine node base image
FROM node:18-alpine

# Set working directory inside the docker node
WORKDIR /app

# Copy package files and install dependencies
COPY package*.json ./
RUN npm install

# Copy the rest of the application code
COPY . .

# Expose the application port
EXPOSE 3000

# Command to run node.js in a docker container
CMD ["node", "app.js"]
Let’s break down the commands we used:
- FROM: Specifies the base image to build from.
- WORKDIR: Sets the working directory inside the container.
- COPY: Is used to copy files from host machine to the container
- RUN: Executes specified bash command.
- CMD: Specifies the command to run when the container starts.
We’ll analyze the Dockerfile in more depth further in this guide.
Step 2: Build the Docker image
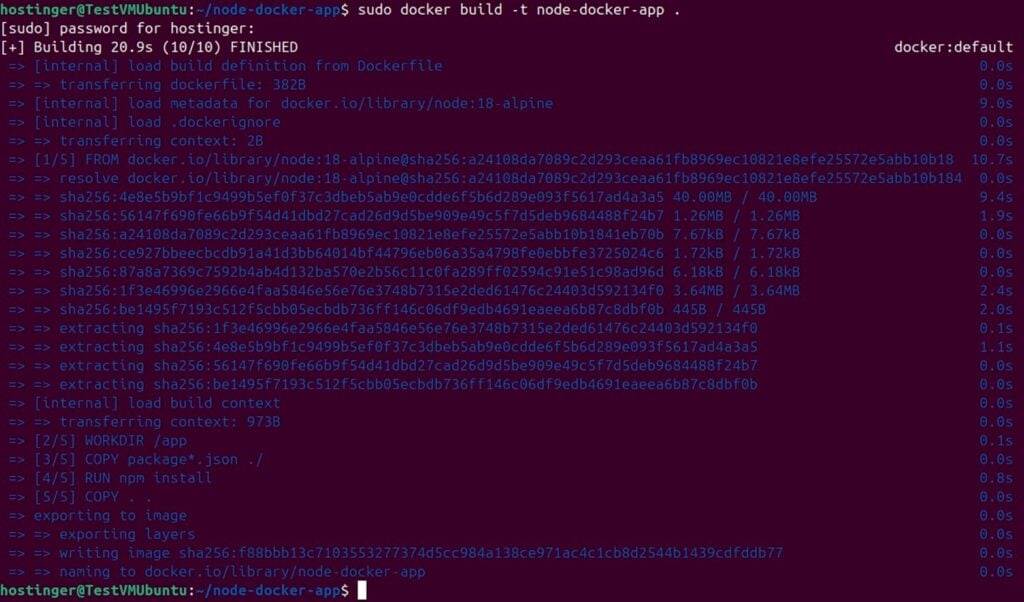
To build the Docker container image, open your terminal in the project directory and run:
sudo docker build -t node-docker-app
If the build is successful, Docker will output a series of steps and generate the image:
Step 3: Run the container
Once the image is built, run the Node.js container using:
sudo docker run -p 3000:3000 node-docker-app .
Visit http://localhost:3000 in your browser. If everything is set up correctly, you’ll see the message “Hello, Docker!” displayed:

Now that we’ve built our first Node.js application with Docker, we can look into containerizing more complex applications.
Containerizing an existing Node.js application
Whether you’re working with a simple Node.js app or a more complex project, Docker can streamline the deployment process. For existing applications, this involves adapting your project structure, configuring Docker effectively, and applying best practices to ensure efficiency and consistency across environments.
Let’s explore the steps to dockerizing Node.js app that is pre-built.
1. Preparing the Node.js application for Docker
Before containerizing an existing Node.js project, it’s important to ensure the source code is well-structured and functional. A solid foundation will help streamline the containerization process and reduce the likelihood of errors.
Ensure the package.json file is accurate:
Verify that the package.json file lists all dependencies and scripts needed to run the application. For example:
{
  "name": "my-node-app",
  "version": "1.0.0",
  "scripts": {
    "start": "node app.js",
    "test": "jest"
  },
  "dependencies": {
    "express": "^4.18.2"
  }
}
Double-check that the scripts section includes a start script to launch the application.
Lock dependencies with package-lock.json:
Run the following command to ensure all dependencies are locked to specific versions:
npm install
This creates or updates the package-lock.json file, which ensures consistent dependency versions across environments.
Test the application locally:
Run the application on your local machine to confirm it functions as expected:
npm start
Verify all routes, middleware, and features are working correctly. Fix any issues before proceeding with containerization.
Clean up unnecessary files (optional):
Remove any files or directories that are not needed in the container, such as logs, temporary files, or development-specific resources. You can use a .dockerignore file to exclude these during the build process, which we will explore in the next section.
2. Creating a .dockerignore file
The .dockerignore file plays a critical role in optimizing builds. When you build a container image, Docker sends all files in the build context to the Docker daemon.
The .dockerignore file specifies which files and directories should be excluded from this process, similarly to the .gitignore file in Git. This helps:
- Minimize the size of the Docker image by avoiding redundant or irrelevant files.
- Protect sensitive data, such as environment configuration files.
- Speed up the build process by reducing the amount of data sent to the daemon.
Below is an example of a typical .dockerignore file for a Node.js application:
node_modules
npm-debug.log
.env
.DS_Store
logs/
tmp/
dist/
coverage/
- node_modules: Excludes locally installed dependencies since they will be installed inside the container.
- npm-debug.log: Prevents debug logs from being added to the image.
- .env: Protects sensitive environment variables.
- logs/ and tmp/: Excludes temporary and log files that are not needed in the image.
- dist/ and coverage/: Excludes build artifacts and test coverage reports, which are not required for running the application.
Some of the best practices for the .dockerignore include:
- Regularly review and update the .dockerignore file to match your project’s evolving needs.
- Exclude all sensitive files, such as API keys or database credentials. It is also very important to exclude .env files and unused build artifacts, as they contain sensitive data about your application and its environment and can be used maliciously.
- Avoid excluding essential files required for building or running your application.
By creating a comprehensive .dockerignore file, you can ensure that your Docker images remain efficient, secure, and free of unnecessary clutter.
3. Writing a Dockerfile for the application
The Dockerfile is a script containing instructions for Docker to build an image of your application. A production-ready Dockerfile for a Node.js application includes several steps to optimize the image for deployment. Let’s write the Dockerfile:
- Use the FROM command to set the appropriate base image:
FROM node:18-alpine
Alpine-based images are lightweight and designed for production environments. Their small size reduces the attack surface and speeds up image builds.
- Set the working directory using WORKDIR:
WORKDIR /usr/src/app
This command sets the working directory inside the container to /usr/src/app, where all subsequent commands will be executed. It ensures consistency and organization within the container.
- Copy application files with COPY command:
COPY package*.json ./
This copies the package.json and package-lock.json files to the working directory. Both of these files are essential for installing dependencies.
- Install the copied dependencies:
RUN npm ci --only=production
We use the RUN command to execute npm ci to install packages. Using –only=production ensures that only production dependencies are installed, reducing the image size.
- Copy the rest of the application files:
COPY . .
This command copies all files from the host to the container, excluding any files specified in the .dockerignore file.
- Set environment variables:
ENV NODE_ENV=production
The NODE_ENV=production variable optimizes Node.js performance by enabling production-specific behaviors.
- EXPOSE the application port:
EXPOSE 3000
This command documents that the container will listen on port 3000. Note that this doesn’t publish the port – it’s mainly for informational purposes.
- Start the application:
CMD ["node", "app.js"]
We specify the command to run when the container starts. In this case, it starts the Node.js application.
Our complete Dockerfile should now look something like this:
# Use a lightweight Node.js default image
FROM node:18-alpine

# Set the working directory
WORKDIR /usr/src/app

# Copy package files and install dependencies
COPY package*.json ./
RUN npm ci --only=production

# Copy application files
COPY . .

# Set environment variables for production
ENV NODE_ENV=production

# Expose the application port
EXPOSE 3000

# Command to start the application
CMD ["node", "app.js"]
This Dockerfile ensures a small, efficient, and production-ready Docker image. It follows best practices like using a minimal base image, installing only production dependencies, and setting environment variables for optimization.
4. Building and running the Docker image
The next step is to build the Docker image and run the containerized application.
Building the Docker image
Use the docker build command to create the Docker image from your Dockerfile:
sudo docker build -t my-node-app .
- docker build: This command instructs Docker to build an image.
- -t my-node-app: Assigns the name my-node-app to the built image. The -t flag stands for “tag.”
- .: Specifies the build context, which is the current directory containing the Dockerfile and application files. Since we’re already in that directory, we simply pass the ., otherwise we would specify the path.
After running this command, Docker will execute each instruction in the Dockerfile step-by-step and generate a reusable container image named my-node-app.
Running the container
To run the containerized application, use the docker run command:
sudo docker run -p 3000:3000 my-node-app
- docker run: Launches a new container based on the specified image.
- -p 3000:3000: Maps port 3000 of the container to port 3000 on the host machine. This allows you to access the application through http://localhost:3000.
- my-node-app: Refers to the Docker image name created in the previous step.
The -p flag in the docker run command is crucial for connecting the containerized application to the host machine. It specifies port mapping in the format host_port:container_port, where:
- host_port: The port on the host machine where the application will be accessible (e.g., 3000).
- container_port: The port inside the container that the application is listening on (e.g., 3000).
Without this mapping, the application would only be accessible from within the container itself, making it unavailable to your host machine or browser.
5. Optimizing the Dockerfile with multi-stage builds
As applications grow in complexity, so do their build processes and dependencies. Multi-stage builds in Docker offer an effective way to reduce the size of the final image by separating the build environment from the runtime environment.
This approach helps streamline the containerization of Node.js applications that require tools like bundlers, transpilers, or compilers during development but not in production.
Multi-stage builds allow you to use multiple FROM instructions in a Dockerfile to create distinct stages. By copying only the necessary artifacts from one stage to another, you can:
- Reduce the size of the final Docker image by excluding build dependencies.
- Improve security by limiting the contents of the production image to essential files.
- Simplify the build process by handling development and production configurations separately.
Below is an example of a multi-stage Dockerfile for a Node.js application that involves building a production-ready bundle with a tool like Webpack:
# Stage 1: Build
FROM node:18-alpine AS builder

# Set the working directory
WORKDIR /usr/src/app

# Copy package files and install dependencies
COPY package*.json ./
RUN npm install

# Copy application files and build the production bundle
COPY . .
RUN npm run build

# Stage 2: Production
FROM node:18-alpine

# Set the working directory
WORKDIR /usr/src/app

# Copy only the built files from the builder stage
COPY --from=builder /usr/src/app/dist ./dist
COPY package*.json ./

# Install only production dependencies
RUN npm ci --only=production

# Set environment variables for production
ENV NODE_ENV=production

# Expose the application port
EXPOSE 3000

# Command to run the application
CMD ["node", "dist/app.js"]
- Stage 1: Build:
- Base Image: Starts with node:18-alpine, a lightweight Node.js image.
- Dependency Installation: Installs all dependencies required for development, including tools like Webpack.
- Build Process: Executes the build script (e.g., npm run build) to generate the production-ready files.
- Stage 2: Production:
- Base Image: Starts with a fresh node:18-alpine image to exclude development tools and reduce the final image size.
- Artifact Copy: Copies the built files from the builder stage to the production image.
- Dependency Installation: Installs only minimal packages needed for production to further optimize the image.
- Environment Variables: Sets NODE_ENV=production to ensure Node.js runs in optimized mode.
- Application Startup: Uses CMD to launch the application.
With multi-stage builds, you can create efficient, production-ready Docker images for your Node.js applications, ensuring optimal performance and security in deployment environments.
6. Testing the containerized application
Once your Node.js application is containerized and running, it’s essential to test it to ensure it behaves as expected in a production-like environment.
Check the application with curl or a web browser
You can test the application by accessing it through a web browser:
Open your browser and navigate to http://localhost:3000. If the container is running correctly, the browser should display the response from your Node.js application.
Alternatively, you can use the curl command to test the endpoint:
curl http://localhost:3000
This command sends a request to the containerized application, and you should see the response printed in the terminal:

Attach to the container’s logs
Logs are crucial for understanding the runtime behavior of your application. To view the container logs, use the docker logs command:
sudo docker logs <container_id_or_name>
Replace <container_id_or_name> with the container ID or name.

If you don’t know the container ID, you can find it by running the docker ps command:
sudo docker ps

This is especially useful if you’re running multiple containers and want to see all of their details.
Verify application behavior
Ensure that the application functions as intended by:
- Testing all routes or endpoints.
- Checking middleware functionality (e.g., authentication, logging).
- Simulating real-world usage scenarios.
For instance, if your application includes a /health endpoint for health checks, you can verify it by running:
curl http://localhost:3000/health
This step confirms that the application is ready to handle requests in a production environment.
Inspect the running container
To debug or inspect the running container interactively, use the docker exec command to open a shell inside it:
sudo docker exec -it <container_id_or_name> sh
This command allows you to explore the container’s file system and investigate any issues directly:

By following these steps, you can ensure that your Dockerized Node.js application is running as expected and is production-ready.
Conclusion
Dockerizing Node.js applications provides numerous benefits, including consistency across environments, simplified dependency management, and easier deployment. By encapsulating your application and its dependencies into a lightweight, portable container, you can eliminate the typical “works on my machine” issues and streamline your workflow.
In this guide, you learned how to set up a simple Node.js application, create a production-ready Dockerfile, optimize it using multi-stage builds, and test the containerized application effectively. With these skills, you are well-equipped to leverage Docker’s full potential.
Experiment with Docker further by exploring additional configurations, automating workflows with Docker Compose, or deploying your containers to cloud platforms. Continuous optimization and testing will ensure your applications remain efficient, secure, and ready for production.
How to use Node.js with Docker FAQ
What is the benefit of using Docker with Node.js?
Docker ensures consistent environments across development, testing, and production by packaging Node.js applications with their dependencies. It simplifies deployment, improves scalability, and eliminates issues caused by environment differences.
Which Node.js Docker image should I use?
For production, use a lightweight image like node:18-alpine to minimize size and improve security. For development, node:18 or node:18-slim can be better choices, as they include additional tools and libraries useful during debugging and development.
How do I create a Dockerfile for a Node.js application?
Create a file named Dockerfile in your project’s base directory and add instructions inside – start with a base image, set a working directory, copy necessary files, install dependencies using npm ci, and define a CMD to start the application.
Can I debug a Node.js application running inside a Docker container?
Yes. Use docker exec -it sh to open a shell in the container and inspect files. Alternatively, expose the debug port (e.g., –inspect=0.0.0.0:9229) and connect your debugger to the container from your host machine or IDE.
All of the tutorial content on this website is subject to Hostinger's rigorous editorial standards and values.

Dominykas is a Technical Content Writer with a background in cloud engineering and technical support. He’s operated in fields like fintech and point-of-sale and is passionate about software development, DevOps, and AI. Find him on LinkedIn.