How to install FFmpeg on Linux, Windows, and macOS
Apr 28, 2025
/
Ariffud M. & Noviantika G.
/
6 min Read

FFmpeg is an open-source, command-line tool for working with audio and video files. Many developers, content creators, and server administrators use it to convert formats, extract audio, or compress videos.
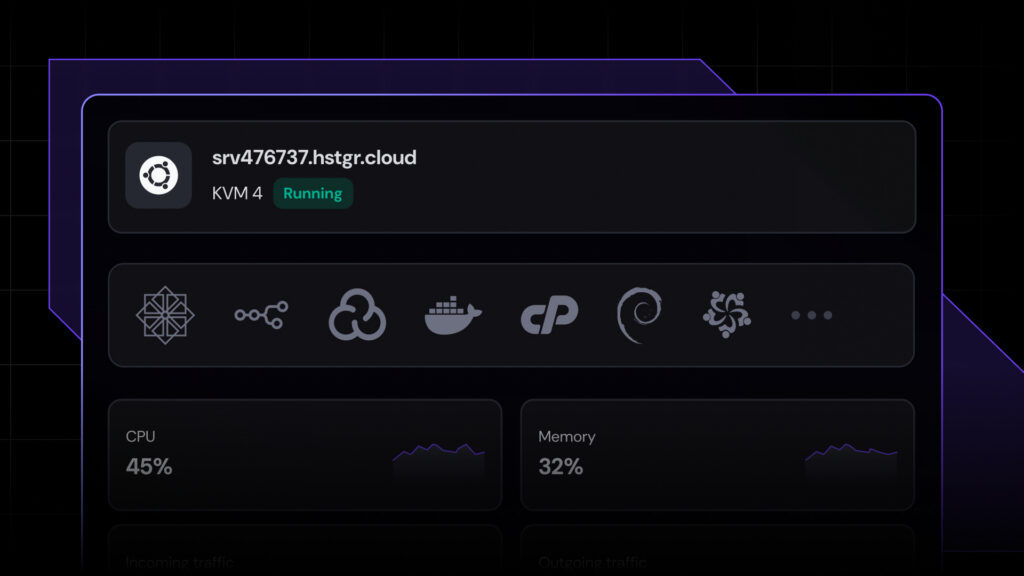
On virtual private servers (VPS), FFmpeg makes it easy to encode, stream, and manage media workflows. This is useful for resource-heavy tasks, such as hosting a video streaming server.
This guide will show you how to install FFmpeg on Linux, Windows, and macOS. By the end, you’ll have it set up on your preferred operating system and ready to handle your multimedia files.
Prerequisites for installing FFmpeg
Before installing FFmpeg, make sure your system meets these requirements:
- Operating system. While FFmpeg works on older OS versions, we recommend using newer ones like Ubuntu 24.04, Windows 11, or macOS 15 Sequoia. These versions offer better compatibility, security updates, and smoother installations, which can help you avoid setup issues.
- Storage. FFmpeg itself is around 80 MB, and with dependencies, you’ll need at least 100 MB of free space. However, since FFmpeg processes video and audio files, make sure you have enough storage for your files, as they can take up a lot of space.
- Terminal application. While you can directly download FFmpeg on Windows, you’ll need to use the terminal on Linux and macOS to set it up. The terminal is a built-in application on both platforms. If you’re installing FFmpeg on a Linux VPS, you can use the terminal or an SSH client like PuTTY to connect to your server remotely.
- Administrative privileges. You need admin or sudo privileges to install FFmpeg. This isn’t an issue on personal computers, as you usually have the required permissions. For servers, check with your hosting provider to confirm admin access. If you use Hostinger’s VPS, you’re in luck – our plans include full root access, so you can modify your server freely.
How to install FFmpeg on Linux
To install FFmpeg on Linux, first open your terminal. On personal computers, simply launch the software and proceed to the first step.
Meanwhile, for VPSs, access your server via SSH with the following command in a terminal window, replacing your_vps_ip with your server’s IP address:
ssh root@your_vps_ip
Hostinger VPS customers can find their VPS IP in hPanel by navigating to the VPS overview area.
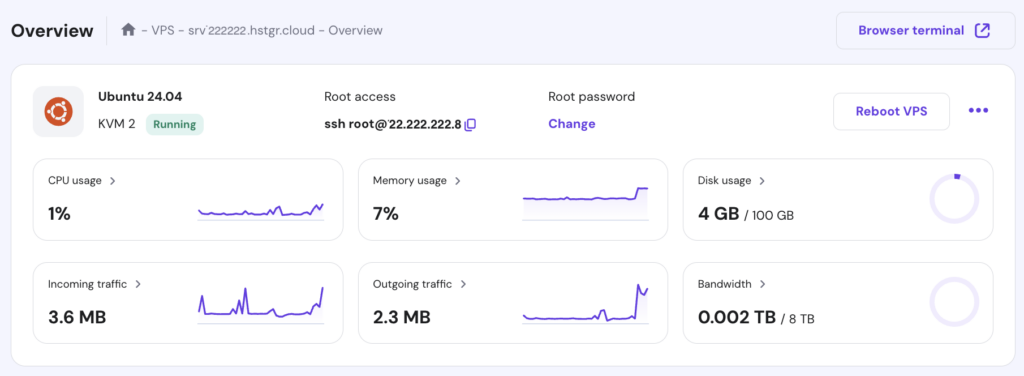
Hostinger also offers a Browser terminal feature, so you can run commands directly from your browser without using additional apps. To use it, hit the button in the top-right corner of your VPS dashboard. This will open a new tab where you can start executing commands.

1. Update the package repository
Updating the package repository lets your Linux system access the latest software versions and prevents issues like missing dependencies during the FFmpeg installation.
Here’s how to update the package repository for different Linux distributions:
Debian and Ubuntu
Debian and its derivatives, like Ubuntu, use the apt package manager to refresh the package list from online repositories:
sudo apt update
Fedora and CentOS Stream
FFmpeg isn’t included in the official Fedora and CentOS Stream repositories managed by dnf. To install it, you need to add the RPM Fusion repository, which provides additional software packages:
sudo dnf -y install https://download1.rpmfusion.org/free/fedora/rpmfusion-free-release-$(rpm -E %fedora).noarch.rpm
sudo dnf -y install https://download1.rpmfusion.org/nonfree/fedora/rpmfusion-nonfree-release-$(rpm -E %fedora).noarch.rpm
After adding RPM Fusion, update the package list to include the new repository:
sudo dnf update
Arch Linux
Arch Linux uses the pacman package manager to synchronize the package database and update outdated information:
sudo pacman -Sy
2. Install FFmpeg using a package manager
Run one of these commands to install the FFmpeg package and its necessary dependencies based on your distribution:
Debian and Ubuntu
sudo apt install ffmpeg
Fedora and CentOS Stream
sudo dnf install ffmpeg
Arch Linux
sudo pacman -S ffmpeg
The above commands will also automatically configure FFmpeg, so it’s ready to use after installation.
Pro Tip
Append the -y option for Debian and Fedora or --noconfirm for Arch Linux to skip confirmation when installing FFmpeg. For example:
sudo apt install -y ffmpeg
3. Verify the installation
To check if FFmpeg was installed successfully, type the command below:
ffmpeg -version
This will display the installed FFmpeg version and details like build configurations and supported codecs. The output should look similar to this:

That’s it! You’re now ready to use FFmpeg for your media tasks.
Furthermore, to update FFmpeg to the latest version, use the appropriate command for your distribution:
sudo apt update && sudo apt upgrade # Debian and Ubuntu
sudo dnf upgrade # Fedora and CentOS Stream
sudo pacman -Syu # Arch Linux
Run these commands at least once a month to keep FFmpeg and your system packages up to date.
Suggested reading
Learn how to compress videos without losing quality to save bandwidth and reduce disk space usage on your streaming server.
How to install FFmpeg on Windows
Installing FFmpeg on Windows involves downloading the required files, organizing them, and updating the PATH variable to use FFmpeg from the command prompt. Here are the steps:
- If you don’t already have a ZIP utility, download and install one like 7-Zip.
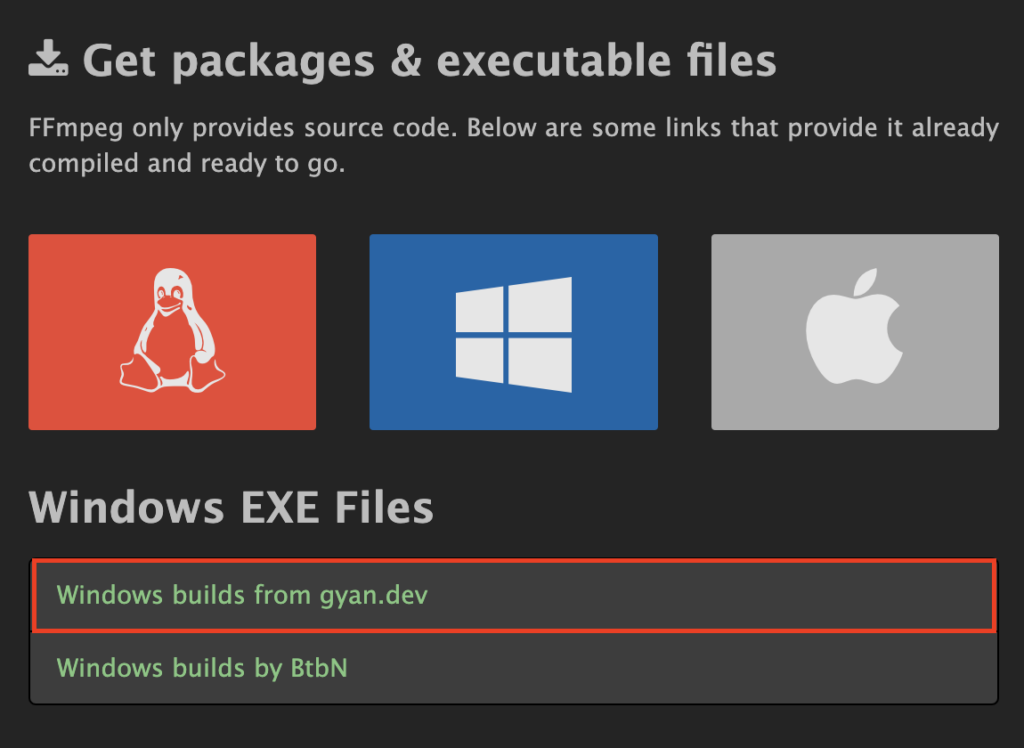
- Visit the official FFmpeg website and navigate to the Windows builds section.
- Select the Windows builds from gyan.dev option, which will redirect you to the respective website.
- Download the ffmpeg-git-full.7z version.

- Right-click the downloaded file and select Extract Here or Extract to ffmpeg-git-full using 7-Zip.
- Rename the extracted folder to FFmpeg for easy reference.
- Move the new FFmpeg folder to the root of your C: drive, creating the path C:\FFmpeg.
- Search for Edit the system environment variables in the Windows search bar and open it.
- In the System Properties window, go to Advanced → Environment Variables…
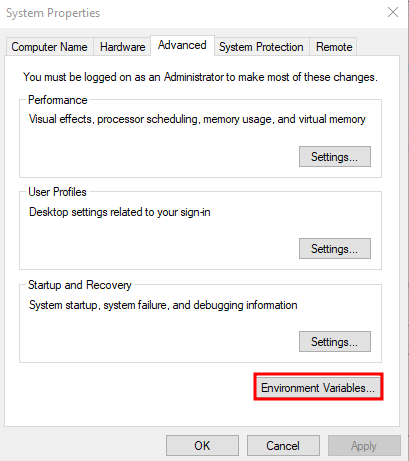
- Under System Variables, find and select the Path variable, then hit Edit…
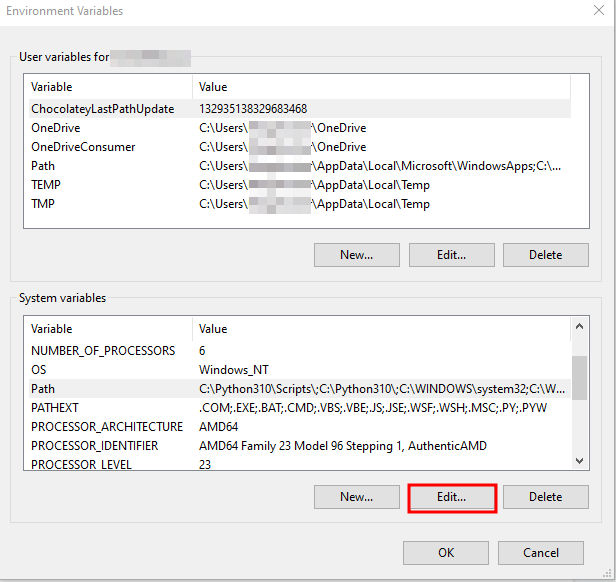
- In the Edit Environment Variable window, click New and add this path:
C:\FFmpeg\bin
- Click OK to close all dialog boxes.
- Open Command Prompt by typing cmd in the search bar and pressing Enter.
- Type the following command:
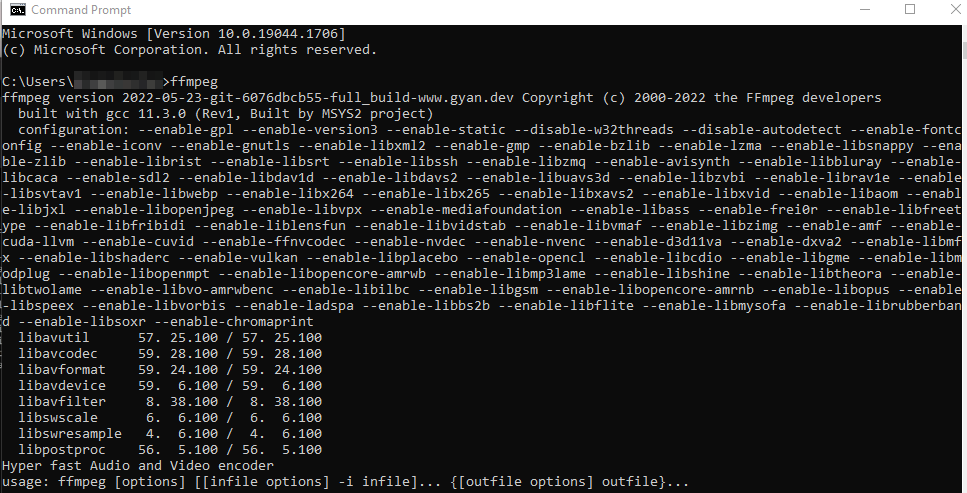
ffmpeg
If the installation succeeds, FFmpeg will display version information and configuration details.
However, if you encounter any problems:
- Double-check that you’ve added the correct path (C:\FFmpeg\bin) to the PATH variable.
- Make sure the ffmpeg.exe file exists in the C:\FFmpeg\bin directory.
- Restart your computer and reopen Command Prompt to apply the changes.
How to install FFmpeg on macOS
You can install FFmpeg on macOS in several ways, including manually downloading files like on Windows. However, the easiest method is using Homebrew, a macOS package manager similar to Debian and Ubuntu’s apt.
Here’s how to set up FFmpeg with Homebrew:
- Open the terminal and run this command to download and install Homebrew:
/bin/bash -c "$(curl -fsSL https://raw.githubusercontent.com/Homebrew/install/HEAD/install.sh)"
- Once installed, confirm Homebrew is working by typing:
brew --version
- Make sure Homebrew is up to date:
brew update
brew upgrade
- Use the following command to install FFmpeg along with all its dependencies:
brew install ffmpeg
If you want the latest features, install the Git master version instead by adding the –HEAD flag:
brew install ffmpeg --HEAD
- To confirm FFmpeg is installed, execute:
ffmpeg
Differences between FFmpeg’s regular and Git master versions
Here’s a quick comparison between the regular and Git master versions of FFmpeg:
| Aspect | Regular version | Git master version |
| Command | brew install ffmpeg | brew install ffmpeg –HEAD |
| Stability | Highly stable and reliable | Less stable; may contain experimental code |
| Features | Limited to the last release’s features | Includes the latest features and updates |
| Compatibility | Tested for compatibility with systems | May cause compatibility issues |
| Use case | General use, production environments | Development or testing purposes |
Choose the regular FFmpeg version for a stable and reliable experience, which is ideal for everyday use or production tasks. In contrast, select the Git master option if you want the latest features or cutting-edge tools for development and experiments.
Conclusion
Installing FFmpeg on Linux, Windows, and macOS is simple. You can use package managers like apt or Homebrew or manually download the required files. With FFmpeg installed, you’re ready to explore its powerful features for working with multimedia files.
For example, you can convert video formats with a simple command:
ffmpeg -i input.mp4 output.avi
Or, extract audio from a video file like this:
ffmpeg -i input.mp4 -q:a 0 -map a output.mp3
These are just a few examples of FFmpeg’s versatility. You can also use other commands to compress videos, create GIFs, and merge audio files. If you have any questions about FFmpeg, feel free to drop them in the comments below!
How to install FFmpeg FAQ
What are the system requirements for FFmpeg?
FFmpeg works on Linux, Windows, and macOS. Make sure you have at least 100 MB of free storage for installation and dependencies. We also suggest a system with a dual-core CPU and 2 GB of RAM for reliable performance, especially when handling large video and audio files.
How to check if FFmpeg is installed?
Run the following command in the terminal (Linux and macOS) or the command prompt (Windows) to see if you’ve successfully installed FFmpeg:
Linux. ffmpeg –version
Windows/macOS. ffmpeg
Can I uninstall FFmpeg if I don’t need it anymore?
Yes, you can uninstall FFmpeg if you no longer need it with:
Linux. sudo apt remove ffmpeg
Windows. Delete the FFmpeg folder and remove its PATH entry from the system variables.
macOS. brew uninstall ffmpeg
All of the tutorial content on this website is subject to Hostinger's rigorous editorial standards and values.

Ariffud is a Technical Content Writer with an educational background in Informatics. He has extensive expertise in Linux and VPS, authoring over 200 articles on server management and web development. Follow him on LinkedIn.

Noviantika is a web development enthusiast with customer obsession at heart. Linux commands and web hosting are like music to her ears. When she's not writing, Noviantika likes to snuggle with her cats and brew some coffee.