How to install n8n and self-host on Ubuntu VPS
Mar 10, 2026
/
Dominykas J.
/
8 min Read

n8n is a workflow automation tool that enables seamless integration between various applications and APIs. The ability to self-host it on an Ubuntu VPS provides better data privacy, customization options, and cost savings compared to managed solutions.
This guide covers two installation methods: Hostinger’s easy one-click setup and a manual installation for users who prefer hands-on control. By the end of this tutorial, you’ll have a fully functional n8n instance running on your VPS, ready to automate workflows.
Prerequisites
Before installing n8n, make sure your hosting environment meets the following requirements:
- Ubuntu Virtual Private Server (VPS)
Minimum: 1 vCPU, 1GB RAM (KVM1)
Recommended: 2 vCPU, 2GB RAM (KVM2)
If you don’t yet have one, Hostinger offers a range of VPS options, including n8n VPS hosting.
- Domain/subdomain: Optional, but recommended to set up HTTPS and easier access.
- Access to your VPS: You’ll need to connect to your VPS either over SSH (root required) or by using a hosting control panel (like hPanel).
- Docker: If you’re following the manual approach, ensure Docker is installed on your VPS (it’s not required for the template).

How to install n8n using Hostinger’s VPS template
Let’s start with the easiest method: using Hostinger’s one-click n8n template. This method automates the Ubuntu server setup and installs n8n and its dependencies.
1. Access the VPS dashboard
First, you need to access your VPS dashboard.
- Go to hPanel and log in using your preferred method.
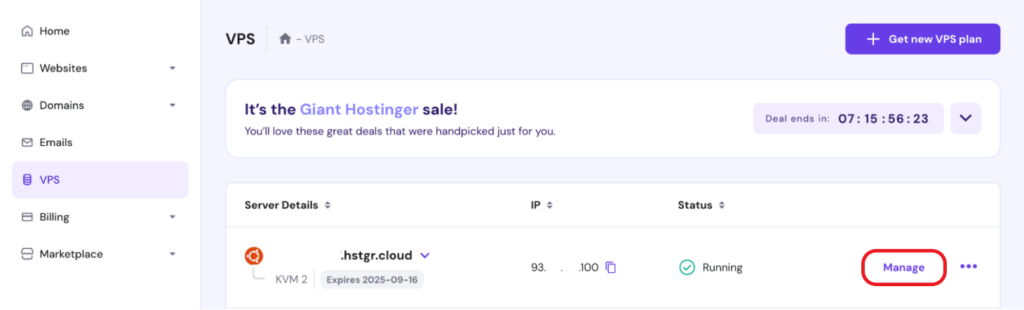
- Once you’re logged in, navigate to the VPS section on the right-side menu.
- Choose the VPS you want to apply the n8n template to and hit the Manage button next to it.
2. Install the n8n template
- Once in the VPS dashboard, open the OS & Panel dropdown menu on the left and select Operating System.
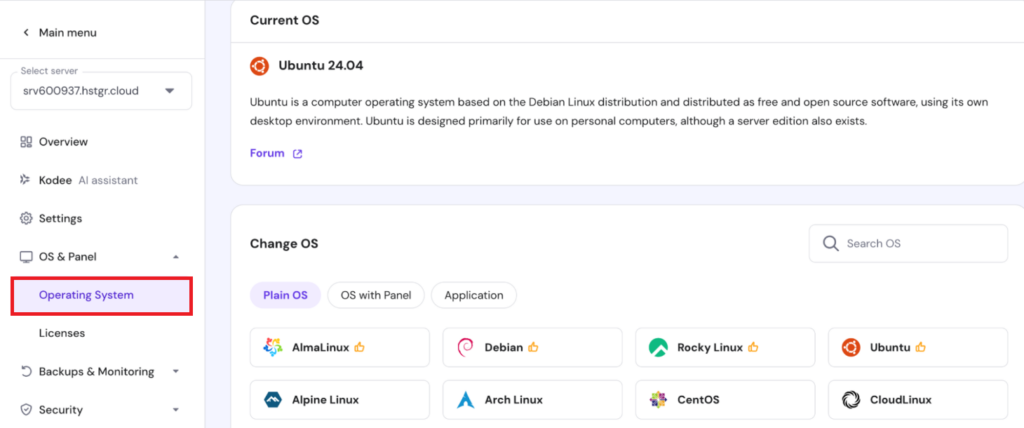
This is where you can find operating systems and their templates available for your VPS server.
- In the Change OS panel, type n8n into the search bar and select the n8n template.
- In the dialogue window that opens, click or tap Change OS.
- You’ll see a dialog window informing you that your VPS OS will be overwritten and all files will be deleted. Put a checkmark next to “I recognize that all my files will be deleted and cannot be restored“ and click Next.
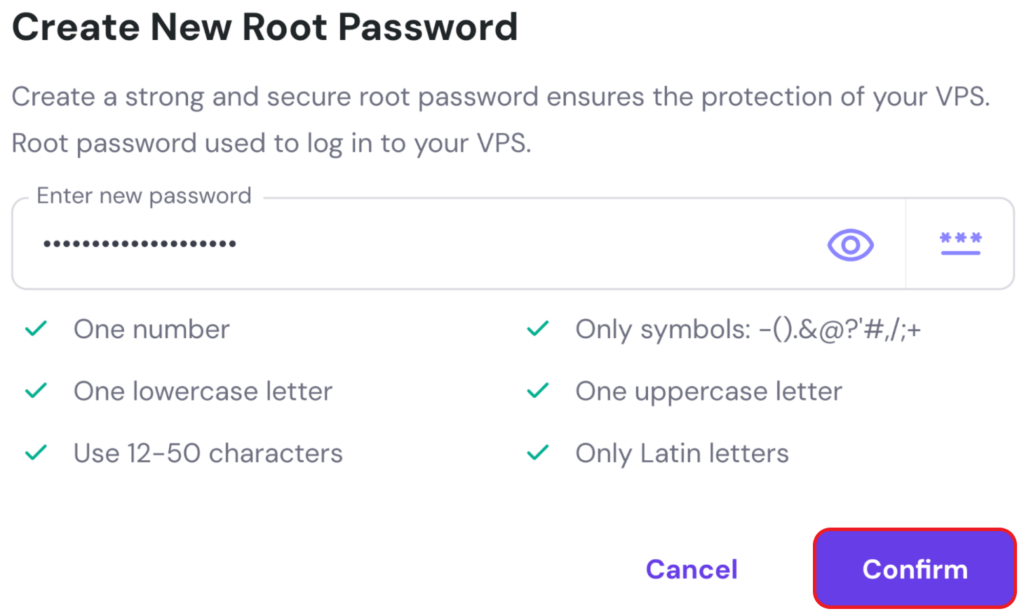
- Enter a password for the root user and click Confirm.
Template setup will begin. You’ll see a progress bar at the top of your dashboard, like in the example below:
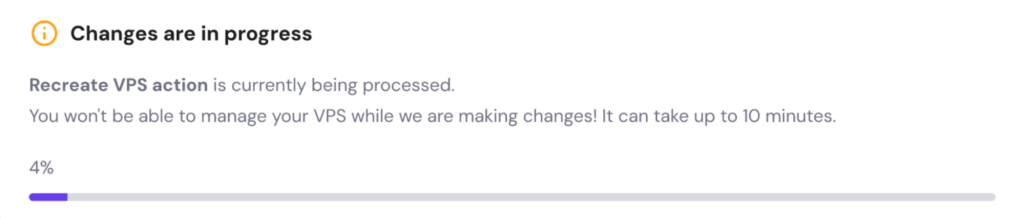
After a short wait, your n8n instance will be ready to use.
3. Test the installation
With n8n set up on your VPS, you should be able to log in and confirm that it’s working.
- In the VPS dashboard on the Overview page, click Panel access and then click on the Login URL.

- This will open the n8n dialog window for registration, which should look something like the example below:
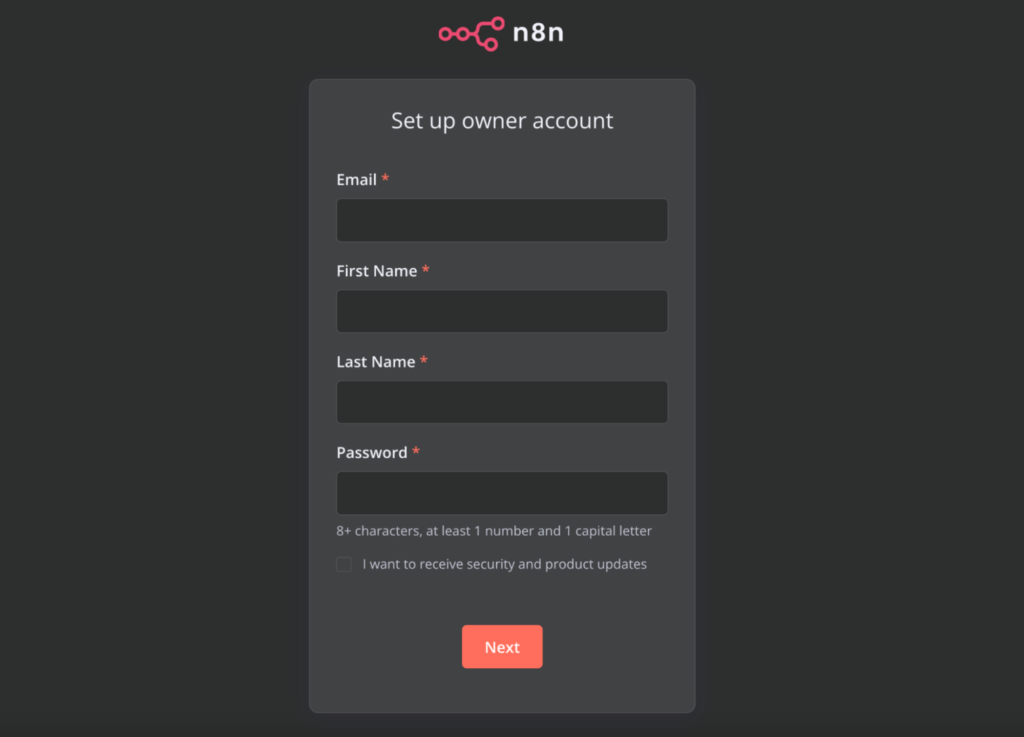
- Simply enter your details and create a password according to the specs indicated. Hit the Next button, then click through any additional popups, leaving them empty for now. This should bring you to the n8n Overview page:
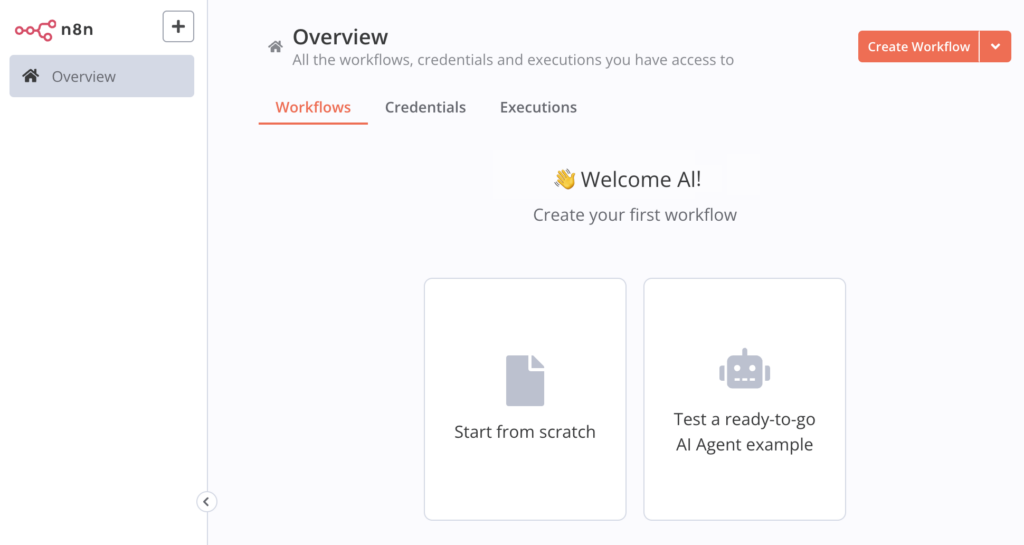
- If you can see the n8n panel in its default view like this, your setup was successful!
4. Configure your n8n instance
Now that your n8n instance is up and running, let’s fine-tune its settings for security and customization.
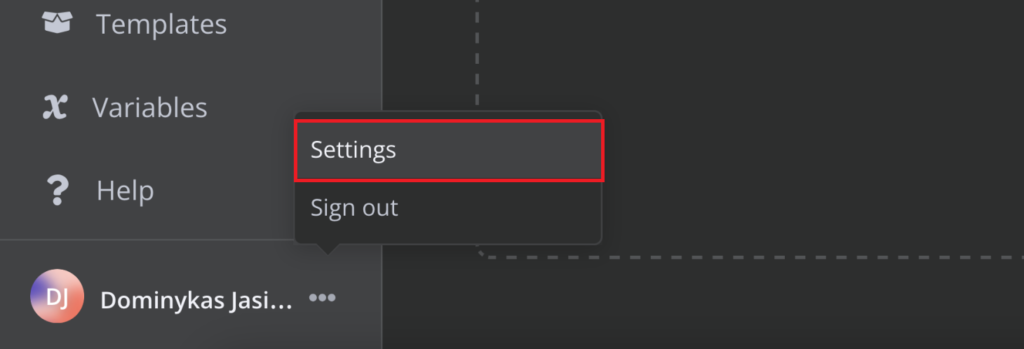
- Click or tap the three-dot icon next to your name in the bottom left corner and select Settings:
- Select Personal on the left side menu:
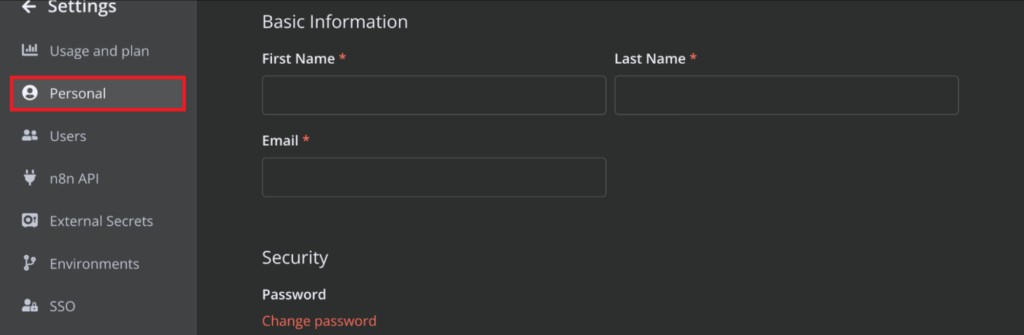
This is where you can see and adjust all of your credentials like First Name, Last Name, Email, and Password.
You can also modify n8n with environment variables:
- Connect to your VPS via SSH or through the Browser Terminal.
- Open the docker-compose.yml file with nano:
nano ../root/docker-compose.yml
- Edit the Environment section – add or adjust the environment variables. For example, if you want to enable basic authentication, add:
  - N8N_BASIC_AUTH_ACTIVE=true
  - N8N_BASIC_AUTH_USER=username
  - N8N_BASIC_AUTH_PASSWORD="password"
Replace username and password above with the actual username and password of your user.
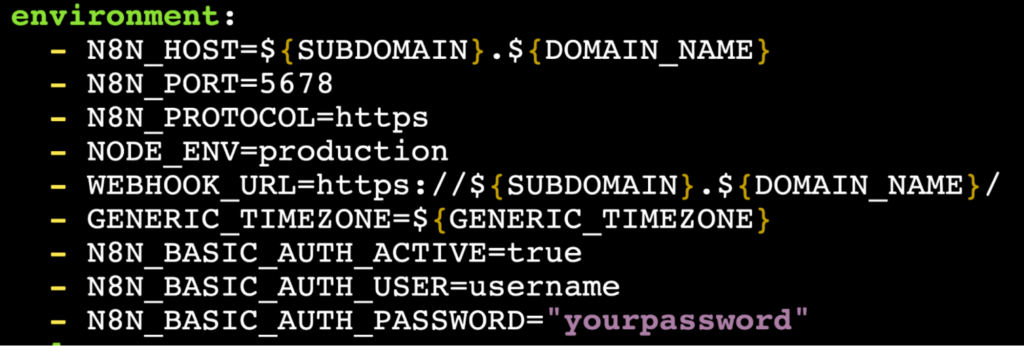
Some other commonly used environment variables you may want to include or adjust:
- N8N_HOST – Set this to your domain if using one.
- N8N_PORT – The default is 5678, but you can change it if needed.
- N8N_PROTOCOL – Specifies which protocol n8n should use.
- WEBHOOK_URL – Required if using webhooks with a domain.
- GENERIC_TIMEZONE – Optional timezone.
- Save and close nano by typing CTRL+X, then Y, and ENTER. You can confirm your changes were saved by running:
cat docker-compose.yml
This will return the whole Docker Compose file. You should see your changes there.
- Restart Docker Compose to apply changes:
docker-compose down
docker-compose up -d
After restarting Docker Compose, your changes will be implemented. n8n will then use the environment variables you’ve set.
If you’re using a custom domain, you should also set up SSL. For a secure HTTPS connection, you can use Let’s Encrypt with NGINX as a reverse proxy:
- Install Certbot and NGINX:
sudo apt install certbot nginx python3-certbot-nginx -y
- Create/open the NGINX site file for n8n:
sudo nano /etc/nginx/sites-available/n8n
- Configure NGINX as a proxy for traffic to n8n. Add the following, replacing yourdomain.com below with your own custom domain name:
server {
server_name yourdomain.com;
location / {
    proxy_pass http://localhost:5678;
    proxy_set_header Host $host;
    proxy_set_header X-Real-IP $remote_addr;
}
}
Save and close the file with CTRL+X, then Y and ENTER.
- Enable the configuration and restart NGINX:
sudo ln -s /etc/nginx/sites-available/n8n /etc/nginx/sites-enabled/
sudo systemctl restart nginx
- Get an SSL certificate for your custom domain (replace yourdomain.com below with your custom domain name):
sudo certbot --nginx -d yourdomain.com
- Open crontab:
sudo certbot renew
Select nano if prompted to select the editor.
- Add the following cron job:
0 2 * * * certbot renew --quiet --post-hook "systemctl restart nginx"
Let’s Encrypt certificates expire every 90 days by default. With this job in place, certbot will renew your certificate automatically when needed.
- Open the docker-compose.yml file with nano:
nano ../root/docker-compose.yml
- Update the following environment variables:
  - WEBHOOK_URL=https://yourdomain.com/
- N8N_HOST=yourdomain.com
  - N8N_PORT=5678
  - N8N_PROTOCOL=https
Save and close the file with CTRL+X, then Y and ENTER.
- Restart Docker Compose to run the changes
docker-compose down
docker-compose up -d
With this done, your n8n instance can then be accessed securely using your custom domain name (e.g. https://yourdomain.com).
How to install n8n on Ubuntu manually
If you’re using a VPS hosting provider without a one-click n8n template, you’ll have to install n8n manually. Let’s walk through the step-by-step process to get it up and running on Ubuntu.
1. Install dependencies
Before setting up n8n manually, we need to install some essential dependencies. Start by connecting to your VPS via SSH or a web-based console. Next, update your package lists and upgrade existing packages to their latest versions by running:
sudo apt-get update && sudo apt-get upgrade -y
This ensures that your system has the latest security patches and software versions before proceeding.
There are two main methods of running self-hosted n8n:
- Direct installation
- Containerized installation
Containerized installation is preferred in most scenarios, however we’ll briefly describe both.
Direct installation
n8n can run directly in a Node.js environment, so if you’re not using Docker, install the latest long-term support (LTS) version of Node.js:
- Install curl and the Node.js setup script:
curl -fsSL https://deb.nodesource.com/setup_18.x | sudo -E bash -
- Install Node.js and npm:
sudo apt-get install -y nodejs
- Verify the installations:
node -v
npm -v
These commands will return versions of npm and Node.js if they are installed.
Containerized installation
If you’d prefer to run n8n in a Docker container, install Docker first.
- Install required dependencies:
sudo apt-get install -y apt-transport-https ca-certificates curl software-properties-common
- Add Docker’s official GPG key:
curl -fsSL https://download.docker.com/linux/ubuntu/gpg | sudo gpg --dearmor -o /usr/share/keyrings/docker-archive-keyring.gpg
- Add the Docker repository and install Docker:
echo "deb [arch=amd64 signed-by=/usr/share/keyrings/docker-archive-keyring.gpg] https://download.docker.com/linux/ubuntu $(lsb_release -cs) stable" | sudo tee /etc/apt/sources.list.d/docker.list > /dev/null
sudo apt-get update
sudo apt-get install -y docker-ce docker-ce-cli containerd.io
- Verify Docker is installed:
docker --version
This command will return the Docker version if it is installed.
2. Set up n8n
Once you have all the dependencies installed, you can set up n8n.
Direct installation
If you installed Node.js earlier, you can install n8n globally using npm:
npm install -g n8n
Start a screen session called n8n:
screen -S n8n
Run n8n inside the screen session:
n8n
To detach from the screen session, type CTRL+A then D. If you want to re-attach to interact with n8n, run:
screen -R n8n
By default, n8n runs on port 5678. You can now access it at:
http://your-server-ip:5678
You might receive a secure cookie error at this point. We will cover SSL certificate creation in later steps.
Containerized installation
Pull the latest n8n Docker image:
docker pull n8nio/n8n
Run the container with port mapping:
docker run -d --name n8n -p 5678:5678 n8nio/n8n
- -d – Runs the container in the background.
- –name n8n – Names the container n8n.
- -p 5678:5678 – Maps port 5678 on the server to port 5678 in the container.
To access n8n in your browser, open:
http://your-server-ip:5678
As with the installation steps above, you might encounter a secure cookie error. Refer to the SSL certificate creation section below.
By default, data inside a Docker container is not persistent. To ensure your workflows and settings are saved, run n8n with a mounted volume:
docker stop n8n && docker rm n8n #stop and remove previous n8n container
docker run -d --name n8n -p 5678:5678 -v ~/.n8n:/home/node/.n8n n8nio/n8n
This maps your local ~/.n8n folder to n8n’s data directory inside the container.
If the container does not start, you might lack permissions to write to the volume. Claim permissions by running:
sudo chown -R 1000:1000 ~/.n8n
sudo chmod -R 755 ~/.n8n
Then start the container:
docker start n8n
3. Configure n8n
By default, n8n doesn’t enforce authentication, so anyone who accesses your server’s IP can use it. To secure your instance, set environment variables before running the container.
With direct installation, you can use the export command to add variables. In the example below, be sure to replace username, password, and yourdomain.com with your chosen credentials:
export N8N_BASIC_AUTH_ACTIVE=true
export N8N_BASIC_AUTH_USER=username
export N8N_BASIC_AUTH_PASSWORD=password
export N8N_HOST=yourdomain.com
export N8N_PORT=5678
export WEBHOOK_URL=https://yourdomain.com/
export GENERIC_TIMEZONE=UTC
When running n8n as a Docker container (containerized installation), you can pass these variables using the -e flag (again, add your own credentials below):
docker stop n8n && docker rm n8n #stop and remove previous n8n container
docker run -d --name n8n
  -p 5678:5678
  -e N8N_BASIC_AUTH_ACTIVE=true
  -e N8N_BASIC_AUTH_USER=username
  -e N8N_BASIC_AUTH_PASSWORD=password
  -e N8N_HOST=yourdomain.com
  -e N8N_PORT=5678
  -e WEBHOOK_URL=https://yourdomain.com/
  -e GENERIC_TIMEZONE=UTC
  -v ~/.n8n:/home/node/.n8n
  n8nio/n8n
4. Enable secure access
To protect your n8n instance and ensure encrypted connections, we’ll set up SSL (HTTPS) using Let’s Encrypt and NGINX as a reverse proxy. This is especially important if you’re using a custom domain.
- Install NGINX and Certbot:
sudo apt update && sudo apt install nginx certbot python3-certbot-nginx -y
- Enable and start NGINX:
sudo systemctl enable nginx
sudo systemctl start nginx
- Create and open a new NGINX configuration file for n8n:
sudo nano /etc/nginx/sites-available/n8n
- Add the following configuration, replacing yourdomain.com with your actual domain:
server {
    server_name yourdomain.com;

    location / {
        proxy_pass http://localhost:5678;  # Forward requests to n8n
        proxy_set_header Host $host;
        proxy_set_header X-Real-IP $remote_addr;
        proxy_set_header X-Forwarded-For $proxy_add_x_forwarded_for;
        proxy_set_header X-Forwarded-Proto $scheme;
    }

    listen 80;
}
Then, save and exit by typing CTRL+X, then Y, then ENTER.
- Enable the configuration:
sudo ln -s /etc/nginx/sites-available/n8n /etc/nginx/sites-enabled/
- Restart NGINX:
sudo systemctl restart nginx
- Generate a free Let’s Encrypt SSL certificate:
sudo certbot --nginx -d yourdomain.com
- Open crontab:
sudo certbot renew
Select nano if prompted to select the editor.
- Add the following cron job:
0 2 * * * certbot renew --quiet --post-hook "systemctl restart nginx"
Let’s Encrypt certificates expire every 90 days by default. With this job in place, Certbot will renew your certificate automatically.
To confirm that n8n is running with HTTPS, open your browser and enter your domain name in the format https://yourdomain.com. If you see the n8n interface without any SSL warnings, your setup was successful and n8n is now ready to use!
Conclusion
Congratulations! You’ve successfully installed and are now self-hosting n8n on your own server. Whether you used Hostinger’s one-click setup or installed n8n manually, you now have a powerful workflow automation tool at your fingertips.
Now it’s time to start building workflows and automating tasks! From simple n8n integrations to complex business processes, n8n gives you the flexibility to connect apps, APIs, and databases without writing tons of code. You can explore various n8n automation ideas that streamline workflows and simplify everyday tasks
Remember these key points:
- Keep n8n secure: Use authentication, enable HTTPS, and restrict access where necessary.
- Update regularly: Stay up to date with the latest n8n and security patches by updating your installation periodically.
- Back up your data: If using Docker, ensure persistent storage so your workflows and credentials are safe.
If you run into any issues or want to explore advanced configurations, check out the n8n documentation or join the n8n community for support.
How to install n8n FAQ
Can you run n8n locally?
Yes, you can run n8n locally by installing it globally using npm with the command npm install n8n -g. After installation, start n8n by running n8n or n8n start.
Which VPS plan do I need to run n8n?
A VPS with 2 vCores and 4GB RAM should be sufficient to get you started, in which case Hostinger’s KVM2 will be more than enough.
How do I access n8n after installing it?
After installing n8n locally, you can access its interface by navigating to http://localhost:5678 in your web browser if running locally. If you’re self-hosting on a VPS with a custom domain, use http://yourdomain.com:5678, or https://yourdomain.com if SSL is configured.
All of the tutorial content on this website is subject to Hostinger's rigorous editorial standards and values.

Dominykas is a Technical Content Writer with a background in cloud engineering and technical support. He’s operated in fields like fintech and point-of-sale and is passionate about software development, DevOps, and AI. Find him on LinkedIn.